
Clean walls are often overlooked, yet they play a crucial role in the overall cleanliness and ambiance of your home. Over time, walls accumulate dust, fingerprints, cooking splatters, and smudges—especially in high-traffic areas like kitchens and hallways. However, improper cleaning can damage paint, leave streaks, or even promote mold growth. Knowing how to clean walls properly, based on their location, surface type, and level of soiling, ensures lasting results without unintended harm.
This comprehensive guide breaks down safe and effective wall-cleaning techniques for every room in your house, from living rooms with delicate finishes to bathrooms prone to mildew. You’ll learn which tools to use, what cleaners to avoid, and how to maintain clean walls between deep cleans.
Understanding Wall Surfaces and Their Needs
Not all walls are created equal. The type of paint or finish determines how it should be cleaned. Using abrasive scrubbing pads on flat paint, for example, can scuff the surface permanently. Conversely, glossier finishes can handle more rigorous cleaning but may show streaks if not dried properly.
Here’s a quick reference by paint sheen:
| Paint Finish | Cleanability | Recommended Tools | Caution |
|---|---|---|---|
| Flat/Matte | Low – absorbs moisture easily | Dry microfiber cloth, soft brush | Avoid water; can cause staining or peeling |
| Eggshell | Moderate – slight sheen | Slightly damp cloth, mild soap | Test in small area first |
| Satin | Good – resists stains | Damp sponge, gentle cleaner | Rinse after cleaning to prevent residue |
| Semi-Gloss/Gloss | High – durable and wipeable | Sponge, warm soapy water, vinegar solution | May show streaks; dry thoroughly |
“Always test any cleaning solution on a small, inconspicuous area first. A patch test prevents costly mistakes.” — Lena Briggs, Interior Maintenance Specialist
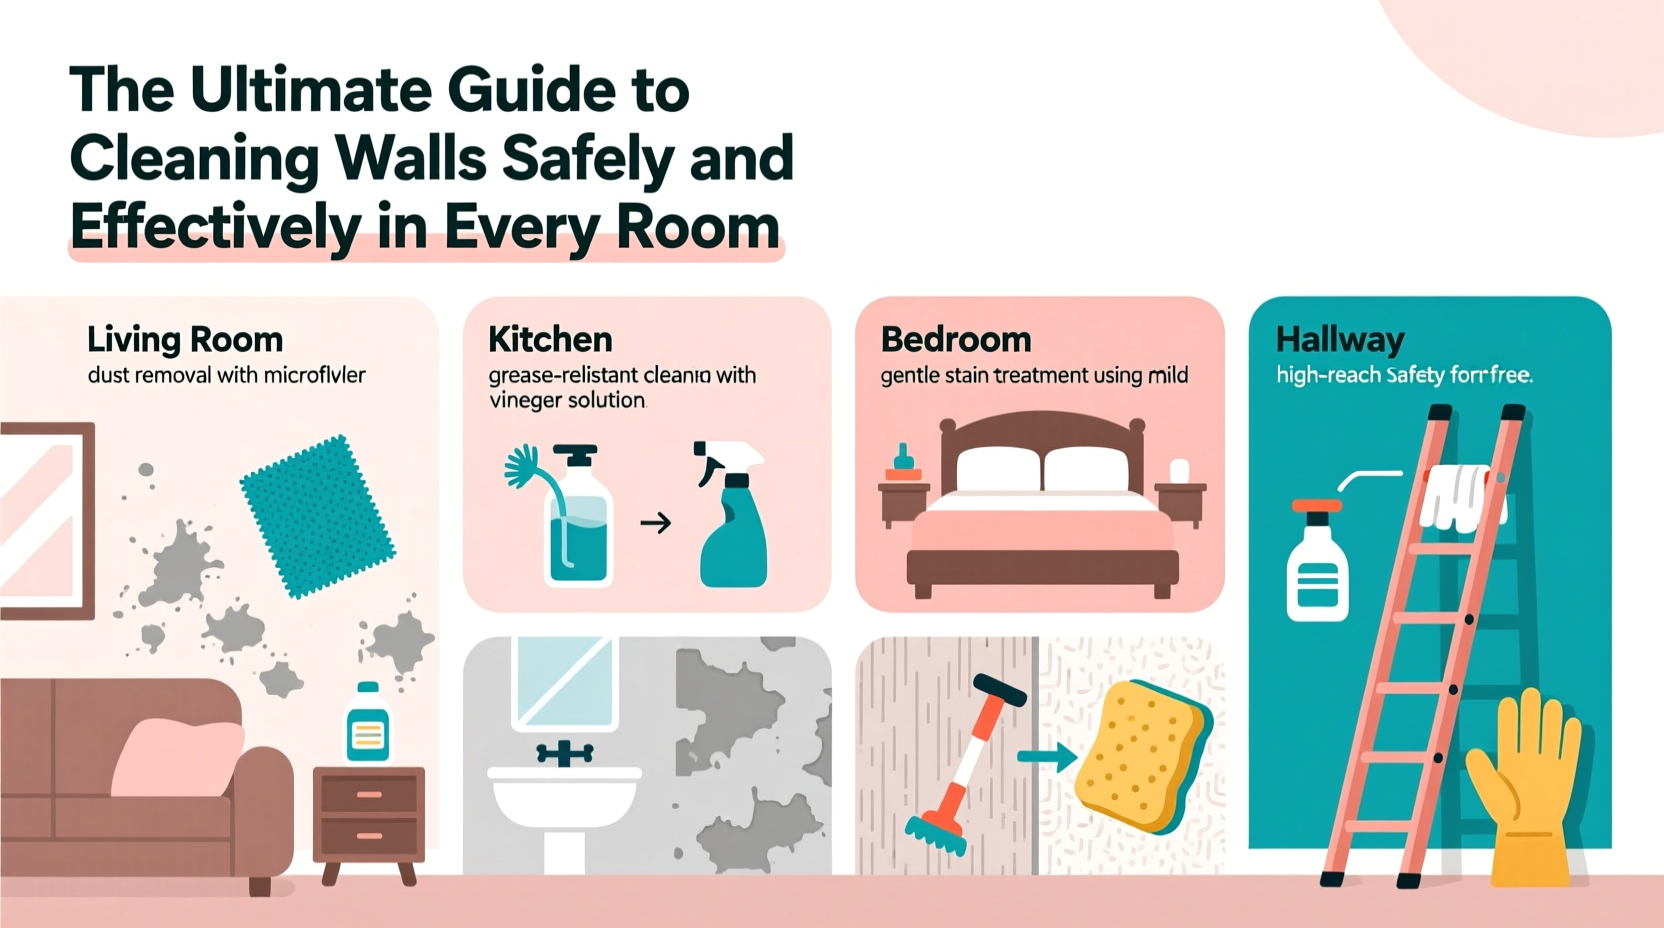
Room-by-Room Cleaning Strategies
Each room presents unique challenges due to usage patterns, humidity, and exposure to grease or moisture. Tailoring your approach per room maximizes effectiveness and safety.
Kitchen Walls
Kitchens are hotspots for grease buildup, especially behind stoves and near range hoods. Grease attracts dust and creates stubborn grime over time.
Step-by-Step Guide:
- Remove artwork and switch plates for full access.
- Vacuum or dust with a microfiber mop to remove loose particles.
- Mix 1 cup warm water, 1 tablespoon dish soap, and 1/4 cup white vinegar.
- Dip a sponge into the solution, wring well, and gently scrub greasy areas in circular motions.
- Rinse with a clean, damp cloth to remove soapy residue.
- Dry immediately with a soft towel to prevent water marks.
Bathroom Walls
Humidity and soap scum make bathroom walls prone to mildew and discoloration, especially around showers and tubs.
Use a solution of equal parts water and white vinegar in a spray bottle. Spray affected areas, wait 5 minutes, then wipe with a non-abrasive sponge. For visible mold, mix 1 part bleach to 3 parts water (only on non-porous tiles or painted surfaces rated for moisture). Always ventilate the room during and after cleaning.
Living Room & Bedrooms
These areas typically collect dust, handprints, and marks from furniture movement. Since decor is often present, work carefully around frames and shelves.
Start with dry dusting using a microfiber duster or vacuum with a brush attachment. For scuffs, use a magic eraser sparingly—press lightly to avoid dulling the paint. Follow up with a barely damp cloth if needed.
Hallways and Children’s Rooms
Frequent touching and crayon marks are common. Treat crayon stains with a small amount of baking soda on a damp cloth, rubbing gently. For general marks, a mixture of dish soap and warm water works well.
“In homes with young children, monthly wall maintenance prevents buildup that becomes harder to remove later.” — Dr. Miriam Cho, Home Hygiene Consultant
Essential Cleaning Supplies Checklist
Having the right tools on hand makes the job faster and safer. Here’s what you need:
- Microfiber cloths (multiple)
- Non-abrasive sponges
- Soft-bristle brush or duster
- Bucket
- Mild dish soap
- White vinegar
- Baking soda
- Isopropyl alcohol (for ink stains)
- Step ladder
- Gloves and eye protection (when using bleach)
Avoiding Common Cleaning Mistakes
Even well-intentioned efforts can backfire. These errors compromise wall integrity or reduce cleaning effectiveness:
- Using too much water: Excess moisture seeps into seams and can damage drywall or encourage mold.
- Scrubbing too hard: Especially on flat paints, this removes pigment and leaves shiny patches.
- Skipping prep work: Dusting first prevents turning dirt into mud when wet cleaning.
- Using harsh chemicals: Ammonia or undiluted bleach can fade colors and degrade paint binders.
- Cleaning in direct sunlight: Causes solutions to dry too quickly, leaving streaks and residue.
Real-World Example: Reviving a Family Kitchen
The Thompson family had lived in their home for eight years. The kitchen walls, painted in satin finish, had turned yellowish near the stove from years of frying and steam. They tried wiping with paper towels and all-purpose spray, but the grease remained.
Following professional advice, they used a vinegar-dish soap solution and a soft sponge. After two passes and thorough rinsing, the walls looked dramatically cleaner. They now clean them every three months and keep a splash guard behind the stove to minimize future buildup. “We didn’t realize how much difference clean walls would make,” said Sarah Thompson. “It feels like a new kitchen.”
FAQ: Frequently Asked Questions
How often should I clean my walls?
In high-use areas like kitchens and hallways, clean every 3–6 months. Living rooms and bedrooms can go 6–12 months between cleanings, depending on dust levels and household activity.
Can I use a steam cleaner on walls?
Generally not recommended. Steam can penetrate paint and drywall, leading to bubbling or mold. It’s safer for tile or sealed surfaces only, and even then, use cautiously.
What’s the best way to remove crayon from walls?
Make a paste of baking soda and water, apply with a damp cloth, and rub gently. For tougher marks, a magic eraser works—but test first and use minimal pressure.
Conclusion: Make Clean Walls a Sustainable Habit
Clean walls transform the look and feel of your home with minimal effort when approached correctly. By understanding your wall surfaces, choosing appropriate tools, and following room-specific strategies, you can maintain fresh, spotless walls year-round. Regular maintenance prevents deep-set grime and extends the life of your paint, saving time and money in the long run.


 浙公网安备
33010002000092号
浙公网安备
33010002000092号 浙B2-20120091-4
Comments
No comments yet. Why don't you start the discussion?