
Cutting vinyl floor tiles may seem straightforward, but achieving clean, accurate cuts—especially around edges, corners, and obstacles—requires more than just a sharp blade. Whether you're installing luxury vinyl tile (LVT), vinyl composition tile (VCT), or peel-and-stick varieties, precision is key to a professional-looking finish. Poor cuts lead to gaps, uneven seams, and wasted materials. This guide breaks down the tools, methods, and insider techniques used by flooring professionals to cut vinyl tiles flawlessly.
Essential Tools for Cutting Vinyl Floor Tiles
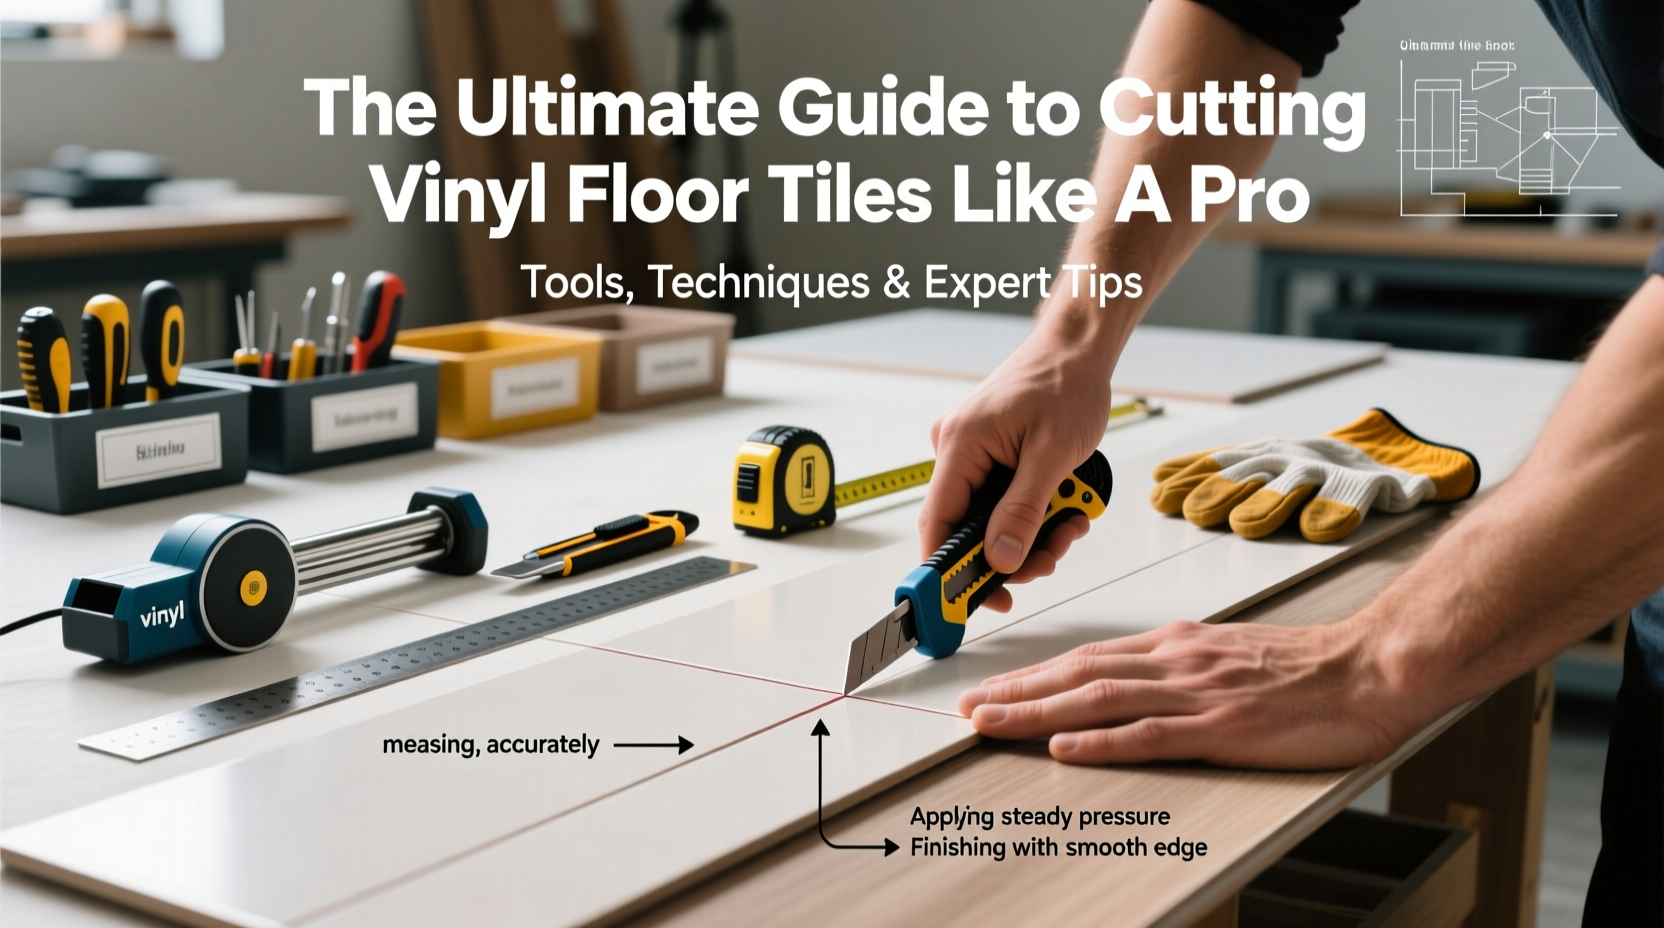
The right tool makes all the difference when cutting vinyl. While some options are suitable for basic DIY jobs, others offer greater control and accuracy for complex layouts.
- Utility Knife: The most accessible tool. Ideal for straight cuts in thinner vinyl planks or tiles. Use with a straightedge and replace blades frequently.
- Carpet Knife: Features a curved blade that allows for controlled scoring and snapping. Preferred by pros for detailed edge work.
- Power Scissors: Electric or manual shears designed for cutting sheet vinyl or thick tiles. Reduce hand fatigue and deliver smooth curves.
- Rotary Cutter: Similar to a pizza cutter, excellent for long straight lines on softer vinyl. Requires a metal straightedge for guidance.
- Jigsaw with Fine-Tooth Blade: Best for intricate shapes like around pipes or irregular wall contours. Use a blade rated for plastic or laminate.
- Tabletop Tile Cutter: A bench-mounted tool that scores and snaps rigid core vinyl (SPC/WPC) cleanly and consistently.
Step-by-Step Guide to Cutting Vinyl Floor Tiles
Follow this proven sequence to achieve precise cuts every time, whether you’re working with planks, squares, or sheet vinyl.
- Measure Twice: Use a tape measure and carpenter’s square to mark exact dimensions on the back of the tile. For walls with inconsistencies, scribe the contour using a compass gauge.
- Mark Clearly: Use a pencil or fine-tip marker. Avoid ink-based pens that can bleed through thin vinyl layers.
- Secure the Tile: Clamp or weight down the vinyl to prevent shifting during cutting, especially when using power tools.
- Score Deeply (for knives): Run the utility knife along a metal straightedge multiple times to create a deep groove. Don’t try to cut through in one pass.
- Break Along the Score: For rigid-core vinyl, place the scored line over the edge of a table and snap downward. Support the waste side to avoid cracking the good piece.
- Smooth Rough Edges: Lightly sand or file any burrs, especially along beveled edges where imperfections are more visible.
- Dry-Fit Before Installing: Place the cut tile in position to verify fit before applying adhesive or locking it into place.
Do’s and Don’ts When Cutting Vinyl Flooring
| Do’s | Don’ts |
|---|---|
| Use a new, sharp blade for each major cutting session | Use dull blades that tear rather than cut the material |
| Cut on a sacrificial surface like cardboard or plywood | Cut directly on finished floors or countertops |
| Work in a dust-free, well-lit area | Rush the measuring and marking process |
| Support large off-cuts to prevent bending during cuts | Force a jigsaw blade—let the tool do the work |
| Wear safety glasses when using power tools | Ignore manufacturer guidelines for specific vinyl types |
Real-World Example: Tackling a Bathroom Installation
Consider a recent project in a small bathroom with an offset toilet pipe and an angled wall. The installer used WPC vinyl planks and needed to make a notched cut around the pipe and a scribed fit along the uneven wall.
First, they measured the distance from the wall to the center of the pipe and transferred that onto the plank. Using a hole saw template guide, they marked a perfect circle. Instead of drilling, they made a starter hole with a utility knife and completed the cut with a jigsaw fitted with a 24-tooth-per-inch blade. For the wall, they used a scribing compass to trace the contour onto the plank, then cleaned up the curve with light sanding.
The result? Seamless integration with no visible gaps. This approach saved time and eliminated the need for excessive caulking, which can yellow over time.
Expert Insight: What Professionals Never Skip
“Most DIYers underestimate how much expansion matters. Always leave a 1/4-inch gap at the perimeter, even with ‘floating’ claims. That space affects how you cut your final edge pieces.” — Marcus Tran, Certified Floor Installer (CFI), 15+ years in residential remodeling
“The biggest mistake? Cutting too aggressively. Vinyl isn’t wood. It compresses and tears if forced. Let the tool glide. Score and deepen gradually.” — Lena Patel, Lead Technician at Urban Floors Inc.
Pro Tips for Specific Vinyl Types
Vinyl comes in various forms, each requiring slight adjustments in technique:
- Luxury Vinyl Plank (LVP): Flexible and forgiving. Can be cut with a utility knife for straight lines. Use a rotary cutter for long runs.
- SPC/WPC (Rigid Core): Harder and denser. Best cut with a tabletop tile cutter or jigsaw. Snap after scoring for clean breaks.
- Peel-and-Stick Tiles: Prone to tearing. Use a fresh blade and support the backing paper during cutting. Cut from the front side to minimize fraying.
- Sheet Vinyl: Requires heavy-duty scissors or a utility knife with constant pressure. Roll the knife forward rather than dragging it backward.
Checklist: Pre-Cut Preparation
Before making your first cut, run through this quick checklist:
- ✅ Acclimate vinyl indoors for 48 hours (if required by manufacturer)
- ✅ Clean and level the subfloor
- ✅ Gather all cutting tools and ensure blades are sharp
- ✅ Measure room dimensions and plan layout (account for waste)
- ✅ Mark cut lines clearly on the back or non-visible side
- ✅ Test your technique on a scrap piece
- ✅ Double-check direction of pattern or grain, if applicable
Frequently Asked Questions
Can I use scissors to cut vinyl floor tiles?
Yes—but only for thin, flexible vinyl or peel-and-stick products. Heavy-duty fabric or aviation snips work better than household scissors. For rigid core or thick planks, scissors will crush the edges and create jagged lines.
Why does my vinyl crack when I try to snap it?
Cracking usually happens when the score line isn’t deep enough or when the tile isn’t properly supported. Ensure you’ve scored multiple times with a sharp blade and align the break precisely over the edge of a table. Also, cold vinyl is more brittle—work in a room above 65°F (18°C).
How do I cut vinyl around door jambs?
Remove the baseboard or shoe molding first. Slide the vinyl underneath for a flush look. If you must cut around the jamb, use a multitool with a flush-cutting blade or make relief cuts with a utility knife. Dry-fit the piece before final installation.
Final Thoughts: Precision Leads to Perfection
Cutting vinyl floor tiles like a pro isn’t about owning expensive tools—it’s about technique, patience, and attention to detail. From selecting the right blade to mastering the score-and-snap method, every step influences the final appearance of your floor. Even minor inaccuracies become glaring once the tiles are laid and light hits the seams at an angle.
Take your time. Measure with precision. Cut with care. And always prioritize fit over speed. A well-cut floor doesn’t just look better—it lasts longer, resists moisture infiltration, and stands up to daily wear without lifting or buckling.


 浙公网安备
33010002000092号
浙公网安备
33010002000092号 浙B2-20120091-4
Comments
No comments yet. Why don't you start the discussion?