
Wearing an Apple Watch should feel effortless—secure, lightweight, and barely noticeable on your wrist. Yet, many users experience discomfort, slipping, or skin irritation simply because their band doesn’t fit properly. A poorly sized band can compromise both comfort and functionality, especially during workouts or sleep tracking. Getting the right fit isn’t guesswork; it’s precision. This guide walks you through every step of accurately measuring your Apple Watch band size, ensuring a secure yet breathable fit tailored to your wrist.
Why Band Size Matters More Than You Think
An ill-fitting Apple Watch band does more than just look awkward—it affects performance. If the band is too loose, motion sensors may struggle to capture accurate heart rate data, and the watch might rotate or shift during activity. Too tight, and you risk restricting blood flow, causing chafing, or developing pressure marks after prolonged wear.
The ideal fit allows the watch to stay stable without pressing into the skin. It should be snug enough to maintain consistent sensor contact but loose enough to let two fingers slide comfortably underneath. Achieving this balance starts with knowing your exact band size.
“Accurate band sizing is critical not just for comfort, but for the reliability of health metrics like heart rate and blood oxygen levels.” — Dr. Lena Patel, Wearable Technology Researcher at Stanford Health Innovation Lab
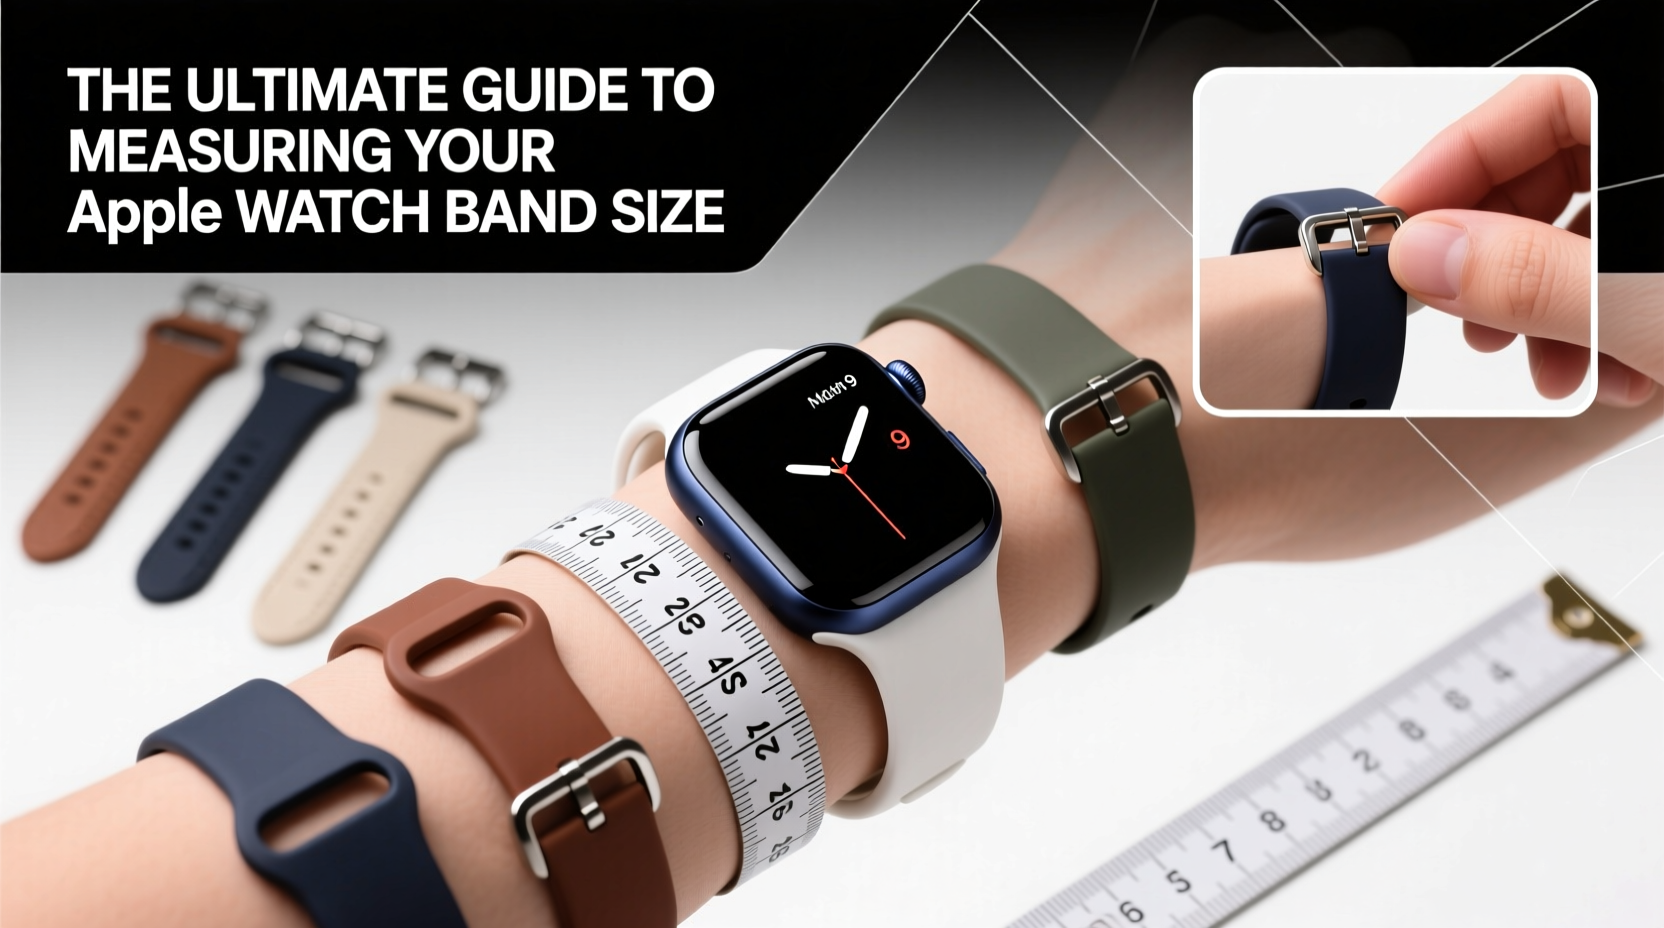
Step-by-Step Guide to Measuring Your Wrist for Apple Watch Bands
Apple Watch bands are sold in specific sizes based on wrist circumference, not the length of the band itself. Follow this five-step process to determine your correct size with confidence.
- Gather your tools: Use a flexible measuring tape (like a tailor’s tape), or if unavailable, a strip of paper and a ruler.
- Measure at the right spot: Wrap the tape around your wrist just below the wrist bone—the same position where you normally wear your watch.
- Tightness matters: Keep the tape snug but not tight. It should lie flat against the skin without compressing it.
- Record in millimeters: Apple uses metric measurements. For example, a measurement of 6.3 inches equals approximately 160mm.
- Check compatibility: Match your measurement to Apple’s official size chart (see table below).
Apple Watch Band Sizing Chart: Find Your Fit
Apple offers two standard band sizes: Small/Medium and Medium/Large. Some third-party manufacturers also offer additional increments. Use the following reference table to match your wrist measurement to the correct size.
| Wrist Circumference (mm) | Apple Band Size | Recommended For |
|---|---|---|
| 120–150 mm | Small | Fits wrists up to ~5.9 inches |
| 140–175 mm | Medium | Most common size; average adult female/male |
| 165–205 mm | Large | Larger wrists or preference for looser fit |
| 185–220+ mm | Extra Large (third-party) | Broad wrists or muscular forearms |
Note: Apple’s Sport Bands and Solo Loops often come labeled as “S/M” or “M/L,” which correspond roughly to these ranges. Always verify manufacturer specs when buying non-Apple bands.
Real Example: How Sarah Found Her Perfect Fit
Sarah, a fitness instructor, loved her Apple Watch Series 8 but found it slipped constantly during spin classes. She assumed she needed a tighter band, so she bought a smaller Solo Loop—but within hours, her wrist felt sore and developed red marks.
After measuring correctly using a fabric tape measure, she discovered her wrist was 168mm—right on the edge between Medium and Large. The small loop had been cutting off circulation. She switched to a Large-sized Nike Sport Band with adjustable hook-and-loop closure, allowing micro-adjustments for different activities. Now, her watch stays securely in place without discomfort, even during high-intensity training.
This case illustrates how minor differences in fit can have major impacts on daily usability.
Common Mistakes When Choosing Apple Watch Band Sizes
- Guessing instead of measuring: Relying on ring size or shoe size analogies leads to errors.
- Ignoring seasonal changes: Wrists swell slightly in heat or humidity—account for this in warmer climates.
- Using outdated guides: Older articles reference discontinued sizing models (e.g., Apple Watch Edition bands).
- Over-tightening sport bands: Silicone bands expand slightly over time; starting too tight accelerates degradation.
Checklist: How to Confirm Your Apple Watch Band Fits Correctly
Before finalizing your purchase or wearing a new band all day, run through this quick verification checklist:
- ✅ Can you fit one finger comfortably under the band at the back of the wrist?
- ✅ Does the watch remain stable when shaking your hand or moving your arm?
- ✅ Is there no visible gap between the band and your skin on the outer side?
- ✅ Do you feel any pinching, numbness, or warmth after 10 minutes of wear?
- ✅ Does the heart rate sensor maintain consistent readings during movement?
If any answer is “no,” consider adjusting or resizing your band.
Frequently Asked Questions
Can I adjust the size of my Apple Watch band myself?
Some bands, like the Milanese Loop or Leather Link, allow professional resizing at Apple Stores. Others, such as the Sport Band, aren’t user-adjustable in length but come in multiple pre-set sizes. Third-party adapters exist for certain models, though they may affect aesthetics or durability.
Do different Apple Watch models require different band sizes?
No. All Apple Watch cases from Series 1 onward use standardized lugs, meaning a 42mm band fits both a Series 4 and a Series 9 of the same case size. However, always confirm whether your band is designed for 41mm/45mm or 42mm/49mm models, depending on generation.
What should I do if my Solo Loop feels too tight after a few days?
Solo Loops don’t stretch much, and discomfort usually means you chose too small a size. Apple allows free exchanges within 14 days. Consider switching to a Braided Solo Loop or Sport Loop, which offer slight elasticity and breathability.
Expert Tips for Long-Term Comfort and Performance
Once you’ve found the right size, maintain optimal fit over time with these practices:
- Clean silicone and nylon bands weekly with mild soap and water to prevent buildup that alters fit.
- Rotate bands regularly to reduce wear on pressure points.
- Avoid wearing metal bands in saltwater or chlorinated pools—they can corrode and lose structural integrity.
- For sleep tracking, use a softer band like the Dream Loop or Knit Band to minimize disturbance.
“The best band is the one you forget you’re wearing. That only happens when size, material, and purpose align.” — Marcus Lin, Senior UX Designer at a leading wearable tech firm
Conclusion: Take Control of Your Comfort Today
Your Apple Watch is only as effective as its fit. Whether you're tracking workouts, monitoring sleep, or staying connected throughout the day, a properly sized band enhances accuracy, comfort, and confidence. Don’t settle for rolling sleeves or constant readjustments. Take five minutes to measure your wrist correctly, consult reliable sizing data, and choose a band that truly fits—not just physically, but functionally.


 浙公网安备
33010002000092号
浙公网安备
33010002000092号 浙B2-20120091-4
Comments
No comments yet. Why don't you start the discussion?