
Capturing what’s on your screen is one of the most practical digital skills you can master. Whether you're troubleshooting an error, sharing instructions, or preserving a moment from a video call, screenshots are indispensable. Yet, many users rely on basic methods without unlocking the full potential of modern capture and editing tools. This guide walks through every essential technique, built-in utility, and post-capture enhancement strategy available on Windows and other PC environments—helping you take smarter, cleaner, and more useful screenshots.
Understanding Screenshot Types and Use Cases
Not all screenshots serve the same purpose. The method you choose should align with your goal. Here are the primary types:
- Full-screen capture: Ideal for showing an entire desktop view, especially when demonstrating system-wide issues.
- Active window capture: Best for focusing on a single application without background distractions.
- Custom region selection: Perfect for highlighting specific UI elements, text snippets, or form fields.
- Delayed capture: Useful for catching context menus, tooltips, or pop-ups that disappear when you click elsewhere.
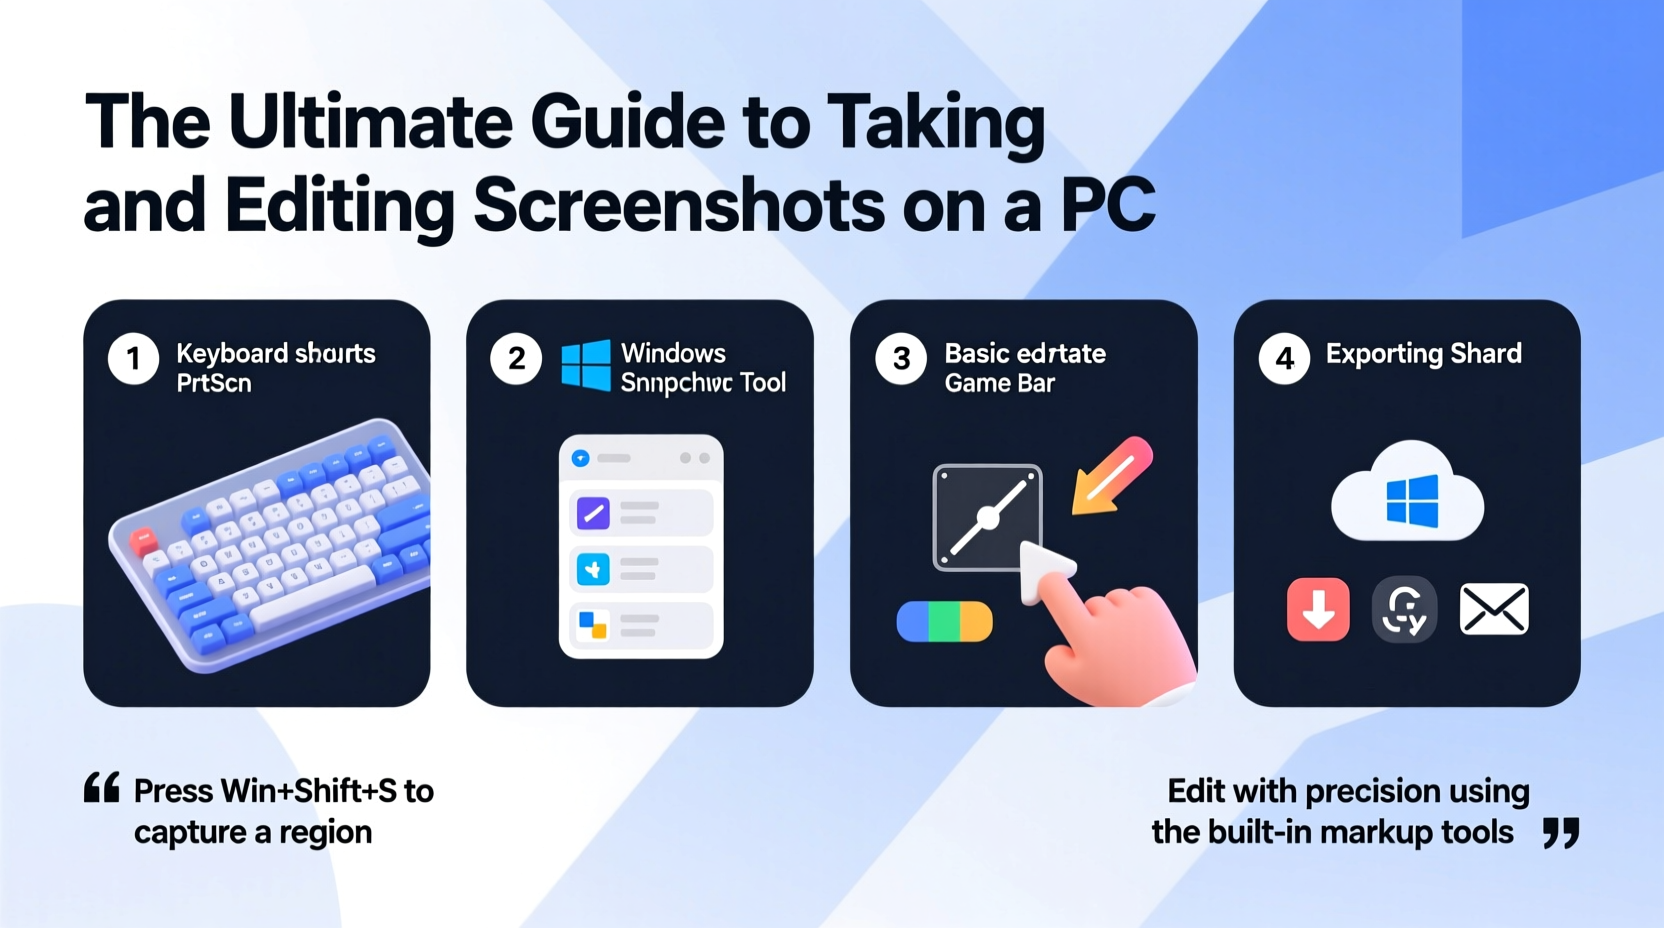
Native Tools and Keyboard Shortcuts
Every Windows PC comes with built-in screenshot capabilities. Mastering these eliminates the need for third-party software in most cases.
Essential Keyboard Shortcuts
| Shortcut | Action | Output Location |
|---|---|---|
| Print Screen (PrtScn) | Copies entire screen to clipboard | Clipboard only |
| Alt + PrtScn | Captures active window only | Clipboard only |
| Win + PrtScn | Saves full screen as file | Pictures > Screenshots folder |
| Win + Shift + S | Opens snip bar for selective capture | Clipboard only (Snipping Tool overlay) |
| Win + H | Records screen (if enabled) | Videos > Captures folder |
The Win + Shift + S shortcut activates the Snip & Sketch tool, which provides rectangular, freeform, window, and full-screen selection modes. After capture, the image briefly appears in a notification—click it to edit or annotate immediately.
“Knowing native shortcuts saves time and reduces reliance on external apps for routine tasks.” — Daniel Park, IT Support Specialist at TechFlow Solutions
Step-by-Step: How to Capture a Dropdown Menu
Certain interface elements vanish when you press keys or switch focus. Capturing them requires timing and the right tool. Follow this sequence:
- Press Win + Shift + S to open the snip bar.
- Hover over the menu trigger (e.g., a gear icon) to reveal the dropdown.
- Click and drag the crosshair cursor across the visible menu area.
- Release to capture. The snip copies to your clipboard.
- Paste (Ctrl + V) into an editor like Paint, Word, or email.
If the menu closes too quickly, use the Delay feature in the Snipping Tool app. Open it from the Start menu, set a 3–5 second delay, then initiate the capture. This gives you time to open the hidden element before the snapshot occurs.
Editing Screenshots Like a Pro
A raw screenshot rarely tells the full story. Strategic editing enhances clarity and professionalism.
Basic Edits You Should Always Consider
- Crop: Remove unnecessary borders or irrelevant sections.
- Blur sensitive data: Hide passwords, personal info, or confidential messages.
- Add arrows or highlights: Direct attention to key areas.
- Annotate with text: Explain steps or point out issues.
- Resize: Optimize for email attachments or web uploads.
Windows includes two powerful editors: Paint and Photos. While Paint offers pixel-level control, Photos provides intuitive markup tools. For advanced needs—like layering or batch processing—consider free tools like GIMP or ShareX.
Mini Case Study: Resolving a Software Bug Report
Sarah, a customer support agent, received a vague complaint: “The app crashes after login.” She asked the user to send a screenshot of the error. Instead of a clear message, she got a cluttered desktop with multiple windows open.
Sarah responded with a quick guide: “Press Win + Shift + S, then drag around just the error popup.” The user resent the image—this time cleanly cropped to show the exact message: “Error 407: Authentication Failed.” With that detail, Sarah identified a misconfigured proxy setting and resolved the issue within minutes.
This example shows how proper screenshot guidance improves communication efficiency—especially in remote support scenarios.
Checklist: Optimizing Your Screenshot Workflow
Use this checklist to ensure consistent, high-quality results every time:
- ✅ Determine the purpose: instruction, documentation, or reporting?
- ✅ Choose the appropriate capture type (full, window, region).
- ✅ Use Win + Shift + S for precision selections.
- ✅ Enable Snipping Tool delays for transient elements.
- ✅ Crop tightly to the subject of interest.
- ✅ Blur or redact private or sensitive information.
- ✅ Annotate with arrows, circles, or short labels if needed.
- ✅ Save in PNG format for clarity, or JPEG for smaller size.
- ✅ Name files descriptively (e.g., “Login_Error_407.png”).
- ✅ Store in an organized folder (e.g., Projects/Support/Screenshots).
Frequently Asked Questions
Where do my screenshots go when I press Win + PrtScn?
They are automatically saved in the “Screenshots” folder inside your main Pictures library. The path is typically: C:\\Users\\[YourName]\\Pictures\\Screenshots.
Can I change the default screenshot format or location?
Yes. While Windows defaults to PNG in the Screenshots folder, third-party tools like ShareX or Greenshot allow full customization—file type, naming rules, upload destinations, and even automatic cloud backup.
Why does my screenshot look blurry when I paste it?
This usually happens due to scaling on high-DPI displays. To fix it, disable display scaling for the application you’re pasting into (right-click .exe > Properties > Compatibility), or use the Snipping Tool instead of Print Screen for sharper output.
Conclusion
Taking and editing screenshots efficiently isn’t about memorizing every shortcut—it’s about building a repeatable process that delivers clear, secure, and meaningful visuals. From leveraging native tools to applying thoughtful edits, each step enhances communication and saves time. These skills are especially vital in today’s hybrid work environments, where visual context often bridges understanding faster than words alone.


 浙公网安备
33010002000092号
浙公网安备
33010002000092号 浙B2-20120091-4
Comments
No comments yet. Why don't you start the discussion?