
Lining a box with fabric transforms an ordinary container into a refined, personalized piece. Whether you're restoring an antique chest, crafting a gift box, or organizing your desk accessories, a well-lined interior elevates both function and aesthetics. Done poorly, fabric can wrinkle, bubble, or peel—undermining your effort. But with the right tools, techniques, and attention to detail, you can achieve a crisp, durable finish that looks store-bought or better. This guide walks you through every stage, from material selection to final pressing, ensuring flawless results every time.
Selecting the Right Materials
The foundation of a professional-looking fabric-lined box lies in thoughtful material choices. Not all fabrics and adhesives are created equal when it comes to adhering smoothly to rigid surfaces like wood, cardboard, or metal.
- Fabric: Choose tightly woven cotton, linen, or upholstery-weight fabric. These hold their shape, resist fraying, and accept adhesive evenly. Avoid stretchy knits or overly textured weaves—they buckle under pressure.
- Adhesive: Use acid-free PVA glue (like Mod Podge) for paper-backed boxes or lightweight materials. For wood or heavy-duty boxes, opt for contact cement or double-sided fusible webbing for a permanent bond.
- Box Material: Ensure the box surface is clean, dry, and smooth. Cardboard boxes benefit from a light sealant coat (diluted white glue) to prevent warping.
- Tools: Precision scissors, a brayer (or credit card), ruler, pencil, and fine-tip applicator for glue.
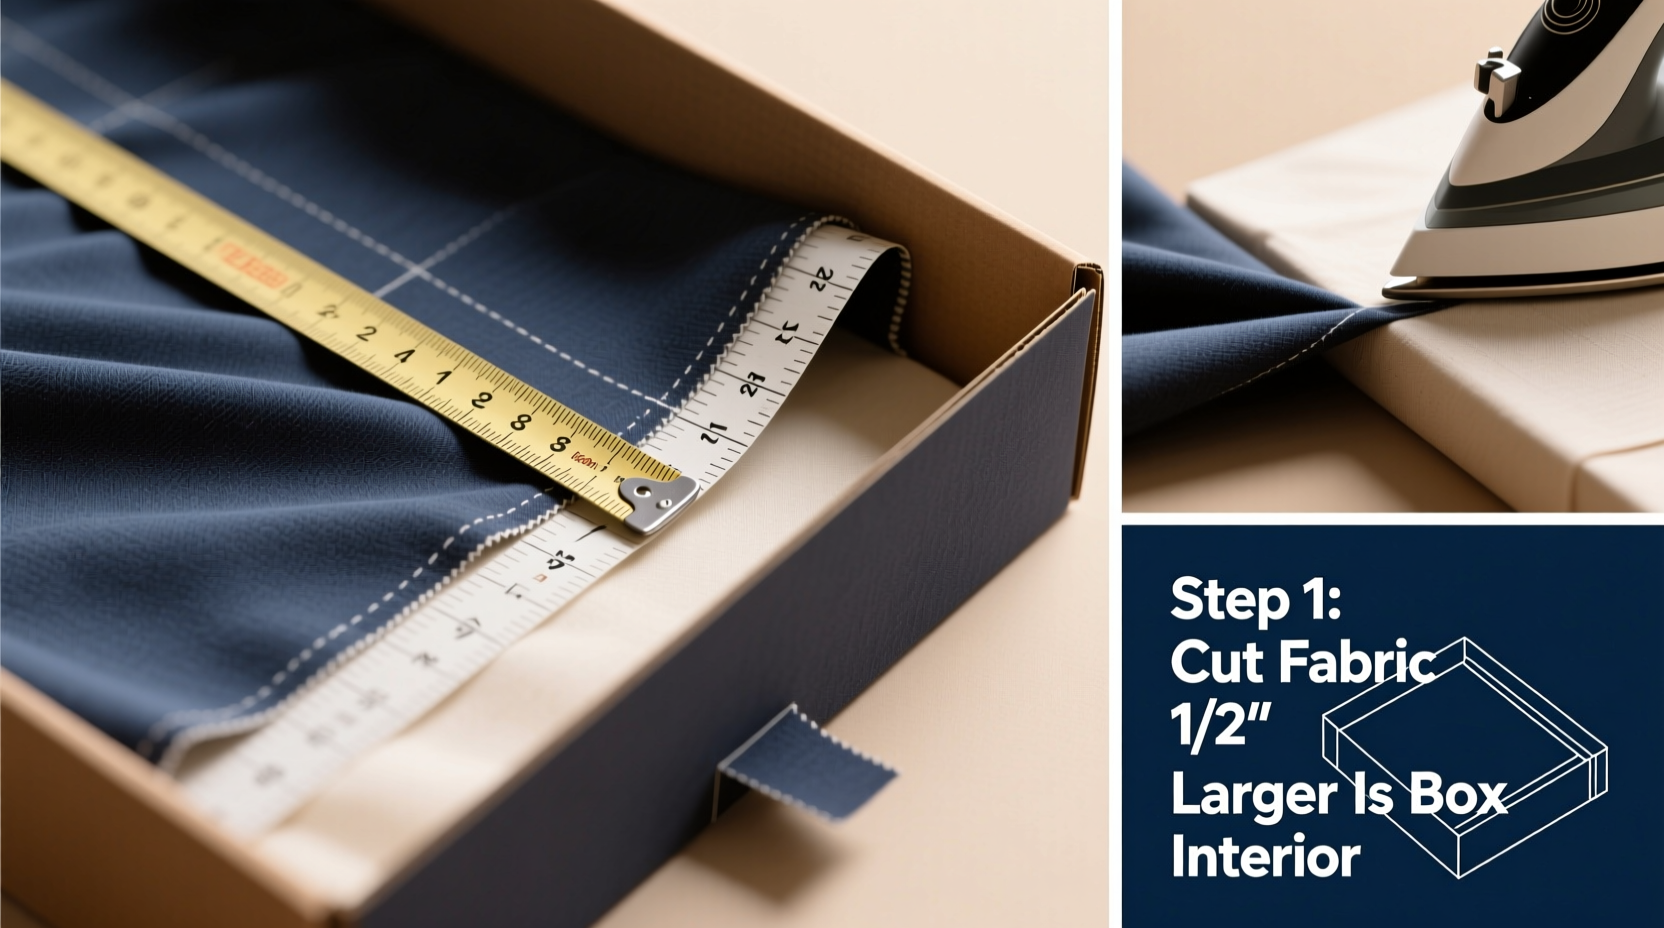
Measuring and Cutting Fabric Accurately
Precision is non-negotiable. A misaligned seam or uneven edge ruins the illusion of professionalism. Begin by measuring each interior surface of the box separately.
- Use a metal ruler and fabric marker to measure length and width of the base and each side wall.
- Add 1/4 inch (6mm) to each dimension to allow for seam allowance at the edges.
- Cut fabric pieces individually—don’t try to wrap one continuous piece around corners unless you’re experienced.
- For mitered corners (the hallmark of high-end finishes), cut corner flaps at 45-degree angles where walls meet.
Press all fabric pieces with a warm iron before application. Wrinkles trapped beneath adhesive become permanent flaws.
Do’s and Don’ts of Fabric Preparation
| Do | Don’t |
|---|---|
| Iron fabric before cutting | Stretch fabric while cutting |
| Use sharp scissors for clean edges | Use pinking shears (can create jagged lines) |
| Label each piece (e.g., “Front,” “Base”) | Assume opposite sides are identical |
| Test adhesive on scrap first | Apply glue too thickly |
Applying the Fabric with Precision
This is where technique separates amateurs from experts. The goal is a seamless bond without bubbles, puckers, or excess glue seepage.
- Start with the base: Apply a thin, even layer of adhesive using a foam brush or applicator. Place the fabric centered over the base and gently press from the center outward using a brayer or flat-edged tool.
- Work on side panels: Apply adhesive to one interior wall at a time. Position the fabric, aligning edges precisely. Smooth downward and outward to eliminate air pockets.
- Handle corners carefully: For mitered corners, fold the angled flap inward at a 45-degree angle, then press down firmly. Use a tweezers or pointed tool to tuck tight seams.
- Trim excess: Once adhesive has set slightly (but not fully dried), use a sharp utility knife to trim any overhang flush with the box rim.
Work methodically—one surface at a time. Rushing leads to misalignment and rework.
“Taking five extra minutes to measure twice and cut once saves hours of frustration later. A perfectly lined box starts long before the glue touches the surface.” — Clara Bennett, Interior Box Designer & Craft Educator
Avoiding Common Mistakes
Even skilled crafters fall into traps that compromise the finish. Awareness prevents these pitfalls:
- Using too much glue: Excess causes bubbling and seepage. Apply a thin, even coat—reapply only if necessary.
- Ignoring grain direction: Align the fabric’s weave parallel to the box edges. Misaligned grain makes patterns appear skewed.
- Skipping the dry fit: Lay out all fabric pieces without glue first. Check alignment, overlaps, and corner folds.
- Touching the surface after gluing: Oils from fingers can stain or weaken adhesion. Use gloves or tools for final adjustments.
Finishing Touches for a Polished Look
The final steps refine your work from “well done” to “exceptional.”
Once all fabric is applied and fully dried (wait at least 2–4 hours), inspect seams and edges. Reinforce loose corners with a dot of fabric glue applied with a toothpick. For added durability, seal cotton or linen linings with a clear matte varnish or spray fixative—especially if the box will be handled frequently.
If the box has a lid, repeat the entire process on its interior. Match pattern alignment between box and lid for a cohesive appearance. For decorative flair, consider adding ribbon trim along the top edge or stitching a subtle piping detail.
Mini Case Study: Restoring a Vintage Jewelry Box
Sophie, a prop stylist in Portland, inherited her grandmother’s cedar jewelry box. The original velvet lining had faded and peeled. She replaced it with deep navy cotton sateen, measuring each panel meticulously. By using a combination of PVA glue and a bone folder to smooth seams, she achieved a museum-quality finish. She added gold-thread trim along the rim for elegance. The result? A cherished family heirloom now functions beautifully and looks professionally restored.
Step-by-Step Checklist
- Choose suitable fabric and adhesive
- Clean and prep the box interior
- Measure and label each surface
- Cut fabric with 1/4\" seam allowance
- Dry-fit all pieces before gluing
- Apply adhesive thinly and evenly
- Smooth fabric from center outward
- Miter corners at 45 degrees
- Trim excess with a sharp blade
- Allow full drying time (minimum 2 hours)
- Inspect and reinforce weak areas
- Optional: Seal or trim for extra polish
Frequently Asked Questions
Can I line a curved or irregularly shaped box?
Yes, but it requires more advanced techniques. Use a flexible fabric like silk or lycra-blend, and consider heat-activated adhesive for conforming to curves. Score the fabric lightly with small cuts (called “relief slits”) to help it bend without wrinkling.
What if the fabric wrinkles during application?
If caught early, gently lift the edge and re-smooth. If the glue has dried, the fabric cannot be adjusted without damage. Prevention is key: always pre-iron fabric and apply adhesive in stages.
How do I clean a fabric-lined box?
Avoid moisture. Use a soft lint roller or handheld vacuum with a brush attachment. For stains, dab with a barely damp cloth and mild soap, then blot immediately. Never soak the interior.
Final Thoughts
A fabric-lined box is more than a storage solution—it's a statement of care and craftsmanship. Every fold, seam, and smooth surface reflects attention to detail. With the right materials, patience, and technique, you can produce results that rival custom upholstery shops. Whether you're personalizing a gift, preserving a keepsake, or refining your DIY skills, this method delivers lasting satisfaction.


 浙公网安备
33010002000092号
浙公网安备
33010002000092号 浙B2-20120091-4
Comments
No comments yet. Why don't you start the discussion?