
For millions of gamers, the holiday season isn’t just about tradition—it’s about identity, nostalgia, and shared joy across generations. A gaming-themed Christmas tree does more than decorate a room; it tells a story: the late-night raids, the first console unboxed, the sibling rivalry over who gets the controller first. Controller ornaments—whether hand-painted replicas, 3D-printed miniatures, or upcycled circuit-board accents—are the anchor of this aesthetic. But success lies beyond slapping a few PlayStation logos on baubles. It demands intentionality in color harmony, material authenticity, spatial balance, and narrative cohesion. This guide distills years of community experimentation, designer interviews, and real-world installations into actionable, scalable strategies—no soldering iron required, but plenty of creative confidence.
Why Controller Ornaments Anchor the Theme (and Why Generic “Gamer” Decor Falls Short)
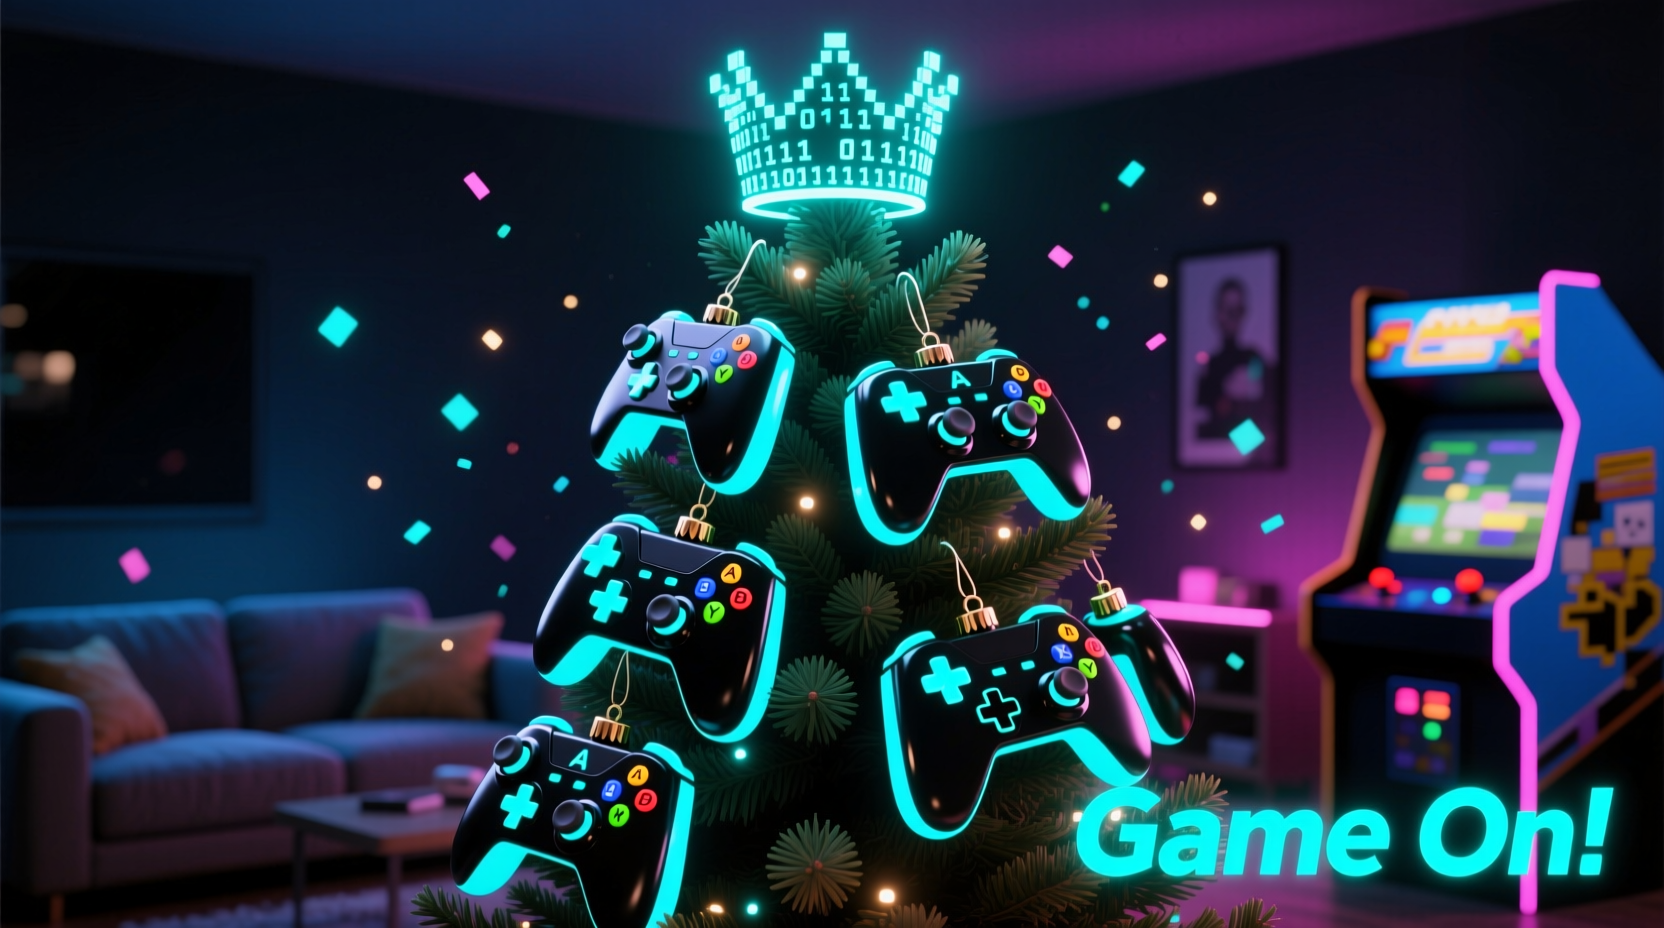
Most attempts at gaming-themed trees stall at surface-level tropes: pixelated snowflakes, neon “GAME OVER” signs, or oversized joystick toppers. These feel decorative—not resonant. Controller ornaments succeed because they’re instantly recognizable, emotionally loaded, and structurally versatile. A DualSense’s subtle light bar, an Xbox’s asymmetrical symmetry, or a Nintendo Switch’s detachable Joy-Con shape each carries decades of muscle memory and emotional association. Unlike abstract symbols, controllers evoke specific memories: the weight of a GameCube controller in a child’s hands, the tactile feedback of a PS5 adaptive trigger, the satisfying click of an SNES directional pad.
This resonance is backed by behavioral design research. Dr. Lena Park, Interaction Design Lead at the MIT Media Lab, explains:
“Physical objects tied to high-engagement digital experiences create what we call ‘tactile anchors’—they reduce cognitive load when recalling associated memories and increase emotional investment in shared spaces. A controller ornament isn’t just decoration; it’s a conversation starter that bridges screen time and family time.”
Crucially, controller ornaments scale gracefully. A single hand-painted NES controller bauble reads as nostalgic. Five arranged in descending size down one branch suggests progression. Twelve scattered with deliberate irregularity mimics the organic chaos of a real game shelf. Their form—compact, symmetrical, and inherently dimensional—also solves a common tree-decorating flaw: flat ornaments disappear against dense foliage. Controllers project outward, catching light from multiple angles.
Step-by-Step: Building Your Controller-Centric Tree (From Concept to Completion)
- Define Your Era or Ecosystem: Choose one unifying thread—e.g., “90s Console Nostalgia” (SNES, Genesis, PlayStation 1), “Modern Multiplatform” (PS5, Xbox Series X, Switch), or “Retro-Futurist” (combining CRT scanlines with cyberpunk lighting). Avoid mixing eras without intention—pairing a wood-grain Atari 2600 controller with a matte-black DualSense creates visual dissonance unless deliberately contrasted.
- Select Your Core Controller Palette: Identify 3–4 dominant colors from your chosen controllers. Example: PS5 = white + black + subtle blue accent; Xbox = green + black + silver; Switch = neon red/blue + gray. Use these as your tree’s primary color framework—not for every ornament, but for lights, ribbon, and background baubles.
- Build the Foundation (Non-Controller Elements): Start with lighting: warm-white LEDs for retro warmth; cool-white + programmable RGB strips for modern immersion. Wrap evenly—no gaps. Add 2–3 large matte-finish baubles in your palette’s base color (e.g., deep charcoal for Xbox, ivory for PS5) to establish depth before adding controllers.
- Place Controller Ornaments Strategically: Never cluster them. Place the largest (2.5–3 inch) at branch tips for visual weight. Medium (1.5 inch) along mid-branches for rhythm. Smallest (0.75 inch) tucked near the trunk for hidden detail. Maintain at least 4 inches between like-shaped controllers to avoid repetition fatigue.
- Add Narrative Layers: Integrate 2–3 non-controller elements that reinforce your era: tiny cardboard cartridge replicas for retro builds, miniature microSD cards for modern themes, or etched circuit-board shards as “geometric filler.” These support—not overshadow—the controllers.
DIY Controller Ornaments: Three Accessible Methods (No Craft Expertise Needed)
Commercial controller ornaments exist, but handmade versions carry irreplaceable authenticity. Here are three proven approaches, ranked by time investment and skill level:
| Method | Time Required | Materials Needed | Best For | Pro Tip |
|---|---|---|---|---|
| Painted Wooden Blanks | 2–3 hours (plus drying) | Pre-cut wooden circles/ovals (1.5\"–2.5\"), acrylic paints, fine brushes, clear sealant | Beginners; nostalgic eras (NES, Genesis) | Use painter’s tape to mask button layouts—paint buttons last for crisp edges. |
| Resin + Circuit-Board Inlays | 6–8 hours (including curing) | Epoxy resin kit, small PCB fragments (salvaged from old electronics), silicone molds shaped like controllers, pigments | Intermediate; modern/cyberpunk themes | Embed PCB traces *before* pouring resin—press gently with tweezers to avoid air bubbles. |
| 3D-Printed Custom Models | 1–2 hours setup + print time | STL files (free on Thingiverse), PLA filament, sandpaper, primer, acrylics | Advanced; exact replica accuracy (DualSense triggers, Switch dock ports) | Sand printed models with 400→800→1200 grit paper for glass-smooth finish before painting. |
Real-World Application: The Thompson Family’s “Generational Game Tree”
In Portland, Oregon, the Thompson family transformed their 7-foot Fraser fir into a living timeline of gaming history. Father Marcus (42) contributed his childhood Sega Genesis controller, carefully cast in silicone and painted with archival-grade acrylics. His daughter Maya (10) designed Joy-Con ornaments using kid-safe air-dry clay, pressing actual Switch buttons into the surface for texture. Grandfather Robert (71), a retired electronics technician, wired three tiny LEDs into miniature NES cartridges—each glowing softly when the tree lights activated.
Their secret? Rigorous color discipline. They chose a palette of charcoal gray (tree base), cream (for vintage CRT glow), and muted forest green (honoring Marcus’s original Genesis). No reds or blues appeared elsewhere—making the green Joy-Cons and Genesis replica pop with intention. Ribbon was matte charcoal velvet, not satin. Lights were warm-white only—no RGB flicker. The result wasn’t “gaming decor”; it was a tactile family archive. As Marcus shared:
“When Maya held her clay Joy-Con next to my Genesis cast, she said, ‘We pressed buttons the same way.’ That’s why we did it—not for Instagram, but for that moment.”
Do’s and Don’ts: Avoiding Common Gaming Tree Pitfalls
- DO prioritize controller variety over quantity. Six distinct, well-placed controllers read as curated; twelve identical ones read as cluttered.
- DO use matte or satin finishes exclusively. Glossy ornaments create distracting hotspots under lights and clash with the tactile feel of real controllers.
- DO incorporate sound subtly—place a small Bluetooth speaker inside the tree stand playing low-volume chiptune carols or ambient game music (e.g., Stardew Valley’s winter track).
- DON’T overload branches with heavy ornaments. Controllers average 20–35g each; exceed 5 per major branch and risk drooping or breakage.
- DON’T ignore scale hierarchy. A 3-inch PS5 controller beside a 0.5-inch Mario Kart cartridge breaks visual flow. Keep size variance within 2:1 ratio.
- DON’T use copyrighted logos without modification. Instead of printing “XBOX,” stencil an abstract green “X” shape; replace “PLAYSTATION” with stylized “P” and “S” glyphs inspired by the font.
FAQ: Practical Questions Answered
How do I safely attach delicate controller ornaments to branches?
Use museum wax or clear ornament hooks with padded grips—not wire or string. Museum wax adheres firmly to both wood and resin/plastic, holds up to 2 lbs per pea-sized dab, and removes cleanly with rubbing alcohol. For heavier pieces (over 40g), drill a 1mm pilot hole in the ornament’s top and insert a discreet brass eye pin—then hang with clear fishing line.
Can I mix real vintage controllers into the display?
Yes—but only as standalone statement pieces, not hanging ornaments. Mount a cleaned, non-functional NES controller on a small floating shelf beside the tree, or suspend it horizontally via nearly invisible monofilament from the ceiling above the tree. Never hang functional controllers: heat from lights can degrade internal components, and accidental drops risk irreparable damage.
What if I’m on a tight budget? What’s the absolute minimum viable approach?
Start with three elements: (1) Warm-white LED lights (non-negotiable for warmth), (2) One hand-painted wooden controller ornament (use free templates online), and (3) A single strand of matte charcoal ribbon woven through lower branches. That trio establishes theme, texture, and cohesion. Everything else is refinement—not requirement.
Conclusion: Your Tree Is More Than Decoration—It’s a Legacy Interface
A gaming-themed Christmas tree built around controller ornaments transcends seasonal decor. It’s a physical interface between digital legacy and tangible tradition—where the haptic memory of a controller’s grip meets the shared warmth of holiday light. It signals to children that their passions are worthy of celebration, reminds adults of the joy in simple interactions, and invites guests into a story told through shape, color, and careful placement. You don’t need a 3D printer or a craft studio. You need curiosity, respect for the objects that shaped your joy, and the willingness to treat your tree not as a backdrop—but as a canvas for meaning.
Start small. Paint one ornament this weekend. Sketch your controller palette on paper. Measure your tree’s branch density. Then share your first attempt—not as finished art, but as an invitation to others building their own legacy interfaces. Because the most powerful gaming moments have never been about pixels alone. They’ve always been about presence, connection, and the quiet pride of saying, “This is part of who I am.”


 浙公网安备
33010002000092号
浙公网安备
33010002000092号 浙B2-20120091-4
Comments
No comments yet. Why don't you start the discussion?