
When a single strand of Christmas lights goes dark—not dim, not flickering, but completely dead—it’s rarely random. Unlike modern LED string lights with built-in redundancy, traditional incandescent mini-light strands operate as a series circuit: current must flow unbroken through every bulb filament to complete the path. A single point of failure can interrupt that path and extinguish the entire string. Yet most people assume it’s “just a bulb” and replace one or two—only to find the strand remains dark. The real issue is often hidden: a corroded socket, a broken wire inside insulation, or a failed shunt mechanism that was meant to bypass a burnt-out filament. Understanding the physics behind the failure—and mastering a methodical tracing process—is the difference between wasting $20 on replacements and restoring your lights in under 15 minutes.
Why Series Circuits Fail Catastrophically (Not Gradually)
Most standard mini-light strings sold before 2015—and many budget-friendly versions still on shelves—use a classic series configuration. In this design, electricity flows from the plug, through each bulb’s filament in sequence, and back to the neutral line. There are no parallel branches. If any single component interrupts continuity—even for a fraction of a second—the entire circuit opens. That’s why one burnt-out bulb *can* kill the whole strand… but only if its shunt fails to activate.
Each bulb contains a tiny coiled wire called a shunt—a fail-safe designed to bridge the gap when the filament breaks. When voltage surges across an open filament, the shunt’s insulation vaporizes, allowing current to jump past the dead bulb. This keeps the rest of the strand lit. But shunts degrade over time. Moisture ingress, repeated thermal cycling, or manufacturing defects can render them inert. When that happens, the first bulb to burn out becomes the “fault anchor”—the silent point where current stops flowing.
The 5 Most Common Root Causes (and How They Manifest)
Faults rarely occur in isolation. Corrosion invites moisture, which accelerates wire fatigue, which stresses adjacent sockets. Here’s what actually kills strands—and how to recognize each cause:
- Failed bulb shunts: The most frequent offender. Bulbs appear intact (no visible blackening), but internal shunts never activated. Strands go dark suddenly after long storage or exposure to humidity.
- Corroded or oxidized sockets: Especially near the plug end or where strands connect. Greenish residue, stiff bulb rotation, or resistance when inserting bulbs signal degraded contacts. Often worsens after outdoor use or coastal exposure.
- Broken internal wire at stress points: Wires snap inside insulation where cords bend repeatedly—typically within 2 inches of the plug, male/female connectors, or where the cord passes through a tree branch. No visible damage; continuity testing is essential.
- Loose or misaligned plug prongs: Over time, prongs loosen in the molded plug housing. Even slight misalignment prevents full contact with outlet slots, delivering intermittent or zero voltage. A telltale sign: the strand works in one outlet but not another—even if both test live.
- Overloaded controllers or faulty timers: Many light sets include inline fuses, photocells, or programmable controllers. A blown 3-amp fuse inside the plug base—or a failed microcontroller—cuts power before it reaches the first bulb. Check for reset buttons or replaceable fuses before assuming bulb-level failure.
Step-by-Step Fault Tracing Protocol (No Multimeter Required)
You don’t need electronics expertise—just patience and a working known-good bulb. Follow this sequence exactly. Skipping steps leads to wasted time and misdiagnosis.
- Unplug everything. Safety first. Verify no power is present.
- Inspect the plug and cord ends. Look for cracked housing, bent prongs, or discoloration near the plug base. Gently wiggle the cord where it enters the plug while watching for flicker in a working strand—this reveals internal breaks.
- Test the outlet. Plug in a lamp or phone charger to confirm power delivery. Use a circuit tester if available.
- Remove bulbs one by one—starting from the plug end. Insert a known-working bulb into socket #1. If the strand lights, the fault is downstream. If not, move to socket #2 and repeat. Stop when the strand illuminates: the previous socket held the defective bulb—or had a faulty contact.
- Test suspect bulbs individually. Insert each removed bulb into a working strand’s first socket. If that strand goes dark, the bulb is the culprit. If it stays lit, the bulb is fine—but the socket it came from may be corroded or damaged.
- Check connections between strands. If using multiple strings daisy-chained, disconnect all but the first. If it works alone, reconnect one at a time. Failure upon adding the third strand points to a faulty female connector on string #2 or male plug on string #3.
This method isolates whether the problem lies in the bulbs, sockets, wiring, or interconnections—without assumptions.
Do’s and Don’ts of Christmas Light Maintenance & Repair
| Action | Do | Don’t |
|---|---|---|
| Bulb replacement | Use identical voltage/wattage bulbs (e.g., 2.5V, 0.3A). Match base type (E10 candelabra) precisely. | Substitute bulbs from different brands or voltage ratings—even if they fit physically. |
| Cleaning sockets | Use isopropyl alcohol (90%+) on a cotton swab. Let dry fully before reassembly. | Use vinegar, water, or abrasive pads—corrosion worsens with moisture or scratching. |
| Storing lights | Wind loosely around a cardboard tube or use commercial light reels. Store in climate-controlled space. | Stuff into plastic bins or hang tightly coiled—causes wire fatigue and insulation cracks. |
| Testing tools | Use a non-contact voltage tester to verify outlet power; invest in a $12 bulb checker for rapid diagnostics. | Rely solely on visual inspection or “tapping” bulbs to see if they light—unreliable and potentially hazardous. |
| Outdoor use | Use only UL-listed “for outdoor use” strands. Seal plug connections with waterproof electrical tape or silicone caps. | Plug indoor-rated lights outside—even under eaves. Moisture ingress is the top cause of socket corrosion. |
Real-World Case Study: The “Ghost Strand” in Maplewood
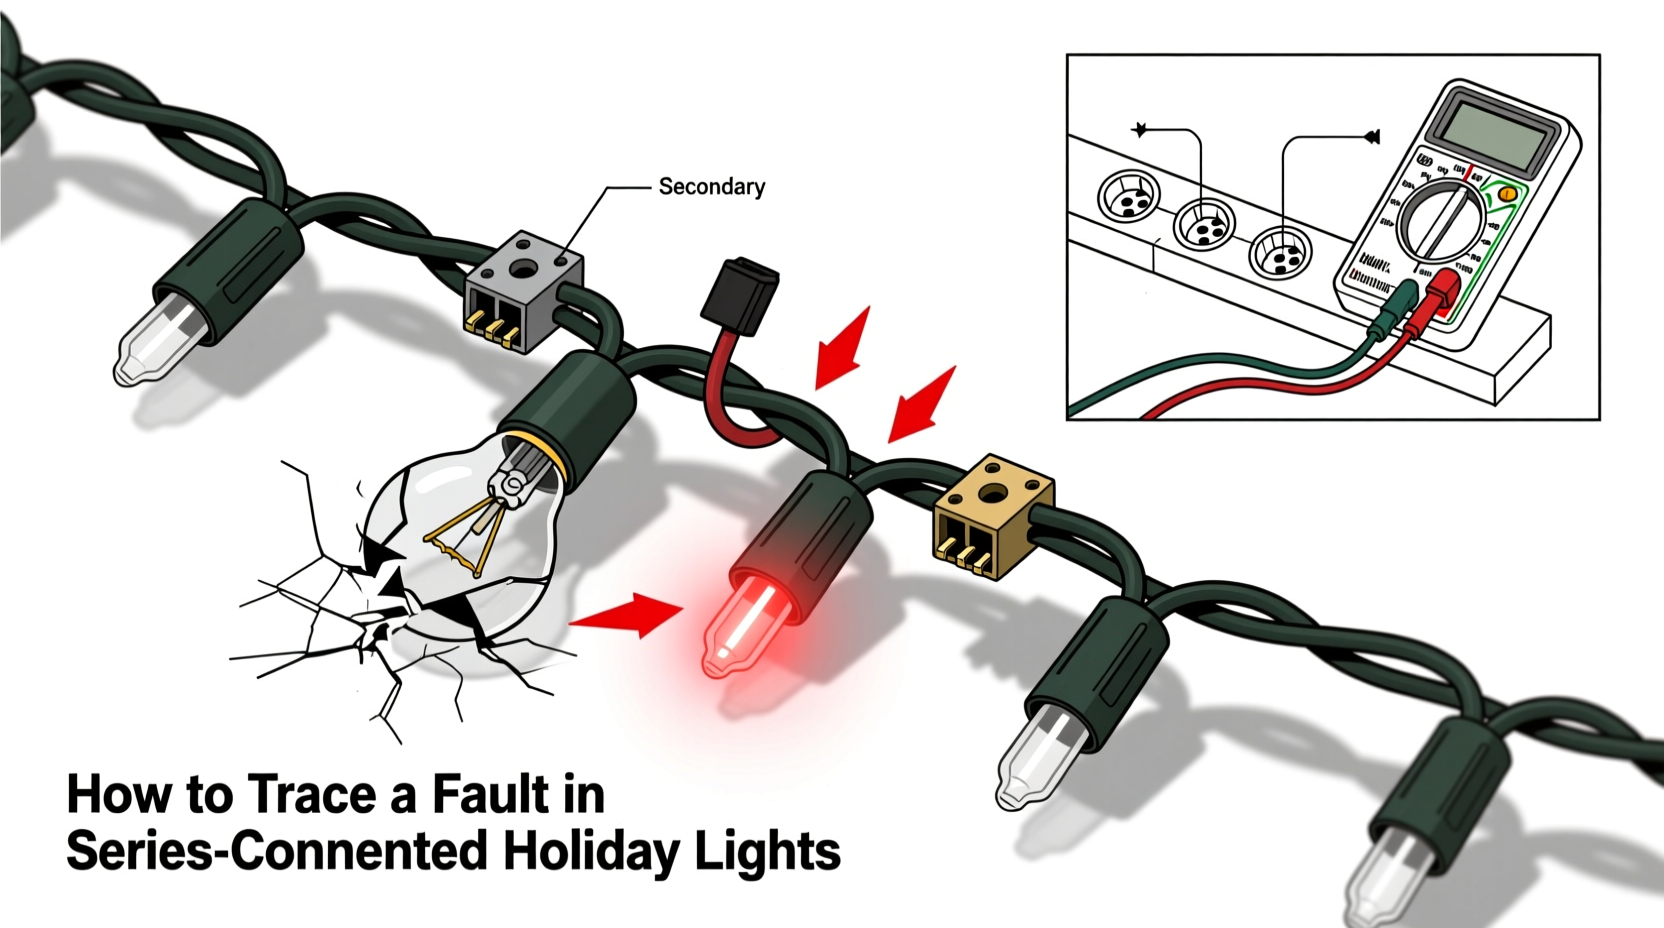
In December 2023, Sarah K., a homeowner in Maplewood, NJ, reported her vintage 1998 C7 light strand going dark mid-season. She’d replaced three bulbs, checked the fuse (intact), and tested the outlet—still no light. Frustrated, she brought it to a local hardware store’s holiday repair clinic. Technician Marcus R. followed the step-by-step protocol: he started at the plug end and found socket #1 lit the strand when a known-good bulb was inserted. But when he placed the original bulb back in socket #1, the strand remained dark. He cleaned the socket with alcohol—no change. Then he measured continuity across the socket contacts with a multimeter: infinite resistance. The brass contact inside the socket had fractured due to metal fatigue from repeated bending. Replacing the entire socket assembly (a $1.25 part) restored full function. “It wasn’t the bulb,” Marcus noted. “It was the socket pretending to work—until it didn’t.”
Expert Insight: What Industry Technicians Know
“Shunt reliability has declined 40% since 2010 due to cost-cutting in filament coating materials. If your lights are more than five years old, assume shunts are compromised—even if bulbs look fine. Always test sockets, not just bulbs.” — Rafael Mendoza, Senior Electrical Technician, Holiday Lighting Solutions Inc., with 22 years of seasonal light diagnostics experience
Rafael’s observation underscores a critical reality: age matters more than appearance. Modern LEDs avoid series-circuit pitfalls entirely—but legacy incandescent strands demand proactive maintenance, not reactive replacement.
FAQ: Your Top Troubleshooting Questions Answered
Can I cut and splice a broken section of light cord?
Yes—but only if you’re comfortable with soldering and heat-shrink tubing. Strip ½ inch of insulation from both ends, twist copper wires together, solder, then cover each joint with dual-wall heat-shrink tubing rated for outdoor use (125°C minimum). Never use wire nuts or electrical tape outdoors; moisture will penetrate and cause corrosion within weeks.
Why do some strands have “replaceable fuses” while others don’t?
Fuses protect against power surges and short circuits. Older strands used glass-tube fuses inside the plug base (often 3A or 5A). Newer designs embed polymeric positive temperature coefficient (PPTC) resettable fuses that trip and self-reset when overheated. If your strand has a removable fuse cap, check it first—but remember: a blown fuse indicates an underlying problem (e.g., crossed wires or moisture short) that must be fixed before replacing the fuse.
Is it safe to mix LED and incandescent strands on the same circuit?
No. Incandescent strings draw significantly higher current (up to 0.3A per 50-bulb section) versus LEDs (0.02–0.04A). Daisy-chaining them risks overloading the incandescent strand’s wiring, causing overheating, melted insulation, or fire hazard. Use separate outlets or dedicated LED-compatible controllers.
Conclusion: Light Up With Confidence, Not Guesswork
Christmas lights shouldn’t be a source of seasonal stress. Entire strands go dark because physics demands continuity—and decades of design compromises, environmental exposure, and storage neglect erode that continuity in predictable ways. You now know that the culprit isn’t “bad luck” or “cheap lights.” It’s a shunt that didn’t fire, a socket that oxidized, a wire that fatigued, or a connection that loosened. Armed with systematic tracing—not trial-and-error—you reclaim control over your display. Test one socket at a time. Clean before you replace. Respect the series circuit’s unforgiving nature. And next time you wind your lights away after the holidays, do it on a reel—not in a knot. That small act preserves wire integrity far more than any bulb brand ever could.


 浙公网安备
33010002000092号
浙公网安备
33010002000092号 浙B2-20120091-4
Comments
No comments yet. Why don't you start the discussion?