
Every holiday season, the frustration is familiar: you pull out your favorite string of Christmas lights, plug them in, and only half the strand lights up—or worse, none of them do. With millions of households relying on festive lighting each December, understanding why some Christmas lights fail—and how to fix them—is essential. Whether you're dealing with incandescent mini-lights or modern LED strings, electrical issues can arise from simple bulb problems to deeper circuit faults. This comprehensive guide breaks down the most common causes of string light failure, offers step-by-step diagnostics, and provides practical solutions to get your display shining again.
Understanding How Christmas Light Strings Work
Before troubleshooting, it's important to understand the basic design of most Christmas light strands. The majority of traditional incandescent mini-lights are wired in a **series circuit**, meaning electricity flows through each bulb one after another. If one bulb burns out or becomes loose, the entire circuit can break, causing the rest of the strand to go dark. Some newer models use shunted sockets or parallel wiring segments to prevent total failure, but many still rely on series connections.
In contrast, LED Christmas lights often operate at lower voltages and may include built-in rectifiers and resistors. Many LED strings are divided into sections—typically three or four—that function semi-independently. If one section fails, others may remain lit, making diagnosis easier but requiring different repair strategies.
The construction of these strings includes several key components:
- Bulbs – Either incandescent filaments or LED diodes that emit light.
- Sockets – Hold bulbs in place and maintain electrical contact.
- Wiring – Thin copper wires carry current along the strand.
- Fuse(s) – Located in the plug, fuses protect against power surges.
- Plug – Connects to the outlet and delivers power to the circuit.
A failure at any point in this chain can disrupt illumination. Identifying where the break occurs is the first step toward restoration.
Common Causes of Christmas Light Failures
Not all light malfunctions stem from the same issue. Below are the most frequent culprits behind non-working Christmas lights:
- Blown fuse in the plug – Often caused by plugging too many strands together or voltage spikes.
- Loose or missing bulb – A single bulb not fully seated can break the circuit.
- Burned-out bulb – Especially in older incandescent sets, filament failure is common.
- Corroded or damaged socket – Moisture exposure or physical stress can degrade contacts.
- Cut or frayed wire – Accidental damage during storage or installation.
- Bad connection between strands – Daisychained sets may lose continuity at connectors.
- Tripped GFCI outlet or circuit breaker – Outdoor lights plugged into protected outlets may trip safety mechanisms.
Each of these has distinct symptoms and requires a specific diagnostic approach. Recognizing patterns—like whether part of the strand works or if adjacent strings also fail—can narrow down the cause quickly.
Step-by-Step Troubleshooting Guide
Follow this systematic process to identify and resolve most Christmas light issues efficiently.
Step 1: Check Power Source and Outlet
Start simple. Plug a known-working device (like a phone charger) into the same outlet to confirm it’s delivering power. If using an extension cord or timer, test without those first. For outdoor setups, ensure the GFCI outlet hasn’t tripped—press the “Reset” button if needed.
Step 2: Inspect the Plug for Blown Fuses
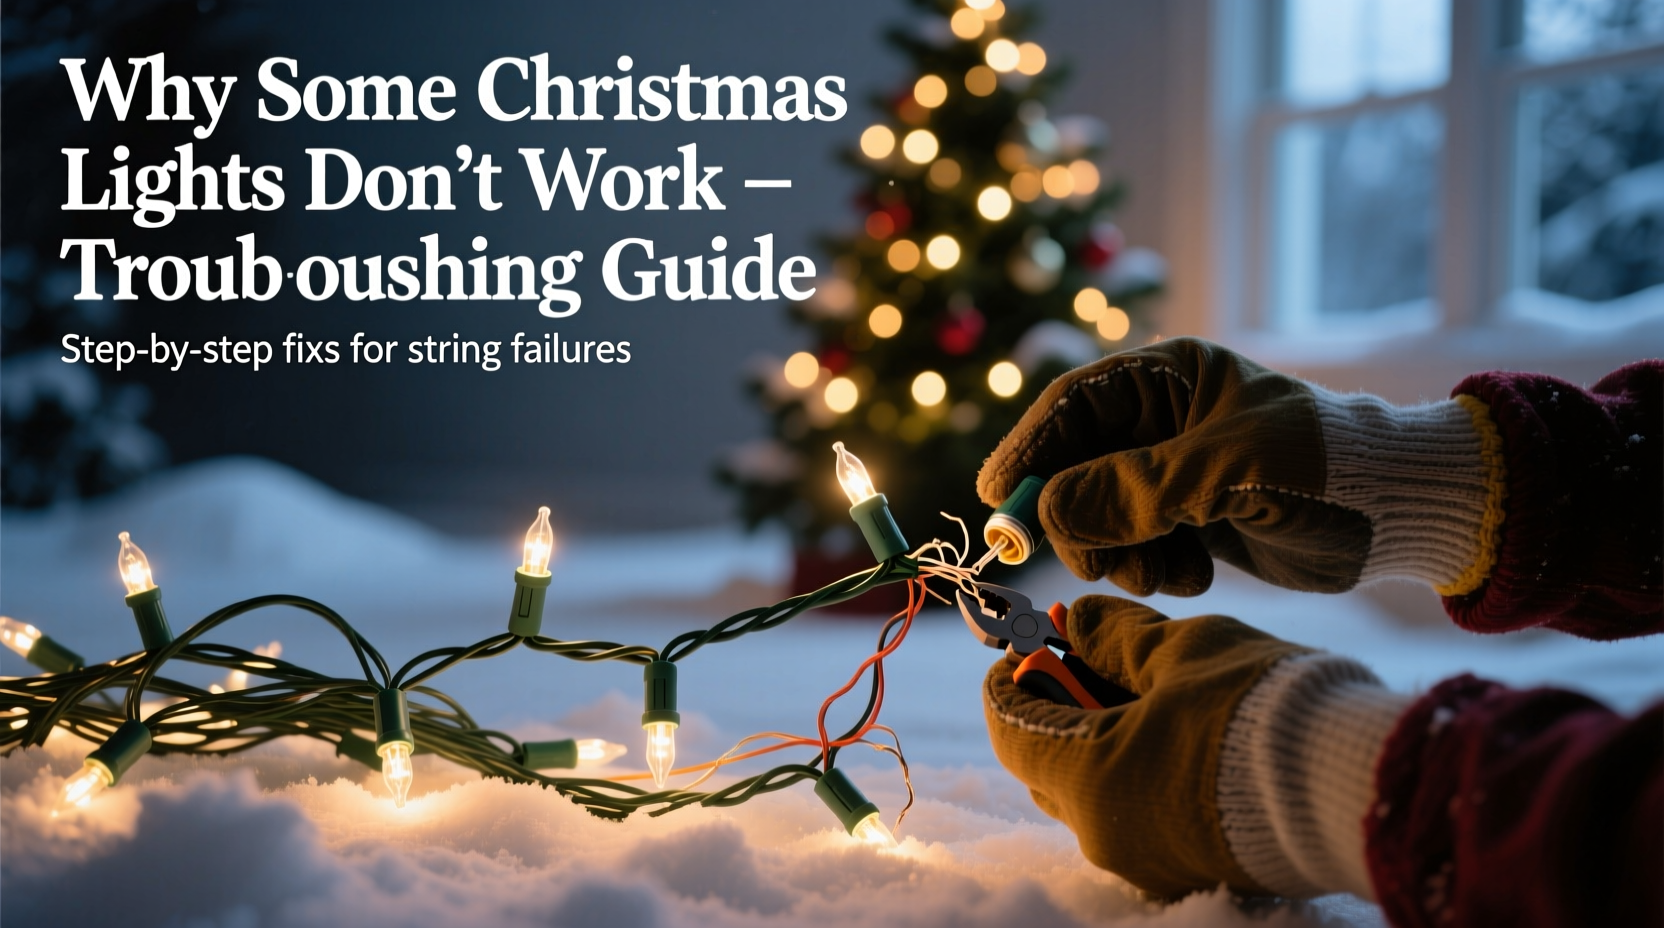
Most standard Christmas light plugs contain two small fuses inside a sliding drawer near the prongs. Use a flathead screwdriver to gently remove the fuse compartment. Look for visible signs of damage—blackened glass, broken filament inside the fuse. Replace both fuses with identical replacements (usually 3-amp, 125V). Even if one looks fine, replace both as a pair since they age together.
Step 3: Examine Bulbs and Sockets
Begin at the plug end and visually inspect each bulb. Look for:
- Darkened or cloudy bulbs (sign of burnout)
- Loose bulbs wobbling in sockets
- Cracked or melted sockets
Gently press each bulb down to ensure full contact. If any are missing, insert a replacement. Note: Some sets require color-coded or shaped bulbs—check packaging for specifications.
Step 4: Test Individual Bulbs (Optional)
If you suspect a bad bulb but can't see it, use a non-contact voltage tester or multimeter. Alternatively, swap suspected bulbs into a working string to verify function. Modern \"light keepers\" are handheld tools that send a signal through the strand to detect open circuits without removing bulbs.
Step 5: Inspect Wiring and Connections
Run your fingers along the length of the wire, checking for cuts, kinks, or exposed copper. Pay close attention to areas near bends or where lights were previously tangled. Also examine inter-strand connectors—these are common failure points when linking multiple sets. Ensure male and female ends are fully mated and dry.
Step 6: Verify Sectional Functionality (LED Strings)
Many LED strings have multiple independent sections. If only one-third or half the lights work, the problem is likely isolated to a single segment. Focus your inspection on that portion—check fuses, bulbs, and wiring continuity within the affected zone.
Step 7: Try a Known-Good Strand
If possible, connect a functioning light set to the same outlet and extension cord. If it doesn’t work either, the issue lies outside the lights themselves—possibly in the circuit, outlet, or power strip.
“Over 60% of Christmas light failures I see in repair clinics are due to blown fuses or loose bulbs—both easily fixed with basic tools.” — Mark Reynolds, Holiday Lighting Technician, 12 years experience
Tips and Tools for Faster Diagnosis
Speed up your troubleshooting with these expert-backed methods:
Use a Light Tester Tool
Dedicated devices like the \"LightKeeper Pro\" emit a pulsing signal that can clear shunt obstructions in incandescent bulbs or detect open circuits. These tools claim to revive \"dead\" sections without replacing bulbs—a controversial but sometimes effective shortcut.
Carry a Repair Kit
Keep a small container with spare bulbs, replacement fuses, electrical tape, and zip ties. Having parts on hand prevents delays when fixing issues mid-installation.
Work in a Well-Lit Area
Trying to spot a tiny burnt filament in dim lighting is nearly impossible. Use a bright desk lamp or natural daylight to inspect bulbs closely.
Replace Entire Sections if Needed
For older strands with repeated failures, consider cutting out faulty segments and splicing in new ones—or replacing the entire string. Given the low cost of basic light sets today, extensive repairs aren’t always worth the effort.
Do’s and Don’ts of Christmas Light Maintenance
| Do’s | Don’ts |
|---|---|
| Unplug lights before inspection or repair | Ignore flickering or partial lighting—it’s an early warning sign |
| Store lights on reels or cardboard tubes to prevent tangling | Pull lights by the cord when removing from trees or eaves |
| Check manufacturer’s max connect limit to avoid overloading | Daisy-chain more than three incandescent strings unless rated for it |
| Use weatherproof cords and covers for outdoor installations | Leave damaged wires exposed—even minor nicks can lead to shorts |
| Test lights before decorating to catch issues early | Mix incompatible bulb types (e.g., 50-light vs. 100-light replacements) |
Mini Case Study: Restoring a Vintage Light String
Sarah from Portland inherited her grandmother’s 1970s-era red-and-green incandescent strand. Excited to use them on her porch, she discovered only the first third lit up. She followed the troubleshooting steps:
- Confirmed the outlet worked with a lamp.
- Opened the plug and found one fuse blown—replaced both.
- No change. Visually inspected all bulbs; noticed one was slightly recessed.
- Re-seated the bulb and tested—still dark.
- Used a LightKeeper Pro tool to send a pulse through the strand.
- The middle section suddenly lit—the tool had reactivated a failed shunt.
The entire string now works perfectly. Sarah attributes the success to early testing and having the right tool. “I almost tossed them,” she said. “But taking an hour to troubleshoot saved a family heirloom.”
FAQ: Common Questions About Non-Working Lights
Why do only half my Christmas lights work?
This usually indicates a partial circuit break. In incandescent strings, it could be a loose bulb or failed shunt in the middle. In LED strings, it often means one of several internal sections has failed due to a bad bulb, fuse, or solder joint. Trace from the last working bulb forward to locate the fault.
Can I mix LED and incandescent lights when daisy-chaining?
No. They have different voltage requirements and current draws. Mixing types can overload one set or cause erratic behavior. Always connect similar types and check labels for compatibility ratings.
How long should Christmas lights last?
Incandescent mini-lights typically last 1,000–3,000 hours. LEDs can last 25,000–50,000 hours. However, real-world lifespan depends heavily on storage, handling, and environmental exposure. Properly stored LED strings can remain functional for 10+ years.
Final Checklist: Restore Your Lights Fast
- ✅ Unplug the light string.
- ✅ Test the outlet with another device.
- ✅ Check and replace fuses in the plug.
- ✅ Inspect every bulb for looseness, darkness, or damage.
- ✅ Reseat all bulbs firmly in their sockets.
- ✅ Examine wires and connectors for cuts or corrosion.
- ✅ Plug in and test. If still not working, isolate sections (if applicable).
- ✅ Use a light tester tool or multimeter for advanced diagnostics.
- ✅ Replace faulty bulbs or splice damaged wires if necessary.
- ✅ Consider retiring old or repeatedly failing strings.
Conclusion: Keep the Holidays Bright
Christmas light failures are common but rarely permanent. With a methodical approach, most issues—from blown fuses to stubborn dead sections—can be resolved in under an hour. Understanding how your lights are wired, keeping essential tools handy, and practicing preventive care will reduce future frustrations. As seasonal traditions go, few bring as much joy as a glowing rooftop or twinkling tree. Don’t let technical glitches dim the spirit. Take action now: test your strings, organize your spares, and apply these proven techniques to ensure your holiday display shines brightly year after year.


 浙公网安备
33010002000092号
浙公网安备
33010002000092号 浙B2-20120091-4
Comments
No comments yet. Why don't you start the discussion?