
Christmas lights should bring warmth and cheer—not circuit breakers tripping, bulbs flickering erratically, or that faint, acrid smell of overheating wire. Yet every holiday season, thousands of homeowners face the same frustrating cycle: string up the lights, plug them in, and within minutes—or sometimes seconds—the strand goes dark, the outlet buzzes, or the breaker trips. This isn’t just inconvenient; it’s a sign of underlying electrical stress that, if ignored, can pose real fire or shock hazards. The root causes are rarely mysterious, but they’re often misdiagnosed. Most short circuits in seasonal lighting stem from predictable, preventable failures—not faulty manufacturing alone. Understanding where and how these shorts occur—and how to verify, isolate, and resolve them—gives you control over safety, saves money on replacements, and preserves the quiet magic of a well-lit holiday.
How Christmas Light Circuits Actually Work (and Where They Break)
Modern mini-light strands—especially those with 50 or 100 bulbs—are typically wired in series-parallel configurations. Older incandescent strings used full-series wiring: one bulb failure broke the entire circuit. Today’s designs group bulbs into smaller series “sub-circuits” (e.g., 3–5 bulbs per segment), then connect those segments in parallel across the main line. This means one dead bulb usually only kills its segment—not the whole string—but it also creates more junction points where insulation degrades, wires twist loose, or moisture penetrates. A short occurs when current bypasses the intended path—usually because hot and neutral wires touch directly, or current leaks through compromised insulation to ground or another conductor. Unlike an open circuit (which simply stops the flow), a short creates a low-resistance path, causing excessive current draw, heat buildup, and often immediate tripping of GFCI outlets or circuit breakers.
Top 5 Causes of Recurring Shorts—and How to Confirm Each
Most persistent shorting traces back to one of five physical or environmental culprits. Identifying which applies to your setup is half the battle—and each has a distinct diagnostic signature.
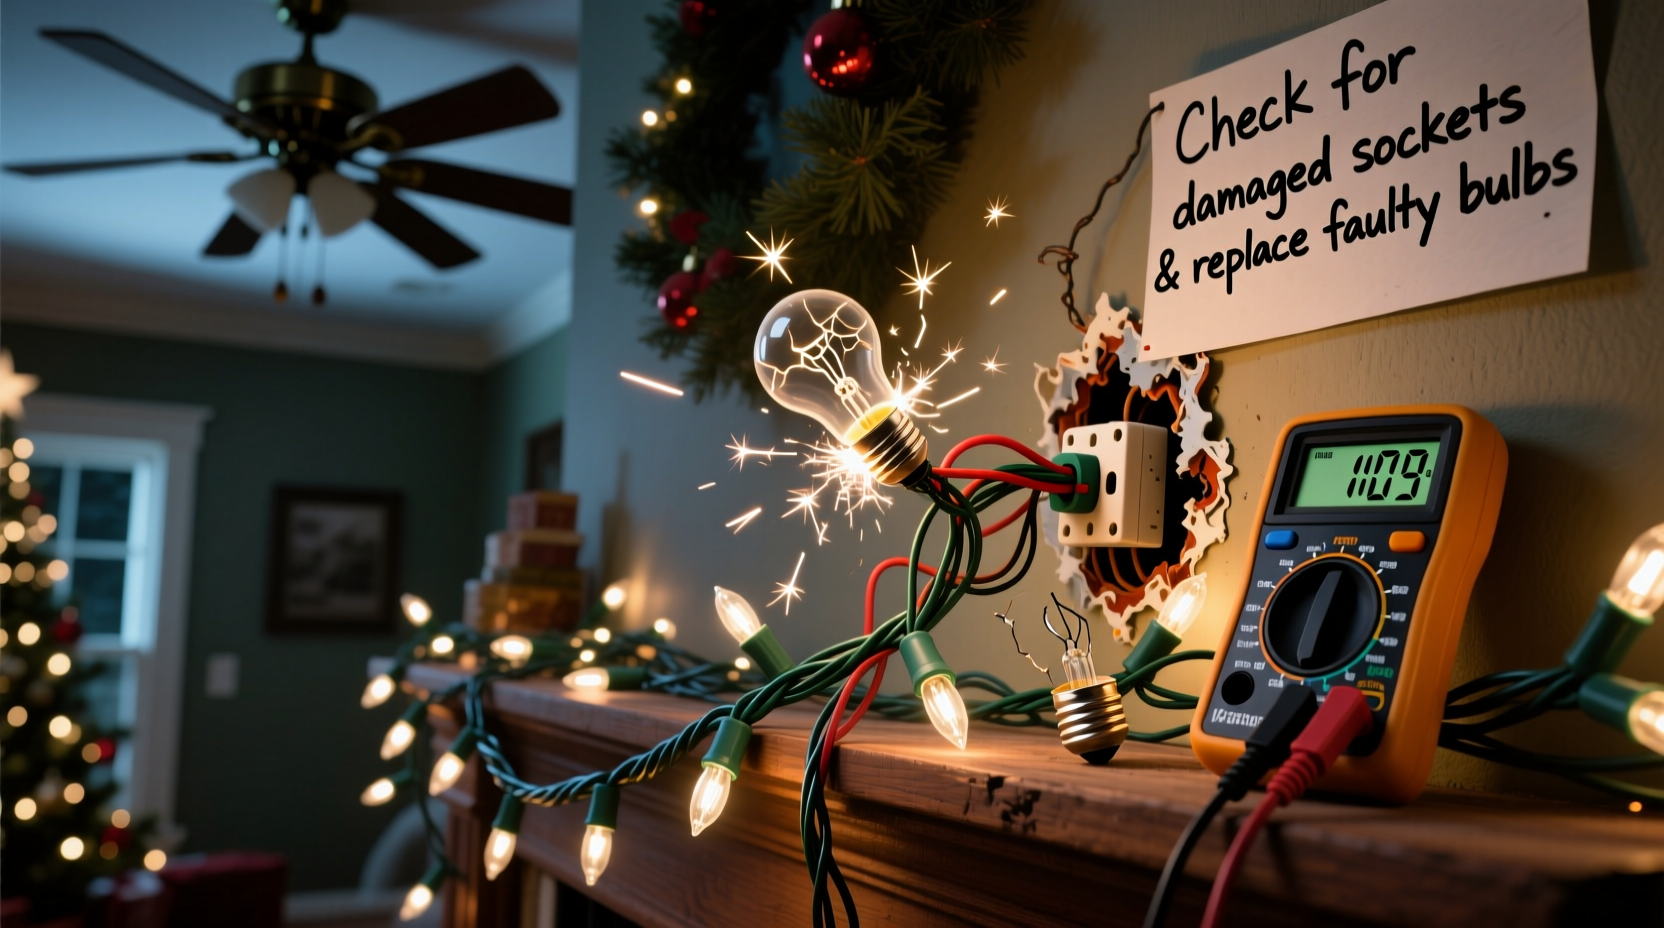
- Insulation Damage from Physical Stress: Kinks, crushing, or repeated bending near plugs, connectors, or bulb sockets fracture thin PVC or rubber insulation. Wires inside rub bare, especially during storage or installation. Signs: Localized warmth near a connector, visible cracks or whitening of cord jacket, intermittent operation when the cord is flexed.
- Moisture Intrusion: Outdoor strands rated for exterior use still rely on sealed connections. Cracked sockets, unsealed end plugs, or damaged waterproofing around controllers let water bridge contacts—especially during rain, frost thaw, or high humidity. Signs: Shorts occur only after damp weather, corrosion (green/white residue) inside sockets, or fogging inside LED lens housings.
- Faulty or Overheated Connectors: Male/female plugs and inline couplers accumulate carbon deposits from arcing, especially when plugged/unplugged under load. Heat warps plastic housings, loosens internal contacts, and degrades insulation. Signs: Discoloration (brown/black) on plug blades or socket interiors, melted plastic near connection points, burning odor localized to a specific junction.
- Internal Bulb Socket Failure: In LED strings, the tiny PCB inside each socket can delaminate, crack, or develop solder joint fractures due to thermal cycling (on/off heat expansion). A cracked trace may intermittently short hot to neutral. Signs: One segment flickers violently before going dark, multimeter shows continuity between pins *when bulb is removed*, or visible micro-cracks under magnification.
- Overloaded Daisy Chains: While modern LEDs draw less power, cheap controllers and undersized extension cords create voltage drop and heat buildup. When multiple strands share one outlet via non-rated splitters, resistance increases at each connection—raising temperature and accelerating insulation breakdown. Signs: Shorts occur only when more than three strands are connected, first failure always happens at the *first* splitter or extension cord plug.
Step-by-Step Diagnostic Protocol (Safe & Effective)
Never skip safety: Unplug all lights before inspection. Use a multimeter with continuity and resistance modes. Work in dry conditions with insulated tools. Follow this sequence to isolate the fault without guesswork:
- Unplug and visually inspect: Examine the entire cord length under bright light. Look for cuts, abrasions, kinks, or swelling. Check plugs for scorch marks, bent prongs, or cracked housings. Inspect each bulb socket for corrosion, debris, or cracked plastic.
- Test the outlet and circuit: Plug in a known-good device (e.g., lamp) to confirm the outlet functions and isn’t GFCI-tripped elsewhere. Note if the breaker trips instantly (hard short) or after delay (overload or thermal short).
- Isolate the strand: Disconnect all daisy chains. Test each strand individually using a multimeter: Set to continuity mode, touch probes to the two prongs of the male plug. A sustained beep indicates a hard short (hot-neutral contact). No beep? Switch to resistance mode—readings under 10 ohms suggest a developing short.
- Segment testing: For strands with removable bulbs, pull bulbs one by one from the first non-working segment. After each removal, retest continuity at the plug. When the beep stops, the last bulb removed was likely bridging the short—or its socket is faulty.
- Check connectors under load: Reconnect only the suspect strand to a GFCI-protected outlet. Use an infrared thermometer (or carefully feel with back of hand) along the cord and at each connector after 60 seconds. Any spot >120°F (49°C) is a critical failure point needing replacement.
Do’s and Don’ts: Handling, Storage, and Repair
Prevention starts long before December. How you handle, store, and maintain lights determines their electrical integrity year after year. This table summarizes field-tested best practices versus common but risky habits:
| Action | Do | Don’t |
|---|---|---|
| Storage | Wind loosely around a rigid cardboard spool or commercial light reel; store in climate-controlled, dry space above freezing | Stuff into plastic bins or vacuum bags; store in attics (extreme heat) or garages (freezing/moisture) |
| Cleaning | Wipe cords with dry microfiber cloth; use compressed air for socket dust | Submerge in water or use alcohol-based cleaners near sockets or controllers |
| Repair | Replace damaged plugs or connectors with UL-listed, outdoor-rated parts; solder and heat-shrink repairs only on low-voltage sections | Use electrical tape as permanent insulation fix; splice wires with wire nuts outdoors; reuse cracked or discolored connectors |
| Installation | Use UV-resistant, 16-gauge or heavier extension cords rated for outdoor use; secure with plastic clips—not nails or staples | Run cords under rugs, pinch in door frames, or staple directly to siding or wood |
Real-World Case Study: The Porch Light Cascade Failure
In late November 2023, Sarah K. in Portland, Oregon, installed her annual porch display: 12 LED strands (100 bulbs each), two animated projectors, and a smart controller—all powered via a single outdoor GFCI outlet. Within 48 hours, the breaker tripped repeatedly. She replaced the GFCI, checked the controller, and even bought new extension cords—only for the problem to return. A licensed electrician diagnosed the issue not in the controller or outlet, but in the *first strand* she’d hung—the one draped over her wrought-iron railing. Microscopic rust had formed inside the female socket where moisture pooled overnight. When the strand warmed slightly during operation, the rust expanded, creating a momentary conductive path between terminals. The resulting arc carbonized the socket interior, lowering resistance until the GFCI detected leakage current (>5mA) and tripped. Replacing that single $8 strand—plus sealing the remaining sockets with dielectric grease—resolved the cascade. Her takeaway: “The first light on the chain is often the weakest link. I now test every strand individually before connecting anything.”
“Over 70% of holiday lighting shorts originate at connection points—not the bulbs themselves. A compromised plug or socket is statistically more dangerous than a failed LED because it exposes live voltage directly.” — Mark Delaney, NFPA Certified Electrical Safety Specialist and former UL Lighting Standards Committee Chair
FAQ: Quick Answers to Urgent Questions
Can I fix a shorted light strand myself—or is replacement always safer?
Minor insulation nicks *away from connectors* can be repaired with heat-shrink tubing rated for 105°C and outdoor UV exposure—but only if the copper wire is undamaged. Any short traced to a plug, socket, controller, or internal PCB requires full replacement. DIY soldering on AC-powered strands voids UL listing and introduces fire risk. When in doubt, replace.
Why do brand-new lights sometimes short right out of the box?
Manufacturing defects do occur—most commonly: incomplete potting compound in LED drivers (allowing moisture ingress), misaligned socket contacts touching during assembly, or underspec’d insulation thickness. Always perform a 5-minute “burn-in” test on new strands before installing: plug in, observe for flickering, heat, or odor, and check GFCI stability. Keep receipts for quick warranty claims.
Are LED lights really safer than old incandescent ones?
Yes—but conditionally. LEDs run cooler and draw less current, reducing thermal stress. However, their complex drivers and tighter spacing increase vulnerability to voltage spikes (e.g., from nearby lightning) and moisture-related tracking across small PCB gaps. A 2022 UL study found LED strand failure rates rose 18% year-over-year primarily due to moisture-induced PCB shorts—not filament burnout. So while inherently lower-risk, LEDs demand stricter moisture management.
Conclusion: Light Up Safely, Not Just Brightly
Your Christmas lights shouldn’t be a source of anxiety or emergency calls. Every short circuit is a warning—not just about a broken strand, but about cumulative wear, overlooked moisture, or outdated infrastructure. By understanding how these systems fail, applying methodical diagnostics instead of trial-and-error replacements, and committing to disciplined handling and storage, you transform seasonal decoration into a predictable, safe ritual. You protect your home, your family, and the quiet joy that flickering lights represent. Don’t wait for the next tripped breaker or burnt-plug smell to act. This weekend, pull out last year’s lights. Test each one. Replace worn connectors. Store them properly—not as an afterthought, but as essential maintenance. Because the most beautiful light displays aren’t the brightest or longest—they’re the ones that glow steadily, safely, and without fear, all season long.


 浙公网安备
33010002000092号
浙公网安备
33010002000092号 浙B2-20120091-4
Comments
No comments yet. Why don't you start the discussion?