
If you’ve ever painted your nails only to see the polish flaking or peeling off before the day ends, you’re not alone. Many people struggle with short-lived manicures despite investing in quality polishes and taking time with application. Chipping isn’t just frustrating—it can make even the most elegant shade look unkempt. The truth is, most early chipping comes down to technique, nail prep, and habits, not the polish itself. Understanding the root causes and avoiding common errors can dramatically extend wear time, sometimes up to a full week or more.
The Science Behind Nail Polish Adhesion
Nail polish doesn’t bond to your nails like glue. Instead, it forms a thin film that adheres best to a clean, oil-free surface. When applied correctly, this film resists minor impacts and moisture exposure. However, several factors interfere with adhesion: natural oils on the nail plate, uneven surfaces, moisture, or improper layering. Without proper preparation, even high-end polishes will lift and chip prematurely.
Polish consists of three key components: solvents (which evaporate), resins (which create flexibility), and pigments (which provide color). As the solvent dries, the resins form a protective shell over the nail. But if the base is compromised—by oil, dust, or ridges—the shell becomes unstable, creating weak points where chipping begins.
“Most chipping issues stem from inadequate prep, not product failure. A well-prepped nail is the foundation of any lasting manicure.” — Dr. Lena Torres, Cosmetic Dermatologist & Nail Health Specialist
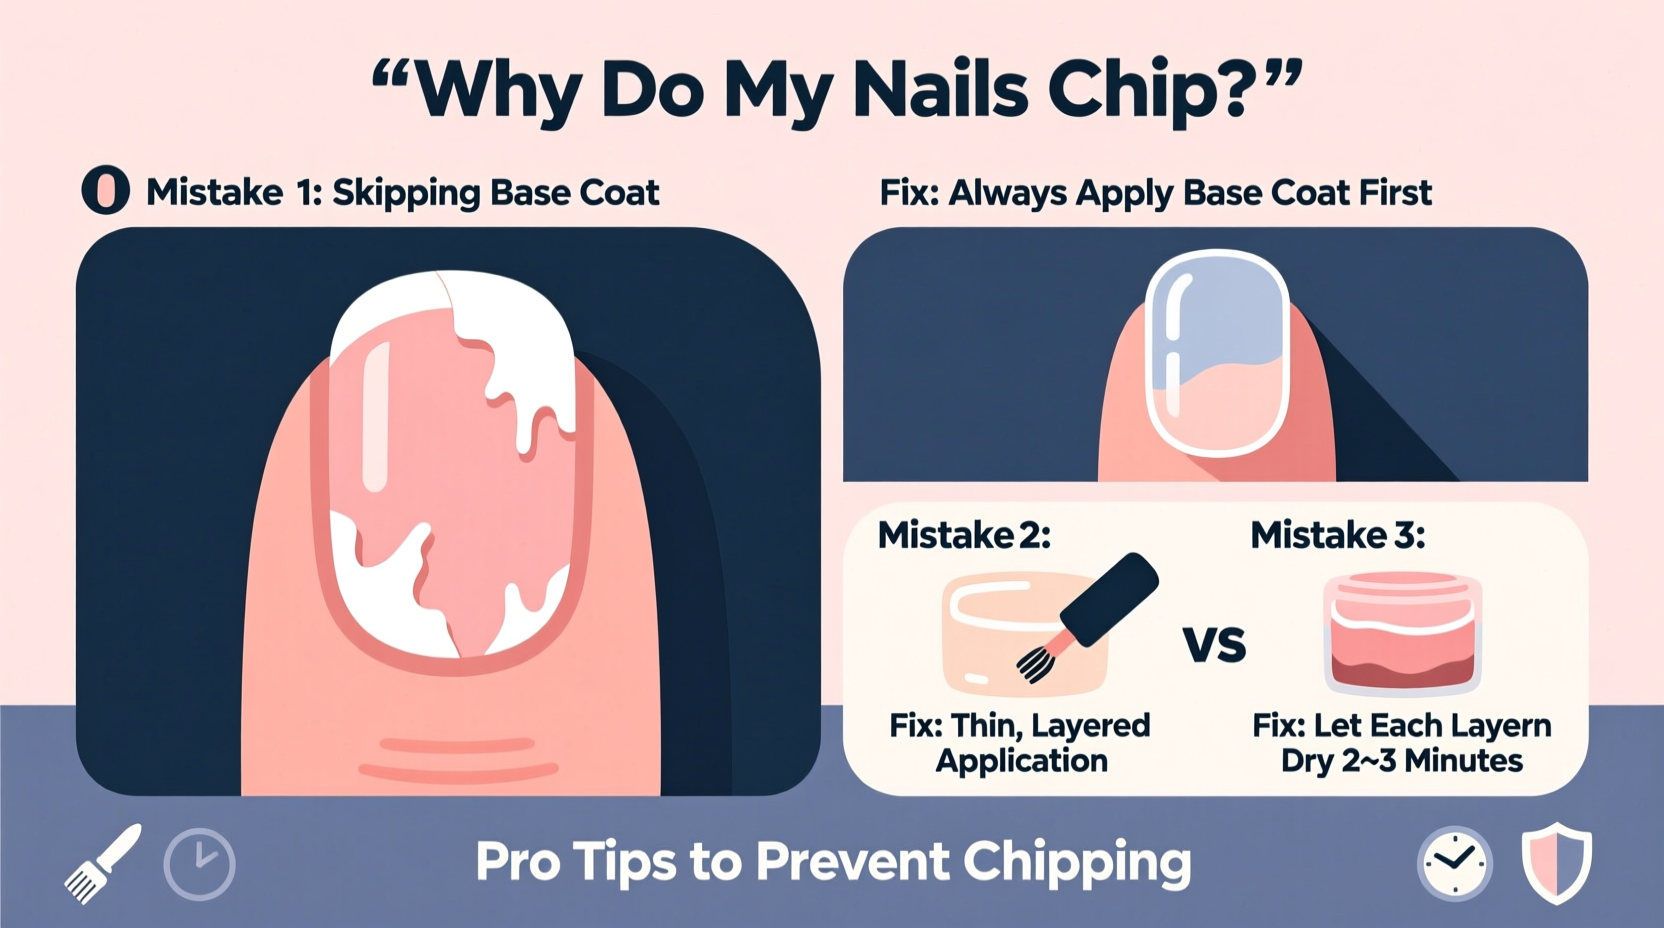
Common Mistakes That Cause Early Chipping
Even experienced polish users often repeat habits that sabotage their manicures. Recognizing these pitfalls is the first step toward improvement.
1. Skipping Nail Prep
Painting over dirty or oily nails is one of the top reasons polish lifts quickly. Daily handwashing leaves residue, lotions leave behind oils, and fingertips naturally secrete sebum—all of which prevent polish from bonding properly.
2. Using Old or Thickened Polish
Polish thickens over time as solvents evaporate. Applying thick, gloopy layers increases drying time and creates tension in the film, leading to cracks and chips. Additionally, older polish may have separated ingredients, reducing its durability.
3. Not Sealing the Tips
The free edge of the nail—especially the tips—is the most vulnerable to impact. If polish doesn’t fully cover and seal this area, daily activities like typing, opening doors, or tapping phones will cause immediate wear.
4. Rushing the Drying Process
Blowing on nails, waving hands, or using quick-dry sprays might seem helpful, but they don’t address the real issue: incomplete curing beneath the surface. While the top layer feels dry, the layers underneath remain soft and prone to denting and lifting.
5. Neglecting Cuticle Oil After Application
While cuticle oil is essential for nail health, applying it too soon after painting disrupts the drying process. Oils can seep under the polish edge, weakening adhesion and causing premature peeling.
Step-by-Step Guide to a Chip-Resistant Manicure
Achieving long-wearing polish starts with a meticulous routine. Follow these steps for maximum durability:
- Remove old polish completely. Use an acetone-based remover for gel or long-wear formulas; non-acetone for regular polish to avoid over-drying.
- Shape and buff gently. File nails in one direction to prevent splitting. Lightly buff the surface to remove shine—this creates micro-texture for better grip.
- Dehydrate the nail. Wipe each nail with rubbing alcohol or a nail dehydrator. This removes invisible oils and moisture.
- Apply a pH-balancing agent (optional). Some professionals use a nail primer to stabilize the nail’s surface, especially for those with naturally oily nails.
- Use a quality base coat. Choose one that strengthens and adheres well. Apply a thin, even layer and let it dry for 2 minutes.
- Apply two thin color coats. Thick layers trap solvents and dry unevenly. Let each coat dry for 2–3 minutes before adding the next.
- Seal the tips. After each color and topcoat layer, run the brush along the free edge of the nail to cap it completely.
- Finish with a high-quality top coat. Opt for a fast-drying, ridge-filling formula. Reapply every 2–3 days to refresh protection.
- Wait fully before activity. Allow at least 1–2 hours for complete curing. Avoid water, heavy typing, or pressure during this time.
Do’s and Don’ts for Long-Lasting Nails
| Do | Don’t |
|---|---|
| Wash hands with lukewarm water and mild soap | Soak hands in hot water for long periods |
| Wear gloves when cleaning or doing dishes | Use nails as tools (e.g., opening cans) |
| Reapply top coat every 2–3 days | Peel or pick at peeling polish |
| Store polish in a cool, dark place | Leave polish bottles open or in direct sunlight |
| Use thin, even layers of polish | Apply thick, gloopy coats to “save time” |
Product Quality vs. Application Technique: What Matters More?
Many assume expensive polish lasts longer—but research and professional experience suggest otherwise. A 2022 study by the Journal of Cosmetic Science found that application method had nearly twice the impact on wear time compared to brand or price. In other words, perfecting your technique yields better results than upgrading products.
That said, certain formulations do offer advantages. Polishes labeled “long-wear,” “chip-resistant,” or “flexible” often contain advanced polymers that resist cracking. Similarly, dual-cure top coats (like those with light-activated resins) can significantly boost durability. However, even the best products fail without proper prep and sealing.
Real-Life Example: From 6-Hour Fade to 7-Day Wear
Sarah, a graphic designer from Portland, used to repaint her nails every other day. She loved bold colors but hated how quickly they chipped—sometimes within hours. After tracking her routine, she realized she skipped base coats, applied thick layers, and didn’t seal the tips. She also washed her hands frequently, weakening the polish film.
She revised her approach: she began prepping nails with alcohol wipes, used a strengthening base coat, applied two thin color layers with tip sealing, and finished with a gel-like top coat. She started wearing gloves during dishwashing and reapplied top coat every third day. The result? Her manicures now last 7–10 days with minimal chipping—only minor wear at the very tips.
“I thought I just had ‘bad nails,’” Sarah said. “But it was all about the method. Now I get compliments all the time.”
When Your Nails Themselves Are the Problem
Sometimes, chipping isn’t about polish—it’s about nail health. Weak, brittle, or overly flexible nails are more prone to peeling and breaking, which pulls polish with them. Common culprits include:
- Nutritional deficiencies (especially biotin, iron, or protein)
- Overuse of acrylics or gels without recovery time
- Excessive exposure to water and detergents
- Frequent use of harsh removers containing high acetone levels
Strengthening your natural nails can improve polish retention. Consider taking a biotin supplement (after consulting a doctor), using a keratin-infused base coat, and giving your nails breaks between polish applications. Hydration matters too—moisturize hands regularly, but always after polish is fully set.
Checklist: Build a Chip-Free Manicure Routine
Use this checklist each time you paint your nails to ensure optimal longevity:
- ✅ Remove all old polish with appropriate remover
- ✅ Shape nails gently with a fine-grit file
- ✅ Buff surface lightly to remove shine
- ✅ Clean nails with alcohol or nail prep solution
- ✅ Apply a strengthening base coat—don’t skip this step
- ✅ Use two thin color coats, capping the free edge each time
- ✅ Seal with a high-gloss, fast-drying top coat
- ✅ Wait at least 2 hours before heavy hand use
- ✅ Reapply top coat every 2–3 days
- ✅ Wear gloves during wet chores
Frequently Asked Questions
Can I use a hair dryer to speed up drying?
Yes, but with caution. Use a cool setting and hold it at least 12 inches away. Heat can actually soften polish, so avoid warm air. Better yet, use a dedicated quick-dry drop solution that accelerates solvent evaporation without compromising integrity.
Why does my polish chip at the edges but stay intact elsewhere?
This usually means the free edge wasn’t sealed properly. Always “cap” the tip by swiping the brush horizontally across the edge after each coat. Also, consider switching to a more flexible polish if your nails tend to flex or bend.
Is it better to use gel polish instead?
Gel polish generally lasts longer—up to 2–3 weeks—but requires UV/LED curing and careful removal to avoid damage. For occasional wear, a well-applied regular polish with good maintenance can last nearly as long without the extra equipment.
Final Thoughts: Small Changes, Big Results
Chipping isn’t inevitable. With attention to detail and consistent habits, you can enjoy vibrant, flawless nails for days—not hours. The key lies in preparation, precision, and patience. It’s not about painting faster or buying pricier brands; it’s about understanding how polish interacts with your nails and adjusting accordingly.
Start implementing one or two changes from this guide—like dehydrating your nails or sealing the tips—and build from there. Over time, you’ll develop a routine that fits your lifestyle and delivers salon-worthy results at home.


 浙公网安备
33010002000092号
浙公网安备
33010002000092号 浙B2-20120091-4
Comments
No comments yet. Why don't you start the discussion?