
Every holiday season, neighborhoods come alive with the whimsical glow of Christmas inflatables—giant snowmen, dancing elves, and floating reindeer that bring joy to homes and sidewalks. But by mid-December, it’s not uncommon to see one of these festive displays lying sideways in a neighbor’s yard after a gust of wind. Why do some Christmas inflatables tip over while others remain upright through winter storms? The answer lies in design, placement, and most critically, anchoring techniques. Understanding the mechanics behind inflatable stability can save you time, frustration, and even prevent property damage.
Inflatables rely on continuous airflow from an internal blower to maintain shape. Once inflated, they create a large surface area exposed to wind forces. Without proper anchoring, even moderate breezes can generate enough lateral pressure to topple them. This article breaks down the science behind tipping, identifies common mistakes, and provides practical, tested strategies to keep your holiday display standing strong all season long.
The Physics Behind Inflatable Stability
At first glance, an inflatable may seem light and harmless. However, when fully inflated, many models reach heights of 8 to 12 feet and present significant wind resistance. A 10-foot-tall Santa figure, for example, can act like a sail during a 20 mph windstorm, generating over 30 pounds of lateral force depending on its shape and material tautness.
The center of gravity plays a crucial role in stability. Taller inflatables with narrow bases or top-heavy designs (such as a sleigh pulled by airborne reindeer) are inherently less stable. Wind pressure applied above the base creates torque, which increases with height. If this rotational force exceeds the counterbalance provided by anchors or weight, the inflatable tips over.
Additionally, ground conditions affect stability. Soft soil, mulch, or recently watered lawns offer poor grip for stakes. On hard surfaces like concrete or asphalt, traditional staking is impossible without alternative solutions.
“Many people treat inflatables like decorations—they plug them in and walk away. But they’re actually wind-exposed structures that need structural consideration.” — Daniel Reeves, Landscape Engineer and Holiday Display Consultant
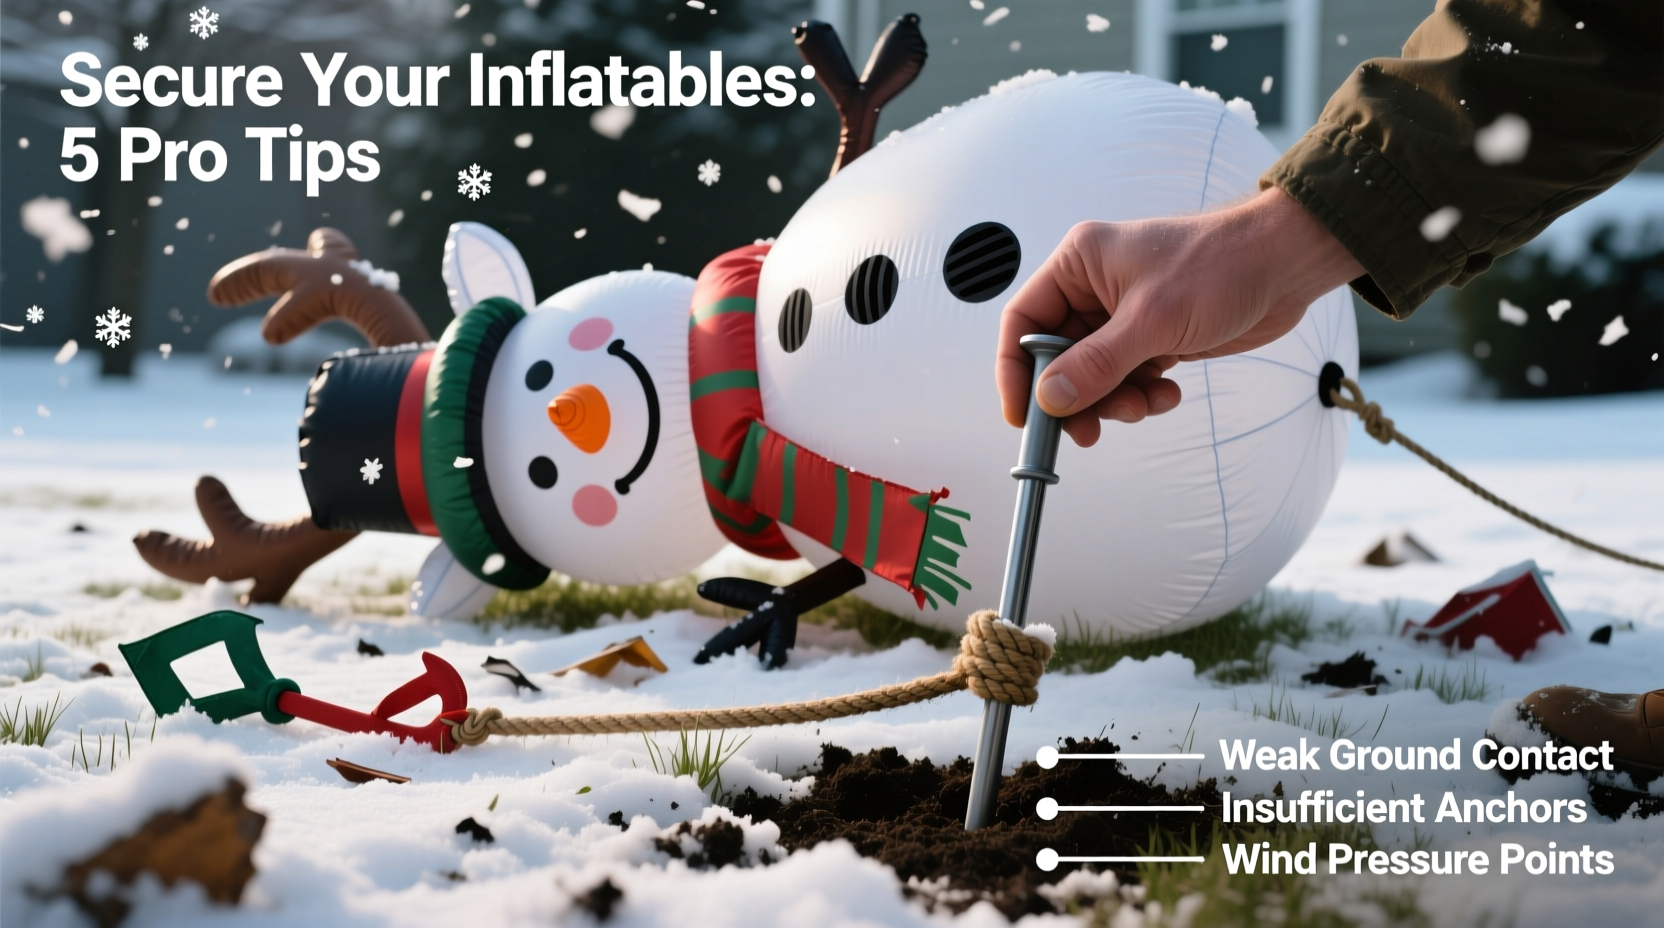
Common Reasons Inflatables Tip Over
While weather is often blamed, poor setup practices are usually the real culprit. Here are the most frequent causes of inflatable failures:
- Insufficient or weak anchoring: Using only one or two flimsy stakes per corner, or skipping anchors entirely.
- Poor stake placement: Anchors placed too close to the base fail to resist leverage from wind pressure higher up.
- Incorrect stake type: Plastic lawn stakes pull out easily in clay or rocky soil; metal rods without wide heads slip under tension.
- Uneven terrain: Placing inflatables on slopes or soft ground shifts weight distribution and reduces contact stability.
- Neglecting wind direction: Positioning inflatables broadside to prevailing winter winds maximizes exposure.
- Low-quality materials: Thin PVC skins stretch under pressure, increasing aerodynamic profile and stress on seams and anchors.
How to Anchor Christmas Inflatables Securely: A Step-by-Step Guide
An effective anchoring system combines multiple points of attachment, appropriate hardware, and environmental awareness. Follow this timeline-based approach for reliable results.
- Choose the Right Location (Day 1)
Select a flat, firm area away from driveways, walkways, and power lines. Avoid low spots where water collects. Use a compass app or local weather data to determine prevailing winter wind direction—typically northwest in much of North America. - Inspect the Inflatable and Accessories (Day 1)
Check for pre-installed anchor loops or grommets. Most quality inflatables have reinforced tie-down points at the base corners and sometimes along the sides. Ensure the included stakes (if any) are substantial—ideally steel rods with a diameter of at least 1/4 inch and a wide head or washer. - Gather Proper Materials (Day 1–2)
Stock up on:- Heavy-duty steel U-stakes or spiral ground anchors (6–8 inches long)
- Weather-resistant rope or bungee cords with hooks (minimum 50-lb tensile strength)
- Ratchet straps (for concrete or pavement installations)
- Sandbags or water-filled weights (optional but effective)
- Install Anchors Before Inflation (Day 2)
Lay the deflated unit in place. Attach ropes or straps to each anchor point. Drive stakes into the ground at a 45-degree angle, pointing away from the inflatable, ensuring they penetrate at least 6 inches into soil. For hard surfaces, secure ratchet straps around fixed objects (like fence posts) or use weighted bases. - Inflate and Adjust (Day 2)
Turn on the blower and allow full inflation (usually 2–5 minutes). As the unit rises, check each tether for tension. Re-tighten any slack. Do not over-tighten—this can distort the shape or tear fabric. - Final Inspection and Monitoring (Ongoing)
After the first night or storm, inspect all connections. Look for signs of stretching, sinking stakes, or fraying. Re-secure as needed. Check weekly throughout the season.
Best Anchoring Methods by Surface Type
Different ground types require different solutions. The table below compares anchoring options based on effectiveness, cost, and ease of use.
| Surface Type | Recommended Method | Materials Needed | Effectiveness (1–5) |
|---|---|---|---|
| Grass / Soil | Spiral or U-shaped steel stakes at 45° angles | Steel stakes, nylon rope | 5 |
| Mulch / Loose Ground | Deep-driven rebar stakes or sandbag weighting | Rebar (12\"), sandbags, rope | 4 |
| Concrete / Pavement | Ratchet straps to fixed points or weighted bases | Ratchet straps, cinder blocks, sandbags | 5 |
| Wood Deck | Non-penetrating weights or railing tie-downs | Sandbags, bungee cords, deck anchors | 4 |
| Sloped Yard | Anchors uphill + downhill counterweights | Extra stakes, sandbags, longer ropes | 3 |
Real-World Example: The Case of the Flying Snowman
In December 2022, a homeowner in suburban Chicago installed a 9-foot inflatable snowman in his front yard. By morning, it had tipped over across the sidewalk, blocking pedestrian access. He replaced it the same day using only the original plastic stakes. It fell again within hours.
After consulting a local landscape contractor, he learned his stakes were too short and driven straight down instead of angled. The snowman's rounded base also offered little resistance to rotation. The fix? He used four 8-inch steel spiral anchors driven at 45 degrees, connected with braided polypropylene rope. He added two 15-pound sandbags draped over the base’s back edge. The display remained upright through three winter storms, including a 38 mph wind event.
This case highlights how small adjustments—proper angle, material upgrade, and added mass—can make the difference between failure and success.
Do’s and Don’ts of Inflatable Anchoring
“Most inflatable accidents are preventable. It’s not about the weather—it’s about preparation.” — Karen Liu, Consumer Safety Advocate, National Holiday Safety Council
| Do’s | Don’ts |
|---|---|
| Use steel or heavy-duty plastic anchors rated for outdoor use | Use flimsy plastic lawn stakes from garden centers |
| Angle stakes away from the inflatable for better hold | Drive stakes vertically—they pull out easier |
| Check tethers weekly for wear or loosening | Install and forget—no maintenance checks |
| Face narrow profile into the wind | Position broad side into prevailing winds |
| Use sandbags or weights on decks or pavement | Rely solely on gravity without securing |
Frequently Asked Questions
Can I use my existing tent stakes for Christmas inflatables?
Only if they are heavy-duty steel stakes designed for high wind. Standard camping stakes are too short and lightweight. Use stakes specifically rated for outdoor seasonal displays—minimum 6 inches long and made of galvanized steel or reinforced polymer.
How many anchor points should an inflatable have?
At minimum, four—one at each corner of the base. Larger or taller inflatables (over 8 feet) should have additional side anchors every 2–3 feet along the perimeter. More points distribute wind load and reduce strain on individual tethers.
Are sandbags better than stakes?
Not necessarily—they serve different purposes. Sandbags add downward pressure and work well on hard surfaces, but they don’t resist lateral pull like properly angled stakes. For maximum security, use both: stakes for tie-downs and sandbags for supplemental weight.
Pro Checklist: Secure Your Inflatable in 7 Steps
- ✅ Choose a flat, sheltered location with minimal wind exposure
- ✅ Identify all factory-installed anchor loops or grommets
- ✅ Select appropriate anchors based on ground type (steel stakes, ratchet straps, etc.)
- ✅ Attach durable ropes or bungee cords to each anchor point
- ✅ Install anchors at a 45-degree angle away from the inflatable
- ✅ Inflate fully and adjust tether tension evenly
- ✅ Inspect weekly for wear, loosening, or shifting
Conclusion: Keep Your Holidays Upright and Safe
A fallen inflatable isn’t just an eyesore—it’s a tripping hazard, a potential obstruction, and a sign of preventable oversight. With a few simple upgrades and mindful installation practices, you can ensure your holiday display remains a source of cheer, not chaos. The investment in proper anchoring takes less than 30 extra minutes but pays off in durability, safety, and peace of mind.
This season, go beyond plugging in and hoping for the best. Treat your inflatables like the engineered structures they are. Use strong materials, apply physics-aware techniques, and inspect regularly. Your neighbors—and the local news crews—will thank you.


 浙公网安备
33010002000092号
浙公网安备
33010002000092号 浙B2-20120091-4
Comments
No comments yet. Why don't you start the discussion?