
It’s frustrating when a charger that once worked perfectly suddenly fails—especially when it happens just a few months after purchase. You're not alone. Millions of users face the same issue with phone, tablet, and laptop chargers dying prematurely. While some assume this is planned obsolescence, the truth is often simpler: physical wear, environmental factors, and usage habits play a far bigger role than most realize. Understanding the root causes and applying practical fixes can significantly extend your charger’s life and reduce electronic waste.
Why Chargers Fail Prematurely
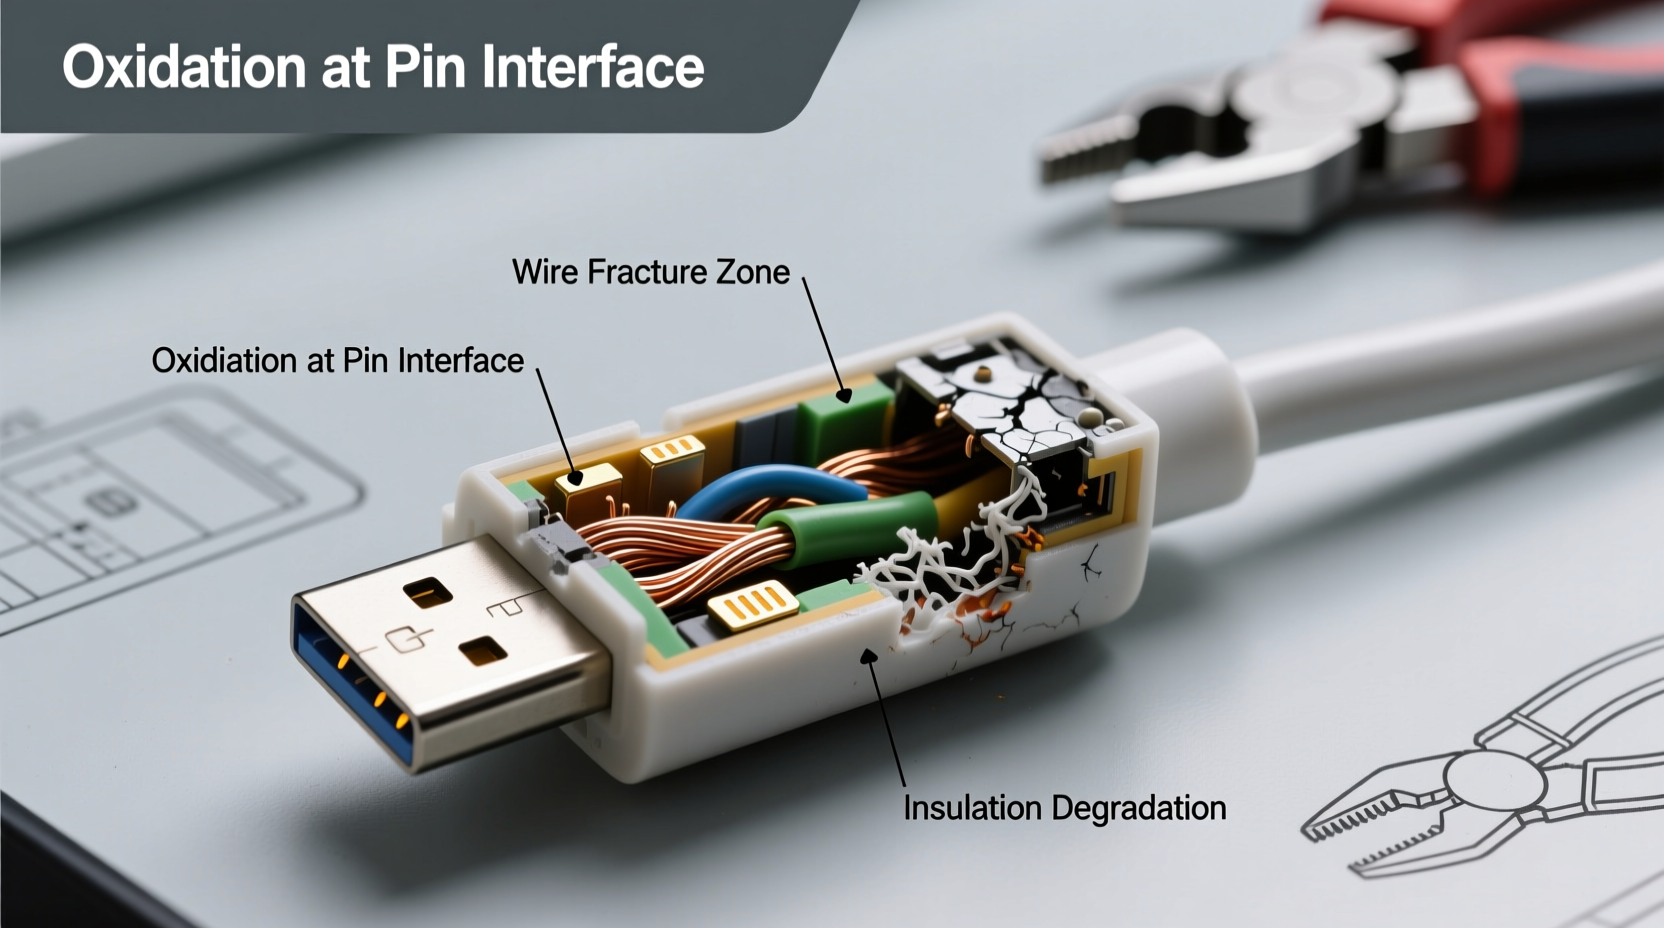
Most people expect their chargers to last years, but many fail within months. This isn’t always due to poor manufacturing. Instead, several interrelated factors contribute to early failure:
- Fraying cables: Repeated bending at stress points (near the plug or device end) weakens internal wires over time.
- Poor strain relief: Many budget chargers lack proper reinforcement where the cable meets the connector, making them prone to breakage.
- Dirt and debris buildup: Dust, lint, and pocket fluff clog charging ports, preventing secure connections.
- Moisture exposure: Charging in humid environments or with damp hands can corrode connectors.
- Overheating: Using devices under heavy load while charging generates excess heat, degrading components.
- Using incompatible accessories: Third-party cables or power adapters not rated for your device can cause voltage fluctuations.
A 2022 study by the European Environmental Bureau found that nearly 40% of consumers replace chargers every 6–12 months due to cable damage alone. The good news? Most failures are preventable with better handling and maintenance.
Common Fixes for a Failing Charger
Before replacing your charger, try these troubleshooting steps. In many cases, what seems like a dead cable is simply suffering from a poor connection or blocked port.
1. Clean the Charging Port
Dust and lint accumulation is one of the top reasons for intermittent charging. Use a dry toothbrush or compressed air to gently remove debris. For stubborn grime, turn off your device and use a wooden or plastic toothpick to dislodge particles without scratching contacts.
2. Test with Another Device
Plug your charger into a different compatible device. If it works, the issue may be with your original device’s port or battery. If not, the problem lies with the charger itself.
3. Try a Different Power Source
Swap out the wall adapter or USB port. A failing power brick or weak USB hub can mimic charger issues. Test using a known-working outlet and adapter combination.
4. Inspect for Visible Damage
Run your fingers along the entire length of the cable, especially near the ends. If you feel kinks, soft spots, or exposed wires, internal breaks are likely. Wiggling the cable while connected may cause flickering charging indicators—confirming an intermittent connection.
5. Reset Your Device
Sometimes, software glitches interfere with charging detection. Restart your phone or tablet to rule out temporary system errors before assuming hardware failure.
“Physical stress on the cable is the number one killer of chargers. The point where the wire meets the plug sees the most flex—and eventually, the copper strands inside fatigue and snap.” — Dr. Alan Reyes, Electrical Engineer and Consumer Electronics Consultant
How to Extend Your Charger’s Lifespan: A Step-by-Step Guide
Prevention is far more effective than repair. Follow this timeline-based care routine to get 2–3 years of reliable service from each charger.
- Day 1 – Proper Unboxing & Initial Setup: Inspect the cable for kinks or molding defects. Avoid sharp bends during first use. Plug and unplug carefully.
- Daily – Mindful Handling: Never yank the cable from the socket. Coil loosely instead of tightly wrapping. Keep away from liquids and high-traffic floor areas.
- Weekly – Port Inspection: Check both your device port and charger plug for dust. Clean as needed using safe tools (wooden picks, soft brushes).
- Monthly – Cable Check: Examine the full length for fraying or stiffness. Rotate between multiple chargers if available to reduce wear on any single unit.
- Every 3 Months – Stress Relief Reinforcement: Apply heat-shrink tubing or silicone tape near vulnerable joints to add durability.
- Every 6 Months – Performance Review: Note any slowdowns in charging speed or inconsistent behavior. Replace proactively before complete failure.
Do’s and Don’ts of Charger Maintenance
| Do’s | Don’ts |
|---|---|
| Unplug by holding the plug head | Pull the cable to disconnect |
| Use manufacturer-certified accessories | Use cheap, uncertified third-party chargers |
| Keep connectors dry and clean | Charge with wet hands or in humid conditions |
| Coil loosely in a figure-eight pattern | Wrap tightly around fingers or objects |
| Replace damaged cables immediately | Continue using frayed or sparking chargers |
| Store in moderate temperatures | Leave in hot cars or freezing environments |
Real-World Example: Sarah’s Charger Struggles
Sarah, a freelance graphic designer, relied heavily on her smartphone for client communication and design work. She noticed her USB-C charger began cutting out randomly after only four months. Initially, she assumed the phone was faulty and considered a costly repair. Instead, she followed a diagnostic checklist:
- She cleaned the phone’s port with a dry brush—no improvement.
- She tested the charger on her tablet—it worked fine.
- She tried a different cable on her phone—it charged normally.
The culprit? A partially broken cable. Upon closer inspection, the wire near the connector showed a tiny bulge indicating internal damage. She replaced it with a braided nylon cable rated for 10,000 bend cycles. Over a year later, it still functions flawlessly. Her key takeaway: “I used to toss chargers at the first sign of trouble. Now I troubleshoot first—and invest in sturdier ones.”
Choosing a Durable Charger: What to Look For
Not all chargers are created equal. When replacing a failed one, prioritize longevity over cost savings. Here’s what makes a charger last:
- Braided cables: Nylon or polyester weaving resists fraying far better than rubber or PVC.
- Reinforced stress points: Look for thickened joints where the cable meets the plug.
- Certifications: Choose cables with MFi (for Apple), USB-IF, or PD3.0 certification for safety and compatibility.
- Modular designs: Some premium chargers offer detachable cables, allowing you to replace only the worn part.
- Thicker gauge wiring: Lower AWG numbers (e.g., 20AWG vs. 28AWG) mean better conductivity and durability.
Brands like Anker, Belkin, and Spigen consistently score high in independent durability tests. While they may cost $20–$30 versus $5 knockoffs, their average lifespan exceeds 2.5 years with proper care—making them more economical long-term.
FAQ: Common Questions About Charger Failure
Can a charger be fixed if the cable is damaged?
In rare cases, skilled individuals can splice and solder broken internal wires, then reinforce with heat-shrink tubing. However, this is risky and may create electrical hazards. For safety and reliability, replacement is strongly recommended.
Why does my phone charge slower over time?
Slower charging can result from degraded battery health, dirty ports, or using a failing charger. It’s also common if you’re using a lower-wattage adapter than your phone supports. Check your device settings for battery health metrics and ensure you’re using a compatible fast-charging cable and adapter.
Is wireless charging better for my device’s longevity?
Wireless charging reduces wear on the physical port and eliminates cable strain. However, it generates more heat, which can degrade battery life faster if used excessively. For best results, use wireless charging overnight and wired charging during the day when you need speed.
Final Checklist: Maximize Your Charger’s Life
Follow this actionable checklist to avoid premature charger failure:
- ✅ Always unplug by gripping the connector, not the cord
- ✅ Clean device and charger ports weekly
- ✅ Use only certified, high-quality cables and adapters
- ✅ Avoid extreme temperatures (hot cars, cold outdoors)
- ✅ Replace frayed or intermittently working chargers immediately
- ✅ Invest in braided, reinforced cables for daily drivers
- ✅ Rotate between multiple chargers to distribute wear
- ✅ Store properly—loosely coiled or in a protective case
Conclusion: Small Habits, Big Results
Your charger doesn’t have to die every few months. With mindful usage, regular maintenance, and smarter purchasing decisions, you can extend its life by years. Each time you avoid yanking the cable or clean out lint from the port, you’re adding weeks—or even months—to its functional lifespan. Beyond saving money, you’re also reducing e-waste and contributing to a more sustainable tech ecosystem.


 浙公网安备
33010002000092号
浙公网安备
33010002000092号 浙B2-20120091-4
Comments
No comments yet. Why don't you start the discussion?