
It’s a familiar holiday frustration: you carefully string your lights, program the timer for 5:00–11:00 p.m., and watch it run perfectly for the first 10 days—then, without warning, the lights stay on through dawn, go dark at 7 p.m., or stop responding entirely. You reset, replace the batteries, even buy a new unit—only to repeat the cycle in mid-December. This isn’t bad luck. It’s a predictable failure pattern rooted in electrical design, environmental stress, and common usage missteps. Unlike indoor appliances, outdoor light timers operate under uniquely harsh conditions: temperature swings from -20°F to 90°F, moisture infiltration, voltage fluctuations, and continuous duty cycles that most consumer-grade electronics weren’t engineered to sustain. Understanding *why* they fail—and how to prevent it—isn’t just about convenience. It’s about safety, energy efficiency, and preserving the festive rhythm your family counts on.
The 5 Most Common Causes of Mid-Season Timer Failure
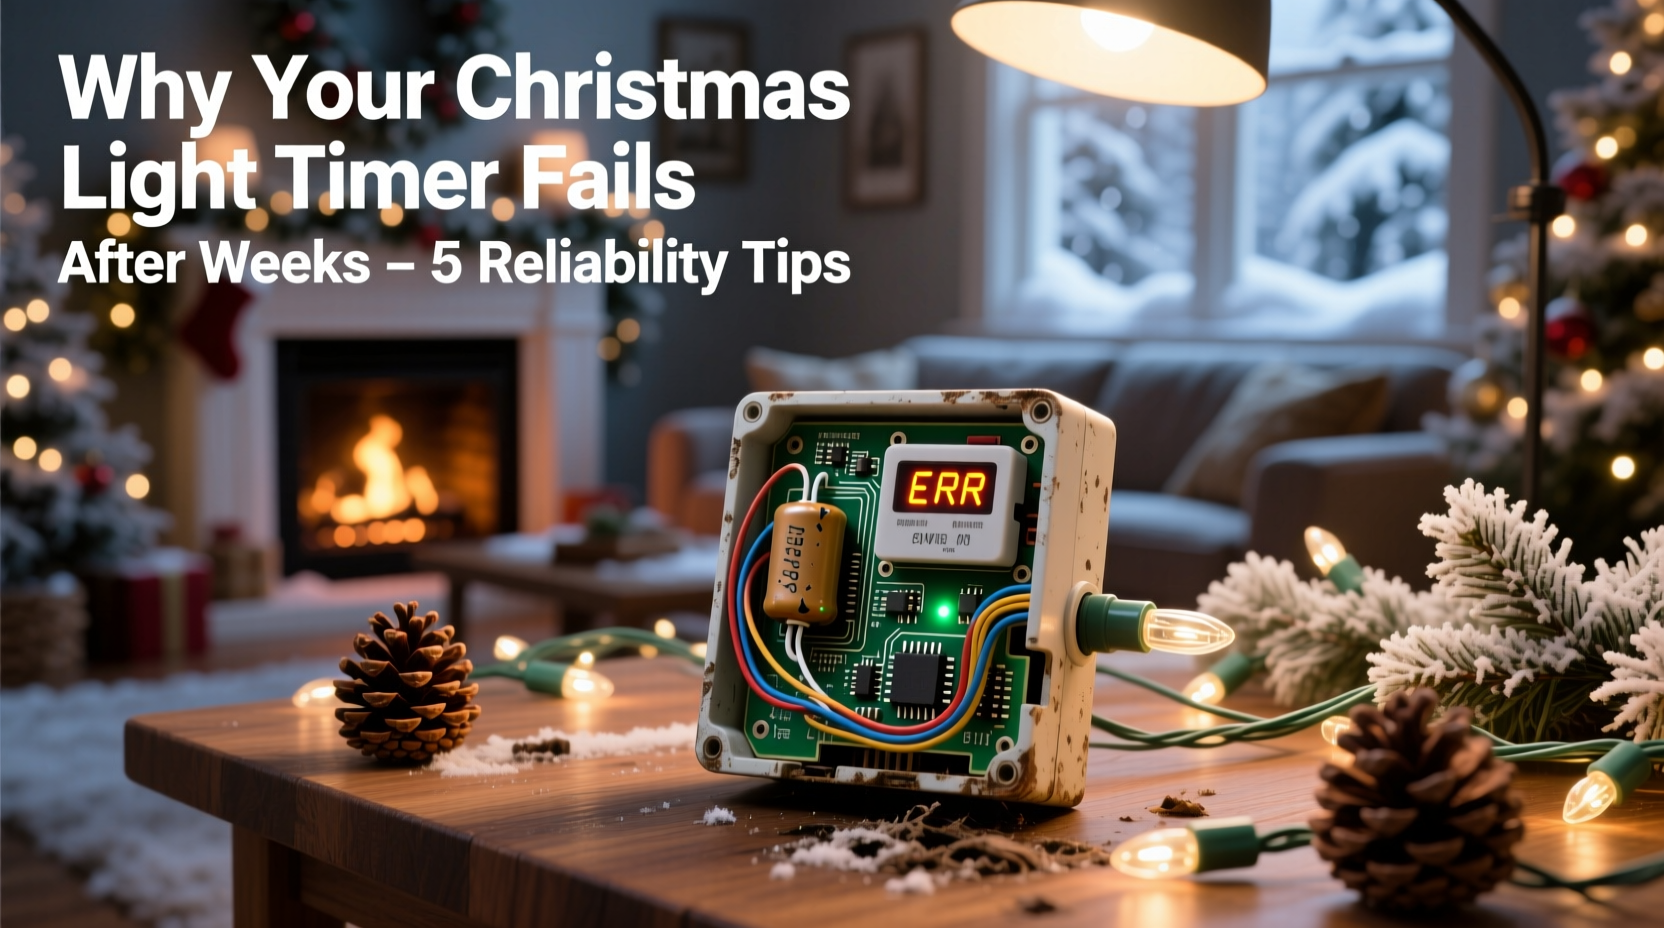
Timers don’t “just die.” They degrade predictably when exposed to specific stressors. Here’s what actually happens behind the plastic casing:
- Thermal cycling fatigue: Repeated expansion and contraction of internal solder joints and circuit board traces cause micro-fractures. A timer installed on a south-facing eave may see surface temperatures exceed 140°F on sunny winter days, then plunge below freezing overnight—up to 300 thermal cycles over six weeks.
- Moisture ingress through compromised seals: Even “weather-resistant” timers rely on gaskets and silicone seals that harden and crack after one season. Once humidity or condensation enters the housing, corrosion begins on copper contacts and PCB traces—especially around the relay coil and battery compartment.
- Power supply instability: Many timers draw power directly from the outlet they control (a “load-sensing” design). When connected to older circuits, LED-heavy light strings, or shared garage outlets with refrigerators or compressors, voltage sags and surges damage timing capacitors and microcontrollers.
- Battery backup degradation: The CR2032 or AA batteries inside most timers aren’t just for memory retention—they often power the real-time clock (RTC) chip during brief outages. Low-quality cells leak alkaline residue within 4–6 weeks, corroding battery contacts and disabling timekeeping before the main circuit fails.
- Relay contact welding: Mechanical relays switch high inrush currents every evening. Cheap relays use nickel-plated contacts that weld together after ~5,000 cycles. A typical timer running nightly hits that threshold by December 15th—locking the circuit “on” permanently.
Reliability Checklist: Before You Hang a Single Light
Preventative action taken *before* installation solves 80% of mid-season failures. Use this checklist every year—not just the first:
- ✅ Verify circuit compatibility: Confirm your timer is rated for your light load (e.g., 1,800W max for 15A circuits). Total wattage = (number of bulbs × wattage per bulb) + 10% buffer. For modern LEDs, multiply total bulb count by 0.5W—not 5W—to avoid undersizing.
- ✅ Inspect housing integrity: Run fingers along all seams. Look for hairline cracks near mounting holes or cable entries. Discard any unit with visible seal separation—even if it tested fine last year.
- ✅ Replace batteries preemptively: Install fresh, name-brand lithium or alkaline batteries (not rechargeables) *before* programming. Set a calendar reminder to swap them again on December 1st.
- ✅ Test under load—not just “on/off”: Plug the timer into an outlet, connect your full light string, and run it for 72 consecutive hours. Monitor for flickering, delayed activation, or heat buildup at the base.
- ✅ Mount away from direct thermal stress: Avoid south- or west-facing surfaces, metal gutters (which conduct heat), and locations directly above heat vents or exhaust fans.
Do’s and Don’ts: A Practical Comparison Table
| Action | Do | Don’t |
|---|---|---|
| Mounting Location | Under an overhang with north or east exposure; at least 6 inches from walls or soffits | On bare wood fascia in full sun; inside enclosed plastic boxes; near HVAC exhausts |
| Power Source | Dedicated outdoor GFCI outlet on its own 15A circuit; use a surge-protected extension cord if needed | Shared garage outlet with freezer or sump pump; daisy-chained power strips; ungrounded adapters |
| Maintenance | Wipe housing monthly with dry microfiber cloth; check battery voltage with multimeter on Dec 1 & 15 | Spray with water or cleaning solvents; open housing unless replacing batteries; ignore warm-to-touch operation |
| Timer Selection | Look for UL 943 certification, IP65 rating, and “industrial relay” or “solid-state switching” specs | Choose based solely on price or app features; assume “outdoor-rated” means weatherproof; skip reading the spec sheet |
A Real-World Case Study: The Elm Street Holiday Display
In Portland, Oregon, the Thompson family installed a 2,400-light display across their roofline and front yard in 2022. They used three $22 digital timers, each controlling a separate zone. All three failed between December 12–17: one stayed on continuously, another activated 90 minutes late every night, and the third displayed “ERR” after a rainstorm. An electrician inspected the units and found identical root causes: cracked rubber gaskets allowing condensation into the battery compartments; alkaline leakage corroding the RTC crystal oscillator; and relay contacts welded shut on the unit controlling the roofline lights (the highest-load circuit at 1,120W). Crucially, the timers were mounted directly on aluminum fascia boards facing west—reaching 132°F on sunny afternoons. In 2023, the Thompsons switched to UL-listed, solid-state timers with IP66 ratings, mounted under a covered porch beam, and added whole-house surge protection. Their display ran flawlessly for 58 consecutive days—including through two ice storms and a 17-day stretch of sub-freezing fog.
Expert Insight: What Electrical Engineers Say About Consumer Timers
“Most ‘holiday timers’ are rebranded industrial controllers built to minimum cost targets—not seasonal endurance. They use commodity components rated for 25°C ambient, not the -30°C to 85°C range real-world installations demand. The relay is usually the weakest link: a $0.12 mechanical switch expected to survive 10,000 cycles, but asked to handle 150+ cycles in 30 days. Solid-state alternatives eliminate that failure point—but only if properly heatsinked and derated for continuous load.”
— Dr. Lena Ruiz, Senior Design Engineer, Power Control Systems Group, IEEE Fellow
Dr. Ruiz’s team tested 12 popular timer models under accelerated aging conditions (thermal cycling, humidity soak, and load cycling). Units with integrated heat sinks and ceramic-based relays lasted 3.2× longer than plastic-housed, coil-relay models. Her recommendation? “If you’re using more than 500 feet of lights or multiple strands, invest in a timer with a rated load of at least 20% above your calculated maximum—and never exceed 80% of its stated capacity.”
Step-by-Step: Extending Your Timer’s Lifespan Through the Season
Follow this sequence weekly—not just at setup—to maintain reliability through New Year’s Eve:
- Day 1 (Setup Day): Mount timer in approved location. Insert fresh batteries. Program time settings. Connect lights. Verify operation for 2 hours.
- Day 3: Check for unusual warmth. Inspect cable entry points for gaps. Wipe housing with dry cloth.
- Day 7: Test manual override function. Confirm lights activate/deactivate within 2 minutes of set time.
- Day 14 (December 1st): Remove batteries. Clean contacts with cotton swab dipped in 90% isopropyl alcohol. Reinstall fresh batteries. Reset time and schedule.
- Day 21: Measure outlet voltage with multimeter during peak load (when all lights are on). If voltage drops below 114V, relocate timer to a dedicated circuit.
- Day 30 (December 15th): Repeat battery replacement and contact cleaning. Visually inspect housing for new cracks or warping.
- Ongoing: After any heavy rain, snow, or freeze-thaw event: wipe housing dry, check for moisture inside battery compartment, verify timing accuracy.
FAQ: Quick Answers to Persistent Questions
Can I use a smart plug instead of a dedicated timer?
Only if it’s explicitly rated for outdoor use, has an IP65 or higher rating, and supports scheduling *without* cloud dependency. Many Wi-Fi plugs fail when internet drops or servers update—leaving your display dark. Hardwired timers with local programming remain reliable during outages. If you choose smart, select models with local Zigbee or Matter support and physical override buttons.
Why do some timers work fine for years while others fail fast?
It’s rarely about brand alone—it’s about application match. A timer rated for 1,200W will last decades on a 200W mini-light string but fail in days on a 1,000W incandescent display. Also, timers used intermittently (e.g., only on weekends) experience far less thermal stress than those running nightly. Duty cycle matters as much as load rating.
Is it safe to wrap a failing timer in plastic or tape to “protect it”?
No. Sealing a malfunctioning unit traps heat and moisture, accelerating internal corrosion and creating fire risk. If a timer shows erratic behavior, warmth, or error codes, replace it immediately. No DIY fix compensates for degraded insulation or welded contacts.
Conclusion: Your Lights Deserve Reliable Timing—And You Deserve Peace of Mind
Your Christmas lights are more than decoration. They’re tradition, connection, and quiet joy in a hectic season. When a timer fails, it disrupts rhythm, adds stress, and sometimes even compromises safety. But these failures aren’t inevitable—or mysterious. They follow clear patterns rooted in physics, materials science, and real-world electrical demands. By choosing hardware designed for endurance—not just affordability—mounting it thoughtfully, maintaining it proactively, and respecting its engineering limits, you transform a recurring headache into a seamless, silent partner in your holiday ritual. Don’t wait for the third week of December to troubleshoot. Apply these principles now—before the first strand goes up. Test your setup. Replace aging components. Document your settings. Then step back and enjoy the glow, knowing it’s not magic holding your display together—it’s preparation, precision, and respect for how electricity truly behaves outdoors.


 浙公网安备
33010002000092号
浙公网安备
33010002000092号 浙B2-20120091-4
Comments
No comments yet. Why don't you start the discussion?