
Nail polish that flakes or chips just hours after application is a frustrating experience shared by millions. No matter how carefully you apply it, avoid water, or resist the urge to pick at dry spots, your manicure often seems doomed from the start. The truth is, chipping isn’t always about poor-quality polish — it’s usually about what happens before and after the brush touches your nails. Understanding the science behind adhesion, moisture, and wear can transform your manicure longevity from two days to seven.
A long-lasting manicure isn’t reserved for salon visits or gel formulas. With the right preparation, product selection, and daily habits, you can achieve a flawless finish that holds up through handwashing, typing, and even light household chores. This guide dives into the root causes of premature chipping and delivers practical, proven strategies to help your polish endure a full week — without peeling, lifting, or fading.
The Science Behind Chipping: Why Polish Fails Early
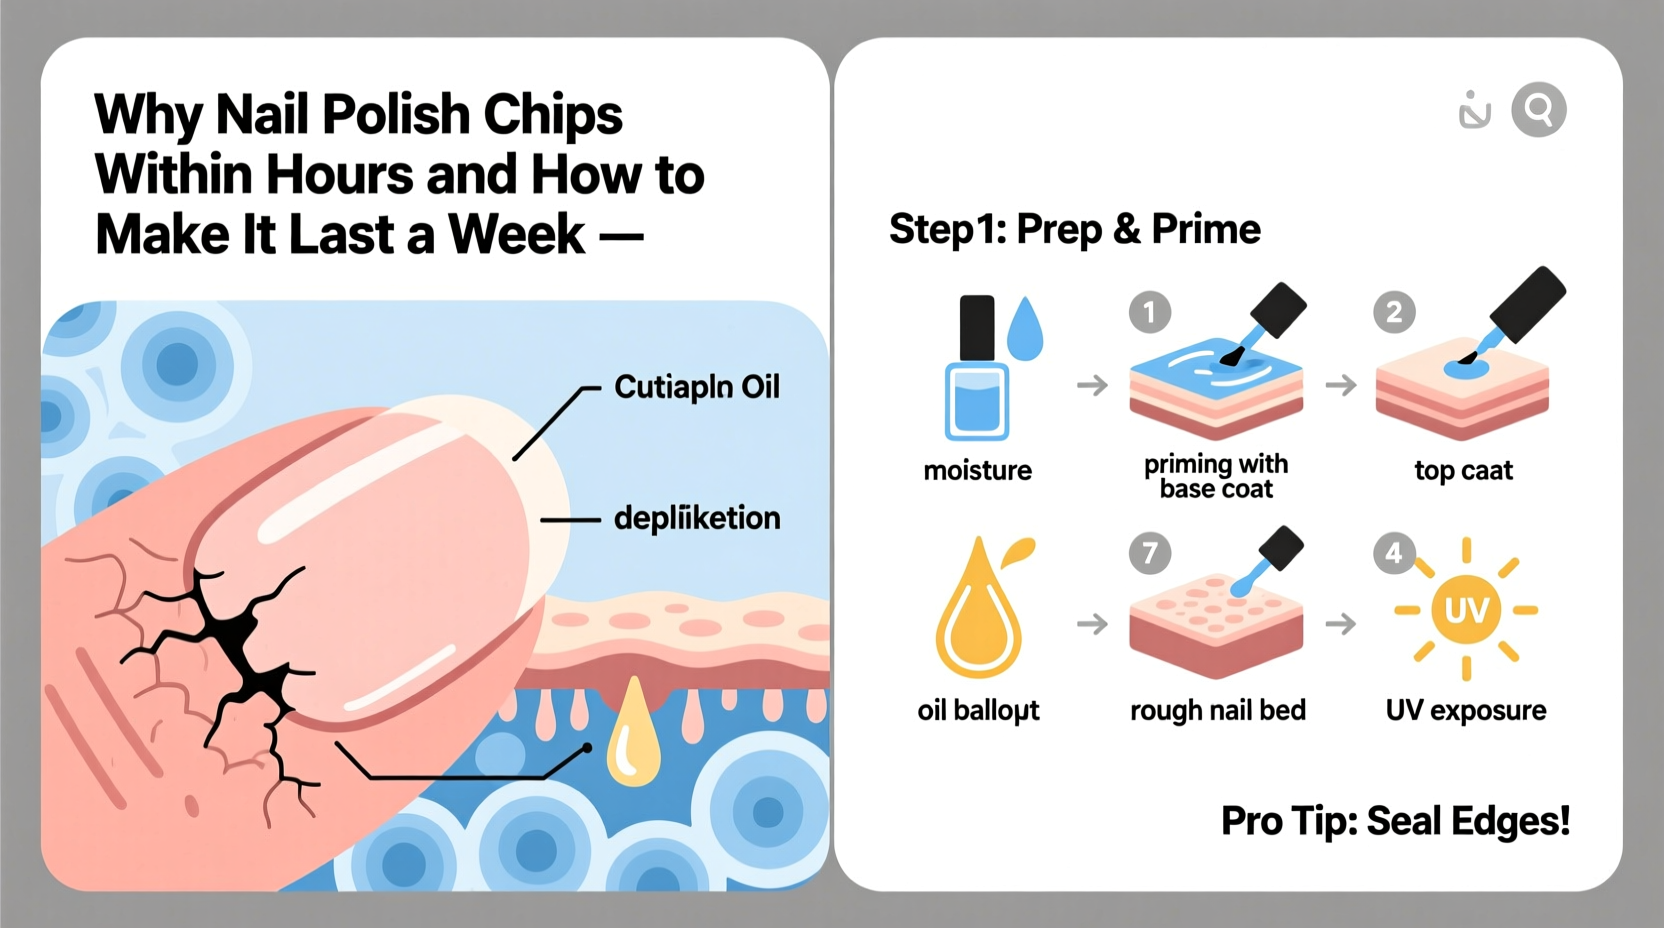
Nail polish adheres best to a clean, oil-free surface. When polish is applied over residue like oils, lotions, or dust, it lacks a stable foundation. Over time, microscopic gaps form between the nail plate and the polish layer, allowing moisture and air to seep in. These micro-separations create pressure points that lead to lifting and chipping — especially at the tips, where stress is highest.
The structure of your natural nails also plays a role. Nails that are soft, ridged, or dehydrated struggle to support polish evenly. Soft nails bend slightly during use, which can crack the rigid polish film. Ridges create uneven surfaces where polish pools in low areas and thins on peaks, weakening coverage. Additionally, frequent exposure to water causes nails to swell and contract, destabilizing the bond between nail and polish.
Environmental factors contribute too. Daily activities like opening jars, typing, or washing dishes generate friction. Even minor impacts — bumping your nails against a countertop — can initiate cracks. Without protective topcoats or proper sealing, these small damages quickly escalate into visible chips.
Step-by-Step Guide to a Week-Long Manicure
Achieving lasting polish starts long before color application. It begins with meticulous nail prep and continues through precise layering and post-care. Follow this professional-grade routine to maximize durability.
- Remove old polish completely. Use an acetone-free remover to avoid drying out nails, then rinse hands and dry thoroughly.
- Shape and buff gently. File nails in one direction using a fine-grit file. Lightly buff the surface to smooth ridges, but avoid over-buffing, which weakens the nail.
- Cleanse the nail plate. Wipe each nail with alcohol or a dedicated nail dehydrator. This eliminates oils and sweat residue that interfere with adhesion.
- Apply cuticle oil — then remove excess. Hydrate cuticles first, then wipe away any oil that spreads onto the nail bed. Oil left on the surface will repel polish.
- Use a high-quality base coat. Choose a base coat designed for grip and ridge-filling. Apply a thin, even layer and let it dry completely (3–5 minutes).
- Apply two thin color coats. Thick layers take longer to dry and are more prone to cracking. Wait 2–3 minutes between coats. <7> Seal with a durable top coat. Use a quick-dry, non-yellowing formula. Wrap the tip of each nail by running the brush along the free edge to seal the color underneath.
- Reapply top coat every other day. This refreshes protection and fills in micro-scratches before they become chips.
- Moisturize wisely. After polish is fully dry (wait at least 1 hour), apply hand cream — but avoid rubbing directly on nails to prevent softening the polish.
“Most chipping occurs because people skip the prep step. You can have the most expensive polish in the world, but if your nails aren’t prepped properly, it won’t last past dinner.” — Lila Torres, Master Nail Technician & Educator
Common Mistakes That Cause Premature Chipping
Even with good intentions, everyday habits sabotage manicures. Recognizing these pitfalls is half the battle.
- Skipping the base coat. Some think it’s optional, but it’s essential for even color distribution and adhesion.
- Applying thick layers. Thick polish takes hours to cure fully. During that time, it remains soft and vulnerable to dents and smudges.
- Not sealing the tips. The free edge is the most stressed part of the nail. If unsealed, polish lifts from the underside.
- Exposing nails to water too soon. Wait at least 12 hours before prolonged water exposure like dishwashing or swimming.
- Using nails as tools. Prying open packages, texting aggressively, or scratching surfaces creates instant leverage for chipping.
- Ignoring reapplication of top coat. A mid-week top coat adds flexibility and shields against wear.
| Mistake | Why It Causes Chipping | Solution |
|---|---|---|
| Applying polish over lotion | Oily surface prevents bonding | Wash and dry hands, then dehydrate nails before painting |
| Rushing between coats | Traps solvents, causing bubbling and softness | Wait 2–3 minutes between layers |
| Using old or thickened polish | Uneven texture leads to weak spots | Replace polish every 6–12 months; store upright in cool place |
| Skipping top coat reapplication | Surface becomes brittle and scratched | Reapply top coat on Day 3 and Day 5 |
Product Selection: What Really Makes a Difference
Not all polishes are created equal. Longevity depends on formula quality, not just brand reputation. Look for products with flexible polymers that move with the nail rather than cracking under stress. Brands like OPI, Essie, and Zoya offer “long-wear” lines specifically engineered for durability.
Base coats should contain adhesive resins and film-formers. Calcium-infused or ridge-filling bases add strength without compromising flexibility. Avoid overly thick bases — they can peel if not fully cured.
Top coats make the biggest difference. Quick-dry formulas contain solvents that evaporate rapidly, forming a hard shell. Gel-like top coats (e.g., Seche Vite, Glisten & Glow) cure to a glassy finish and significantly extend wear. Some even include UV filters to prevent color fading in sunlight.
Real Example: From Two Days to Seven
Sarah, a graphic designer from Portland, used to repaint her nails every three days. She blamed her job — constant typing, sketching, and hand sanitizer use. After switching to a disciplined routine, she achieved her first full-week manicure in years.
Her transformation started with prep: she began wiping nails with alcohol before every application. She switched to thinner coats, waited between layers, and started sealing the tips. On Day 3, she reapplied a high-shine top coat during her lunch break. By Day 7, only minor tip wear was visible — no lifting or chipping.
“I thought I just had ‘bad nails,’” Sarah said. “But it was my technique. Now I get compliments all week instead of hiding my hands by Day 2.”
Checklist for a Chip-Resistant Manicure
Use this checklist every time you paint your nails to ensure maximum longevity:
- ☑ Remove old polish completely
- ☑ Shape nails with a fine file (one direction only)
- ☑ Buff lightly to smooth ridges (don’t overdo it)
- ☑ Wash hands and dry thoroughly
- ☑ Push back cuticles gently
- ☑ Apply cuticle oil — then wipe off excess from nail beds
- ☑ Dehydrate nails with alcohol or nail prep solution
- ☑ Apply thin base coat — wait 3–5 minutes
- ☑ Apply first color coat — wait 2–3 minutes
- ☑ Apply second color coat — wait 3–5 minutes
- ☑ Seal edges with top coat — wrap the tip of each nail
- ☑ Wait 1 hour before heavy use or moisturizing
- ☑ Reapply top coat on Day 3 and Day 5
- ☑ Wear gloves during cleaning or dishwashing
Frequently Asked Questions
Can I make regular polish last as long as gel?
While gel polish typically lasts 2–3 weeks with UV curing, a well-applied regular polish routine can reliably reach 7 days. The key is preparation, thin layers, and top coat maintenance. For most people, this is a practical and safer alternative to UV exposure.
Why does my polish chip at the tips so quickly?
The tips bear the brunt of daily contact. If the polish isn’t sealed properly along the free edge, it lifts from underneath. Always “cap” the tip with both color and top coat to create a continuous barrier.
Does nail polish remover type matter?
Yes. Acetone-based removers are effective but extremely drying. Use them sparingly — ideally only for removing glitter or gel polish. For regular removal, opt for acetone-free formulas to preserve nail health and prevent brittleness that contributes to chipping.
Final Thoughts: Consistency Beats Perfection
You don’t need salon visits or complicated tools to achieve a long-lasting manicure. What matters most is consistency in preparation and maintenance. The few extra minutes spent cleansing, waiting between coats, and reapplying top coat pay off in days of flawless wear.
Your nails are constantly exposed to stress, moisture, and friction. Giving them a strong foundation and ongoing protection turns a fleeting beauty ritual into a sustainable habit. Whether you prefer classic red, subtle nudes, or bold neons, your color deserves to shine all week — not just until your next coffee refill.


 浙公网安备
33010002000092号
浙公网安备
33010002000092号 浙B2-20120091-4
Comments
No comments yet. Why don't you start the discussion?