
Every holiday season, the glow of Christmas tree lights brings warmth and joy to homes. But nothing disrupts the festive mood faster than discovering that only part of your string lights is working. You plug in the set, and while most bulbs shine brightly, one entire section remains dark. This common issue frustrates homeowners, but understanding the underlying causes can help you diagnose and resolve the problem quickly—without replacing the whole strand.
Modern Christmas lights are designed with segmented circuits for safety and efficiency, which means a failure in one section doesn’t necessarily affect the rest. However, this design also introduces unique failure points. From loose bulbs to fused shunts and circuit breaks, multiple factors can cause partial outages. This guide explores the technical reasons behind these failures, offers step-by-step solutions, and provides long-term maintenance strategies to keep your display glowing year after year.
How Modern Christmas Lights Are Wired
To understand why only one section fails, it’s essential to know how most modern mini Christmas lights are wired. Unlike older series-wired strands where a single dead bulb would kill the entire string, today’s lights use a hybrid approach: they’re arranged in series within small segments but connected in parallel across the full strand.
Each section typically contains 20–50 bulbs wired in series, meaning electricity must pass through each bulb sequentially. These sections are then connected in parallel to the main power line. This configuration ensures that if one segment fails due to a broken filament or disconnection, the other sections continue receiving power and remain lit.
This design improves reliability but introduces complexity. A break anywhere in a series segment—whether from a missing bulb, damaged socket, or failed shunt—will interrupt current flow in that specific section only. The rest of the strand continues operating normally, creating the illusion of a “half-dead” light set.
Common Causes of Partial Light Failure
Several mechanical and electrical issues can lead to a single non-functional section. Identifying the root cause is key to applying the right fix.
1. Loose or Missing Bulb
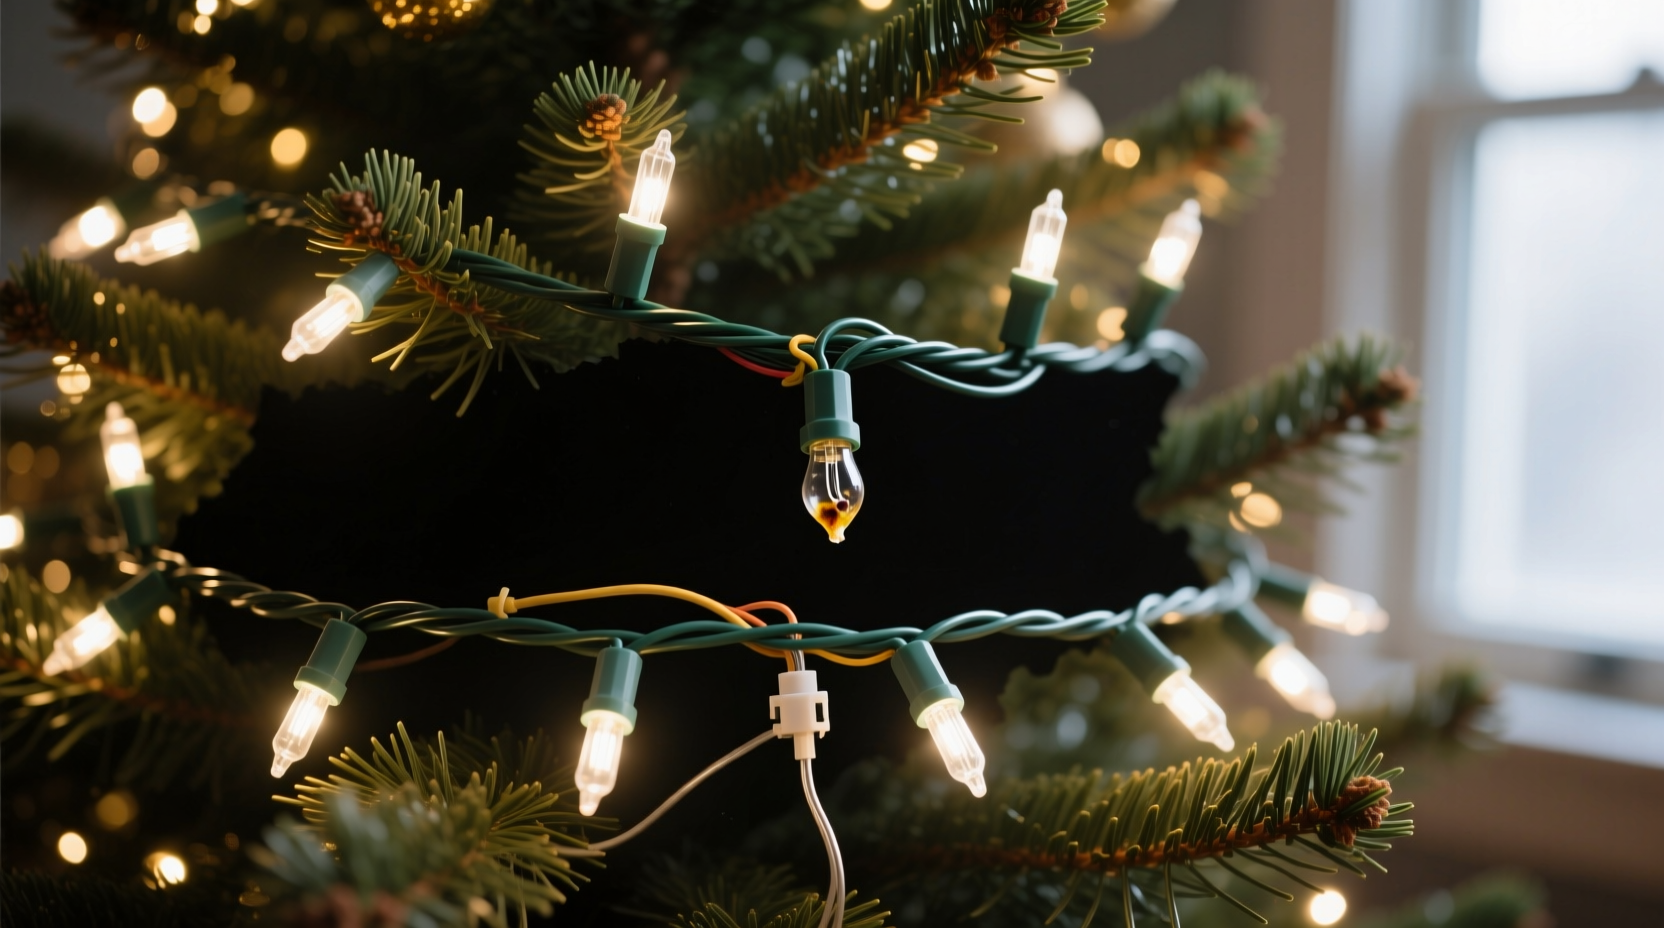
The most frequent culprit is a bulb that has become partially dislodged or completely removed from its socket. Even slight misalignment can break the circuit. These bulbs may appear seated but aren’t making proper contact.
2. Burned-Out Filament with Failed Shunt
Miniature incandescent bulbs contain a shunt—a tiny wire coated in insulating material. When the filament burns out, the increased voltage across the bulb should melt the coating, activating the shunt and rerouting current. If the shunt fails to activate (due to age, poor quality, or corrosion), the circuit breaks and the entire section goes dark.
3. Damaged Socket or Wiring
Physical damage from storage, handling, or pet interference can crack sockets or sever internal wires. A cracked socket may still hold a bulb but fail to conduct electricity. Similarly, pinched or frayed wires between bulbs can interrupt continuity.
4. Faulty Fuse in Plug or Section Connector
Some multi-section light sets include fuses not just in the plug but also at connection points between segments. A blown fuse in a junction box or interconnecting adapter will cut power to downstream sections while leaving upstream ones unaffected.
5. Corrosion or Moisture Buildup
If lights were stored in humid conditions or used outdoors without proper protection, moisture can corrode metal contacts inside sockets or connectors. This increases resistance and eventually breaks the circuit.
“Over 70% of partial failures in LED and incandescent holiday lights stem from simple contact issues—often a loose bulb or oxidized socket.” — Robert Lin, Electrical Systems Technician at Holiday Lighting Institute
Step-by-Step Guide to Diagnose and Fix the Problem
Follow this systematic approach to restore your lights efficiently. Most repairs take under 30 minutes with basic tools.
- Unplug the lights – Always start with power disconnected to avoid shock.
- Inspect the dark section visually – Look for obvious signs: missing bulbs, cracked sockets, kinked wires, or water residue.
- Check each bulb – Gently press down on every bulb in the affected section. Rotate slightly to clean contacts. Replace any visibly damaged bulbs.
- Test with a known-good bulb – Swap in a working bulb from a lit section. If the section lights up, the original bulb was faulty.
- Use a light tester or multimeter – For precision, test continuity across each socket. Set your multimeter to continuity mode and touch probes to the bottom and side of the socket. No beep means a break in the circuit.
- Examine connectors and fuses – Open the plug’s fuse compartment and inspect both fuses. Also check any inline connectors between sections for bent pins or discoloration.
- Verify power input to the section – Use a non-contact voltage tester near the start of the dark segment (while powered) to confirm whether electricity reaches it. If not, the break is upstream.
If no physical defect is found, the issue may lie in a hidden wire break inside the insulation. In such cases, replacing the affected section or using a splice kit may be necessary.
Tips and Tools for Effective Repair
Having the right tools and techniques makes a significant difference in success rate and speed.
- Bulb Remover Tool: Included with many light sets, this small plastic tool safely extracts bulbs without damaging sockets.
- LightKeeper Pro: A commercial device that sends pulses to clear shunt failures and test bulbs without removal.
- Dielectric Grease: Apply sparingly to clean connectors to prevent future corrosion, especially for outdoor use.
- Spare Bulbs: Keep an extra pack matching your light type (e.g., 2.5V miniature E12 base).
- Heat-Shrink Tubing: For permanent wire repairs, seal splices with heat-shrink instead of electrical tape for durability.
Avoid using pliers or metal tools directly on bulb bases—they can crush delicate filaments or warp sockets. Always handle bulbs by their plastic base.
Prevention Checklist: Avoid Future Failures
Proper care before, during, and after the season extends the life of your lights and reduces partial failures.
- ✅ Inspect all strands before installation—test each one fully
- ✅ Store lights on cardboard reels or foam tubes to prevent tangling and stress
- ✅ Keep lights in breathable fabric bags—not sealed plastic, which traps moisture
- ✅ Label sections clearly (indoor/outdoor, color, length)
- ✅ Replace weak or flickering bulbs immediately—even if still working
- ✅ Use surge-protected extension cords for outdoor displays
- ✅ Unplug lights when leaving home or overnight
Real Example: A Homeowner’s Experience
Sarah M., a homeowner in Vermont, faced recurring issues with her pre-lit artificial tree. Each year, the lower midsection refused to light. She initially assumed the tree was defective and considered replacement. After consulting an electrician neighbor, she learned the problem wasn’t the tree itself—but how she stored the lights.
She had been wrapping the strands tightly around the tree branches during disassembly, causing micro-fractures in the wiring over time. The repeated bending fatigued the copper wires, leading to intermittent breaks in one segment. By switching to a removable reel system and testing each section annually, she restored full function and extended the tree’s usable life by five additional seasons.
Her story underscores a critical point: often, the failure isn’t random—it’s cumulative damage masked as sudden malfunction.
LED vs. Incandescent: How Technology Affects Failure Modes
The type of lighting technology influences both the likelihood and nature of partial failures. Here's a comparison:
| Factor | Incandescent Lights | LED Lights |
|---|---|---|
| Failure Rate per Season | Higher (filament sensitive to vibration) | Lower (solid-state construction) |
| Partial Outage Cause | Shunt failure, loose bulb | Driver board fault, single LED short |
| Repairability | High (bulb-level fixes) | Low to moderate (often requires segment replacement) |
| Energy Efficiency | Low (generates heat) | High (uses ~80% less power) |
| Lifespan (average hours) | 2,000–3,000 | 25,000–50,000 |
While LEDs are more durable overall, their circuitry is less forgiving of voltage spikes. A single failed diode in a series chain can shut off a section, and unlike incandescents, they don’t rely on shunts. Some LED strings include bypass resistors, but many do not—making individual failures more disruptive.
Frequently Asked Questions
Can I connect different brands or lengths of light strands together?
You can mix compatible voltages and types, but only if the total wattage does not exceed the maximum load rating of the first string (usually printed on the label). Overloading can cause overheating and partial failures. Always follow manufacturer guidelines.
Why do some bulbs look darker than others even when lit?
This usually indicates aging filaments or uneven current distribution. In incandescents, older bulbs draw less power and glow dimmer. In LEDs, minor manufacturing variances can create subtle brightness differences. Replace noticeably dim bulbs to maintain uniform appearance.
Is it safe to repair Christmas lights myself?
Yes, as long as you work with the lights unplugged and avoid modifying plugs or high-voltage components. Simple bulb replacements, socket checks, and wire splices are safe for DIY. If you're unsure, consult a qualified technician—especially for pre-lit trees with built-in wiring.
Conclusion: Keep Your Holidays Bright
A dark section on your Christmas tree doesn’t mean the end of your light display. With a clear understanding of how segmented circuits work and a methodical approach to diagnosis, most issues can be resolved in minutes. Whether it’s a loose bulb, failed shunt, or corroded connector, the fix is often simpler than expected.
By adopting preventive habits—like careful storage, annual testing, and using protective accessories—you’ll reduce frustration and extend the life of your holiday lights significantly. Don’t let a single dark segment dim your spirit. Take action now, restore the glow, and enjoy a fully lit tree that radiates cheer throughout the season.


 浙公网安备
33010002000092号
浙公网安备
33010002000092号 浙B2-20120091-4
Comments
No comments yet. Why don't you start the discussion?