
A leaky garbage disposal isn’t just a minor annoyance—it can lead to water damage, mold growth, and even electrical hazards if left unattended. The moment you notice moisture under your sink or dripping from the unit, action is required. While some leaks are simple to address, others may point to deeper mechanical issues. Understanding the source of the leak is the first step toward an effective repair. This guide breaks down the most common causes of garbage disposal leaks, walks you through diagnostic steps, and provides clear, actionable solutions—many of which you can complete in under an hour with basic tools.
Common Causes of Garbage Disposal Leaks
Garbage disposals are designed to handle food waste and water, but they aren't immune to wear and tear. Over time, seals degrade, connections loosen, and internal components fail. The location of the leak often reveals its cause. Here are the five most frequent sources:
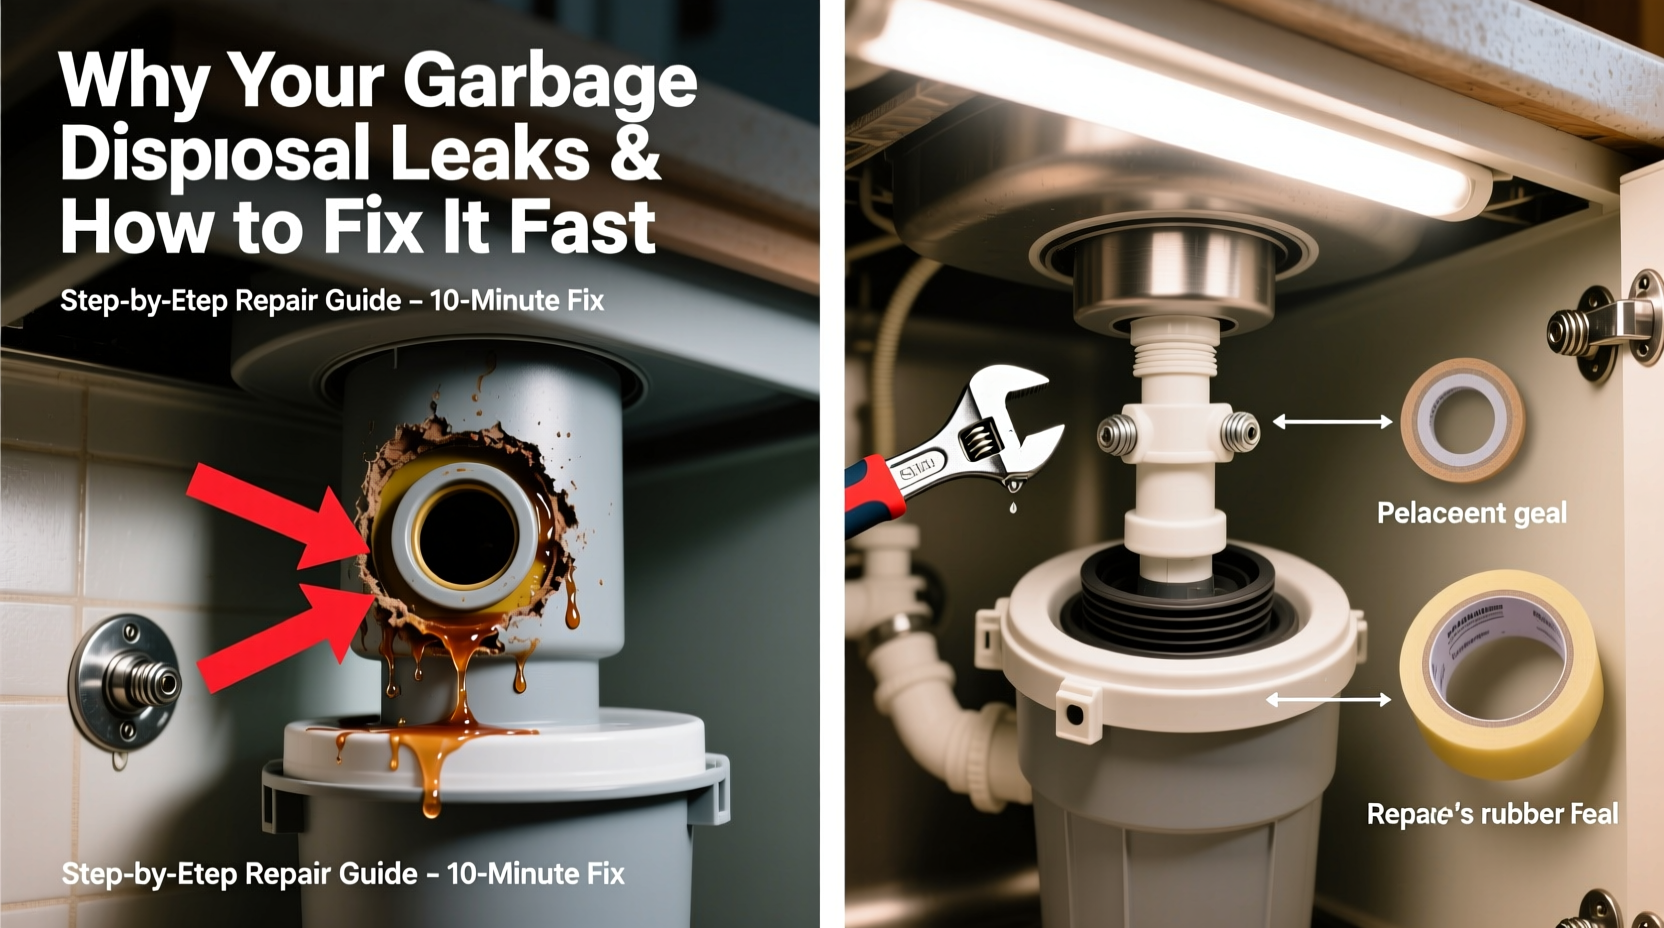
- Sink flange seal failure: The rubber gasket between the disposal and the sink drain can dry out or crack, allowing water to seep into the cabinet below.
- Drainpipe connection leaks: The discharge tube connecting the disposal to the drain line may have loose clamps or deteriorated seals.
- Faulty dishwasher hose connection: If your dishwasher drains through the disposal, a loose or cracked hose fitting can cause intermittent leaks during wash cycles.
- Internal body cracks: Older units may develop hairline fractures due to corrosion or impact, especially near stress points like mounting rings.
- Worn-out seals around the motor shaft: The main spinning shaft has a seal that prevents water from entering the motor housing. When this fails, leaks occur from the bottom of the unit.
Pinpointing where the leak originates is critical before attempting any repair. A small drip might seem harmless, but continuous exposure to moisture weakens cabinetry and promotes bacterial growth beneath the sink.
Step-by-Step Guide to Diagnose and Fix the Leak
Before disassembling anything, ensure safety by disconnecting power at the circuit breaker. Never work on a live appliance. Follow these steps methodically to identify and resolve the issue:
- Shut off power: Locate the correct breaker and switch it off. Confirm no power reaches the disposal using a voltage tester.
- Dry all surfaces: Use towels to wipe down the disposal, sink flange, drainpipe, and dishwasher hose connections.
- Inspect visually: Look for signs of corrosion, cracks, or mineral buildup. Pay close attention to joints and seams.
- Test with water: Turn on the faucet and let water flow into the disposal for 30–60 seconds. Watch carefully for drips.
- Check each potential leak point:
- If water appears at the top near the sink, the flange seal is likely compromised.
- If dripping occurs at the side outlet, inspect the drainpipe clamp and gasket.
- If moisture emerges only during dishwasher use, focus on the dishwasher inlet.
- If water pools at the base, suspect either the internal shaft seal or a cracked housing.
Once you’ve identified the origin, proceed with the appropriate fix. Many repairs require only a screwdriver, pliers, plumber’s putty, and replacement gaskets—all readily available at hardware stores.
Fixing a Leaky Sink Flange
The sink flange sits between the drain basket and the garbage disposal. Over time, the plumber’s putty or gasket sealing this joint deteriorates, especially in homes with hard water or frequent disposal use.
“Over 60% of disposal leaks I see stem from failed flange seals. It’s not a complex fix, but many homeowners overlook it because the leak seems to come from below.” — Mark Reynolds, Master Plumber with 22 years of experience
To replace the flange seal:
- Disconnect the disposal from the mounting assembly by loosening the snap ring underneath.
- Lower the unit carefully and set it aside.
- Remove the disposal flange from the sink drain.
- Clean old putty residue from both the sink and the flange.
- Apply a fresh bead of plumber’s putty around the underside of the flange.
- Reinsert the flange into the drain hole and tighten the mounting bolts evenly.
- Reattach the disposal and restore power after testing.
This process takes about 20 minutes and costs less than $10 in materials. It’s one of the most effective ways to eliminate persistent top leaks.
Securing Drainpipe and Dishwasher Connections
The discharge tube connects the disposal to the home’s drainage system. A loose hose clamp or worn gasket here causes lateral leaks that often go unnoticed until significant water accumulates.
| Connection Type | Common Issue | Solution |
|---|---|---|
| Drainpipe Outlet | Loose band clamp or degraded rubber gasket | Tighten clamp or replace gasket; ensure snug fit without over-tightening |
| Dishwasher Inlet | Cracked hose nipple or loose ferrule | Replace inlet plug if removed improperly; secure hose with clamp |
| Multiflex Coupling (if used) | Aging rubber sleeve causing slow seepage | Replace with new coupling kit |
For dishwasher-related leaks, verify that the knockout plug was properly removed during installation. Some units ship with a plastic disc blocking the dishwasher inlet port. If not punched out, water backs up and leaks at the connection point.
When the Disposal Body Is Cracked or the Shaft Seal Has Failed
Leaks from the bottom of the unit are more serious. If water drips directly from the center or sides near the motor housing, two scenarios are possible:
- Shaft seal failure: The seal around the impeller shaft wears out, allowing water to enter the motor compartment. This often happens after years of heavy use.
- Housing crack: Physical impact or corrosion creates a fissure in the cast body, usually near the mounting ring or discharge port.
While some manufacturers offer rebuild kits for shaft seals, the labor involved typically outweighs the cost of replacement. Most plumbers recommend installing a new unit when internal seals fail or cracks appear.
Replacing a garbage disposal is simpler than many assume. Modern units feature snap-on mounting systems and plug-in wiring (in non-hardwired models), enabling DIY installation in under 45 minutes.
Mini Case Study: Resolving a Persistent Post-Dishwasher Leak
Sarah from Portland noticed her cabinet floor was damp every morning, despite no visible leaks during hand washing. She suspected the garbage disposal but couldn’t replicate the issue. After drying everything thoroughly and running her dishwasher, she observed water trickling from the disposal’s side port only during the drain cycle.
Upon inspection, she found the dishwasher hose had been attached to a port still sealed with the factory knockout plug. The partial blockage caused backpressure, forcing water past the clamp. Removing the plug and resecuring the hose with a stainless steel clamp stopped the leak permanently. Sarah saved over $150 in service fees by diagnosing the pattern and timing of the leak.
Essential Checklist: How to Fix a Leaking Garbage Disposal Fast
Use this checklist to quickly assess and repair your leaking disposal:
- ✅ Turn off power at the breaker
- ✅ Dry all surfaces under the sink
- ✅ Run water through the disposal to locate the leak
- ✅ Inspect sink flange, drainpipe, and dishwasher connections
- ✅ Tighten clamps and replace worn gaskets
- ✅ Reapply plumber’s putty to the flange if needed
- ✅ Replace the disposal if the body is cracked or the bottom leaks
- ✅ Restore power and test operation
Completing this checklist ensures no potential leak point is overlooked. Most minor issues can be resolved within an hour using common household tools.
Frequently Asked Questions
Can I use silicone instead of plumber’s putty for the sink flange?
Yes, but with caution. 100% silicone sealant works as a waterproof barrier, but it cures permanently and makes future removal difficult. Plumber’s putty remains slightly pliable and is easier to clean off during repairs. For long-term serviceability, putty is preferred.
Is a leaking garbage disposal dangerous?
Yes, if ignored. Water near electrical components increases shock risk. Additionally, prolonged moisture encourages mold growth and wood rot under the sink. Even small leaks should be addressed promptly to avoid structural damage and health hazards.
How long should a garbage disposal last before leaking becomes inevitable?
Most units last 8–12 years with regular maintenance. Beyond a decade, seal degradation and internal corrosion become common. Units older than 10 years showing leaks are often better replaced than repaired, given improved energy efficiency and noise reduction in newer models.
Prevention Tips to Avoid Future Leaks
Regular maintenance extends the life of your disposal and reduces the likelihood of leaks. Incorporate these habits into your routine:
- Flush the disposal monthly with hot water and dish soap to dissolve grease buildup.
- Avoid putting fibrous foods (like celery or onion skins) or starchy items (such as potato peels) that can bind and strain the motor.
- Inspect connections annually for tightness and early signs of wear.
- Install an air gap or high-loop for the dishwasher line to prevent backflow and pressure surges.
These small actions prevent undue stress on seals and joints, minimizing the risk of sudden failures.
Conclusion: Act Now to Protect Your Kitchen
A leaking garbage disposal is more than a puddle under the sink—it’s a warning sign. Whether the issue stems from a dried gasket, a loose clamp, or a failing internal seal, timely intervention prevents costly water damage and keeps your kitchen safe. Most repairs are straightforward and affordable when caught early. Don’t wait for a major flood to take action. Use the steps outlined here to diagnose, fix, and prevent leaks efficiently. With basic tools and a little know-how, you can restore your disposal to full function in less time than it takes to call a plumber.


 浙公网安备
33010002000092号
浙公网安备
33010002000092号 浙B2-20120091-4
Comments
No comments yet. Why don't you start the discussion?