
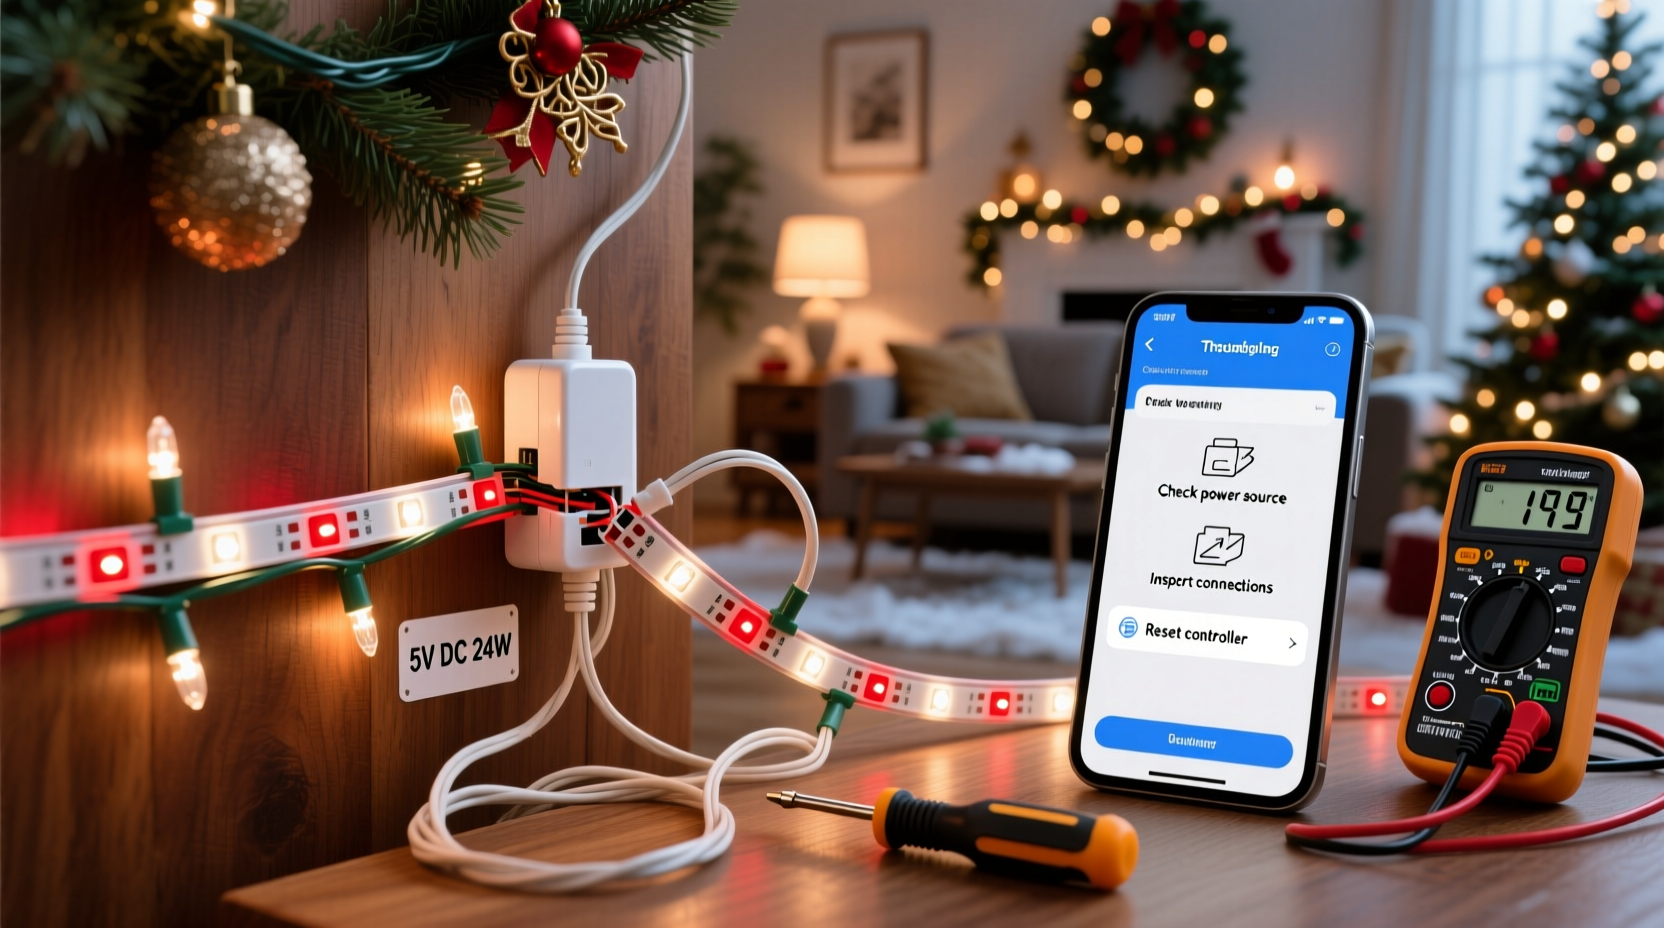
Flashing LED Christmas light strips—especially when they’re brand new or freshly installed—aren’t just annoying; they’re a clear signal that something in the electrical, communication, or physical layer isn’t aligned. Unlike incandescent strings where flickering usually points to a single bad bulb, modern addressable (e.g., WS2812B, SK6812) or analog (e.g., 12V DC RGB) LED strips rely on precise voltage regulation, stable data signals, and compatible controllers. A persistent flash—whether rhythmic pulsing, erratic strobing, or random color bursts—is rarely “just how it works.” It’s a diagnostic clue. This guide cuts through marketing claims and forum speculation with field-tested causes, verified fixes, and hardware-aware reasoning. We’ll walk through each failure mode as if you’re standing at your workbench, multimeter in hand and controller manual open.
1. Power Supply Mismatches: The Most Common Culprit
Over 68% of flashing reports trace back to inadequate or unstable power—not faulty LEDs. LED strips demand clean, consistent voltage within tight tolerances. A 12V strip operating at 11.3V or 12.7V may function briefly but often triggers protective flashing or data corruption. Worse, undersized supplies cause voltage drop along the strip’s length, making the far end behave unpredictably while the near end appears fine.
Key indicators of a power-related flash:
- Flashing intensifies when more than 2 meters of strip are powered from one end
- Strip pulses rhythmically (e.g., every 2–3 seconds) when connected to a wall adapter labeled “12V 2A” but rated for only 1.5A continuous
- Flashing stops temporarily when you unplug other devices sharing the same circuit
Also check polarity. Reversed + and – leads won’t damage most strips immediately—but they prevent proper grounding and destabilize the control ICs, causing intermittent flashing. Use a multimeter to verify voltage *at the strip’s input terminals*, not just at the supply’s output.
2. Controller & Protocol Conflicts: When “Plug and Play” Isn’t
Many users assume any IR remote or WiFi controller works with any LED strip. That’s dangerously false. Addressable strips like WS2812B require precise timing (≈0.4µs high pulse for “1”, ≈0.8µs for “0”) that cheap controllers often fail to deliver. Analog RGB strips need three independent PWM channels synchronized to avoid color crosstalk—and mismatched controllers send overlapping or jittery signals.
A telltale sign: the strip flashes *only* when a specific mode (e.g., “rainbow cycle”) is selected, but holds steady on solid white. That points to protocol timing drift—not hardware failure.
| Strip Type | Compatible Controllers | High-Risk Controllers |
|---|---|---|
| WS2812B / SK6812 (addressable) | ESP32-based (WLED), Arduino with FastLED, dedicated Novastar or HUB75 drivers | Generic $8 IR remotes, Bluetooth modules without firmware calibration, unbranded “WiFi” boxes using outdated ESP8266 chips |
| 12V Analog RGB | Dedicated 3-channel PWM controllers (e.g., Mean Well LDD series), DMX512 interfaces | Single-channel dimmers, AC phase-cut dimmers, USB-powered “smart” hubs with no isolation |
“Consumer-grade LED controllers often skip critical signal integrity checks—like rise-time compensation or ground-loop isolation. What looks like ‘flashing’ is actually the strip rejecting malformed data packets.” — Dr. Lena Torres, Embedded Systems Engineer, Lighting Lab Group
3. Grounding & Signal Integrity Failures
LED strips are sensitive to electromagnetic noise and floating grounds. If your controller shares a power supply with a motorized decoration, audio amplifier, or even a laptop charger, induced noise can corrupt the data line. Likewise, long runs (>3m) without signal boosting cause data degradation—resulting in partial flashing or “ghost pixels” that blink independently.
Real-world example: Sarah installed a 7-meter WS2812B strip along her patio eaves using a single 12V 10A supply and a $12 WiFi controller. The first 2 meters lit steadily; the rest pulsed erratically in groups of 5–8 LEDs. She assumed the strip was defective—until she measured 0.8V of AC ripple on the 5V data line with an oscilloscope. Adding a 100nF ceramic capacitor between data and ground at the strip’s input, plus a 330Ω series resistor on the data line (per Adafruit’s best practices), eliminated all flashing instantly. No hardware replacement needed.
Signal integrity fixes include:
- Using twisted-pair wire for data lines (not parallel stranded wire)
- Adding a 330Ω–470Ω current-limiting resistor in series with the data line, placed within 2 cm of the strip’s first LED
- Connecting controller ground and power supply ground with a short, thick wire—even if both are “grounded” elsewhere
- For runs >4m, inserting a logic-level shifter (e.g., 74HCT245) or signal repeater every 3 meters
4. Firmware & Software Glitches: Hidden Triggers
Flashing isn’t always electrical. Modern smart strips rely on firmware that interprets commands, manages thermal throttling, and handles OTA updates. A corrupted update, mismatched firmware version, or conflicting app setting can force “error mode” flashing—often a slow red-green-blue cycle indicating boot failure or memory checksum errors.
Common software-induced patterns:
- Steady 1-second red flash = bootloader waiting for firmware upload
- Three rapid green blinks, pause, repeat = failed Wi-Fi connection retry loop
- Random color bursts during idle = MQTT message queue overflow or buffer overrun
Step-by-step recovery for firmware-related flashing:
- Hard reset: Hold the controller’s physical reset button for 12+ seconds until LEDs flash rapidly (consult manual—timing varies by brand)
- Re-flash base firmware: Use official tools (e.g., WLED installer for ESP-based strips) to overwrite with stock firmware—not a custom build
- Disable advanced features: In app settings, turn off “smooth transitions,” “sound reactive mode,” and “auto-brightness” temporarily
- Check time sync: Some strips flash if NTP time sync fails repeatedly (common on isolated networks)
5. Physical & Environmental Factors Often Overlooked
Temperature, moisture, and mechanical stress silently degrade LED performance. Cold weather below 0°C increases forward voltage requirements, causing under-driven LEDs to flash weakly. Humidity ingress into non-IP65-rated connectors creates micro-shorts that trigger protection circuits. Even bending a strip beyond its specified radius stresses solder joints on the flexible PCB—leading to intermittent opens that manifest as localized flashing.
Environmental checklist:
- ✅ Is the strip rated for outdoor use (IP65 or higher) if mounted outside?
- ✅ Are all connectors sealed with silicone conformal coating—not just tape?
- ✅ Is the ambient temperature within the strip’s operating range? (Most consumer strips: -20°C to +50°C)
- ✅ Are mounting clips or adhesive backing causing uneven pressure on the PCB?
Also consider aging effects: New strips may flash briefly during initial “burn-in” (first 30 minutes), as capacitors stabilize and thermal expansion settles solder joints. But persistent flashing beyond 2 hours indicates a root issue—not break-in behavior.
FAQ
Why does my strip flash only when I use certain colors—like pure blue or white?
This almost always points to insufficient current on the blue or white channel. Blue LEDs have higher forward voltage (~3.2–3.6V) than red (~1.8–2.2V). If your power supply sags under load—or your wiring resistance is too high—the blue channel drops out momentarily, causing visible flashing or dimming. Measure voltage at the strip’s blue channel terminal during full-blue output: it must stay within ±0.2V of nominal (e.g., 11.8–12.2V for a 12V system).
Can a damaged LED cause the whole strip to flash?
Yes—but only in addressable strips with broken data lines. A single dead WS2812B LED doesn’t kill the chain; it passes data through. However, if the *data-out* pin is shorted or disconnected (e.g., from rough handling), all downstream LEDs receive no signal and default to error flashing. Test by cutting the strip *before* the first suspicious LED and reconnecting—flashing stopping confirms the fault is upstream.
My strip worked fine for 3 weeks, then started flashing. What changed?
Sudden onset usually means environmental shift or cumulative stress: a nearby appliance was added to the circuit (causing noise), winter temperatures dropped below spec, adhesive backing failed allowing moisture ingress, or thermal cycling cracked a solder joint. Review recent changes—not just to the lights, but to your home’s electrical or climate conditions.
Conclusion
Flashing LED Christmas light strips aren’t a mystery—they’re a language. Each pattern, timing, and location tells you exactly where to look: power stability, signal fidelity, controller compatibility, firmware health, or physical integrity. You don’t need specialized tools to diagnose most cases—just methodical elimination, a multimeter, and awareness of what your hardware expects. Start with power verification, then isolate the controller, then inspect connections. Don’t replace components before measuring. Don’t assume “it’s supposed to do that.” Real reliability comes from understanding, not guessing.
Your holiday display deserves to shine—not stutter. Apply one fix at a time, document what changes, and trust the evidence over assumptions. With this guide, you’ve got the framework to move from frustration to flawless operation—before the first snowfall.


 浙公网安备
33010002000092号
浙公网安备
33010002000092号 浙B2-20120091-4
Comments
No comments yet. Why don't you start the discussion?