
There’s nothing more frustrating during the holiday season than unpacking your cherished pre-lit Christmas tree only to find dark spots where lights should be glowing. Missing or burnt-out bulbs can turn festive anticipation into confusion and delay. While these trees are designed for convenience, their integrated lighting systems aren’t immune to failure. Understanding why bulbs go missing—and how to effectively replace them—can save time, preserve the tree’s appearance, and extend its usable life for years to come.
Why Pre-Lit Trees Lose Bulbs: Common Causes
Pre-lit Christmas trees come with hundreds or even thousands of lights permanently wired into the branches. Despite their durability claims, several factors contribute to bulb loss or failure over time.
- Vibration during storage or transport: If a tree is jostled in a garage, attic, or moving truck, fragile bulb filaments can break or dislodge from their sockets.
- Poor manufacturing quality: Some budget models use thin wires and loosely fitted bulbs that don't lock securely into place.
- Heat buildup: LED or incandescent bulbs generate heat. Over time, especially if lights stay on too long, this can degrade socket integrity.
- Improper handling during setup: Forcing branches into position may tug on wires, popping bulbs out or damaging connections.
- Moisture exposure: Storing a tree in damp areas like basements can corrode contacts and weaken bulb adhesion.
- Natural wear and tear: Even high-quality LEDs have a lifespan. After several seasons, individual bulbs may fail.
Unlike traditional string lights, you can’t simply unplug and replace a faulty strand. The issue must be diagnosed within the fixed circuit system, often requiring targeted troubleshooting.
How to Identify Missing or Faulty Bulbs
Not every dark bulb is physically missing. Often, it's burned out, improperly seated, or part of a larger electrical issue. Here’s how to determine what you’re dealing with:
- Visual inspection: Walk around the tree slowly, looking closely at each section. A missing bulb leaves an empty socket, while a dead one remains in place but doesn’t glow.
- Check for loose seating: Gently press each non-working bulb. Many screw-in or push-style bulbs require full insertion to complete the circuit.
- Test adjacent lights: In series-wired trees (common in older models), one dead bulb can shut off an entire section. Newer parallel-wired designs isolate failures better.
- Use a light tester: Devices like the \"Light Keeper Pro\" send pulses through the cord to clear shunt failures in incandescent sets—a common cause of dark sections.
- Trace wiring paths: Follow the wire from the power source. Note where illumination stops; that’s your problem zone.
If multiple bulbs are out along a single line, it may not be individual failures but a broken wire, damaged connector, or power block issue. However, isolated dark spots usually point to one or two specific bulbs needing attention.
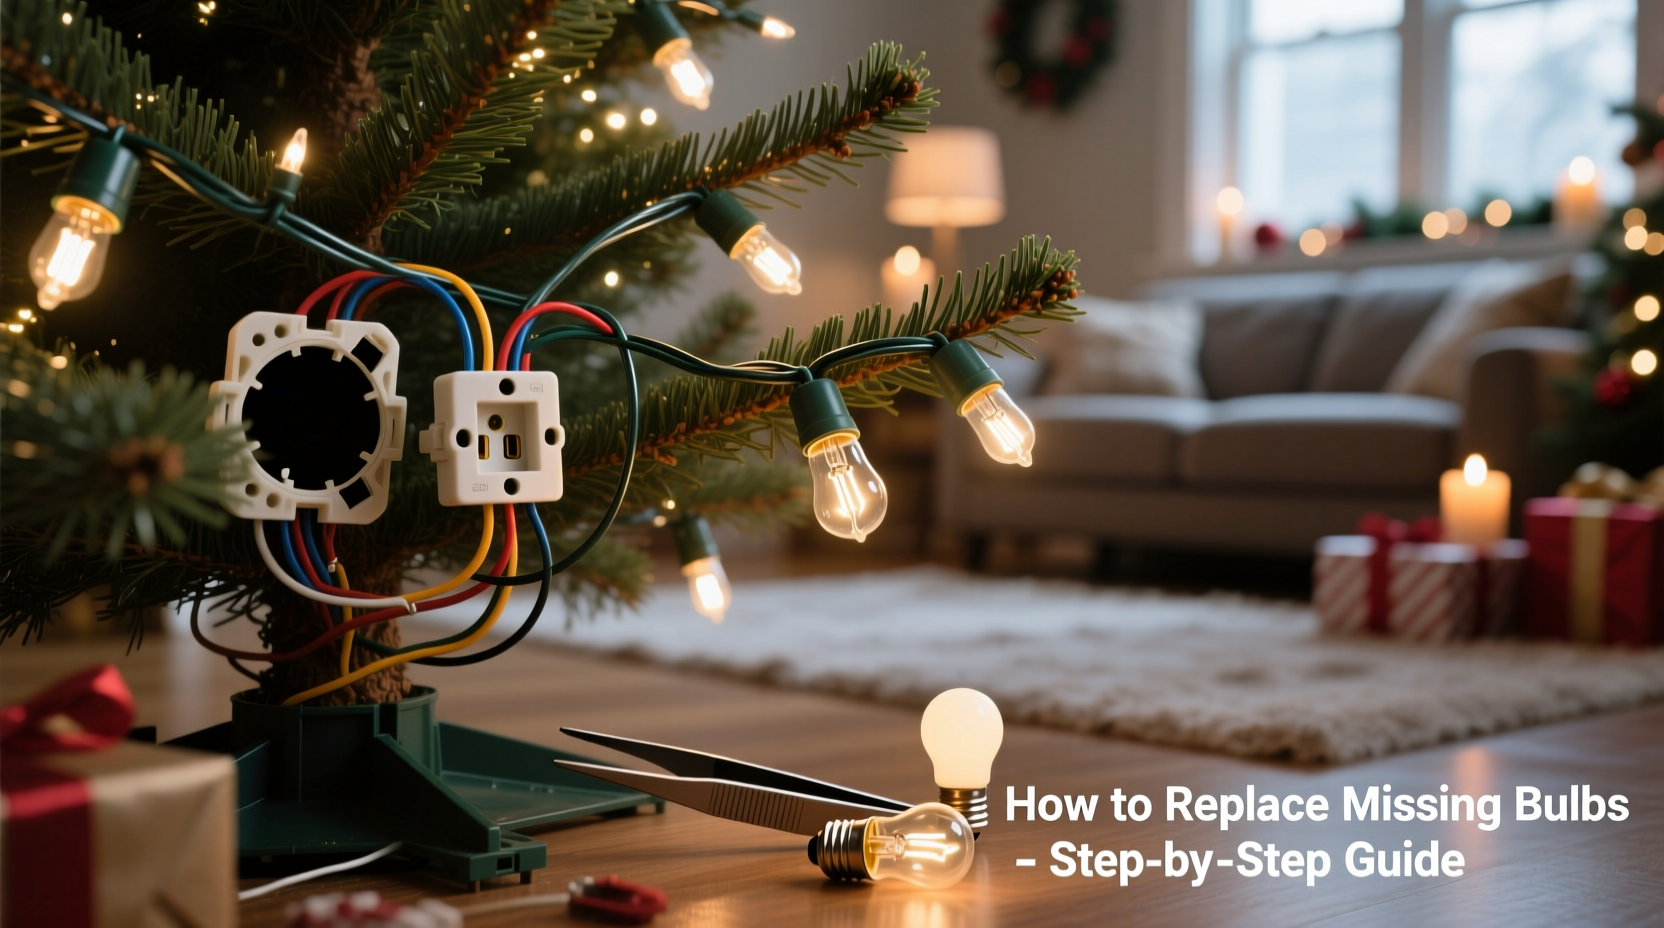
Step-by-Step Guide to Replacing Missing Bulbs
Replacing a missing bulb isn’t always straightforward—especially when replacements weren’t included. But with care and the right tools, most issues can be resolved without rewiring.
Step 1: Gather Supplies
- Replacement bulbs (exact match required)
- Small needle-nose pliers (optional)
- Flashlight
- Light tester (recommended)
- Spare fuse set (often stored in the plug)
Step 2: Unplug the Tree
Safety first. Always disconnect the tree from power before touching any wiring or attempting repairs.
Step 3: Locate the Empty Socket
Identify the exact spot where the bulb is missing. Use a flashlight to see deep within dense foliage. Mark the area with a ribbon or tape if needed.
Step 4: Find the Correct Replacement
This is critical. Most pre-lit trees use proprietary bulb sizes and bases. Check:
- The manufacturer’s label on the tree stand or box
- Original packaging or instruction manual
- A remaining bulb—remove it carefully and compare
Common types include E12 candelabra base, mini cone-shaped LEDs, or specialty wedge bases. Never force a mismatched bulb—it can damage the socket.
Step 5: Insert the New Bulb
For twist-lock bulbs: align the base and gently rotate until it clicks. For push-in styles: apply even pressure straight down until fully seated. Avoid tilting, which can bend internal contacts.
Step 6: Test the Section
Reconnect power and observe. If the light still doesn’t work, the issue may be deeper—a bad shunt, wire break, or voltage drop. Try the Light Keeper Pro or move to professional repair options.
Do’s and Don’ts When Replacing Bulbs
| Do’s | Don’ts |
|---|---|
| Use only manufacturer-recommended replacement bulbs | Never mix LED and incandescent bulbs on the same strand |
| Inspect all bulbs annually during setup | Don’t pull bulbs out by the wire |
| Store the tree in a dedicated storage bag with branch tips protected | Don’t stack heavy items on top of stored tree sections |
| Label sections if your tree has multiple light circuits | Don’t leave lights on unattended or overnight |
| Clean bulbs gently with a dry cloth before storage | Don’t use household cleaners near electrical components |
Mini Case Study: Restoring a 7-Foot Noble Fir Pre-Lit Tree
Sarah from Portland bought a premium 7-foot pre-lit Noble Fir tree five years ago. Last holiday season, she noticed three large dark patches on the lower third. She assumed the whole section was dead. After consulting the manual, she discovered the model used replaceable LED bulbs with color-coded caps.
She ordered a $9 replacement kit online using the model number. Upon closer inspection, she found two bulbs were actually missing—one likely dislodged during storage. Using tweezers, she inserted the new bulbs, ensuring they clicked into place. Two sections lit up immediately. The third remained dark. She used a Light Keeper Pro and revived it by clearing a failed shunt.
Her total repair time: 20 minutes. Cost: under $10. Without knowing about replaceable bulbs, she might have replaced the entire tree at a cost of $180.
“Most people don’t realize that many pre-lit trees are designed for bulb-level maintenance. A few minutes of inspection can prevent premature disposal.” — Mark Reynolds, Holiday Lighting Technician with 12 years of retail support experience
Prevention: How to Avoid Missing Bulbs in the Future
Once you’ve repaired your tree, take steps to protect your investment going forward.
- Handle branches gently during assembly: Bend limbs slowly and avoid tugging on wires.
- Invest in a tree storage bag with compartments: These reduce compression and prevent bulb shear.
- Label each section: Especially useful for multi-plug trees. Helps isolate issues next season.
- Rotate usage: If you own multiple trees, alternate them yearly to reduce wear.
- Use surge protectors: Voltage spikes can fry delicate LED drivers.
Additionally, consider upgrading to newer models with parallel-wired LEDs if you frequently encounter cascading failures. These keep the rest of the lights working even if one bulb dies.
Frequently Asked Questions
Can I replace a missing bulb with a different brand?
Only if the voltage, base type, and size are identical. Mismatched bulbs can overload circuits or create fire hazards. Always verify compatibility. When in doubt, contact the manufacturer or use their official replacement kit.
What if I can’t find replacement bulbs for my tree?
Try searching by model number on sites like ChristmasLightsEtc.com, ReplacementBulbs.net, or Amazon. Some manufacturers discontinue parts after 5–7 years. As a last resort, you can retrofit a short section with clip-on mini lights, though this affects aesthetics.
Why do some bulbs burn out faster than others?
Heat dissipation varies by location. Bulbs near the trunk or in dense clusters retain more heat, shortening lifespan. LEDs are less prone to this than incandescents, which is why modern trees increasingly use LED-only systems.
Expert Checklist: Fixing and Maintaining Your Pre-Lit Tree
- Unpack and assemble the tree completely before plugging in.
- Plug in and scan for dark sections or flickering areas.
- Visually inspect each non-working bulb—look for looseness or absence.
- Press in all suspect bulbs firmly to reseat them.
- Use a light tester to resolve shunt issues (for incandescents).
- Order exact replacement bulbs using the model number.
- Replace missing or dead bulbs carefully.
- Test again after each replacement.
- Store spares with the tree in a labeled, static-free bag.
- Pack the tree in a protective bag, avoiding pressure on lighted branches.
Conclusion: Keep the Lights On for Years to Come
A missing bulb doesn’t mean the end of your pre-lit Christmas tree’s life. With a methodical approach, the right tools, and a bit of patience, most lighting issues are fixable. The key lies in understanding your tree’s design, sourcing correct replacements, and adopting preventive habits. These trees are built to last—but only if cared for properly across seasons.
Instead of replacing a functional tree because of a few dark spots, invest an hour in diagnosis and repair. You’ll save money, reduce waste, and preserve the tradition year after year. Whether it’s your family’s centerpiece or a cozy apartment accent, a well-maintained pre-lit tree can shine brightly for a decade or more.


 浙公网安备
33010002000092号
浙公网安备
33010002000092号 浙B2-20120091-4
Comments
No comments yet. Why don't you start the discussion?