


Types of Backup Camera Moving Guidelines
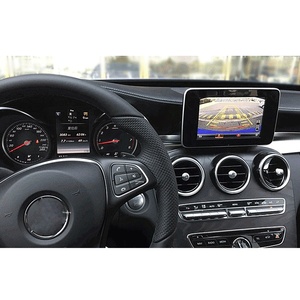
Backup cameras have become an essential safety feature in modern vehicles, significantly reducing the risk of reversing accidents. The virtual guidelines displayed on the screen assist drivers in estimating distances and understanding their vehicle's trajectory during reverse maneuvers. These guidelines come in several different types, each with unique advantages.
Static Guidelines
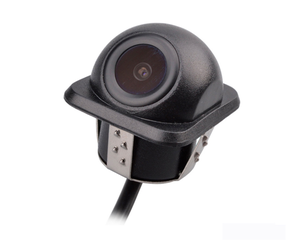
Static guidelines are fixed lines that appear on the display screen. They do not adjust or move based on steering wheel position, remaining in the same position regardless of wheel movement.
- Show fixed width and length of vehicle
- Help judge distances when reversing straight
- Assist with vehicle alignment
- Simplest and most basic guideline system
Best for: Basic reversing tasks and budget-conscious drivers
Proximity Sensor Systems
These systems combine visual static guidelines with audible proximity alerts for enhanced safety. Sensors integrated into the rear bumper detect obstacles near the vehicle.
- Provides visual and audio feedback
- Alert frequency increases as objects get closer
- Helps detect obstacles outside camera view
- Works effectively even in poor visibility
Best for: Added safety and obstacle detection in various conditions
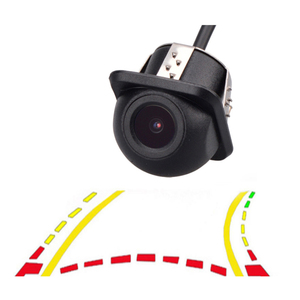
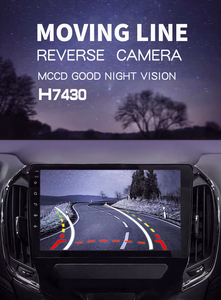
Dynamic Guidelines
Dynamic guidelines actively adjust on the screen based on steering wheel position, showing the projected path of the vehicle in real-time as you turn the wheel.
- Curves and moves with steering wheel
- Shows actual projected vehicle path
- Excellent for navigating tight spaces
- Advanced feature in modern vehicles
Best for: Complex parking maneuvers and tight parking situations
Expert Tip: Some advanced backup camera systems offer adjustable guidelines that allow drivers to switch between static and dynamic guidelines based on preference or specific parking scenarios. This versatility makes these systems particularly valuable for drivers who regularly navigate various parking environments.
| Guideline Type | Movement | Best Application | Technology Level |
|---|---|---|---|
| Static Guidelines | Fixed position | Straight reversing, basic alignment | Basic |
| Proximity Sensors | Fixed with audio alerts | Low visibility conditions, safety-focused | Intermediate |
| Dynamic Guidelines | Adjusts with steering | Tight spaces, parallel parking | Advanced |
| Adjustable Systems | User-selectable | Various parking scenarios | Premium |
Specifications & Maintenance of Backup Camera Moving Guidelines
Key Technical Specifications
Understanding the technical specifications of backup cameras is crucial for selecting a system that meets your specific needs and ensures optimal performance.
| Specification | Range/Options | Importance |
|---|---|---|
| Display Size | 3-10 inches | Larger displays offer better visibility but require more dashboard space |
| Resolution | 480p to 1080p | Higher resolution provides clearer images for obstacle detection |
| Field of View (FOV) | 120° to 180° | Wider FOV shows more of the area behind your vehicle |
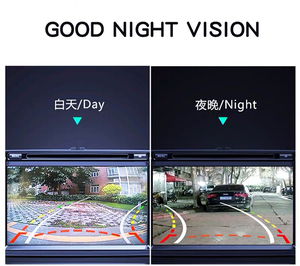
| Night Vision | IR LED / Low-light sensors | Essential for clear visibility in dark conditions |
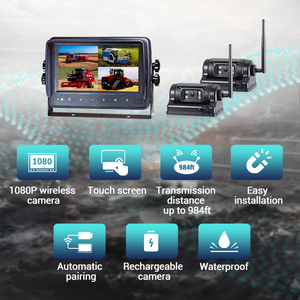
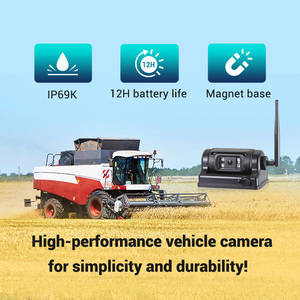
| Weather Resistance | IP rating (IP67, IP68) | Higher ratings provide better protection against elements |
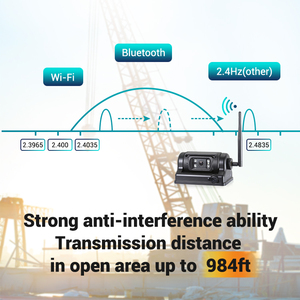
| Connection Type | Wired / Wireless | Affects installation complexity and signal reliability |
Pro Tip: When evaluating camera resolution, remember that environmental factors like rain, snow, or fog can significantly reduce visibility. Selecting a camera with higher resolution and enhanced low-light capabilities can help maintain visual clarity in challenging conditions.
Essential Maintenance Practices
Regular maintenance ensures your backup camera system remains functional and reliable. Implementing these practices will extend the life of your system and maintain optimal performance:
Routine Cleaning
- Clean lens regularly with microfiber cloth
- Remove dirt, debris, and water spots
- Use mild cleaner (avoid abrasives)
- Check for lens scratches or damage
System Inspection
- Verify all connections are secure
- Check for wire corrosion or damage
- Ensure mounting brackets are tight
- Test system functionality regularly
Software & Protection
- Update firmware when available
- Protect from extreme temperatures
- Apply protective coating to lens
- Store vehicle under cover when possible
Important: Never use abrasive cleaners or rough materials to clean camera lenses. These can cause micro-scratches that permanently reduce image clarity and potentially damage protective coatings on the lens surface.
Maintenance Schedule
| Maintenance Task | Frequency | Special Considerations |
|---|---|---|
| Lens cleaning | Weekly or after exposure to mud/debris | More frequent in winter or off-road conditions |
| Connection inspection | Monthly | Check immediately if display shows interference |
| Software updates | Semi-annually | Check manufacturer website for updates |
| Full system test | Quarterly | Test all guideline modes and sensor functions |
| Professional inspection | Annually | Include during regular vehicle maintenance |
How to Choose Backup Camera Moving Guidelines
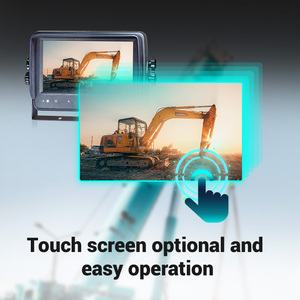
Selecting the right backup camera system with appropriate guidelines requires careful consideration of several key factors. The right choice enhances safety, improves parking precision, and provides peace of mind.
Camera Resolution & Quality
Higher resolution cameras provide clearer images, allowing for better obstacle detection and improved depth perception when using guidelines.
- Entry-level: 480p resolution
- Mid-range: 720p resolution
- Premium: 1080p resolution
Look for: CMOS sensors with HDR capability for varying light conditions
Field of View
The camera's viewing angle determines how much area behind your vehicle is visible on screen, affecting guideline usefulness.
- Standard: 120° viewing angle
- Wide-angle: 140-150° viewing angle
- Ultra-wide: 170-180° viewing angle
Consider: Wider angles show more area but may distort distance perception
Low-Light Performance
Effective backup camera guidelines are only useful if you can see the display clearly in all lighting conditions.
- IR LEDs for night vision
- Automatic brightness adjustment
- Low-lux rating for dim lighting
- Anti-glare screen technology
Ideal: Systems with 0.1 lux rating or better for night use
Selection Advice: When choosing between static and dynamic guidelines, consider your typical parking environments. Static guidelines work well for straightforward parking situations, while dynamic guidelines provide significant advantages in tight spaces, angled parking, and parallel parking scenarios.
Additional Selection Criteria
| Feature | Why It Matters | Recommended For |
|---|---|---|
| Installation Complexity | Determines whether DIY installation is feasible or professional help is needed | Choose wireless systems for easier DIY installation |
| Guideline Customization | Allows adjusting guidelines to match specific vehicle dimensions | Larger vehicles or those with unusual proportions |
| Display Integration | Determines how camera feed appears (dedicated screen vs. integrated) | Factory-look integration preferred for newer vehicles |
| Weather Resistance | Ensures camera functions in all weather conditions | Essential for vehicles in extreme climates |
| Additional Features | Provides enhanced functionality beyond basic guidelines | Parking sensors, multi-view angles for comprehensive coverage |
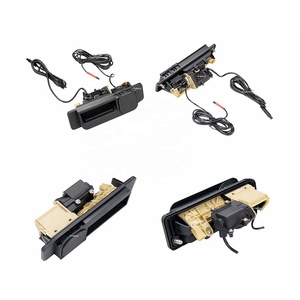
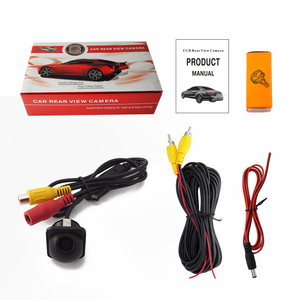
How to DIY and Replace Backup Camera Moving Guidelines
Replacing a backup camera with moving guidelines can be a straightforward DIY project that saves on installation costs while upgrading your vehicle's safety features. Follow this comprehensive step-by-step guide for a successful installation.
Safety Warning: Always disconnect the vehicle's battery before beginning any electrical work to prevent short circuits or electrical damage. Ensure you have the proper tools and consult your vehicle's manual before starting.
Turn Off Vehicle Power
Before beginning any work, completely shut down your vehicle's electrical system:
- Turn off the ignition
- Remove the key
- Disconnect the negative battery terminal
- Wait 10-15 minutes for capacitors to discharge
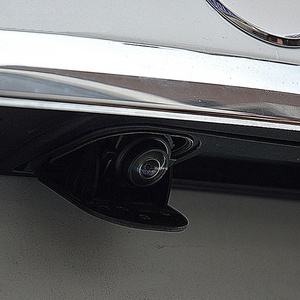
Remove the Old Camera
Carefully remove the existing backup camera:
- Locate access points (may require removing trim panels)
- Unscrew mounting hardware
- Disconnect the wiring harness (note connection patterns)
- Take photos of wiring for reference
Prepare the New Camera
Get the replacement camera ready for installation:
- Unpack and inspect for damage
- Test connections if possible
- Verify compatibility with your vehicle's system
- Organize all mounting hardware
Install the New Camera
Mount the new camera securely:
- Position in the same location as the original
- Secure with appropriate mounting hardware
- Connect wiring following the same pattern as original
- Use electrical tape or heat shrink to protect connections
Check Guidelines Configuration
Ensure guideline settings are properly configured:
- Reconnect battery temporarily for testing
- Access settings menu on display unit
- Select appropriate guideline type (static/dynamic)
- Adjust guideline position if customizable
Test and Finalize
Verify functionality and complete installation:
- Perform complete system test
- Check camera view and guideline accuracy
- Test in reverse at low speed
- Reinstall any removed trim pieces
Installation Tip: If your new camera has different mounting dimensions than the original, use a mounting adapter plate or create a custom bracket. This ensures proper alignment with your vehicle's existing mounting location while providing a secure attachment for the new camera.
Troubleshooting Common Installation Issues
| Problem | Possible Cause | Solution |
|---|---|---|
| No display image | Loose connections, incompatible camera | Check all wiring connections, verify camera compatibility |
| Distorted guidelines | Incorrect settings, improperly mounted camera | Adjust settings menu, realign camera mounting position |
| Flickering display | Power supply issues, interference | Check power connections, route cables away from interference sources |
| Guidelines not appearing | Feature disabled in settings, incompatible system | Enable guidelines in settings menu, check system compatibility |
Frequently Asked Questions
Almost all vehicles can be equipped with backup camera systems, including older models without built-in displays. For newer vehicles (typically 2018 and later), backup cameras are standard equipment due to federal regulations. Older vehicles may require more extensive installation including an aftermarket display, but universal kits are available that can be installed on virtually any vehicle. The installation complexity varies depending on the vehicle's age and existing electrical systems.
Yes, backup cameras can be repaired, but the feasibility depends on the specific issue. Common repairable problems include wiring issues, loose connections, and software glitches. However, for physical damage to the camera lens, water damage, or internal electronic failures, replacement is typically more cost-effective than repair. Professional diagnosis is recommended to determine whether repair or replacement is the better option. Many repair shops can perform basic troubleshooting and repairs for around $100-200, while complete replacement might cost $300-700 depending on the camera system's complexity.
No, not all backup cameras include moving guidelines. Camera systems typically fall into three categories: those with no guidelines, those with static (fixed) guidelines, and those with dynamic (moving) guidelines that adjust with steering wheel position. Entry-level and basic aftermarket cameras often have no guidelines or only static guidelines. Dynamic guidelines are more common in factory-installed systems on newer vehicles and premium aftermarket options. When purchasing a replacement or aftermarket system, check the specifications carefully if moving guidelines are a desired feature.
With proper maintenance, a quality backup camera system can last 5-10 years or more. Factors affecting longevity include camera quality, environmental exposure, installation quality, and maintenance frequency. Factory-installed cameras typically last longer than aftermarket options due to better integration and weatherproofing. Regular cleaning and protection from extreme weather conditions can significantly extend a camera's useful life. The electronic display components often outlast the camera itself, as the external camera is exposed to more environmental stress.
In many cases, yes, but it depends on your vehicle's specific system. Upgrading typically requires either: (1) replacing the entire camera unit with one that supports dynamic guidelines, (2) updating the system software if your hardware supports it, or (3) installing an additional processing module between the camera and display. For factory-installed systems, check with your dealer about available software updates that might enable dynamic guidelines. For aftermarket systems, a complete replacement is usually required. The feasibility and cost of upgrading vary significantly between vehicle makes and models.