All categories
Featured selections
Trade Assurance
Buyer Central
Help Center
Get the app
Become a supplier
Alibaba
Vehicle Accessories, Electronics, & Tools
Auto Electronics
Car Monitor
Popular in your industry
Cute Car Decoration
Smart In-Car Entertainment
Bling Car Decoration
Sports Car Decoration
Camping
Camouflage Car Decoration
Previous slide
Next slide
Dvd headrest monitor
(2129 products available)
Previous slide
Next slide
OEM/ODM 14 Inch 1200P Touch Screen Portable
Monitor
Speaker IPS Panel 60Hz Refresh Compatible PS4 Desktop Switch LCD
Monitors
Ready to Ship
$
70
.00 - $
90
.00
Min. Order: 10 pieces
1 yrs
CN
Supplier
5.0/5.0
·
7 reviews
·
"Good purchase"
Contact supplier
Chat now
Previous slide
Next slide
Universal 9 Inch 2+32GB 360 Panorama AHD DSP Android Auto Car
DVD
Player CarPlay Radio Tuner Amplifier
Headrest
Android 11
$
57
.84 - $
58
.84
Min. Order: 50 pieces
1 yrs
CN
Supplier
0.0/5.0
·
0 reviews
Contact supplier
Chat now
Previous slide
Next slide
Double Din Carplay Radio
Dvd
Player Auto Audio Stereo 9 Inch 10 Inch Navigator Gps Android System Car MP5 Navigation For Car
$
50
.00
Min. Order: 2 pieces
7 yrs
CN
Supplier
4.7/5.0
·
6 reviews
·
"Professional supplier"
Contact supplier
Chat now
Previous slide
Next slide
10-Inch Portable Car Player With Apple CarPlay Android Auto GPS Navigation RGB Function LCD Screen
$
38
.00
Min. Order: 1 piece
1 yrs
CN
Supplier
0.0/5.0
·
0 reviews
Contact supplier
Chat now
Previous slide
Next slide
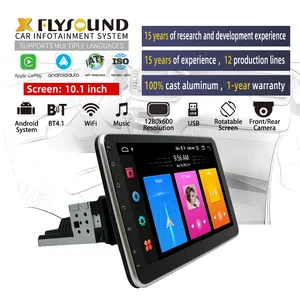
Flysonic Universal 10 Inch 1 Din Touch Screen Built-in Gps Wifi Mirror Link Navigation Android Car
Dvd
Player
$
52
.00 - $
53
.40
Min. Order: 200 pieces
7 yrs
CN
Supplier
4.7/5.0
·
6 reviews
·
"Professional supplier"
Contact supplier
Chat now
Previous slide
Next slide
9' Car Player Car Play Android Car Auto Gps Navigation Android Headunit
$
38
.00
Min. Order: 1 piece
1 yrs
CN
Supplier
0.0/5.0
·
0 reviews
Contact supplier
Chat now
Previous slide
Next slide
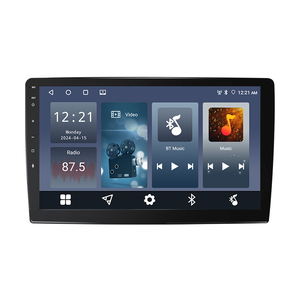
10.1 android in car screens video
headrest
dvd
player car back seat
monitor
car
monitor
$
83
.00 - $
89
.00
Min. Order: 2 pieces
9 yrs
CN
Supplier
4.9/5.0
·
88 reviews
·
"great service"
Contact supplier
Chat now
Previous slide
Next slide
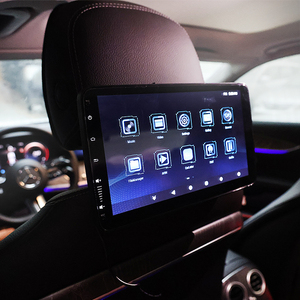
2023 Android 9.0
Headrest
Video Player Car
Monitor
For Volvo XC90 S90 V90 XC60 Rear Seat Multimedia
DVD
Screen Special Bracket
Ready to Ship
$
180
.00 - $
199
.00
Min. Order: 2 pieces
Shipping per piece: $32.50
6 yrs
CN
Supplier
4.1/5.0
·
20 reviews
·
"Fast shipping"
Contact supplier
Chat now
1
2
3
4
5
More pages
54
1
/
54


 Ready to Ship