


Types of E46 Window Regulators
The E46 window regulator is a critical component for controlling window movement in BMW E46 models manufactured between 1998 and 2006. This mechanism ensures smooth and consistent operation when raising or lowering windows.
Manual Window Regulators
Manual window regulators (hand cranks) utilize mechanical systems for operation. Key features include:
- Simple mechanical design with crank handle, window pulley, and metal channels
- Reliable operation with minimal maintenance requirements
- Lower cost compared to power systems
- No dependency on vehicle electrical system
Best for: Budget-conscious owners who prefer mechanical simplicity
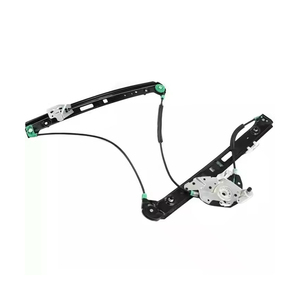
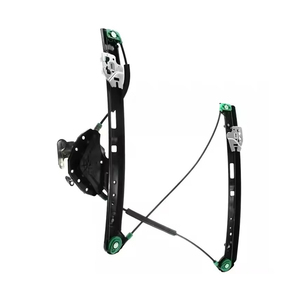
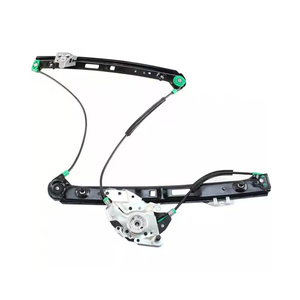
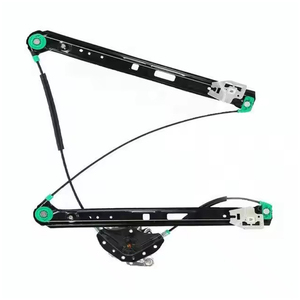
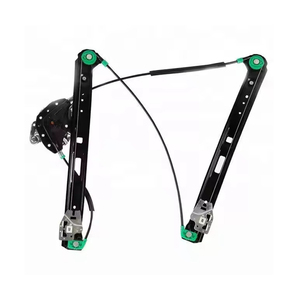
Power Window Regulators
Power window regulators employ electrical systems for automated operation. Key components include:
- Window motor, gear assembly, window track, and control switches
- Convenient one-touch operation from driver or passenger controls
- More complex design with additional electrical components
- Higher comfort level but may require more maintenance
Best for: Modern convenience and ease of use, especially in larger vehicles
Expert Tip: Power window regulators are by far the most common type found in E46 models. If you're replacing a regulator, verify whether your vehicle has the standard type or one with advanced features like one-touch operation or pinch protection.
Advanced Variations
One-Touch Up/Down Regulators
These advanced regulators allow complete window opening or closing with a single button press, utilizing additional sensors and control modules to detect window position.
Pinch Protection Regulators
Safety-enhanced regulators that automatically reverse window direction when an obstruction is detected, providing protection for children, pets, and objects.
Reinforced Component Regulators
Aftermarket options with upgraded motors, gears, and window tracks designed to improve durability, especially for high-performance vehicles or models with heavier windows.
| Regulator Type | Operation Method | Key Advantages | Common Issues |
|---|---|---|---|
| Manual | Hand-cranked mechanical system | Simple, reliable, low cost | Less convenient, requires physical effort |
| Power (Standard) | Electric motor with switch control | Convenient, effortless operation | More complex, potential electrical failures |
| Power (One-Touch) | Advanced electric with position memory | Maximum convenience, premium feature | Higher complexity, more expensive to replace |
| Power (Pinch Protection) | Electric with obstacle detection | Enhanced safety, prevents injuries | Requires calibration, sensitive sensors |
Specifications and Maintenance of E46 Window Regulators
Understanding the technical specifications and implementing proper maintenance procedures are essential for maximizing the lifespan and performance of your E46 window regulators.
Technical Specifications
| Specification | Description | Importance |
|---|---|---|
| Fitment | BMW 3 Series E46 (1998-2006) | Critical for proper installation and function |
| Location | Front/rear, driver/passenger side specific | Regulators are not interchangeable between positions |
| Regulator Type | Cable system or scissor mechanism | Affects durability and operation characteristics |
| Material | Steel or aluminum construction | Impacts weight, durability, and corrosion resistance |
| Window Motor | 12V DC electric motor (power versions) | Determines power consumption and operational speed |
| Glass Attachment | Clips and brackets for secure mounting | Critical for proper window movement and alignment |
| Load Capacity | Varies by window size and type | Must match window weight for reliable operation |
Maintenance Best Practices
Preventative Maintenance Tip: Regular maintenance significantly extends the lifespan of window regulators. A well-maintained regulator can last the lifetime of the vehicle, while neglected ones typically fail within 5-7 years.
Regular Lubrication
Apply silicone-based lubricant to moving parts every 6-12 months to reduce friction and wear. Focus on tracks, cables, and pivot points while avoiding electrical components.
Cleaning Procedures
Remove debris from window channels and door interiors quarterly. Use compressed air to clear dust from hard-to-reach areas and check for moisture accumulation that could lead to corrosion.
Electrical Inspection
Check wiring connections and harnesses annually for loose connections, fraying, or damage. Test switches and motors for proper response and consistent operation.
Window Alignment
Verify proper window alignment with weatherstripping and ensure smooth travel without binding. Adjust clips and brackets if necessary to maintain correct fitment.
Operational Practices
Avoid forcing windows against obstructions or ice. When encountering resistance, stop operation immediately to prevent motor or mechanism damage.
System Inspection
Perform comprehensive testing every 12-18 months. Listen for unusual noises, check for uneven movement, and verify full range of motion for all windows.
Warning: Continuing to operate a window regulator that makes grinding or popping noises can lead to catastrophic failure, potentially causing the window to fall into the door cavity or become permanently jammed.
How to Choose E46 Window Regulators
Selecting the appropriate window regulator for a BMW E46 requires careful consideration of several key factors to ensure compatibility, reliability, and value.
OEM vs. Aftermarket Options
When choosing between original equipment manufacturer (OEM) and aftermarket regulators, consider:
- OEM parts offer exact fitment and factory quality but at premium prices
- Reputable aftermarket brands can provide comparable quality at 30-50% lower cost
- Some aftermarket options include upgrades to address common failure points
- Warranty periods vary significantly between manufacturers
Price range: $80-200 for aftermarket, $150-350 for OEM
Critical Selection Criteria
To ensure you select the appropriate regulator for your needs:
- Verify exact vehicle fitment (year, model, door position)
- Confirm whether you need manual or power type
- Check if special features like one-touch or pinch protection are required
- Assess material quality, especially for plastic components
- Consider complete assemblies vs. regulator-only replacements
Expert advice: Complete assemblies save time but cost more
| Selection Factor | What to Look For | Why It Matters |
|---|---|---|
| Vehicle Fitment | Exact model year and door position compatibility | Ensures proper installation without modification |
| Window Position | Front/rear and driver/passenger specific models | Regulators are not interchangeable between doors |
| Window Type | Power vs. manual operation | Must match existing door configuration |
| Quality and Brand | Reputable manufacturers with positive reviews | Directly impacts durability and performance |
| Installation Complexity | Complete kits vs. regulator-only replacements | Affects installation time and additional parts needed |
| Warranty Coverage | Length and terms of manufacturer guarantee | Protects against premature failure and defects |
| Price | Competitive pricing with similar quality options | Value assessment based on quality and features |
Purchasing Tip: When buying regulators for resale or inventory, focus on front window regulators (especially driver's side) as these experience the most frequent use and highest failure rates. Stock reinforced versions for regions with extreme climate conditions where window operation is more stressful.
DIY Replacement of E46 Window Regulator
Replacing an E46 window regulator is a moderately complex DIY project that can save significant labor costs. With the right tools and careful attention to detail, most owners can complete this repair in 1-2 hours.
Before You Begin: This procedure requires careful handling of the window glass, which can break if mishandled. Work in a well-lit, clean area and consider having an assistant help with glass manipulation and tool handling.
Required Tools and Materials
- New E46 window regulator (specific to your door position)
- 10mm socket and ratchet
- T20 Torx driver
- Flathead screwdriver
- Trim removal tool
- Masking tape
- Silicone spray lubricant
- Clean rags
- Work gloves
Step-by-Step Replacement Procedure
-
Door Panel Removal
Use a trim removal tool to carefully pry around the edges of the door panel. Locate and remove the two screws holding the door panel (typically behind handles or in recessed areas). Disconnect the door handle cable and window switch electrical connections before fully removing the panel.
-
Electrical Disconnection
Use the T20 Torx driver to remove screws securing the door handle and window switch. Gently pull these components away from the door to access the electrical connections behind them. Press the release tabs and unplug all connectors.
-
Window Glass Removal
Roll the window down to access the mounting bolts. Use a 10mm socket to remove these bolts. Carefully lift the glass straight up and secure it to the top of the door frame using masking tape to prevent it from falling.
-
Regulator Removal
Locate and remove all mounting bolts (typically 10mm) that secure the window regulator to the door. There are usually 3-4 bolts around the perimeter. Disconnect the electric motor connector if present. Carefully maneuver the old regulator through the access hole in the door panel.
-
New Regulator Installation
Insert the new regulator through the door panel access hole. Position it correctly and secure it with the mounting bolts. Reconnect the electric motor connector, ensuring it clicks firmly into place. Apply a light coat of silicone lubricant to moving parts if not pre-lubricated.
-
Window Glass Reinstallation
Remove the tape securing the window glass. Carefully lower it into position and align it with the mounting points on the regulator. Reinstall and tighten the mounting bolts, ensuring they're secure but not overtightened.
-
Electrical Reconnection and Testing
Reconnect all electrical connections to the window switch and door handle. Before reassembling the door panel, test the window operation to ensure smooth movement throughout the full range of motion.
-
Door Panel Reassembly
Once satisfied with the window operation, reattach the door panel. Start by hooking the top edge, then press the panel into place around the perimeter. Reinstall all screws and clips, ensuring they're properly seated.
Caution: Do not force the window if you encounter resistance during testing. This could damage the new regulator or motor. If the window binds or makes unusual noises, recheck your installation before proceeding.
Frequently Asked Questions
Common indicators of window regulator failure include:
- Intermittent operation when using window controls
- Window glass that appears loose or falls down unexpectedly
- Grinding, rattling, or popping noises during window operation
- Uneven or jerky window movement
- Window becoming stuck in fully open or closed position
- Visible damage to regulator components when door panel is removed
Early detection of these symptoms can prevent complete failure and potentially save the window glass from damage.
It's not recommended to use window regulators from different BMW models or series in your E46. Each vehicle has unique door dimensions, mounting points, and electrical specifications. Using incompatible regulators can result in:
- Improper fitment requiring modification
- Window alignment issues causing wind noise or water leaks
- Damage to the window glass or door frame
- Electrical compatibility problems with power window systems
- Voided warranties on both the part and potentially other vehicle components
Always install regulators designed specifically for your E46's year, model, and door position to ensure proper fit and function.
The key differences between manual and power window regulators are:
| Feature | Manual Regulator | Power Regulator |
|---|---|---|
| Operation Method | Hand crank mechanism | Electric motor with switch control |
| User Interface | Rotating handle on door panel | Push-button switches on door panel |
| Power Source | Human physical effort | Vehicle electrical system |
| Complexity | Simple mechanical system | Complex electro-mechanical system |
| Cost | Lower purchase and replacement cost | Higher purchase and replacement cost |
| Additional Features | None | May include one-touch, auto-reverse, lockout |
Power window regulators are standard in most E46 models, but some base models or older vehicles might have manual systems.
If you're experiencing window regulator issues:
- Initial Diagnosis: Check fuses, inspect the window switch functionality, and listen for motor sounds when pressing controls
- Basic Troubleshooting: Test all windows to determine if the issue is isolated or electrical system-wide
- Temporary Measures: If the window is stuck down, use weather-resistant tape to cover the opening until repairs can be made
- Professional Assessment: If the cause isn't immediately apparent, consult a qualified mechanic for proper diagnosis
- Repair Options: Determine whether the issue requires switch replacement, motor repair, or complete regulator replacement
- Consider DIY vs. Professional Repair: Evaluate your skills and tools against the complexity of the required repair
Address window regulator issues promptly to maintain vehicle security and prevent potential water damage to interior components.