


Types of Fuel Sending Unit Float
A fuel sending unit float is a crucial component of a vehicle’s fuel measurement system. It provides an accurate reading of the fuel level within the tank by working in tandem with other parts of the sending unit mechanism. The float is typically made from buoyant materials such as plastic or metal and is attached to an arm that moves up and down depending on the fuel level. This movement affects a variable resistor (rheostat), which sends an electrical signal corresponding to the amount of fuel remaining.
The basic operation involves the float rising or falling with the fuel level. As the float moves, it pivots an arm connected to a spring and resistor. This changes the resistance value between two terminals, which is then interpreted by the fuel gauge on the dashboard. Modern systems may use current-producing units instead of resistors for more precise readings.
Resistor Type
This is the most commonly used type of fuel sending unit. It operates by changing resistance based on the position of the float arm. As the fuel level rises or falls, the resistance varies accordingly, transmitting this information to the analog fuel gauge.
Advantages
- Simple and reliable design
- Cost-effective manufacturing
- Compatible with traditional analog gauges
- Easy to replace and maintain
Limitations
- Less precise than digital alternatives
- Prone to wear over time
- Can give inaccurate readings when worn
Best for: Older vehicles, budget-conscious replacements, non-digital dashboards
Current Producing Type
Unlike resistor-based units, these modern systems generate a current proportional to the float's position. They provide more accurate and stable readings, especially when integrated with digital instrument clusters found in newer vehicles.
Advantages
- Highly accurate fuel readings
- Stable performance over time
- Works seamlessly with digital displays
- Improved durability under varied conditions
Limitations
- More complex construction
- Higher replacement cost
- Requires compatible electronics
Best for: Newer model cars, luxury vehicles, advanced driver interfaces
Metal Float
Metal floats are designed for vehicles that operate with aggressive fuel blends or in environments where plastic might degrade. Constructed from corrosion-resistant metals like stainless steel or aluminum, they offer enhanced longevity while maintaining the same operational principle as other types.
Advantages
- Superior resistance to harsh fuels
- Durable and long-lasting
- Corrosion-resistant properties
- Excellent structural integrity
Limitations
- Heavier than plastic options
- Higher production and replacement costs
- Potential for conductivity issues if not insulated properly
Best for: Diesel engines, heavy-duty trucks, industrial machinery
Plastic Float
Plastic floats are the most common choice in standard automotive applications due to their lightweight nature and resistance to typical fuel compositions. Made primarily from polyethylene or similar synthetic materials, they are cost-effective and widely available.
Advantages
- Lightweight and easy to install
- Cost-efficient manufacturing
- Resistant to most gasoline formulations
- Widely compatible across vehicle models
Limitations
- May degrade with ethanol-blended fuels
- Not suitable for extreme chemical exposure
- Prone to cracking after prolonged use
Best for: Standard passenger vehicles, economy cars, everyday driving conditions
| Type | Accuracy | Durability | Compatibility | Best Use Case |
|---|---|---|---|---|
| Resistor Type | Fair | Good | Excellent | Older vehicles, analog dashboards |
| Current Producing Type | Excellent | Very Good | Good | Newer cars, digital displays |
| Metal Float | Good | Excellent | Good | Heavy-duty vehicles, diesel engines |
| Plastic Float | Good | Good | Excellent | Standard cars, everyday driving |
Expert Tip: If your fuel gauge starts showing erratic readings or fails completely, inspect the fuel sending unit float first. A faulty float can cause incorrect fuel level indications and lead to unexpected fuel depletion during driving.
Maintenance Advice: When replacing a fuel sending unit, ensure you select the correct type for your vehicle's make, model, and year. Using an incompatible float type can result in poor performance, inaccurate readings, or premature failure.
Specifications and Maintenance of Fuel Sending Unit Float
Key Material Specifications
The fuel sending unit float is a critical component in accurately measuring and displaying the fuel level in your vehicle. Understanding its specifications helps ensure optimal performance and longevity:
Material Composition
Fuel sending unit floats are typically constructed from corrosion-resistant materials such as stainless steel, brass, or high-grade plastics. These materials are specifically chosen for their ability to withstand prolonged exposure to gasoline, diesel, ethanol blends, and other chemicals commonly found in modern fuels.
Stainless steel provides excellent durability and chemical resistance, making it ideal for long-term use. Brass offers similar benefits with slightly better electrical conductivity, while specialized plastic composites are lightweight and non-reactive, making them suitable for many applications without compromising accuracy.
Corrosion Resistance
Due to constant contact with fuel and potential moisture exposure, corrosion resistance is a vital specification for any fuel sending unit float. The chosen materials must resist oxidation, pitting, and chemical degradation over time.
Modern units often incorporate protective coatings or plating (such as nickel or chrome) to further enhance corrosion resistance. This ensures reliable operation throughout the vehicle's lifespan and prevents premature failure due to material breakdown inside the fuel tank.
Electrical and Functional Characteristics
Electrical Properties
The sending unit operates using a variable resistor (or potentiometer) mechanism that converts physical float movement into an electrical signal readable by the vehicle’s fuel gauge. As the fuel level changes, the float moves accordingly, altering the resistance value sent to the instrument cluster.
Precision-engineered resistors and contacts ensure consistent, stable readings without interference from other onboard electronics. High-quality carbon tracks and conductive elements help maintain accuracy even under varying voltage conditions and temperature fluctuations within the fuel tank environment.
Fuel Type Compatibility
To accommodate different fuel types—gasoline, diesel, E85 ethanol blends, and biodiesel—the sending unit float must be compatible with a wide range of chemical compositions. Manufacturers select materials based on their inertness to these fuels to prevent swelling, cracking, or deterioration.
This compatibility extends beyond just the float body to include all internal components like wiring insulation, seals, and resistor materials. Ensuring proper fuel type compatibility avoids costly replacements and maintains accurate fuel level monitoring across various operating conditions.
| Specification | Criticality | Design Considerations |
|---|---|---|
| Float Buoyancy | High | Must float reliably without absorbing fuel; density carefully balanced for stability |
| Resistor Tolerance | High | Maintains ±5% resistance accuracy for consistent gauge readings |
| Tank Fitment | Medium | Available in multiple configurations to match specific fuel tank geometries |
| Temperature Range | Medium | Operates effectively between -40°C to +120°C (-40°F to 248°F) |
Dimensional and Installation Factors
Fuel sending units are engineered to fit precisely within specific fuel tanks while allowing free float movement:
- Custom Fitments: Units are available in various arm lengths and mounting configurations to accommodate different vehicle makes and models.
- Float Size: Designed to provide sufficient buoyancy without obstructing fuel flow or interfering with pump operation.
- Mounting Options: Includes threaded flanges, bayonet mounts, and direct-fit designs depending on application requirements.
- Sealing Integrity: Incorporates durable O-rings or gaskets to prevent fuel leakage around the tank opening.
Essential Maintenance Practices
Regular maintenance of the fuel sending unit float helps preserve accuracy and extend service life:
Important: Always disconnect the vehicle battery before performing any work on the fuel system. Ensure proper ventilation when accessing fuel components, and follow all safety precautions outlined in the vehicle service manual.
How to Choose Fuel Sending Unit Float
Selecting the correct fuel sending unit float is essential for accurate fuel level readings and long-term reliability of your vehicle's fuel system. A properly chosen float ensures optimal performance, prevents gauge inaccuracies, and avoids unnecessary replacements or repairs.
Compatibility with Fuel System Components
The first and most critical consideration when choosing a fuel sending unit float is ensuring compatibility with your vehicle’s existing fuel system components. This includes the type of fuel sending unit, tank dimensions, and mounting configuration.
- Verify that the float arm length matches the design of your fuel tank
- Confirm that the float connects correctly to the wiper resistor assembly
- Ensure the mounting style (screw-in, clamp-style, etc.) aligns with your sending unit
Expert Tip: Always cross-reference part numbers with manufacturer specifications or consult a repair manual specific to your vehicle make and model.
Material Selection and Performance Characteristics
Fuel sending unit floats are available in various materials—each offering different benefits in terms of durability, buoyancy, and resistance to environmental factors.
- Foam floats: Lightweight and cost-effective but may absorb fuel over time, leading to inaccurate readings
- Plastic floats: Resistant to corrosion and commonly used in modern vehicles; offers good balance between weight and durability
- Metal floats: Typically made from brass or stainless steel; highly durable but heavier and more prone to wear on moving parts
Important Note: Avoid using foam floats in ethanol-blended fuels unless they are specifically designed to resist fuel absorption.
Environmental Conditions: Temperature and Pressure
Fuel systems operate under varying conditions depending on climate, altitude, and engine bay temperatures. The float must withstand these conditions without warping, cracking, or losing buoyancy.
- High-temperature environments can degrade plastic floats if not rated appropriately
- Pressurized fuel tanks require floats that maintain structural integrity under pressure
- Extreme cold can affect material flexibility, especially in lower-quality plastics
Pro Insight: For high-performance or off-road applications, consider upgraded metal or composite floats designed for thermal stability.
Corrosion Resistance and Longevity
In environments where moisture, road salts, or ethanol fuels are present, corrosion resistance becomes a vital factor in selecting a durable float.
- Stainless steel floats offer excellent corrosion resistance but may be overkill for standard passenger vehicles
- Ethanol-resistant plastic floats are ideal for modern fuel blends
- Coated metal floats provide an economical middle ground between durability and cost
Critical Recommendation: In marine or industrial applications, prioritize stainless steel or specialized composites to prevent premature failure due to chemical exposure.
Size, Shape, and Fuel Tank Geometry
The physical dimensions and shape of the float directly impact how accurately it tracks the fuel level within the tank. An ill-fitting float can result in erratic fuel gauge readings or even mechanical interference.
- Oval-shaped floats are common in rectangular tanks for smooth travel along the guide rod
- Circular floats work best in cylindrical or irregularly shaped tanks
- Floats should not rub against tank walls or interfere with internal baffles
Key Consideration: Custom or modified tanks may require custom-shaped floats to ensure accurate operation throughout the full range of motion.
Durability and Expected Lifespan
While price is often a factor, prioritizing durability can save money and hassle in the long run. High-quality floats last longer, reduce maintenance frequency, and provide consistent performance.
- Budget-friendly foam or basic plastic floats may need replacement every 3–5 years
- Mid-range plastic or coated metal floats typically last 5–7 years
- Premium stainless steel or composite floats can exceed 10 years of service life
Cost vs Value: Investing in a slightly more expensive float with better construction can prevent repeated replacements and diagnostic headaches.
Selection Advice: When replacing a fuel sending unit float, always inspect the entire fuel sender assembly for signs of wear or damage. A faulty resistor or corroded contacts can mimic float issues and lead to misdiagnosis. If unsure, opt for OEM-quality or premium aftermarket brands known for precision engineering and material quality.
| Float Type | Material | Lifespan | Best Applications |
|---|---|---|---|
| Basic Foam | Foam | 3–5 years | Economy cars, short-term use |
| Standard Plastic | ABS or Polyethylene | 5–7 years | Regular commuter vehicles |
| Coated Metal | Brass with epoxy coating | 7–10 years | Commercial vehicles, moderate ethanol use |
| Stainless Steel | 304 Stainless Steel | 10+ years | Marine, industrial, racing applications |
How to DIY and Replace Fuel Sending Unit Float
Replacing a fuel sending unit float is a moderately challenging but rewarding DIY task that can save you money while ensuring accurate fuel level readings on your dashboard. With the right tools, basic mechanical knowledge, and careful attention to safety protocols, this job can be completed successfully in a few hours.
Safety Warning: Working with fuel system components poses fire and health hazards. Always work in a well-ventilated area, keep open flames or sparks away, and wear protective gloves and eyewear. Have a fire extinguisher readily available during the procedure.
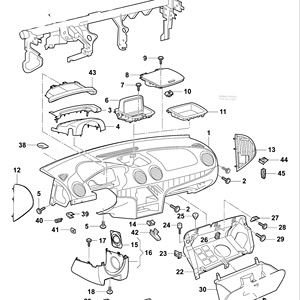
Understanding the Fuel Sending Unit
The fuel sending unit is a crucial component of your vehicle's fuel system, typically located inside or mounted on top of the fuel tank. It consists of a float mechanism connected to a variable resistor that sends an electrical signal to the fuel gauge. When the float wears out or becomes faulty, it can lead to inaccurate fuel readings or even complete failure of the fuel gauge.
Gathering Tools and Materials
Before beginning the replacement process, ensure you have all necessary tools and materials ready:
- New OEM or high-quality aftermarket fuel sending unit with float
- Socket set and ratchet
- Fuel line disconnect tool (varies by vehicle make/model)
- Flathead and Phillips screwdrivers
- Pliers and adjustable wrench
- Fuel-safe container for draining
- Jacking equipment (jack stands or ramps)
- Shop towels or rags
- Electrical contact cleaner (optional)
- New O-rings or gaskets if not included with the unit
DIY Tip: Consult your vehicle’s service manual for specific instructions related to your make and model. Some vehicles may require removing the rear seat or accessing the unit from inside the trunk through a removable panel.
Step-by-Step Replacement Guide
- Prepare the Vehicle
- Park on a level surface and turn off the ignition
- Engage the parking brake and chock the wheels for stability
- Relieve fuel pressure by locating and removing the fuel pump relay (usually found in the fuse box), then starting the engine until it stalls
- Battery Disconnection
- Safely disconnect the negative battery terminal to eliminate the risk of sparks or short circuits
- Accessing the Fuel Tank
- Determine access method based on your vehicle design:
- Undercarriage: Use jack stands to safely lift the vehicle
- Interior: Remove carpet and access panel in the trunk or rear floorboard
- If working under the car, support the fuel tank with a transmission jack or sturdy stand
- Drain fuel to at least half capacity using a siphon pump or drain plug (if available)
- Determine access method based on your vehicle design:
- Tank Removal (If Required)
- Remove fuel tank straps and any mounting bolts or clamps
- Carefully lower the tank while supporting its weight
- Disconnect fuel lines, vent hoses, and electrical connectors
- Removing the Old Sending Unit
- Locate the sending unit assembly on top of the fuel tank
- Disconnect remaining fuel lines, electrical connectors, and vent tubes
- Use a socket or wrench to loosen and remove the locking ring or bolts securing the sending unit
- Lift the unit straight up and out of the tank, being careful not to drop debris into the tank opening
- Installing the New Sending Unit
- Inspect the new unit to ensure the float moves freely and matches your original unit
- Install new O-rings or gaskets if needed
- Insert the new sending unit into the tank opening
- Secure it in place with the locking ring or bolts, tightening evenly to avoid warping
- Reconnect all fuel lines, electrical connectors, and vent hoses following your labels or notes
- Reassembly
- If removed, reinstall the fuel tank using proper lifting techniques
- Secure tank straps and mounting hardware
- Reconnect any remaining external fuel lines and electrical connections
- Replace interior panels or secure the fuel tank cover beneath the vehicle
- Final Testing
- Reconnect the battery's negative terminal
- Turn the ignition key to the "On" position without starting the engine to allow the fuel pump to prime
- Check for any fuel leaks or unusual smells
- Start the engine and verify that the fuel gauge operates correctly
- Monitor for warning lights on the dashboard
| Stage | Key Actions | Common Pitfalls | Recommended Tools |
|---|---|---|---|
| Preparation | Relieving fuel pressure, battery disconnection | Forgetting to relieve pressure, rushing steps | Fuse puller, socket set |
| Access | Proper jacking, panel removal | Improper support, damaged wiring | Jack stands, screwdrivers |
| Removal | Labeling connections, careful extraction | Dropping debris, damaged seals | Flashlight, marker |
| Installation | Correct orientation, sealing integrity | Cross-threaded fittings, misaligned float | New gaskets, torque wrench |
| Testing | Leak check, gauge verification | Driving with low fuel, ignoring warnings | Visual inspection, multimeter |
Environmental Responsibility: Properly dispose of old fuel sending units and any contaminated rags or fluids according to local environmental regulations. Many auto parts stores offer recycling services for used automotive components.
Post-Replacement Maintenance Tips
After completing the replacement, consider these additional tips to extend the life of your new fuel sending unit:
- Avoid running the tank completely empty regularly, as this accelerates float wear
- Use quality fuel from reputable stations to reduce sediment buildup
- Periodically inspect connections for corrosion or wear during routine maintenance
- If experiencing recurring issues, test the fuel pump pressure and wiring circuitry
Frequently Asked Questions About Fuel Sending Units
A faulty fuel sending unit can manifest through several telltale signs, including:
- Inconsistent fuel gauge readings – The needle may fluctuate randomly or freeze at a certain level regardless of the actual fuel level.
- Gauge stuck on empty – Even with fuel in the tank, the gauge remains at "E," which can be dangerous during long trips.
- False full readings – After refueling, the gauge might inaccurately show a full tank even when it's not.
- Fuel leaks – A leaking fuel sending unit can cause puddles under the vehicle and poses a significant fire hazard.
- Check Engine Light illumination – Issues with the fuel system may trigger onboard diagnostics, signaling a potential fault.
If any of these symptoms occur, it’s crucial to have the fuel sending unit tested by a certified mechanic to avoid further complications such as engine damage or safety risks.
Typically, a fuel sending unit lasts between 5 to 7 years, although this lifespan can vary based on several factors:
- Component quality – OEM (Original Equipment Manufacturer) units often outlast aftermarket alternatives, especially from lesser-known brands.
- Driving conditions – Frequent exposure to extreme temperatures, dusty environments, or rough terrain can accelerate wear.
- Fuel quality – Consistently using low-grade or contaminated fuel can contribute to premature failure of the sending unit and other fuel system components.
- Maintenance habits – Regular inspection and cleaning of the fuel system can extend the life of the sending unit significantly.
To maximize longevity, consider investing in high-quality replacement parts and maintaining regular service intervals as recommended by your vehicle manufacturer.
While it may be technically possible to operate a vehicle with a malfunctioning fuel sending unit, it is not advisable for several reasons:
- Erratic fuel gauge readings can lead to unexpected fuel depletion, stranding you in unsafe locations.
- The engine may run too lean (not enough fuel) or too rich (too much fuel), both of which can reduce performance and fuel efficiency while increasing emissions.
- Prolonged lean operation can damage sensitive components like the catalytic converter, leading to expensive repairs.
- Fuel leaks pose a serious fire risk and should be addressed immediately.
For safety and reliability, it's best to resolve fuel sending unit issues promptly rather than risking mechanical failure or hazardous situations.
Replacing a fuel sending unit is a moderately complex task that requires intermediate mechanical knowledge and proper tools. Here are key considerations before attempting a DIY replacement:
- Experience level – Those unfamiliar with fuel systems may find the process challenging and potentially risky due to flammable materials involved.
- Safety precautions – It's essential to disconnect the battery, relieve fuel pressure, and work in a well-ventilated area away from ignition sources.
- Access to tools – You'll likely need a socket set, screwdrivers, pliers, and possibly a multimeter to test the new unit before installation.
- Manufacturer instructions – Always refer to the vehicle’s repair manual or official documentation for step-by-step guidance tailored to your specific make and model.
If unsure about any part of the procedure, it’s safer and more reliable to have a professional technician perform the replacement to ensure everything functions correctly and safely.
If the issue continues after replacing the fuel sending unit, there could be other underlying causes within the fuel or electrical system. Consider the following possibilities:
- Electrical wiring issues – Faulty connections, damaged wires, or blown fuses in the fuel gauge circuit can mimic sending unit problems.
- Corroded connectors – Over time, corrosion can build up on terminals, disrupting signal transmission between the sending unit and the dashboard.
- Instrument cluster failure – Sometimes, the fuel gauge itself or the entire instrument panel may be defective, leading to incorrect readings.
- Ground connection problems – A poor ground can prevent the sending unit from communicating properly with the vehicle’s electronics.
In such cases, a qualified mechanic equipped with diagnostic tools can trace the root cause accurately. Attempting to guess the issue could result in unnecessary part replacements and wasted time.