


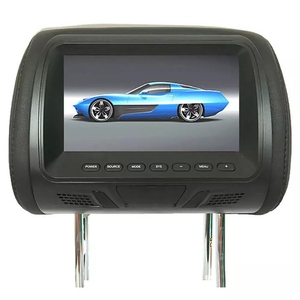
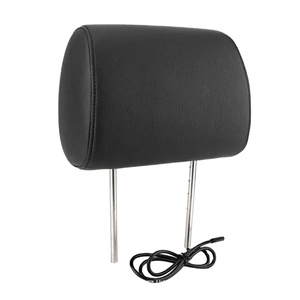
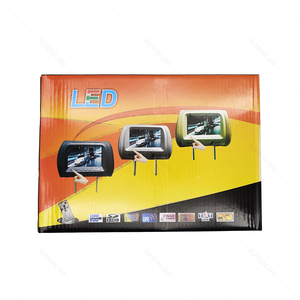
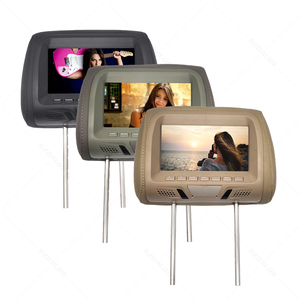

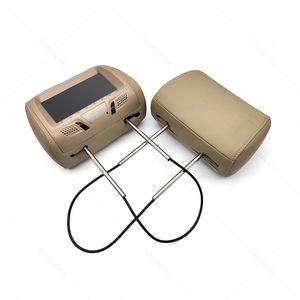


Types of Headrest TFT LCD Monitors With Pillow
A headrest TFT LCD monitor with pillow is a popular rear-seat entertainment solution that combines functionality and comfort in one sleek design. These monitors are commonly used in vehicles to provide passengers with visual entertainment during long trips, while the attached or integrated pillow enhances seating comfort. Available in various configurations, these devices cater to different user preferences, vehicle types, and budget ranges.
Built-in Monitors
These monitors are seamlessly integrated into the car’s headrest, offering a clean and unobtrusive look when not in use. They can be manually or automatically deployed and often feature advanced functionalities such as touchscreens, high-definition displays, and adjustable viewing angles.
Advantages
- Sleek, hidden design when retracted
- Touchscreen capabilities available
- High-resolution display options
- Custom-fit for specific car models
Limitations
- More expensive than universal models
- Installation may require professional help
- Limited portability
Best for: Luxury vehicles, permanent installations, drivers who prioritize aesthetics and seamless integration
Universal Monitors
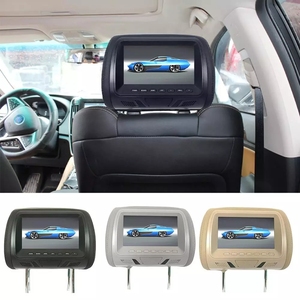
Designed for versatility, universal headrest monitors are compatible with most car models and are typically mounted onto existing headrests using straps or brackets. These units offer an easy DIY installation process and come in a variety of screen sizes and resolutions.
Advantages
- Easy to install without professional help
- Cost-effective option
- Available in multiple sizes (7” to 10.1”)
- Portable between vehicles
Limitations
- May appear bulkier than built-in models
- Less refined aesthetic
- Potential for movement if not properly secured
Best for: Budget-conscious buyers, families with multiple cars, temporary installations
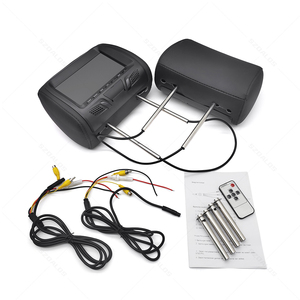
Single & Dual Monitor Systems
Single systems feature one monitor for shared viewing, while dual systems include two independent screens. The latter allows passengers to watch different content simultaneously, making them ideal for larger families or groups with varied entertainment preferences.
Advantages
- Dual systems allow personalized content per passenger
- Great for road trips with children or mixed-age groups
- Can share media via wireless connections
Limitations
- Dual systems cost more than single monitors
- Increased power consumption
- May take up more space in the car
Best for: Families with multiple children, frequent travelers, those needing flexibility in entertainment choices
TV Tuner Monitors
These monitors come equipped with a built-in TV tuner, allowing passengers to watch live television broadcasts during travel. Availability depends on regional broadcasting standards and whether the monitor supports analog or digital signals.
Advantages
- Access to live TV channels
- No need for external streaming devices
- Perfect for spontaneous travel plans
Limitations
- Signal quality may vary based on location
- Requires an antenna for reception
- Not suitable for all regions
Best for: Road trippers, rural areas with limited Wi-Fi access, viewers who prefer live programming
DVD/Blu-ray Monitors
Equipped with built-in optical disc players, these monitors allow playback of movies from DVDs or Blu-rays. Some models also support USB drives or SD cards for added media flexibility, making them ideal for movie lovers.
Advantages
- Independent media source (no internet required)
- Supports physical media collections
- Some models support external DVD players
Limitations
- Discs can be lost or scratched easily
- Heavier due to internal player
- Less modern compared to streaming-based alternatives
Best for: Traditionalists, parents with young kids, travelers without consistent internet access
Wireless & Bluetooth Monitors
These monitors connect wirelessly to smartphones, tablets, or portable media players, enabling seamless streaming of videos, music, or games. Bluetooth connectivity also allows pairing with headphones or speakers for enhanced audio experience.
Advantages
- Eliminates clutter of cables
- Supports mirroring and casting features
- Can stream from popular apps like YouTube, Netflix
- Bluetooth-enabled audio sync possible
Limitations
- Dependent on device compatibility
- Wi-Fi or mobile data required for streaming
- Potential latency issues during video playback
Best for: Tech-savvy users, families with multiple devices, modern car setups
Touchscreen vs Non-Touchscreen Monitors
Touchscreen monitors offer intuitive control through taps and swipes, enhancing user interaction. Non-touchscreen models rely on buttons or remote controls, which can be simpler for younger children or less tech-oriented users.
Advantages
- Touchscreens offer responsive, modern interface
- Easier navigation for younger users
- Enhanced interactivity with menus and settings
Limitations
- Higher cost than non-touch versions
- Screen smudges and fingerprints visible
- Remote or button-based models may be more durable
Best for: Users preferring interactive interfaces, families with older kids, tech enthusiasts
| Type | Ideal For | Pros | Cons | Price Range |
|---|---|---|---|---|
| Built-in | Luxury vehicles, integrated look | Seamless design, touchscreen options | Expensive, professional installation needed | $$$ - $$$$ |
| Universal | Multicar families, DIY users | Affordable, portable, easy setup | Bulkier, less stylish | $ - $$ |
| Single/Dual | Shared or individual viewing | Flexible content sharing | Higher cost for dual systems | $$ - $$$ |
| TV Tuner | Live TV watching on the go | No internet needed, instant access | Signal issues, region-dependent | $$ - $$$ |
| DVD/Blu-ray | Physical media users | Offline content, no streaming needed | Prone to disc damage, heavier | $$ - $$$ |
| Wireless/Bluetooth | Smartphone/tablet users | Cable-free, modern interface | Requires stable connection | $$ - $$$ |
| Touchscreen | Interactive UI preference | User-friendly, intuitive | More expensive, prone to smudges | $$ - $$$ |
Expert Tip: When choosing a wireless headrest monitor, ensure it supports Miracast or AirPlay for broader device compatibility. Also, consider models with HDMI input for future-proofing and connecting gaming consoles or external media boxes.
Specifications and Maintenance of Headrest TFT LCD Monitors with Pillow
Headrest TFT LCD monitors with pillows are a popular choice for in-car entertainment systems due to their combination of functionality, comfort, and style. These devices offer rear-seat passengers the ability to enjoy movies, games, and other multimedia content while traveling. Choosing the right monitor involves understanding key specifications that impact performance, usability, and compatibility with your vehicle.
Key Specifications to Consider
The following detailed breakdown of technical features will help you select the most suitable headrest monitor for your needs:
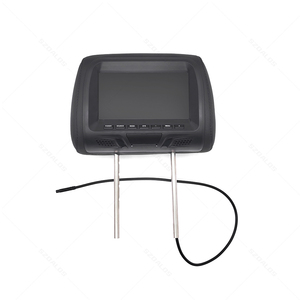
Screen Size and Resolution
Headrest monitors typically range from 7 to 12 inches in diagonal screen size. Larger screens provide an immersive viewing experience, particularly beneficial for watching movies or playing games, but may not be ideal for smaller vehicles where space is limited.
Resolution plays a crucial role in image clarity. While standard definition (SD) monitors are available at lower price points, HD-ready (1280x720) or even Full HD (1920x1080) resolution models deliver sharper visuals, especially when streaming or playing media from high-quality sources like Blu-ray players or modern gaming consoles.
Panel Type
Most headrest monitors use either IPS (In-Plane Switching) or VA (Vertical Alignment) panels. IPS panels are known for excellent color accuracy and wide viewing angles, making them ideal for situations where multiple passengers might view the screen from different angles.
VA panels, on the other hand, offer superior contrast ratios, which enhance detail in darker scenes. However, they can suffer from motion blur during fast-moving sequences. The choice between panel types depends on the primary usage scenario and personal preference.
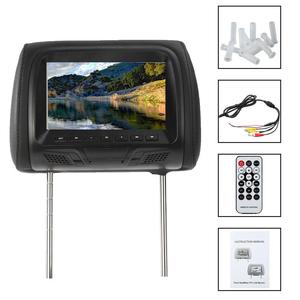
Connectivity Options
Versatile connectivity enhances the monitor’s usability. Most models come equipped with HDMI ports for connecting modern devices like gaming consoles, DVD/Blu-ray players, and streaming sticks. USB ports allow direct playback of media files from flash drives or charging mobile devices.
Additional AV input/output ports enable integration with existing car entertainment systems, allowing users to route audio through the vehicle’s speakers or daisy-chain multiple monitors together for multi-passenger setups.
Built-in Features
Some headrest monitors include built-in DVD players, eliminating the need for external media devices. Others feature digital tuners for over-the-air TV reception or wireless capabilities for Bluetooth headphones or Wi-Fi-based streaming.
USB hubs, SD card readers, and preloaded media content are additional conveniences that can significantly enhance user experience by reducing clutter and dependency on extra gadgets.
Contrast Ratio and Brightness
A good contrast ratio ensures vibrant images with deep blacks and bright whites. A minimum ratio of 1000:1 is recommended, though higher-end models often exceed 3000:1 for enhanced visual fidelity.
Brightness levels are equally important, especially for visibility in daylight conditions. Look for monitors offering at least 500 nits of brightness, with premium options reaching up to 800 nits to ensure clear visibility even under direct sunlight.
Adjustable Stand and Mounting Options
An adjustable stand allows users to tilt and swivel the monitor for optimal viewing angles. Some models also support rotation into landscape or portrait mode, depending on content type.
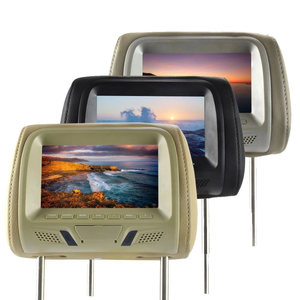
Mounting flexibility is crucial for universal fitment across various vehicle models. Monitors with customizable brackets, adjustable straps, or magnetic attachments offer greater adaptability and secure installation in sedans, SUVs, or minivans.
| Feature | Recommended Value | Why It Matters |
|---|---|---|
| Minimum Screen Size | 7 inches | Ensures adequate viewing area without compromising portability |
| Minimum Resolution | 1280x720 (HD Ready) | Provides clear and sharp video quality |
| Contrast Ratio | 1000:1 or higher | Enhances depth and realism in visuals |
| Brightness Level | 500+ nits | Guards against glare and maintains visibility in daylight |
| Connectivity Options | HDMI, USB, AV In/Out | Supports versatile device integration |
Maintenance Best Practices
To ensure long-term reliability and optimal performance of your headrest TFT LCD monitor with pillow, regular maintenance is essential. Here's how to keep your system in top condition:
Important: Never expose the monitor to extreme temperatures, moisture, or direct sunlight for prolonged periods. Doing so can cause permanent damage to the screen and internal circuitry. Always store the device in a cool, dry place when not in use.
How to Choose a Headrest TFT LCD Monitor with Pillow
Selecting the ideal headrest TFT LCD monitor with pillow involves evaluating several critical factors to ensure an enjoyable and functional viewing experience tailored to your specific needs. With numerous options available in the market, understanding these key features will help you make an informed decision.
Screen Size and Resolution
The size and resolution of the monitor are foundational considerations that directly impact user satisfaction. A larger screen enhances immersion, especially for movies or gaming, while higher resolution ensures sharper images and better detail clarity.
- Most headrest monitors range from 7” to 12”, with 9”–10” being optimal for most vehicles
- HD (1280x720) is standard, but Full HD (1920x1080) offers superior clarity for media consumption
- Consider the distance between the monitor and viewers when choosing screen size
Tip: Ensure the monitor fits securely within the headrest without obstructing driver visibility
Display Quality
Beyond resolution, display quality encompasses brightness, contrast ratio, and viewing angles — all crucial for maintaining clear visuals under varying lighting conditions such as direct sunlight or night driving.
- Look for at least 300 nits brightness for good daylight visibility
- High contrast ratios (above 1000:1) improve image depth and readability
- Wide viewing angles (170°+ horizontal/vertical) allow multiple passengers to see clearly
- OLED or QLED panels offer deeper blacks and more vibrant colors than standard LCDs
Note: Anti-glare screens can reduce reflections and improve comfort during long trips
Connectivity Options
Modern headrest monitors should support a variety of input sources to maximize entertainment flexibility. Consider both wired and wireless connectivity options depending on how you plan to use the device.
- HDMI ports allow connection to game consoles, streaming sticks, or set-top boxes
- USB ports can power devices or serve as media inputs for flash drives
- Bluetooth and Wi-Fi capabilities enable wireless streaming from smartphones or tablets
- Composite AV inputs remain useful for older devices
Bonus: Dual HDMI ports let two children watch different content simultaneously via separate devices
Mounting and Installation
Proper installation is vital for safety and usability. Most headrest monitors mount either behind the front seats or directly onto adjustable headrest poles, so it's important to assess compatibility with your vehicle type.
- Universal mounts fit most seat posts, but verify dimensions before purchase
- Adjustable arms allow rotation and tilt for optimal viewing angles
- Some models include swivel brackets for easy storage when not in use
- Check if tools or professional installation are required
Warning: Always follow manufacturer instructions to avoid loose mounting that could pose a hazard
Additional Features
Many modern headrest monitors come with added functionality that enhances convenience and enjoyment. These extras can significantly improve the overall value of your purchase.
- Reclining headrest pillows add comfort during long journeys
- Split-screen functionality allows dual users to watch different content
- Preloaded apps or smart TV platforms provide direct access to streaming services
- FM transmitters or headphone jacks offer private audio listening options
- Remote controls simplify operation from the back seat
Pro tip: Look for models with parental control settings to manage content access for children
Price and Value Consideration
Headrest monitors vary widely in price based on size, features, and brand reputation. Establishing a budget helps narrow down choices while ensuring you get the best value for your investment.
- Entry-level models start around $80–$120 with basic features
- Mid-range units ($150–$250) often include HD resolution and multiple inputs
- Premium systems ($300+) may offer OLED displays, smart functions, and dual screens
- Warranty length and customer support availability also affect long-term value
Investment advice: Prioritize essential features over unnecessary extras to avoid overspending
Buying Tip: Before making a final selection, read verified customer reviews and check return policies. Many online retailers offer return windows where you can test the monitor in your actual vehicle environment before committing permanently.
| Feature Category | Recommended Specifications | Minimum | Ideal | Premium |
|---|---|---|---|---|
| Screen Size | Viewing Experience | 7" | 9"-10" | 11"-12" |
| Resolution | Clarity | 800x480 | 1280x720 | 1920x1080 |
| Brightness | Sunlight Visibility | 250 nits | 300-400 nits | 500+ nits |
| Contrast Ratio | Image Depth | 500:1 | 1000:1 | 3000:1+ |
| Connectivity | Input Variety | AV + USB | HDMI + Bluetooth | Dual HDMI + Smart OS |
How to DIY and Replace Headrest TFT LCD Monitor With Pillow
Replacing a headrest TFT LCD monitor with a pillow-style unit is a manageable DIY project that can significantly enhance the entertainment experience for rear passengers in your vehicle. This upgrade typically involves removing the existing monitor, installing new mounting hardware if necessary, and connecting the electrical components properly. While the process is relatively straightforward, attention to detail is essential for ensuring functionality, safety, and aesthetics.
Safety Warning: Always disconnect the vehicle battery before working on electrical systems to avoid short circuits or damage. Handle sharp tools and small parts with care, and ensure children are not nearby during installation.
Step-by-Step Replacement Guide
- Preparation and Planning
- Confirm compatibility of the new pillow-style monitor with your vehicle’s make, model, and year
- Check if any additional mounting brackets or adapters are required
- Gather necessary tools: screwdrivers (flathead and Phillips), ratchet set, wire cutters/strippers, electrical tape, zip ties, and a multimeter (optional)
- Review the user manual for both the old and new monitors for wiring diagrams and specifications
- Ensure you have enough time — this job typically takes 1–3 hours depending on complexity
- Removing the Existing Monitor
- Turn off the vehicle and remove the key from the ignition
- Locate and remove the trim panel around the headrest monitor, using appropriate screwdrivers
- Disconnect all electrical connectors carefully — label them if multiple connections exist
- Unscrew or unclip the monitor from its mount, noting any unique fastening methods
- Set aside the old monitor in a safe place while working
- Installing the New Pillow Monitor
- Inspect the new pillow-style monitor and compare it to the original to verify fitment
- If needed, install any included mounting brackets onto the headrest
- Slide or clip the new monitor into place, ensuring it sits securely and doesn’t obstruct driver visibility
- Secure with screws or clips as specified in the manufacturer’s instructions
- Electrical Connections
- Match the wiring harness of the new monitor to the vehicle’s system
- Splice wires if necessary, using heat shrink tubing or electrical tape to insulate connections
- Use zip ties to organize and secure loose wires away from moving parts
- Double-check all connections before restoring power to the system
- Testing and Final Assembly
- Reconnect the vehicle battery or turn the ignition to accessory mode
- Power on the new monitor and test video input, audio output, and any remote control functions
- Adjust screen brightness, volume, and other settings via the provided controls or menu options
- Replace the headrest trim panel and ensure all fasteners are tightened properly
| Stage | Key Tasks | Common Mistakes | Recommended Tools |
|---|---|---|---|
| Preparation | Verify compatibility, gather tools, read manuals | Assuming universal fitment, skipping documentation | Service manual, measuring tape, camera |
| Dismantling Old Unit | Remove trim, disconnect wiring, unscrew monitor | Misplacing screws, damaging wiring harnesses | Screwdriver set, panel tool, marker for labeling |
| Mounting New Monitor | Install bracket, position pillow monitor, secure fit | Poor alignment, insecure mounting | Drill (if needed), level, wrench set |
| Wiring & Setup | Connect wiring, route cables neatly, test connections | Incorrect splicing, loose wires | Wire stripper, crimping tool, electrical tape |
| Final Testing | Test all features, reinstall trim, clean workspace | Rushing final checks, missing connections | Multimeter, cleaning cloth, owner's manual |
DIY Tip: Before fully securing the monitor, temporarily power it up to check screen positioning and viewing angles for optimal passenger comfort. Consider adding a fuse inline with the power wire for added electrical protection.
Additional Tips and Best Practices
- Label everything: Use masking tape and a marker to label each connector and wire before disassembly. This prevents confusion during reinstallation.
- Organize your workspace: Keep screws, clips, and tools sorted in labeled containers to avoid losing small parts.
- Double-check voltage: Ensure the new monitor operates on the same voltage as your vehicle’s electrical system (typically 12V DC).
- Consider wireless options: Some modern pillow monitors support wireless connectivity; plan for proper signal routing if applicable.
- Take photos: Document each step with your phone to help with reassembly and future reference.
Note: Specific installation steps may vary depending on the vehicle make and model, as well as the headrest monitor model. Always refer to the manufacturer’s instructions for the most accurate guidance tailored to your specific product. Taking the time to understand your system will lead to a smoother, safer, and more satisfying DIY experience.
Frequently Asked Questions About Headrest Monitors
Yes, you can watch television on certain types of headrest monitors. Monitors with built-in digital tuners are capable of receiving over-the-air (OTA) TV signals through an antenna, allowing passengers to view local broadcast channels such as ABC, NBC, or CBS without additional devices.
However, many headrest monitors do not come equipped with tuners by default. In such cases, you can still enjoy live TV by connecting external streaming devices like Roku, Amazon Fire Stick, or Apple TV via HDMI input. Alternatively, using mobile hotspots or signal boosters with compatible apps allows for streaming services like Hulu, YouTube TV, or Sling TV to be displayed directly on the monitor.
While most modern headrest monitors no longer include built-in DVD players due to the rise in digital media and streaming, some models—especially those designed for families or older systems—do feature integrated DVD playback functionality. These monitors typically support both CDs and DVDs, allowing direct playback from physical discs.
If your headrest monitor lacks a built-in DVD player, you can easily connect an external portable DVD player using AV cables or HDMI ports. This setup enables high-quality video playback from DVDs while maintaining compatibility with the monitor’s screen size and audio system. Additionally, some car entertainment kits offer all-in-one solutions that combine a monitor with a DVD player for convenience.
Absolutely! Most headrest monitors are well-suited for gaming, especially those with HDMI inputs. You can connect popular gaming consoles like the PlayStation, Xbox, or Nintendo Switch directly to the monitor, transforming it into a mobile gaming station during long trips.
The latency or input lag of the monitor is an important consideration for serious gamers. Some models are optimized for low latency, making them ideal for fast-paced games. For casual gaming experiences, even standard monitors provide sufficient performance. The portability of systems like the Nintendo Switch makes them particularly convenient for use with headrest monitors, offering seamless transitions between handheld and docked modes.
- Supported Devices: PlayStation, Xbox, Nintendo Switch, Steam Deck, etc.
- Connection Options: HDMI, USB, AV ports
- Audio Integration: Many monitors have built-in speakers or headphone jacks for immersive gameplay
Headrest monitors provide significant value beyond basic rear-seat entertainment. Their primary advantage lies in keeping passengers—especially children—occupied and entertained during long drives. By offering access to movies, TV shows, educational content, and interactive games, these monitors help reduce travel fatigue and make road trips more enjoyable.
Additionally, they contribute to a safer driving experience by minimizing distractions caused by restless backseat passengers. Parents often find them indispensable for managing behavior and encouraging quiet time while on the move. Some advanced headrest systems also allow for dual-screen setups, enabling multiple users to enjoy different content simultaneously via wireless headphones.
From a practical standpoint, headrest monitors can also serve as tools for navigation, vehicle diagnostics, or even as part of a broader infotainment system that supports front-to-back communication and control.
Many headrest monitors offer remote control options that allow the driver or front passenger to manage what’s being played on the rear screens. Basic systems may include a simple infrared or RF wireless remote, giving front-seat occupants the ability to power the monitor on or off, switch inputs, adjust volume, or select content.
More advanced systems integrate touchscreen displays directly into the headrest monitor, which passengers can use to navigate menus and choose their own entertainment. However, some premium setups go a step further by including front console integration—allowing the driver to control rear monitors via the car’s central infotainment screen.
This level of control ensures that parents or drivers maintain authority over content choices, volume levels, and usage duration, making it easier to enforce rules about screen time or appropriate material for younger passengers.