


Types of JS Alternators and Their Applications
A JS alternator is a crucial component in a vehicle’s electrical system that generates power to operate various onboard systems while the engine is running. It recharges the battery and powers lights, ignition systems, audio equipment, and other electrical accessories. The type of JS alternator used depends on several factors including the vehicle's make, model, year, and any additional electrical components installed.
1. JS Series Alternator
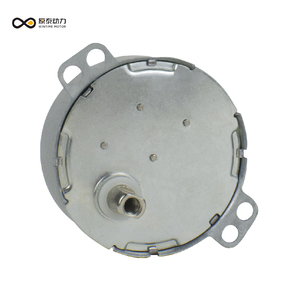
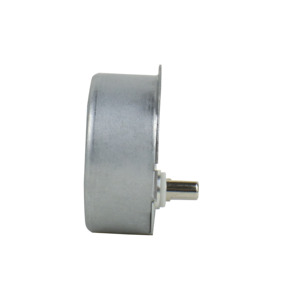
The standard JS Series Alternator is commonly found in vehicles with internal combustion engines. These alternators utilize electromagnetism to generate electricity efficiently. They consist of a rotor (the inner rotating part) with multiple magnetic poles, a stator (the outer stationary part), and winding coils. The vehicle's battery energizes the electromagnets in the rotor, and a belt connected to the crankshaft pulley spins the alternator to produce electrical energy.
Common models include the JS 100A, JS 120A, and JS 150A. The number indicates the amperage rating of the unit. Higher amperage alternators are essential for vehicles equipped with high-draw electrical systems such as premium audio setups, off-road lighting, or auxiliary power outlets.
Advantages
- Reliable performance under standard conditions
- Cost-effective replacement option
- Available in various amperage ratings
- Easy to install and maintain
Limitations
- Not suitable for high-power modifications
- May struggle with extreme electrical demands
- Standard efficiency levels
Best for: Standard passenger vehicles, light trucks, and daily drivers without extensive aftermarket electronics
2. High-Performance Alternators
High-performance JS alternators are engineered for vehicles with enhanced electrical needs. These units typically offer higher amperage output than standard models, allowing them to support demanding applications such as custom sound systems, LED light bars, winches, compressors, and more.
They are often used in modified cars, off-road vehicles, and specialty builds where consistent and robust power delivery is critical. Some versions also feature upgraded internal components like heavy-duty diodes and reinforced housings for improved durability.
Advantages
- Higher amperage output for demanding accessories
- Better voltage regulation under load
- Durable construction for harsh environments
- Improved heat dissipation
Limitations
- More expensive than standard units
- Heavier and may require mounting adjustments
- Overkill for basic vehicles
Best for: Modified vehicles, off-road rigs, car audio enthusiasts, and commercial vehicles with heavy electrical use
3. Dual Voltage Alternators
Dual-voltage JS alternators are specialized units designed to supply two distinct voltage outputs simultaneously. One output is typically 12V for standard vehicle systems, while the second can be 24V or another specified level to power auxiliary equipment such as emergency lighting, communication systems, or industrial tools mounted on the vehicle.
These alternators are especially useful in commercial, military, or emergency response vehicles where diverse electrical systems must coexist seamlessly. They often come with advanced control modules to manage power distribution effectively.
Advantages
- Supports dual electrical systems
- Ideal for specialized vehicle conversions
- Enhanced versatility in power delivery
- Integrated voltage management
Limitations
- Complex wiring and installation
- Higher cost and maintenance
- Limited availability compared to standard units
Best for: Emergency vehicles, mobile workshops, military vehicles, and multi-system commercial fleets
4. Variable Frequency Drive (VFD) Alternators
VFD JS alternators are advanced units designed for efficiency and reduced mechanical stress. Unlike traditional fixed-speed alternators, these alternators adjust their rotational speed based on demand, which helps conserve energy and reduce wear over time.
They are frequently used in commercial and industrial applications where precise power control is needed. VFD alternators can adapt to fluctuating loads, making them ideal for hybrid vehicles, electric assist systems, and large-scale machinery requiring stable electrical output.
Advantages
- Energy-efficient operation
- Reduced noise and vibration
- Precise output control
- Longer service life due to reduced stress
Limitations
- Higher initial investment
- Requires compatible vehicle electronics
- More complex diagnostics and repair
Best for: Hybrid vehicles, industrial equipment, commercial fleets, and applications requiring precision power management
5. High-Output Alternators
High-output JS alternators are built to deliver maximum electrical power even under challenging conditions. These alternators are optimized for reliability and continuous operation in high-demand environments. They often feature larger stators, upgraded rectifiers, and forced-air cooling systems to handle sustained high-load scenarios.
They are commonly found in vehicles with extensive electrical systems such as motorhomes, food trucks, emergency response vehicles, and off-grid mobile operations. These units ensure that all onboard systems remain fully powered without draining the battery.
Advantages
- Superior power output capacity
- Designed for continuous heavy use
- Robust build quality
- Excellent thermal management
Limitations
- Heavier and bulkier than standard units
- Higher cost and installation complexity
- May require upgraded belts and tensioners
Best for: Motorhomes, food trucks, emergency vehicles, and mobile command centers
| Type | Amperage Range | Efficiency | Best For | Key Features |
|---|---|---|---|---|
| JS Series Alternator | 90A–150A | Moderate | Standard vehicles, daily driving | Basic power generation, reliable operation |
| High-Performance Alternator | 150A–250A | High | Modified vehicles, car audio systems | Upgraded internals, high output |
| Dual Voltage Alternator | 12V + 24V | Moderate to High | Emergency vehicles, commercial conversions | Dual output capability, advanced controls |
| VFD Alternator | Adjustable | Very High | Hybrid vehicles, industrial applications | Variable speed, energy-efficient |
| High-Output Alternator | 200A–300A+ | High | Motorhomes, food trucks, emergency services | Heavy-duty design, superior cooling |
Expert Tip: When selecting a JS alternator, always consider your vehicle's base electrical requirements plus any additional accessories you plan to install. Choosing an alternator with at least 20% more output than your total draw ensures reliable performance and longevity.
Important: Installing an alternator that is not matched to your vehicle’s electrical system can cause damage to the battery, ECU, or other sensitive components. Always consult a professional mechanic or refer to manufacturer specifications before installation.
Specifications and Maintenance of JS Alternators
Understanding the technical specifications and proper maintenance practices for JS alternators is crucial to ensure consistent performance, prevent unexpected breakdowns, and extend component lifespan. These alternators are essential for powering vehicle electrical systems and maintaining battery charge under various operating conditions.
Key Technical Specifications of JS Alternators
The following specifications define the operational capabilities and efficiency of JS alternators across different applications:
Voltage Output
JS alternators are available in two standard voltage outputs: 12V and 24V. These values are critical for compatibility with the vehicle’s electrical system and battery type.
Stable voltage output ensures that sensitive electronics such as ECUs, lighting systems, and onboard computers receive a consistent power supply without risk of overvoltage or undervoltage damage.
Current Output Range
Designed to meet varying electrical demands, JS alternators offer current outputs ranging from 50A to 300A depending on model and application requirements.
This wide range allows them to efficiently power auxiliary components like air conditioning, audio systems, and advanced driver-assistance systems (ADAS) while maintaining reliable battery charging even under heavy loads.
Core Components – Rotors & Stators
The rotor and stator assembly is constructed using high-grade silicon steel laminations to minimize eddy current losses and improve magnetic efficiency during electricity generation.
Copper windings are used for both rotor and stator coils due to their superior conductivity, which enhances overall alternator efficiency and reduces heat buildup during operation.
Bearing Types and Performance
JS alternators incorporate either brass or ceramic bearings based on the model's design and intended usage environment.
Brass bearings provide excellent load-bearing capacity and wear resistance for heavy-duty applications, while ceramic bearings offer lightweight construction, corrosion resistance, and reduced friction for high-speed operations and extended service life.
Cooling System Design
To prevent thermal overload and maintain optimal operating temperatures, JS alternators feature an integrated cooling fan mounted directly on the rotor shaft.
This fan generates continuous airflow during operation, effectively dissipating heat from internal components such as the rectifier, regulator, and windings, especially under high-load conditions.
Voltage Regulation Technology
Each JS alternator includes a built-in voltage regulator made from durable, temperature-resistant materials to ensure stable voltage control throughout the alternator’s lifecycle.
This regulator dynamically adjusts output voltage based on real-time electrical demand, protecting connected systems from voltage spikes and ensuring efficient energy use across all driving conditions.
| Specification | Typical Values | Performance Impact |
|---|---|---|
| Voltage Output | 12V / 24V | Determines system compatibility and electronic safety |
| Current Output | 50A–300A | Affects charging speed and ability to power high-draw accessories |
| Material Quality | Silicon steel + copper windings | Impacts efficiency, longevity, and heat resistance |
| Bearing Type | Brass or Ceramic | Influences durability and rotational smoothness |
| Cooling Mechanism | Integrated Fan Cooling | Prevents overheating and prolongs component lifespan |
| Regulator Type | Internal Solid-State | Ensures voltage stability and protects electronics |
Recommended Maintenance Practices
Regular maintenance of JS alternators is essential to ensure continued reliability and prevent premature failure. The following procedures should be performed at recommended intervals:
Important: Always address any irregularities in alternator performance immediately. Delayed maintenance can result in complete electrical system failure, leaving the vehicle stranded and potentially damaging other components such as the battery and ECU.
How to Choose an Alternator
Selecting the right alternator for your vehicle is a critical decision that directly affects electrical system performance, fuel efficiency, and long-term reliability. A properly chosen alternator ensures all onboard electronics operate smoothly while maintaining battery charge under various driving conditions.
Understanding Power Requirements
Every vehicle has unique electrical demands based on factory equipment and aftermarket accessories. It's essential to calculate total wattage needs accurately to avoid underpowered systems or unnecessary overspending on high-output units.
- Start with the vehicle’s original equipment manufacturer (OEM) specifications
- Add power requirements for aftermarket devices like audio systems, lighting upgrades, and cooling fans
- Consider future modifications that may increase power demand
- Factor in seasonal variations—cold weather can increase electrical load on systems
Pro tip: Use a digital multimeter to test current draw under different operating conditions for precise measurements
Ensuring Proper Compatibility
An alternator must physically and functionally integrate seamlessly with your vehicle’s engine configuration. Mismatched components can lead to installation headaches, premature wear, or even complete system failure.
- Verify mounting points match your engine configuration (V-belt, serpentine belt, etc.)
- Check pulley alignment to prevent belt wear and slippage
- Confirm wiring harness compatibility and voltage regulator type
- Measure available space to ensure proper clearance for service access
Critical check: Compare dimensions with OEM unit before purchasing
Evaluating Quality and Reliability
The quality of construction materials and manufacturing processes significantly impacts an alternator’s longevity and performance consistency. Investing in quality upfront can save money and inconvenience over time.
- Look for sealed bearings and dust-resistant housings
- Choose units with thermal protection circuitry
- Premium models often feature upgraded diodes and regulators
- Consider remanufactured options from reputable suppliers
Quality indicator: Check for industry certifications like ISO 9001 or TS 16949
Warranty and Support Considerations
A comprehensive warranty package reflects the manufacturer's confidence in product durability and provides financial protection against unexpected failures. Equally important is access to technical support when issues arise.
- Compare coverage duration across manufacturers (typically 1-5 years)
- Understand what specific failures are covered
- Verify availability of replacement parts and service centers
- Research average response times for customer service inquiries
Warranty benefit: Lifetime exchange policies offer maximum protection
| Vehicle Type | Recommended Output Range | Special Features | Typical Lifespan |
|---|---|---|---|
| Compact commuter | 70-100 amps | Standard regulation | 7-10 years |
| Family SUV | 100-140 amps | Thermal protection | 5-8 years |
| Heavy-duty truck | 140-200+ amps | High-temp resistant components | 3-6 years |
| Race/performance car | 180-250+ amps | J-Spec rotor technology | Varies with usage |
Energy Efficiency Insight: J-Spec alternators represent the pinnacle of modern alternator engineering, featuring specialized magnetic rotors that reduce parasitic drag by up to 20%. This translates to measurable improvements in fuel economy and engine performance, particularly beneficial for vehicles with high electrical demands or those used in stop-and-go traffic conditions. When upgrading, consider these units if budget allows.
DIY Alternator Replacement Guide for JS Trucks and Similar Vehicles
Replacing an alternator is a common yet critical maintenance task that most vehicle owners can perform with basic mechanical skills. This comprehensive guide focuses on the process for JS trucks, though the principles apply to many modern vehicles. By following these steps carefully, you can safely replace your alternator and restore proper charging functionality to your vehicle's electrical system.
Safety Warning: Always disconnect the battery before working on any electrical components. Ensure your workspace is well-lit and ventilated, and use jack stands if lifting the vehicle. Wear protective gloves and eye protection throughout the process.
Preparation and Tools Required
Before beginning the replacement process, ensure you have all necessary tools and equipment within reach. Having everything prepared will streamline the process and reduce the risk of damaging components while searching for missing tools.
- Socket set (standard and deep sockets)
- Wrenches (open-end and combination wrenches)
- Belt tensioner tool or appropriate breaker bar
- Flathead and Phillips screwdrivers
- Jumper wires or multimeter for testing connections
- Jack and jack stands (if accessing from underneath)
- Gloves and safety glasses
- New JS alternator (or compatible replacement)
- Owner’s manual or repair guide specific to your vehicle model
Pro Tip: Take photos or make notes during disassembly to help with reassembly. Labeling each wire or connector can prevent confusion later in the process.
Step-by-Step Alternator Replacement Procedure
- Disconnect the Battery
This is the first and most important step. Locate the vehicle’s battery and disconnect the negative terminal first using a wrench or socket. This prevents accidental short circuits. If the positive terminal is easily accessible, you may also disconnect it for added safety.
- Remove the Drive Belt
The alternator is connected to the engine via a serpentine belt or V-belt. Use a belt tensioner tool or the appropriate wrench to relieve tension on the belt. Slide the belt off the alternator pulley and note its routing for reinstallation.
Note: Some vehicles have a diagram under the hood showing the correct belt routing. If not, take a photo before removing the belt.
- Unplug Electrical Connections
Locate all wiring harnesses connected to the alternator. These typically include a large power lead and one or more smaller connectors. Carefully unplug each connection and label them if needed. Use a multimeter to confirm there’s no residual voltage present before proceeding.
- Remove Mounting Hardware
Alternators are usually mounted with 2–3 bolts. Depending on your vehicle’s configuration, some bolts may be easier to access from above, while others might require working from underneath. Remove all mounting hardware and keep track of where each bolt was located.
- Lift the Vehicle (If Necessary)
If the alternator is difficult to reach from above, raise the vehicle using a floor jack and secure it on jack stands. Never work under a vehicle supported only by a jack. Ensure the vehicle is stable and secure before proceeding.
- Remove the Old Alternator
Once all connections and mounts are removed, gently pull the alternator free from its bracket. You may need to twist or angle it slightly depending on clearance. Set the old unit aside and dispose of it according to local regulations.
- Install the New Alternator
Position the new JS alternator into place, ensuring it aligns properly with the mounting brackets and belt path. Insert and hand-tighten all mounting bolts before fully tightening. Do not over-torque as this can damage the alternator housing.
- Reconnect Electrical Connections
Plug back in all wiring harnesses in the same order they were disconnected. Double-check that all connections are secure and properly seated. Loose connections can cause charging issues or electrical failures.
- Replace the Drive Belt
Slide the drive belt onto the alternator pulley and release the tensioner slowly to allow the belt to seat properly. Check the belt tension—there should be minimal deflection (typically around ½ inch when pressed). Replace the belt if it shows signs of wear or cracking.
- Reconnect the Battery
Reattach the battery terminals starting with the positive terminal followed by the negative. Tighten securely and inspect for corrosion. Apply a thin layer of dielectric grease to prevent future corrosion buildup.
- Test the Installation
Start the vehicle and check for any unusual noises coming from the alternator or belt. Use a multimeter to measure the alternator output at the battery terminals—it should read between 13.8V and 14.4V with the engine running. Verify that all lights, accessories, and dashboard indicators function correctly.
| Phase | Key Actions | Potential Mistakes | Recommended Tools |
|---|---|---|---|
| Preparation | Verify alternator compatibility, gather tools, consult owner’s manual | Mismatched alternator, missing specialty tools | Owner’s manual, camera for documentation |
| Disconnection | Battery disconnected first, electrical connections labeled | Skipping battery disconnection, mislabeled wires | Multimeter, zip ties, labels |
| Removal | All mounting bolts removed, alternator extracted safely | Damaged mounting points, dropped alternator | Socket set, extension bars |
| Installation | Secure mounting, proper belt tension, tight connections | Loose bolts, incorrect belt routing | Torque wrench, belt tension gauge |
| Testing | Voltage tested, accessories checked, belt noise monitored | Assuming success without testing | Multimeter, test drive checklist |
Post-Replacement Advice: After installation, monitor your vehicle’s charging system for the next few days. Watch for warning lights, dimming headlights, or unusual noises. A faulty alternator can drain your battery unexpectedly even after successful installation.
Frequently Asked Questions About Alternator Replacement
Replacing an alternator can vary significantly in duration depending on several key factors. For a skilled mechanic with proper tools, the process may take between 1 to 2 hours for straightforward setups. However, vehicles with limited engine bay space or complex layouts can extend the time required up to 5 hours. Factors influencing the timeline include:
- Vehicle make and model – Some cars have more accessible alternators than others.
- Alternator location – Front-mounted units are generally easier to access than those tucked away behind other components.
- Mechanic experience – A seasoned technician will work faster and more efficiently than someone new to automotive repair.
- Tool availability – Having the correct socket sizes and extensions can greatly reduce removal and installation times.
If you're attempting this as a DIY project for the first time, it's wise to allocate extra time to carefully follow instructions and ensure safety throughout the process.
While replacing the battery is not mandatory when installing a new alternator, there are important considerations that might make simultaneous replacement beneficial. The alternator and battery work together to maintain your vehicle’s electrical system, so if the battery shows any signs of weakness—such as slow cranking or dimming headlights—it might be nearing the end of its life cycle.
Some reasons to consider replacing the battery at the same time include:
- Avoiding future breakdowns – If one component fails, stress on the other increases.
- Ensuring optimal charging efficiency – A worn-out battery may not hold charge effectively even with a brand-new alternator.
- Cost savings – Labor charges may be reduced if both replacements are done simultaneously by a professional mechanic.
Before making a decision, it's advisable to test the battery using a multimeter or load tester to determine whether it still holds a sufficient charge and maintains proper voltage levels.
Yes, a malfunctioning alternator can have significant effects on a vehicle’s overall performance and functionality. Since the alternator is responsible for recharging the battery and powering the electrical systems while the engine runs, any issues with it can lead to a cascade of problems:
- Electrical failures – Components like lights, radio, air conditioning, and sensors may begin to fail or operate erratically.
- Engine stalling – A lack of consistent power can cause fuel injectors or ignition systems to misfire or stop working altogether.
- Battery drain – Without proper recharging, the battery will eventually deplete, leaving the car unable to start.
- Poor fuel economy – Faulty voltage regulation can impact engine control modules, leading to inefficient combustion and higher fuel consumption.
Warning signs of a failing alternator include dashboard warning lights (like the battery or check engine light), unusual noises from the engine area, dimming interior or exterior lights, and difficulty starting the car. Prompt diagnosis and repair are essential to avoid being stranded or causing further damage to the vehicle's electronics.
Replacing an alternator requires a set of basic hand tools commonly found in most home garages. Depending on your vehicle's design, you may also need some specialty tools to safely and efficiently complete the job. Here’s a comprehensive list of what you might need:
- Socket set – With metric and standard sizes (typically ranging from 8mm to 19mm).
- Ratchet and extension bar – For accessing bolts in tight spaces.
- Wrenches – Combination wrenches for loosening nuts and bolts that may be hard to reach with a socket.
- Screwdrivers – Both flathead and Phillips for removing panels or fasteners.
- Wire brush – To clean battery terminals and connections before reinstallation.
- Cable ties or zip ties – Useful for securing wires out of the way during the process.
- Jack and jack stands or ramps – If undercarriage access is required.
Some vehicles may require additional tools such as serpentine belt tools, torque wrenches for proper bolt tightening, or specialized sockets for specific fasteners. Always consult your vehicle’s service manual for recommended tools and procedures before beginning the replacement process.
While it's technically possible for someone without prior mechanical experience to replace an alternator, it is strongly discouraged unless you have access to detailed guidance and are comfortable following technical instructions step-by-step. This type of repair involves:
- Understanding vehicle electrical systems – Working around the battery and wiring requires caution to avoid short circuits or damage.
- Proper use of tools – Mishandling tools can result in personal injury or damage to surrounding components.
- Physical dexterity – Many alternators are located in cramped spaces, requiring careful maneuvering and flexibility.
- Time management – Inexperience often leads to extended labor times and potential frustration.
If you're determined to proceed without mechanical experience, here are some tips to improve your chances of success:
- Watch instructional videos tailored to your specific vehicle model.
- Read through repair manuals or online forums for common pitfalls and solutions.
- Gather all necessary tools and parts before beginning the job.
- Take photos or notes during disassembly to help with reassembly.
For most people, especially those unfamiliar with automotive repairs, having the work performed by a qualified mechanic is the safest and most reliable option. This ensures proper installation and reduces the risk of damaging expensive components or creating unsafe conditions.