Types of Oxygen Sensor for Vios 1.3L 1.5L
Oxygen sensors, also called O2 sensors, are electronic devices that measure the proportion of oxygen in gases. The sensors are used in the Toyota Vios to manage emissions and help fuel control. A failing oxygen sensor can result in increased fuel consumption. The car may also fail an emissions test. The Toyota Vios has two main types of oxygen sensors. They include:
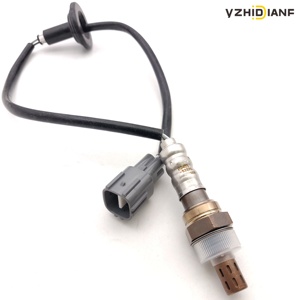
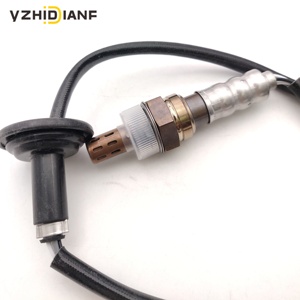
- Oxygen sensor 1 for vios 1.3l 1.5l: The upstream oxygen sensor is located before the catalytic converter. It monitors the level of emissions produced by the engine. The data collected by this sensor helps the Engine Control Unit (ECU) fine-tune the air-fuel mixture for optimal combustion. A healthy upstream sensor ensures that the engine runs efficiently. The Toyota Vios 1.3 and 1.5 models come with upstream O2 sensors, ensuring that the emissions levels are within the stipulated environmental standards.
- Oxygen sensor 2 for vios 1.3l 1.5l: This downstream oxygen sensor is located after the catalytic converter. It ensures that the emissions reduced by the converter are at the required standards level. The sensor's job is to ensure that the catalytic converter is functioning as required. If the readings from the downstream sensor don't match the upstream one, it could indicate a problem with the catalytic converter. However, if the Vios's downstream O2 sensor throws a code, it could mean that the catalytic converter is not cleaning the emissions as it should.
By utilizing both upstream and downstream sensors, the Toyota Vios 1.3 and 1.5 models can optimize fuel efficiency and minimize emissions. In turn, this helps improve engine performance. The oxygen sensors work together, communicating with the ECU to ensure that the engine maintains the ideal air-fuel ratio.
Specification and maintenance of Oxygen Sensor for Vios 1.3l 1.5l
Specifications of the Toyota V1 oxygen sensor vary depending on the make and year of the car. Here are some common specifications:
- The supply voltage of the Vios oxygen sensor ranges from 0.1 to 0.5 volts.
- Oxygen sensors have a high response time of 100 milliseconds (ms) to 300 ms, allowing them to detect changes in oxygen levels in exhaust quickly.
- The low response time of the Vios oxygen sensor ranges from 10 mV to 100 mV.
- The sensor's sensitivity to change is 20 mV, making it a reliable tool for measuring oxygen levels in exhaust.
- Vios oxygen sensors have an output impedance of 200 ohms, allowing them to transmit data quickly and accurately.
- Some oxygen sensors for Vios 1.3l and 1.5l have a heating element that helps heat the sensor quickly and get accurate readings in no time.
Regardless of the specifications, here are some general tips on maintaining oxygen sensors:
- Maintain the correct air-fuel ratio in the car. When the air-fuel ratio is disturbed, the oxygen sensor is forced to work harder, which can damage it over time.
- Avoid using leaded gasoline, as lead is a poison that can kill the oxygen sensor and prevent it from working effectively.
- Regularly change the engine oil, as used engine oil can contaminate the oxygen sensor and affect its performance.
- Avoid using high oil-level engine additives, as they may not be necessary and can potentially harm the oxygen sensor over time.
- Keep the engine in good condition. A well-tuned engine will produce fewer emissions and put less stress on the oxygen sensor, helping it last longer.
- Avoid excessive idling, as prolonged idling can cause the sensor to become dirty and degrade its performance.
How to Choose an Oxygen Sensor for Vios 1.3L 1.5L
There are a number of factors that need to be considered before purchasing an oxygen sensor for a Toyota Vios 1.3L or 1.5L model. These are:
- Ensure the oxygen sensor is compatible with the Vios: Make sure the sensor is compatible with the car exhaust system and engine control. It should be able to read the exact air and fuel mixture needed by the engine.
- Check the warranty and reliability of the sensor: When choosing a sensor to buy, consider the reliability and warranty of the supplier or manufacturer. Choose a product with a longer warranty period. This shows that the manufacturer or supplier trusts the quality of their product.
- Consider the price of the sensor: Before purchasing an oxygen sensor, consider the price. Make sure it is within the set budget. However, do not go for the cheapest offers, as they may be of low quality. Remember that quality sensors may have a higher price.
By so doing, the Toyota Vios will have a new oxygen sensor that will enable it to perform better.
How to DIY and Replace Oxygen Sensor For Vios 1.3l 1.5l
Here’s how to replace an oxygen sensor in a Toyota Vios:
- Gather necessary tools: Users will need a new oxygen sensor, oxygen sensor socket or 22mm wrench, ratchet extension, torque wrench, jack and jack stands or ramps, and safety glasses.
- Find the sensor: The Vios’s engine V will have 1 or 2 oxygen sensors before the catalytic converter, while the V’s engine V will have 1 sensor after the catalytic converter. Using the vehicle’s service manual as a guide, locate the oxygen sensor(s) in the Vios.
- Prepare the vehicle: Ensure the vehicle is parked on a level surface, then engage the parking brake. To access the oxygen sensor, raise the vehicle using ramps or a jack and secure it with jack stands. Allow the exhaust to cool before handling it.
- Disconnect the electrical connector: In the Vios, press the tab on the oxygen sensor’s electrical connector to disconnect it. Slide the connector out of its retention clip.
- Remove the old sensor: Use an oxygen sensor socket or a 22mm wrench to loosen and remove the old sensor from the exhaust pipe. Turn it counterclockwise. If the sensor is stuck, use penetrating oil to help loosen it.
- Install the new sensor: Clean the threads of the sensor port in the exhaust pipe. Apply anti-seize compound (if provided) to the threads of the new sensor. Carefully thread the new sensor into the exhaust pipe. Use the socket or wrench to tighten it gently. Follow the torque specifications in the vehicle’s service manual.
- Reconnect the electrical connector: Ensure the notch and tab align on the new sensor’s connector. Push it into place until it clicks. Then, slide it into the retention clip.
- Complete the installation: Lower the vehicle if it was raised. Start the engine and allow it to idle. Ensure there are no exhaust leaks around the new sensor. The check engine light should turn off after a few driving cycles if the new sensor is correctly installed.
Q and A
Q1: How often should an oxygen sensor be changed?
A1: Oxygen sensors are designed to last between 30,000 and 100,000 miles. However, the lifespan can vary depending on the sensor type and driving conditions. It's important to replace faulty sensors as soon as possible to avoid further engine damage.
Q2: Can a car run with a faulty oxygen sensor?
A2: A faulty oxygen sensor will not immediately stop the car from running. However, it can cause long-term damage to other engine components, such as the catalytic converter. The car may also run inefficiently, leading to increased fuel costs.
Q3: Is it expensive to replace an oxygen sensor?
A3: The cost of replacing an oxygen sensor varies depending on the sensor location and the mechanic's labor costs. Prices typically range from $100 to $300. However, addressing a faulty sensor early can save money in the long run by improving fuel efficiency and preventing engine damage.
Q4: Can DIYers change the oxygen sensor themselves?
A4: Yes, changing the oxygen sensor is a relatively straightforward task that many DIYers can undertake. There are many online guides and videos available, step-by-step instructions for replacing oxygen sensors. However, it's essential to use the correct type of sensor for the specific vehicle.
Q5: What is the warranty period for oxygen sensors?
A5: Warranty periods vary depending on the supplier and the product. However, most oxygen sensors have a warranty of 12 to 24 months. Some suppliers offer a warranty extension for loyal customers.