


Types of PWM Switch
A pulse-width modulation (PWM) switch is a fundamental component used in modern electronics to efficiently control the power delivered to various loads such as motors, LEDs, and other electrical devices. By rapidly switching the power on and off at a high frequency, a PWM switch regulates the average power output based on the duty cycle—the percentage of time the signal is "on" during each cycle. This method allows for precise control with minimal energy loss, making it ideal for applications where efficiency and performance are critical.
The key advantage of using a PWM switch lies in its ability to maintain full voltage across the load while varying the current flow through timing adjustments. This results in more accurate control over motor speed, LED brightness, or other variable power requirements without significant heat dissipation or inefficiencies commonly associated with linear control methods.
Linear PWM Switch
Unlike traditional PWM switches that operate by toggling between fully on and fully off states, a linear PWM switch modulates the current in a controlled analog manner while still maintaining digital-like precision. It's particularly useful in applications requiring smooth transitions and fine-tuned control, such as LED dimming systems where flicker-free operation and consistent color temperature are essential.
Advantages
- Provides smooth and flicker-free dimming
- Maintains consistent color accuracy in LEDs
- Offers precise current regulation
- Excellent for low-noise applications
Limitations
- Less efficient compared to standard PWM
- Can generate more heat under certain conditions
- More complex circuitry required
Best for: High-end lighting systems, professional photography setups, LED displays
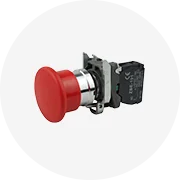
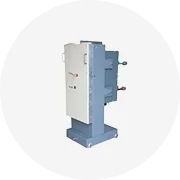
High-side PWM Switch
A high-side PWM switch controls the connection between the power supply and the load from the positive side of the circuit. This type of switch is typically used when grounding the load directly isn't feasible or safe, such as in automotive systems or industrial equipment where multiple loads share a common ground. It ensures that the load remains isolated until activated, enhancing safety and system integrity.
Advantages
- Safe isolation of load when off
- Compatible with grounded systems
- Effective for motor and solenoid control
- Supports complex power management schemes
Limitations
- Requires higher-side driver circuitry
- More complex design than low-side alternatives
- Higher cost due to specialized components
Best for: Automotive electronics, industrial automation, battery-powered systems
Low-side PWM Switch
A low-side PWM switch operates by controlling the ground path of the circuit rather than the power supply. This configuration is widely used due to its simplicity and cost-effectiveness. The switch connects or disconnects the load from the ground, effectively regulating the amount of current flowing through the device. Common implementations use N-channel MOSFETs or bipolar junction transistors (BJTs), which are both affordable and easy to integrate into circuits.
Advantages
- Simple and economical design
- Easy integration with microcontrollers
- Effective for basic motor and LED control
- Widely available components
Limitations
- Load always connected to power supply
- Not suitable for shared ground systems
- Potential for ground loop issues
Best for: Hobbyist projects, basic robotics, consumer electronics
| Type | Control Side | Complexity | Efficiency | Typical Use Case |
|---|---|---|---|---|
| Linear PWM | Analog-regulated | High | Moderate | Professional lighting, audio equipment |
| High-side PWM | Positive terminal | Moderate | High | Automotive, industrial control systems |
| Low-side PWM | Ground side | Low | High | Hobby electronics, simple motor control |
Expert Tip: When designing with high-side PWM switches, always ensure proper gate drive voltage levels are maintained, especially when working with high-voltage systems. Using dedicated high-side drivers or bootstrap circuits can help prevent improper switching and potential damage to components.
Specifications and Maintenance of PWM Switches
A Pulse Width Modulation (PWM) switch is an essential electronic component in modern vehicles, responsible for controlling power delivery to various systems such as fans, lights, and motorized components. Proper understanding of its specifications and regular maintenance ensures optimal performance, energy efficiency, and longevity.
Key Specifications of a PWM Switch
When selecting or evaluating a PWM switch, several technical parameters must be considered to ensure compatibility and reliability:
Voltage Rating
PWM switches are designed for specific voltage ranges—commonly 12V or 24V DC for automotive applications. Exceeding this range can lead to overheating or electrical failure.
Always verify the system’s voltage before installation to avoid damage to the switch or connected devices.
Current Capacity
The maximum current (measured in amps) that the switch can handle without overheating is crucial. Typical ratings range from 5A to 30A depending on design and application.
Exceeding the rated current capacity may cause premature wear or even permanent failure of the switch.
Duty Cycle Range
This refers to the percentage of time the switch is "on" during each cycle. A standard automotive PWM switch typically operates within a 0–100% duty cycle range.
This feature allows precise control over output levels, making it ideal for dimming lights or regulating motor speeds.
Frequency Rating
The switching frequency determines how quickly the signal cycles between on and off states. Automotive PWM switches often operate between 100Hz and 20kHz.
Higher frequencies reduce audible noise and improve smoothness but may generate more heat depending on load conditions.
| Specification | Description | Typical Value |
|---|---|---|
| Operating Voltage | Maximum voltage the switch can safely handle | 12V or 24V DC |
| Max Current | Maximum current the switch can regulate | 5A–30A |
| Duty Cycle Range | Adjustable on/off ratio for power modulation | 0–100% |
| Switching Frequency | Rate at which the switch toggles between states | 100Hz–20kHz |
Essential Maintenance Practices
To ensure long-term reliability and consistent performance of your PWM switch, regular maintenance is necessary. Below are expanded guidelines for proper care:
Important: Always disconnect the vehicle’s battery before performing any maintenance or replacement work on the PWM switch. This prevents accidental short circuits and protects both the user and the vehicle's electrical system.
How to Choose a PWM Switch for Retail Applications
Selecting the right Pulse Width Modulation (PWM) switch is crucial for ensuring efficient control, long-term reliability, and user satisfaction in retail environments. Whether you're outfitting commercial equipment, consumer electronics, or industrial systems, making an informed choice will enhance both performance and safety.
Understanding Load Requirements
The first step in choosing a PWM switch involves evaluating the electrical load it will manage. This includes understanding not only the steady-state current and voltage but also transient spikes such as inrush currents that can stress components during startup.
- Always check the maximum continuous current and voltage ratings of the switch
- Consider peak loads like motor startup surges or capacitor charging spikes
- Select switches with a safety margin—typically 20% above expected maximums
Key consideration: Undersized switches may overheat or fail prematurely under excessive load
Selecting the Right Switch Type
Different applications demand different types of PWM switches, each offering unique advantages depending on the form factor, control method, and interface requirements.
- Rotary switches: Ideal for analog-style control like fan speed or audio volume adjustment
- Push-button/tactile switches: Compact options suited for portable devices or embedded panels
- Touch-sensitive switches: Provide sleek, modern interfaces often used in smart appliances and digital displays
Design tip: Match the switch type to the intended user interaction style and available space
Control Circuit Compatibility
PWM switches don't operate in isolation—they must integrate seamlessly with the existing control system, whether that's a simple microcontroller or a complex industrial PLC setup.
- Verify signal voltage compatibility (e.g., 3.3V vs 5V logic levels)
- Check for required communication protocols (I²C, SPI, UART)
- Ensure proper driver circuitry exists for high-side or low-side switching
Technical note: Some switches require additional buffering or level shifting circuits
Ergonomics and User Experience Design
In retail settings where customer interaction matters, the tactile and visual feedback of a PWM switch significantly impacts user satisfaction and perceived product quality.
- Tactile feedback helps users confirm actuation without visual confirmation
- LED indicators or backlit designs improve visibility in low-light conditions
- Switch size and shape should match ergonomic guidelines for finger placement
Retail insight: Consider how the switch integrates into overall product aesthetics and usability
Environmental Durability Tip: If the PWM switch will be exposed to moisture, dust, or extreme temperatures, look for models with appropriate IP ratings (like IP65 for water resistance) and corrosion-resistant materials. This is especially important for outdoor kiosks, food service equipment, or industrial vending machines.
| Application Type | Recommended Switch Type | Typical Voltage Range | Minimum Current Rating |
|---|---|---|---|
| Consumer electronics | Miniature tactile or touch | 3.3V - 5V | 0.1A - 0.5A |
| Commercial HVAC controls | Rotary or push-button | 12V - 24V DC | 1A - 5A |
| Industrial equipment | Heavy-duty rotary or sealed | 24V - 48V DC | 5A - 15A |
| Outdoor kiosks | Waterproof touch or sealed | 12V - 24V DC | 1A - 10A |
Cost, Availability, and Supplier Support
Beyond technical specifications, business considerations play a critical role in selecting PWM switches for retail distribution. The total cost of ownership includes not just component pricing but also logistics, support, and potential warranty implications.
- Compare unit costs across suppliers while maintaining quality standards
- Verify minimum order quantities (MOQs) and lead times
- Assess supplier track record for consistent supply and technical support
Strategic advice: Prioritize components with multiple sourcing options to avoid supply chain disruptions
How to DIY and Replace PWM Switch
Replacing a Pulse Width Modulation (PWM) switch can be an essential repair for many electronic devices, especially those that rely on variable speed control or power regulation. While the concept of PWM circuitry might seem complex, replacing a faulty PWM switch in common household items or small electronics is actually a manageable task with basic tools and a bit of patience.
Safety Warning: Always ensure the device is completely disconnected from all power sources before beginning any work. For battery-powered devices, remove all batteries. Working with electrical components poses risks of electric shock or damage to the device if not handled properly.
Understanding the PWM Switch
PWM switches are commonly used in electronics to control the amount of power delivered to a component by rapidly switching it on and off at different intervals. This method is efficient and allows precise control over motors, LEDs, fans, and other components without significant energy loss. When these switches fail, you may notice erratic behavior, reduced performance, or complete failure of the device's adjustable functions.
Step-by-Step Replacement Process
- Power Down and Disconnection
- Turn off the device using its main power switch if available
- Unplug the device from any wall outlet or power source
- For battery-operated devices, remove all batteries to ensure no residual power remains
- Casing Removal
- Use the appropriate screwdriver (typically Phillips or flathead) to remove casing screws
- Some devices may have hidden screws under rubber feet or labels – check carefully
- Keep track of all screws and components as you disassemble the device
- Locating the PWM Switch
- Identify the switch connected to the circuit board with several soldered pins
- The switch may be labeled on the PCB or resemble a small toggle or rotary switch
- If unsure, consult the device manual or look up service diagrams online
- Documentation
- Take clear photographs of the current wiring configuration
- Make notes about any specific orientation or connections that might be important
- This will serve as reference during reassembly with the new switch
- Desoldering the Old Switch
- Heat each solder joint with a soldering iron while gently pulling the switch away
- Use desoldering braid or a solder sucker to remove excess solder from the holes
- Be careful not to damage surrounding components or lift copper traces from the PCB
- Cleaning the Area
- Gently clean the solder pads and surrounding area with isopropyl alcohol (90% or higher)
- This removes flux residue and ensures good conductivity for the new switch
- Allow the board to dry completely before proceeding
- Installing the New Switch
- Select a replacement switch that matches the specifications of the original
- Align the new switch with the solder pads on the circuit board
- Ensure proper orientation based on your documentation
- Soldering the New Component
- Apply a small amount of fresh solder to each pin connection
- Avoid creating bridges between adjacent solder points
- Double-check all connections once soldering is complete
- Reassembly
- Secure the device casing back into place
- Replace all screws in their original positions
- Ensure no wires or components are pinched when closing the case
- Power Restoration
- Reinsert batteries or connect the device to its power source
- Do not turn the device on immediately – allow time for capacitors to charge if applicable
- Check for any signs of overheating or unusual smells
- Final Testing
- Turn on the device and test the functionality of the new PWM switch
- Verify that all speed/power settings operate correctly
- Monitor the device for several minutes to ensure stable operation
| Replacement Stage | Key Actions | Potential Issues | Required Tools/Materials |
|---|---|---|---|
| Preparation | Device disconnection, tool gathering | Incomplete power removal, missing tools | Phillips/flathead screwdrivers, safety gloves |
| Disassembly | Casing removal, switch location | Damaged casing, lost screws | Plastic prying tools, magnetic tray |
| Old Switch Removal | Desoldering, cleaning | PCB trace damage, incomplete desoldering | Soldering iron, desoldering braid/sucker |
| New Switch Installation | Alignment, soldering | Misalignment, solder bridges | Replacement switch, flux, solder |
| Testing | Function verification | Intermittent connections, incorrect operation | Multimeter, magnifying glass |
Expert Tip: Before starting the replacement, research the exact model number of the switch to ensure compatibility. Some PWM switches have specific orientation requirements, so double-checking this before soldering can save time and prevent potential damage to the circuit board.
Troubleshooting After Replacement
If the device doesn't function correctly after replacement:
- Double-check all solder joints for cold solder connections or bridges
- Verify that the new switch has been installed in the correct orientation
- Test the continuity of the new switch with a multimeter if possible
- Ensure all other components were properly reconnected during reassembly
- If problems persist, consult a professional technician for further diagnosis
Pulse Width Modulation (PWM) Switches – Frequently Asked Questions
A1: Pulse Width Modulation (PWM) switches are versatile control devices widely used across many industries and applications. While they are common in industrial automation, motor control, LED dimming, and power regulation systems, they are not limited to these uses. Anyone with a basic understanding of electronics can use a PWM switch, provided that the component matches the technical requirements of their project.
Key factors to consider before using a PWM switch include:
- Voltage and current ratings: Ensure the switch can handle the electrical load.
- Duty cycle range: Confirm compatibility with your control system's output signal.
- Environmental conditions: Consider temperature, humidity, and exposure to dust or vibration.
With proper selection and installation, PWM switches can be safely and effectively employed in both professional and DIY settings.
A2: Yes, several important safety considerations must be taken into account when working with PWM switches to ensure safe operation and prevent hazards:
- Proper rating: The switch must be rated for the voltage, current, and power levels of the connected load to avoid overheating or failure.
- Overload protection: Install appropriate fuses or circuit breakers to protect against overcurrent situations.
- Correct wiring: Follow manufacturer guidelines for wiring connections to prevent shorts, arcing, or incorrect polarity.
- Heat dissipation: Adequate ventilation or heatsinking may be necessary depending on the switching frequency and load.
- Insulation and isolation: Use insulated enclosures and isolate high-voltage circuits from user-accessible components.
Adhering to these safety practices helps reduce risks such as fire, electric shock, and equipment damage, making PWM switches a reliable option when handled responsibly.
A3: Absolutely — PWM switches are especially advantageous in battery-powered applications due to their ability to precisely regulate power delivery while minimizing energy waste. By rapidly cycling the power on and off at a controlled duty cycle, PWM technology enables:
- Extended battery life: Precise control reduces unnecessary power consumption.
- Efficient motor speed control: Ideal for robotics, drones, and portable tools.
- Better brightness control: Used in LED lighting systems to adjust light output without flickering.
- Thermal management: Reduces heat generation in motors and other loads, which is critical in compact, battery-operated devices.
These benefits make PWM switches a popular choice in applications like portable electronics, remote-controlled vehicles, handheld power tools, and wearable tech where energy efficiency and performance are essential.
A4: PWM switches generally do not require specialized maintenance beyond standard care for electronic components. However, regular inspection and upkeep can help maintain reliability and longevity:
- Cleaning: Dust, dirt, and debris can accumulate over time, potentially affecting thermal performance and connectivity. Periodically clean the switch and surrounding area.
- Connection checks: Ensure all terminals remain tight and free of corrosion, especially in environments with vibration or moisture.
- Performance monitoring: Listen for unusual buzzing or observe erratic behavior, which could indicate wear or misalignment in the switching circuitry.
- Environmental protection: In harsh conditions, consider protective covers or coatings to guard against moisture, chemicals, or extreme temperatures.
By maintaining a clean, secure, and stable operating environment, you can ensure consistent performance and minimize unexpected failures in PWM-based systems.
A5: Yes, PWM switches can be effectively used to control heating elements by modulating the average power delivered to the element. This method allows precise temperature control while avoiding the inefficiencies of analog control methods. However, several key considerations apply:
- Switching frequency: Lower frequencies are often preferred for resistive heating elements to prevent electromagnetic interference (EMI) and thermal stress.
- Load type: Some heating elements, particularly those with long response times (like ceramic heaters), respond well to PWM control.
- Component durability: High-frequency switching can cause wear on mechanical relays; using solid-state relays (SSRs) with PWM can enhance lifespan and reliability.
- Control accuracy: Properly tuned PID controllers combined with PWM can provide excellent temperature stability in industrial and consumer heating systems.
In summary, PWM is a viable and efficient method for controlling heating elements, especially when paired with suitable control algorithms and hardware components tailored to the specific application needs.