


Types of Suzuki Alto Lambda Sensors
The Suzuki Alto lambda sensor, also known as an oxygen sensor, is a crucial component in the vehicle's emissions control system. This part plays a vital role in monitoring the amount of oxygen present in the exhaust gases, enabling the engine control unit (ECU) to adjust the air-fuel mixture for optimal combustion. Proper functioning of the lambda sensors ensures better fuel efficiency, reduced harmful emissions, and smoother engine performance.
There are two primary types of lambda sensors used in the Suzuki Alto model lineup, each serving a distinct function in maintaining engine efficiency and compliance with environmental standards:
Lambda Sensor 1
This sensor is strategically positioned in the exhaust system before the catalytic converter. Its main function is to measure the oxygen content in the exhaust gases exiting the engine cylinders. The data collected by this sensor is sent directly to the ECU, which uses it to fine-tune the air-fuel ratio in real-time for maximum combustion efficiency.
Advantages
- Directly influences fuel economy
- Optimizes engine performance
- Helps reduce unburned hydrocarbons
- Improves cold-start emissions
Limitations
- Exposure to high-temperature exhaust gases
- May degrade faster than Sensor 2
- Fault can trigger rich or lean engine conditions
Best for: Maintaining proper air-fuel mixture, improving fuel efficiency, and reducing emissions at the source
Lambda Sensor 2
Installed after the catalytic converter, this sensor acts as a diagnostic tool for the emissions system. Unlike Sensor 1, its primary purpose isn't to adjust the air-fuel mixture but rather to monitor how effectively the catalytic converter is cleaning the exhaust gases. By comparing readings from both sensors, the ECU can determine if the catalytic converter is functioning within acceptable parameters.
Advantages
- Monitors catalytic converter efficiency
- Helps maintain emissions compliance
- Triggers warning system when issues arise
- Supports long-term environmental compliance
Limitations
- Less direct impact on engine performance
- May not show symptoms until catalytic failure occurs
- Can be difficult to access for replacement
Best for: Ensuring proper catalytic converter operation and supporting emission control system diagnostics
| Type | Location | Primary Function | Impact on Engine | Replacement Priority |
|---|---|---|---|---|
| Lambda Sensor 1 | Before catalytic converter | Measures pre-conversion oxygen levels | High - affects fuel delivery and combustion | High - critical for engine efficiency |
| Lambda Sensor 2 | After catalytic converter | Monitors post-conversion emissions | Moderate - mainly affects emissions compliance | Moderate - important for inspection compliance |
Expert Tip: When replacing lambda sensors in your Suzuki Alto, always use OEM-quality parts or equivalent replacements. Inferior sensors may provide inaccurate readings that can lead to poor fuel economy, increased emissions, and potential damage to the catalytic converter over time.
Importance of Lambda Sensors in Suzuki Alto
Both lambda sensors work together to ensure the Suzuki Alto maintains optimal engine performance while minimizing environmental impact. A properly functioning Sensor 1 helps achieve the ideal stoichiometric air-fuel ratio of 14.7:1, which maximizes fuel efficiency and minimizes harmful emissions. Meanwhile, Sensor 2 plays a crucial role in verifying that the catalytic converter is effectively reducing pollutants like carbon monoxide, nitrogen oxides, and hydrocarbons.
Common symptoms of failing lambda sensors include:
- Increased fuel consumption
- Rough idling or misfires
- Illuminated check engine light
- Failed emissions test
- Poor acceleration response
Regular maintenance and timely replacement of faulty lambda sensors are essential for keeping your Suzuki Alto running efficiently and ensuring compliance with local emissions regulations. Most manufacturers recommend inspecting these sensors during regular service intervals and replacing them every 60,000 to 100,000 miles, depending on driving conditions and sensor type.
Specification and Maintenance of Suzuki Alto Lambda Sensor
The lambda sensor (also known as the oxygen sensor) plays a crucial role in your Suzuki Alto's engine management system. It measures the amount of oxygen in the exhaust gases and helps the Engine Control Unit (ECU) adjust the air-fuel mixture for optimal combustion efficiency. Proper understanding of its specifications and maintenance is essential for maintaining performance, fuel economy, and emissions compliance.
Detailed Specifications of the Suzuki Alto Lambda Sensor
Below are the key technical specifications that define the performance and functionality of the lambda sensor in the Suzuki Alto:
Voltage Output
The lambda sensor generates an electrical signal measured in microvolts (µV), which indicates whether the air-fuel mixture is rich or lean. A typical zirconium-based sensor produces between 0.1V and 0.9V — with lower voltages indicating a lean mixture and higher voltages indicating a rich mixture.
This voltage signal is continuously monitored by the ECU to fine-tune the fuel injection rate and maintain the ideal air-fuel ratio of approximately 14.7:1 for gasoline engines.
Operating Temperature
Zirconium dioxide sensors require a minimum operating temperature of around 600°C to function effectively. These sensors typically include an internal heating element to reach this temperature quickly during cold starts.
Newer wideband lambda sensors, such as those using titania or planar ceramic technology, may operate at slightly lower temperatures and provide more accurate readings across a broader range of conditions.
Response Time (Time Constant)
The response time, or time constant (TC), refers to how quickly the sensor reacts to changes in the oxygen content of the exhaust. In most lambda sensors, this value ranges between 10 and 20 seconds.
A faster TC ensures more precise real-time adjustments by the ECU, improving engine responsiveness and emission control. Slower response times can lead to poor fuel economy and increased emissions.
Durability and Lifespan
Lambda sensors are engineered for long-term reliability, but their lifespan can be significantly impacted by factors like prolonged exposure to high temperatures, contamination from substances such as sulfur or lead in low-quality fuel, and mechanical stress from engine misfires or oil burning.
A degraded lambda sensor can result in incorrect air-fuel mixture calculations, reduced engine performance, and increased emissions. Regular monitoring and timely replacement are key to avoiding these issues.
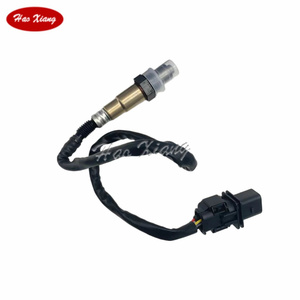
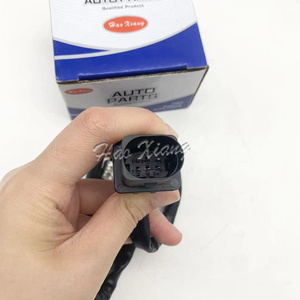
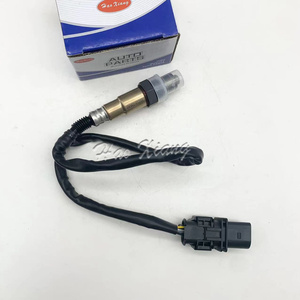
Wiring and Electrical Configuration
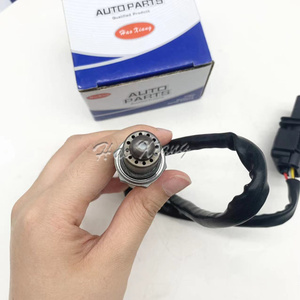
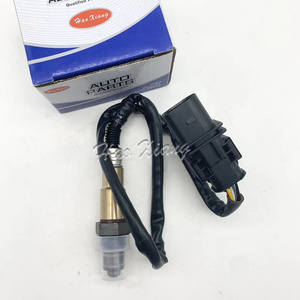
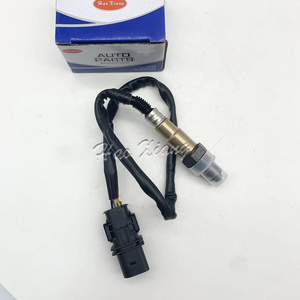
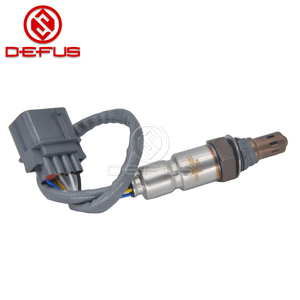
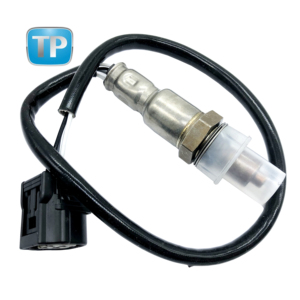
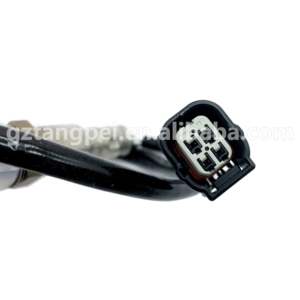
Suzuki Alto lambda sensors typically have five wires: three connected to the heater circuit and two connected to the sensing element. The wiring is usually made of heat-resistant aluminum or copper alloys to withstand underhood temperatures.
The sensing element's resistance changes based on the oxygen levels in the exhaust, which is detected by the ECU through a microvoltmeter. This data is used to dynamically adjust the fuel injection timing and volume.
| Specification | Details | Impact on Performance |
|---|---|---|
| Voltage Range | 0.1V – 0.9V | Determines ECU's ability to adjust fuel delivery accurately |
| Minimum Operating Temp | ~600°C (zirconium type) | Affects startup performance and warm-up emissions |
| Response Time (TC) | 10–20 seconds | Influences real-time fuel adjustment and engine smoothness |
| Number of Wires | Typically 5 (3 heater, 2 sensor) | Ensures stable operation and rapid warm-up |
Maintenance Practices for Optimal Lambda Sensor Function
Proper maintenance of the lambda sensor ensures your Suzuki Alto runs efficiently and meets emissions standards. Here are essential practices to follow:
Important: Never ignore a malfunctioning lambda sensor. Doing so can lead to increased fuel consumption, higher emissions, and potential damage to the catalytic converter. Always ensure the sensor is functioning properly, especially before emissions testing.
How to Choose a Lambda Sensor for Suzuki Alto
The lambda sensor, also known as the oxygen sensor, is a crucial component of your Suzuki Alto’s engine management system. It plays a vital role in maintaining optimal fuel efficiency, reducing harmful emissions, and ensuring smooth engine operation. Choosing the correct lambda sensor involves more than just finding a part that fits—it requires understanding technical specifications, compatibility factors, and performance expectations.
Understanding the Role of a Lambda Sensor
A lambda sensor measures the amount of oxygen in the exhaust gases and sends this information to the Engine Control Unit (ECU). The ECU then adjusts the air-fuel mixture to maintain the ideal stoichiometric ratio (14.7:1 for gasoline engines), which maximizes combustion efficiency and minimizes emissions. A faulty or incompatible sensor can lead to poor fuel economy, increased emissions, rough idling, and even engine damage over time.
1. Vehicle Compatibility
Ensuring proper fitment with your specific Suzuki Alto model year and engine configuration is the first and most critical step. Different generations of the Alto may have variations in engine design, exhaust layout, and sensor location.
- Check your vehicle's VIN code to confirm exact specifications
- Consult your owner’s manual or a parts catalog for OEM reference numbers
- Verify if your model uses front (pre-catalytic) or rear (post-catalytic) sensors
Pro tip: Some models may require multiple sensors—be sure to identify which one you're replacing.
2. Quality and Reliability
Given the harsh environment in which lambda sensors operate (high heat, exposure to exhaust chemicals), selecting a durable and reliable sensor is essential. Low-quality sensors can fail prematurely, leading to recurring issues and additional costs.
- Look for sensors from brands with ISO certifications or OE-level quality standards
- Consider corrosion-resistant materials like stainless steel housings
- Ensure the sensor has protective coatings against contaminants
Note: Reputable manufacturers often provide test data showing sensor longevity under real-world conditions.
3. OEM vs. Aftermarket Sensors
While Original Equipment Manufacturer (OEM) sensors are designed specifically for your Suzuki Alto and offer guaranteed compatibility, they come at a premium price. Aftermarket options can be cost-effective but vary significantly in quality and reliability.
- OEM: Factory-tested, plug-and-play installation, often longer warranty
- Aftermarket: Varies by brand; some high-end aftermarket sensors match or exceed OEM performance
- Hybrid options: Some aftermarket brands license OE technology for better performance
Recommendation: For long-term reliability, consider OEM or premium-tier aftermarket brands like Bosch, Denso, or NGK.
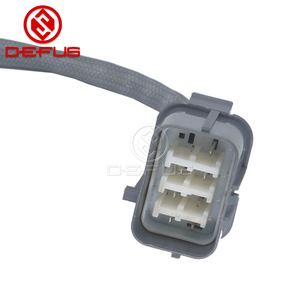
4. Wiring and Connector Match
Lambda sensors use different wiring configurations depending on their type and function. Ensuring that the wiring harness and connector match your existing setup is crucial for proper installation and functionality.
- Single-wire sensors: Older analog types
- Multi-wire sensors: Modern digital types with heater elements
- Universal sensors: Require splicing wires (not recommended unless necessary)
Caution: Incorrect wiring can cause check engine lights, poor performance, or even damage the ECU.
5. Sensor Type: Zirconia vs. Solid Electrolyte
Zirconia sensors are the most commonly used in modern vehicles, including the Suzuki Alto. They generate their own voltage signal based on oxygen content. Solid electrolyte sensors, sometimes called wideband sensors, offer more precise readings but are typically found in higher-performance vehicles.
- Zirconia: Common in standard Alters; binary rich/lean output
- Wideband (solid electrolyte): More accurate air-fuel ratio measurement, often used in modified or turbocharged models
- Heated vs. unheated: Heated sensors warm up faster and last longer
Key point: Check your vehicle’s original equipment specification before upgrading.
6. Operating Temperature Range
Lambda sensors must function reliably in extreme temperatures, typically ranging from 300°C to 900°C in the exhaust stream. Selecting a sensor rated for your vehicle’s operating conditions ensures longevity and consistent performance.
- Standard range: 300–650°C for normal driving conditions
- High-temperature variants: Up to 900°C for turbocharged or performance-modified engines
- Thermal shock resistance: Important for frequent cold starts and short trips
Insider advice: Look for sensors with integrated heating elements for quicker response times.
Expert Tip: If you’re unsure about which sensor to choose, look up the original part number stamped on your current sensor and search using that number. This method guarantees compatibility and simplifies selection.
| Factor | Recommended Feature | Why It Matters |
|---|---|---|
| Compatibility | Exact fit for Suzuki Alto model/year | Ensures proper mounting and ECU communication |
| Quality Level | OEM or premium aftermarket | Guarantees durability and accuracy |
| Wiring | Same pin count and connector style | Prevents miscommunication and error codes |
| Sensor Type | Zirconia (standard) or Wideband (if applicable) | Matches engine management system requirements |
| Temperature Rating | 300–650°C (standard) or higher | Maintains accuracy across all driving conditions |
| Warranty | At least 1-year coverage | Provides peace of mind and protection against defects |
Final Considerations
Selecting the right lambda sensor for your Suzuki Alto is an investment in your vehicle’s performance, efficiency, and environmental compliance. Always prioritize compatibility, quality, and proper installation. Whether choosing OEM or a trusted aftermarket brand, ensure that the sensor meets or exceeds the factory specifications for your specific model.
Remember: A properly functioning lambda sensor contributes to smoother engine operation, better fuel economy, lower emissions, and extended engine life. Don’t compromise on quality when it comes to such a vital component.
DIY Replacement Guide for Suzuki Alto Lambda Sensor
Replacing the lambda sensor (also known as an oxygen sensor) in your Suzuki Alto is a straightforward task that can significantly improve your vehicle's fuel efficiency and emissions performance. The lambda sensor plays a critical role in monitoring the amount of oxygen in the exhaust gases, allowing the engine control unit (ECU) to adjust the air-fuel mixture accordingly.
The Suzuki Alto typically has one catalytic converter, meaning it will have a single lambda sensor. This sensor is located in the exhaust system between the engine down pipe and the front silencer. Due to its position and surrounding components, accessing the sensor may require some careful maneuvering, but with the right tools and approach, this can be completed by most DIYers in under two hours.
Safety Warning: Always ensure the engine is completely cool before beginning work. Exhaust systems retain heat for a long time after shutdown and can cause burns. Wear protective gloves and eye protection when working underneath the vehicle.
Understanding the Lambda Sensor's Role
The lambda sensor provides real-time feedback to the ECU about the oxygen content in the exhaust stream. A faulty or aging sensor can lead to poor fuel economy, rough idling, failed emissions tests, and even check engine light illumination. Replacing a worn-out lambda sensor ensures optimal engine performance and helps maintain compliance with environmental regulations.
Tools Required for Replacement
- 10mm socket
- 22mm deep ratchet
- 8” extension bar
- 45-degree angle driver
- 10mm ring spanner
- 22mm 6-sided crow foot wrench
- Clean rag or wire brush for thread cleaning
- New OEM-compatible lambda sensor
Step-by-Step Replacement Procedure
- Engine Preparation
- Turn off the ignition and allow the engine and exhaust system to cool completely.
- If possible, raise the vehicle on ramps or jack stands for better access (ensure proper safety precautions are taken).
- Locating the Sensor
- Consult your Suzuki Alto service manual if you're unsure of the exact location.
- In most models, the lambda sensor is mounted on the exhaust manifold or just after the downpipe, before the catalytic converter.
- Disconnecting Electrical Connection
- Identify the electrical connector attached to the sensor.
- Press the release tab and carefully pull the connector away from the sensor.
- Use needle-nose pliers if necessary, but avoid damaging the wiring harness.
- Removing the Old Sensor
- Attach the appropriate tool (22mm crow foot or deep socket) to the sensor base.
- If the sensor is rusted, apply penetrating oil and let it sit for a few minutes before attempting removal.
- Turn counterclockwise to loosen and remove the old sensor from the exhaust pipe.
- Preparing for Installation
- Inspect the threaded hole in the exhaust pipe for debris or corrosion.
- Use a wire brush or clean rag to remove any buildup from the threads to ensure a secure fit.
- Installing the New Sensor
- Hand-thread the new lambda sensor into the hole to prevent cross-threading.
- Once started, use your ratchet or wrench to tighten it securely—but not excessively—until snug.
- Over-tightening can damage the sensor or make future replacements more difficult.
- Reconnecting the Wiring
- Align the electrical connector with the new sensor and press until it clicks into place.
- Double-check that the connection is secure and no pins are bent or misaligned.
- Final Testing
- Start the engine and let it idle while observing the dashboard for any warning lights.
- Take the vehicle for a short test drive to monitor performance and ensure no error codes return.
- Use an OBD-II scanner if available to clear any stored codes and verify sensor functionality.
Pro Tip: If you're having trouble reaching the sensor due to tight clearance, consider using a universal joint adapter on your ratchet for better access. Also, applying anti-seize compound to the threads of the new sensor can make future replacements much easier.
| Phase | Key Actions | Common Mistakes | Recommended Tools |
|---|---|---|---|
| Preparation | Ensure engine is cold, gather correct tools, locate sensor | Rushing process without cooling, incorrect tool selection | Penetrating oil, service manual, flashlight |
| Removal | Disconnect wiring, remove old sensor | Damaging wiring harness, stripping threads | Wire brush, pliers, 22mm crow foot |
| Installation | Thread new sensor by hand, torque appropriately | Cross-threading, over-tightening | Torque wrench (if available), anti-seize compound |
| Testing | Clear codes, test drive, monitor performance | Ignoring error codes, skipping diagnostics | OBD-II scanner, multimeter |
Maintenance Tips After Replacement
- Monitor your vehicle’s fuel consumption to ensure improvement post-replacement.
- Check the dashboard periodically for any recurring check engine lights.
- Keep the area around the sensor clean and free from excessive dirt or grime.
- Consider replacing the air filter at the same time if it's been a while since the last change.
Note: Lambda sensors are sensitive electronic components. Always handle them with care and avoid touching the sensing tip. Store replacement sensors in a dry environment to prevent moisture damage.
By following this detailed guide, you should be able to successfully replace the lambda sensor in your Suzuki Alto and restore proper engine function. Regular maintenance of such components contributes to longer vehicle life, improved fuel economy, and reduced emissions.
Q and A - Suzuki Alto Lambda Sensor Guide
The Suzuki Alto lambda sensor is specifically engineered for use in the Suzuki Alto model line, particularly those manufactured during specific model years that utilize this type of emissions control system. However, many Suzuki vehicles produced around the same time period may share similar engine management components, including lambda sensors with comparable specifications.
To determine compatibility with other models such as the Suzuki Swift, Baleno, or Ignis, it's essential to cross-reference:
- OEM part number from the service manual
- Vehicle Engine Control Unit (ECU) requirements
- Exhaust system configuration
- Sensor connector type and wiring layout
Recommendation: Always consult your vehicle’s service manual or a qualified mechanic before attempting to install a lambda sensor from another application. Incorrect installation can lead to check engine light activation, poor fuel economy, or emissions test failure.
Lambda sensors are precision-engineered electronic components that cannot be effectively repaired once they become faulty. These sensors contain delicate zirconia elements and heater circuits that degrade over time due to exposure to extreme temperatures, exhaust contaminants, and normal wear and tear.
Attempting to repair a lambda sensor—whether through soldering, cleaning, or component replacement—is not advisable because:
- The internal structure is fragile and easily damaged
- Sealing integrity cannot be reliably restored
- Calibration accuracy will likely be compromised
- Warranty protection will be voided
Best Practice: Replace any defective lambda sensor with a new unit—either OEM (original equipment manufacturer) or high-quality aftermarket—to ensure proper engine performance, emission control, and diagnostic system functionality.
The typical operational lifespan of a lambda sensor in a Suzuki vehicle ranges between **60,000 to 100,000 kilometers**, although some modern sensors may last even longer under ideal conditions. The longevity of the sensor depends on several key factors:
- Driving Conditions: Frequent short trips, stop-and-go traffic, and excessive idling can shorten sensor life.
- Fuel Quality: Contaminated or low-grade fuel can lead to deposits and premature failure.
- Engine Health: Issues like oil burning, coolant leaks, or rich/lean fuel mixtures accelerate sensor degradation.
- Environmental Exposure: Road salt, moisture, and vibration also play roles in wear and tear.
Signs of a failing lambda sensor include increased fuel consumption, rough idling, failed emissions tests, and illuminated check engine lights. Regular diagnostics using an OBD-II scanner can help identify early signs of deterioration.
Genuine Suzuki lambda sensors are manufactured to meet exacting factory specifications, ensuring optimal compatibility and performance. Key advantages of choosing genuine parts include:
- Precision Calibration: Matches the ECU programming exactly for accurate air-fuel ratio adjustments.
- Durability: Constructed with materials designed to withstand Suzuki-specific operating environments.
- Plug-and-Play Installation: Guaranteed fitment without modifications or wiring changes.
- Warranty Coverage: May be covered under Suzuki’s parts warranty if installed at an authorized dealership.
- Emissions Compliance: Ensures the vehicle meets environmental regulations during inspection periods.
While aftermarket options may offer cost savings, genuine parts provide the highest level of assurance in maintaining your Suzuki’s performance, reliability, and compliance standards.
Technically, yes—a lambda sensor can be replaced with a used unit, but doing so comes with significant risks and limitations. Used lambda sensors often have unknown histories, which means they may already be partially degraded or contaminated by previous engine issues.
Potential Risks Include:
- Undetected internal damage from overheating or contamination
- Inaccurate readings due to worn-out sensing elements
- Lack of warranty or return policy
- Compatibility mismatches with current ECU settings
Recommended Approach: It is far more reliable to replace a faulty lambda sensor with a brand-new unit, whether genuine Suzuki or a reputable aftermarket alternative. This ensures consistent performance, prevents recurring diagnostic trouble codes, and contributes to long-term engine health and efficiency.