All categories
Featured selections
Trade Assurance
Buyer Central
Help Center
Get the app
Become a supplier
(1003 products available)


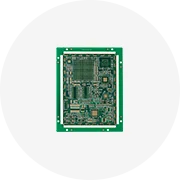
The TWR MCF5441X kit is a modular development platform for the MCF5441X processor. It has various components to support different functionalities. Here are some of its main types:
The TWR-MCF5441X kit has the following major design features.
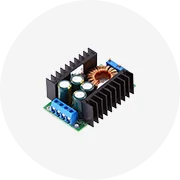
Power Supply
The TWR-MCF5441X Tower System provides power to the target board from the Tower module. The power supply comes from an external source or USB. The system has regulators for different voltage levels. They supply 3.3V, 5V, and 12V for the board's needs. The Tower module has connectors for power input and output. They ensure safe and stable power flow to all parts of the system. The design meets the needs of the MCF5441X. It supports its varied power requirements and protects its components.
Clock Source
The TWR-MCF5441X kit has a robust clock source design for stable timing. It uses an oscillator as its primary clock source. The system can switch to a real-time clock (RTC) for backup. This switch occurs when the primary source fails. The RTC keeps time even when the main power is off. It uses a small battery for this task. The design also includes a clock buffer. It distributes the clock signal to various parts of the system. This design ensures the TWR-MCF5441X kit has a reliable clock source. It maintains accurate timing under different conditions.
Debugging Interface
The debugging interface of the TWR MCF5441X involves a JTAG interface. This interface supports various debugging functions. It helps to load code into the target memory. The interface also sets breakpoints in the code. It can control the execution of the program. This allows the user to step through the code line by line. It checks the values of variables during the execution. The TWR MCF5441X kit uses a USB connection for the JTAG interface. This connection links the PC to the target board. It enables the use of debugging tools on the PC. These tools can start the debugging session with a single click.
LED Indicators
The TWR MCF5441X kit has several LED indicators. They show the status of the power supply. One LED lights up when the 5V power is on. Another LED indicates the 3.3V supply. Yet another LED shows the status of the 12V power. The design also includes a dual-color LED. It serves multiple purposes based on its color. The green color indicates normal operation. The red color signals an error. The kit also has several smaller LEDs. These LEDs are used for system status and fault indications. Each LED has a specific role in the system. They provide clear visual cues for different power levels and operational states.
Ethernet Interface
The TWR MCF5441X kit has two main components for its Ethernet design. They include the Ethernet controller and the RJ45 connector. The Ethernet controller connects to the CPU through a parallel interface. This allows data exchange between the CPU and the controller. The RJ45 connector links the board to the network. It has 8 pins for the data lines. The design includes LED indicators for link status and data transfer. These LEDs show whether there is a link and data transmission. The design supports both 10BaseT and 100BaseT speeds. It uses a transformer for signal matching and isolation.
The following guidelines are useful for wearing and matching the TWR MCF5441X kit.
Wearing the Kit
The TWR MCF5441X kit can be worn as a single-board development kit. The user integrates it with the power supply and connects it to a host computer. They should install the required drivers before connecting the board to the computer. When using the kit, users should ensure the board is grounded. This prevents static discharge from damaging the board components. They should handle the board by its edges to avoid touching the components. When the board is powered, users should avoid shorting the pins. This can cause damage to the board or the components. They should also avoid overloading the power supply by exceeding its rated output. This can damage the supply or affect other connected components.
Matching the Kit to Other Components
The TWR MCF5441X kit matches with various components to form a complete system. It works with different power supplies. Users should choose a supply that meets the board's voltage and current requirements. The board connects to displays via HDMI. Users should select a display that supports the HDMI interface. The kit works with USB-based peripherals. It connects via the USB ports on the board. The kit also interfaces with sensors and actuators. These match via the GPIO pins. Users should consult the board's documentation for pinout details. The kit connects to network devices via the Ethernet port. Users should ensure their network components support standard Ethernet protocols.
Q1: What does the TWR MCF5441X kit include?
A1: The kit contains the TWR-MCF5441X board, a micro SD card, a USB cable, a 5V power supply, and a quick start guide. These tools help users set up and test the TWR MCF5441X quickly.
Q2: How does one power the TWR MCF5441X board?
A2: Power the board using a 5V supply through the barrel jack or USB port. Ensure the source meets the voltage and current requirements for proper board operation.
Q3: Can the TWR MCF5441X support wireless communication?
A3: Yes, the board supports Wi-Fi and Bluetooth via the wireless module. Configure it using the provided software libraries and tools for your chosen wireless protocol.
Q4: What are the main features of the MCF5441X processor?
A4: The MCF5441X processor features an ARM926EJ-S core, up to 128MB SDRAM, Ethernet and USB interfaces, and low power consumption. These features are ideal for embedded applications.
Q5: How do users debug applications on the TWR MCF5441X?
A5: Use the JTAG interface with a compatible debugger like the KEIL ULINK. This allows users to debug their applications and test different code versions.