
In an age where touchscreens dominate our digital interactions, having a reliable stylus can significantly enhance precision, drawing accuracy, and note-taking efficiency on your iPhone. While commercial styluses offer advanced features, they often come with a premium price tag. Fortunately, crafting a functional, responsive stylus at home is not only possible but surprisingly simple. With just a few common household items, you can create a tool that works seamlessly with your iPhone’s capacitive touchscreen—no soldering, no special tools, and no prior experience required.
Capacitive screens, like those on iPhones, respond to the electrical conductivity of the human body. A stylus must mimic this conductivity to register touches. The good news? Many everyday materials conduct electricity well enough to serve as effective stylus tips when properly assembled.
Understanding Touchscreen Compatibility
iPhones use projected capacitive touch technology, which detects changes in an electrostatic field caused by conductive objects—like fingers. For a stylus to work, its tip must be made from a material that conducts electricity and has sufficient surface area to trigger the screen’s sensors.
Materials such as metal, conductive foam, and even damp fabric can complete the circuit between your hand and the screen. However, the shape, size, and conductivity of the tip determine responsiveness. Too small, and it won’t register; too rigid, and it may scratch the screen. The ideal DIY stylus balances softness, conductivity, and control.
“Even basic conductive materials can function as styluses if they maintain consistent contact and mimic skin conductivity.” — Dr. Lena Patel, Electronics Interface Researcher, MIT Media Lab
Materials You’ll Need
The beauty of this project lies in its simplicity. Most components can be found around the house. Below is a checklist of what you’ll need to build one or more versions of a working stylus.
Diy Stylus Checklist
- A cotton swab (Q-tip) or foam earbud
- Aluminum foil or copper tape
- A ballpoint pen casing (empty ink tube)
- Conductive thread or thin wire (optional)
- Water or saline solution (for dampening)
- Tape or heat-shrink tubing
- Scissors and pliers
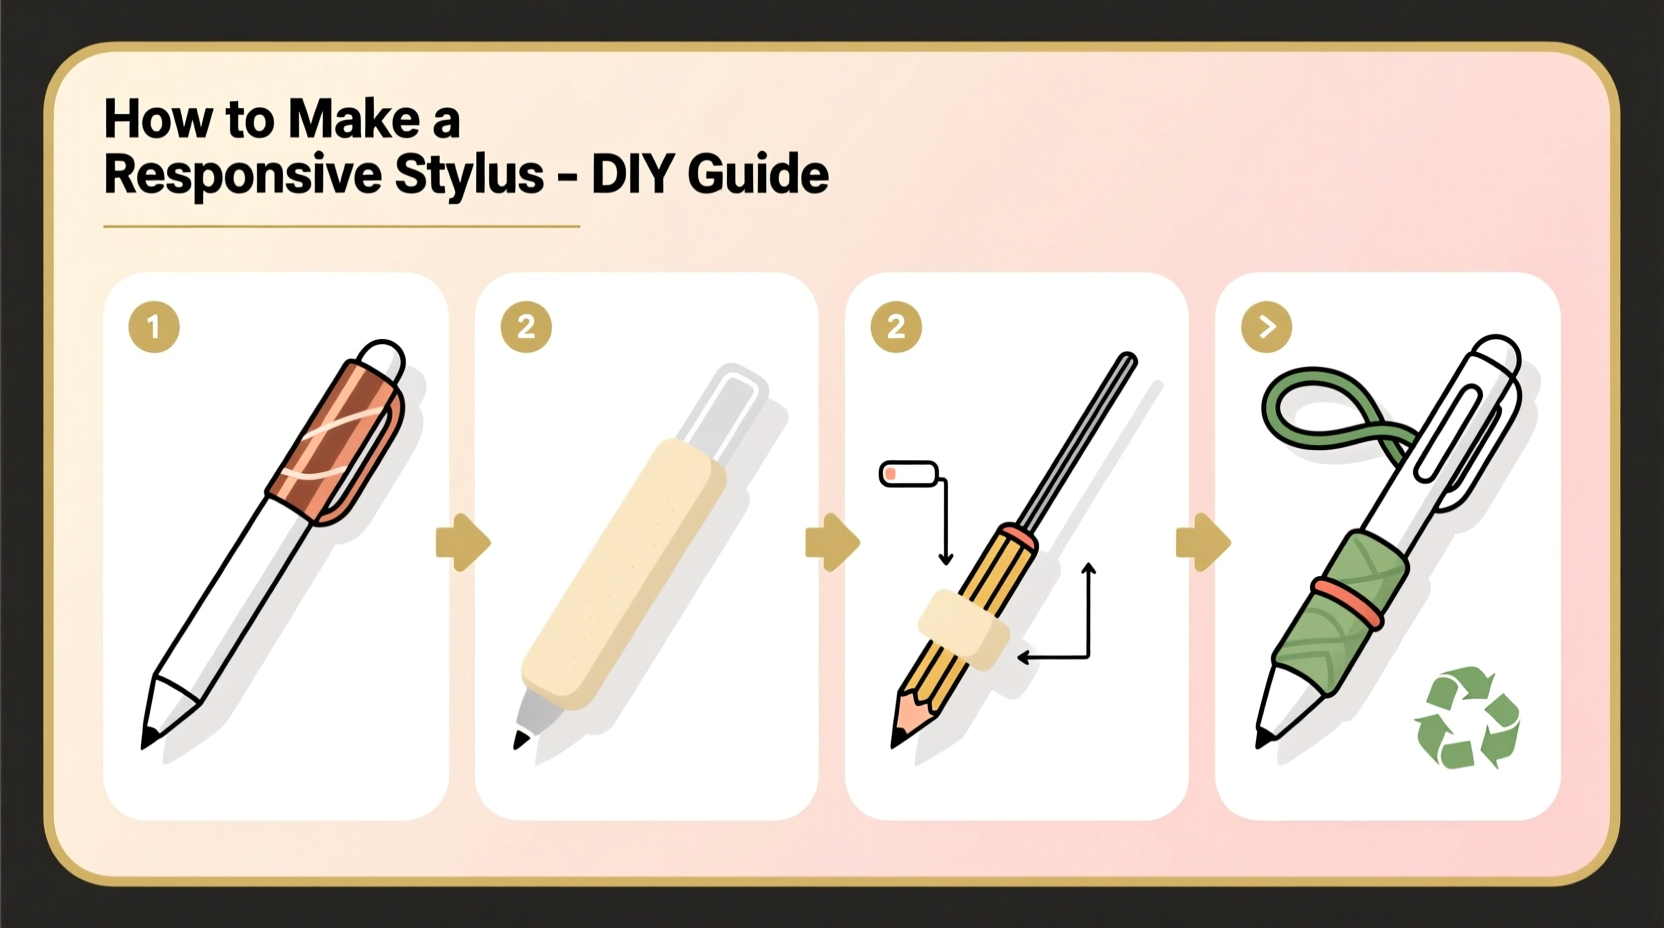
Step-by-Step Guide to Building Your Stylus
Follow this detailed process to assemble a responsive, durable stylus using minimal tools and maximum ingenuity.
- Prepare the Conductive Tip: Take a cotton swab and lightly dampen the tip with water or a drop of saline solution. Moisture increases conductivity. Avoid soaking—it should be damp, not dripping.
- Create the Conductive Bridge: Wrap a 2-inch strip of aluminum foil tightly around the stem of the swab, just below the cotton head. This foil will act as the conductor connecting your hand to the tip.
- Enhance Contact: If using a pen casing, insert the swab into the open end so the cotton protrudes slightly. Secure it with tape. The plastic body insulates the handle while allowing you to hold it comfortably.
- Ground the Circuit: Hold the foil-wrapped section firmly while using the stylus. Your skin completes the circuit through the foil to the damp tip. Without direct hand contact, the stylus won’t work.
- Test and Adjust: Try drawing in Notes or navigating Safari. If unresponsive, increase dampness slightly or expand the cotton surface area by fluffing it gently.
Alternative Design: Foam-Tipped Stylus with Wire Core
For greater durability and precision, consider upgrading to a foam earbud-based design.
- Cut the foam tip from an earbud, leaving about ½ inch of the plastic stem.
- Insert a short piece of bare copper wire or conductive thread into the foam base.
- Attach the other end of the wire to a metal pen clip or wrap it around a conductive sleeve.
- Slide the assembly into a pen barrel for structure.
- Dampen the foam tip lightly before use.
This version offers better ergonomics and consistent conductivity, especially for artists or note-takers who need fine control.
Do’s and Don’ts of Diy Stylus Use
| Do’s | Don’ts |
|---|---|
| Use slightly damp tips for better conductivity | Soak the tip—excess water can damage ports or seep inside |
| Maintain skin contact with the conductive part | Wear thick gloves or hold only the insulated section |
| Store in a dry place when not in use | Leave damp styli in humid areas—mold can develop |
| Use soft foam or fabric tips to avoid scratches | Use sharp metal points—they may damage the screen coating |
| Experiment with different tip sizes for varied tasks | Apply excessive pressure—iPhone screens are sensitive |
Real-World Example: Sketching on the Go
Jamal, a freelance illustrator based in Portland, needed a quick solution during a power outage that left his Bluetooth stylus dead. With a deadline looming, he crafted a makeshift stylus using a Q-tip, foil, and a mechanical pencil casing. After dampening the cotton and securing the foil to the shaft, he held it firmly and opened Procreate on his iPhone 13.
To his surprise, the stylus responded smoothly, allowing him to sketch light outlines and shade with moderate precision. “It wasn’t as refined as my Wacom pen,” he said later, “but it got the job done. I was able to send the draft on time.” His experience highlights how a simple DIY tool can bridge gaps in productivity when professional gear isn’t available.
Frequently Asked Questions
Will a DIY stylus damage my iPhone screen?
No, as long as you use soft, non-abrasive materials like cotton, foam, or fabric for the tip. Avoid metal, sandpaper, or rough plastics. The iPhone’s screen is designed to withstand thousands of touches daily, and a properly made DIY stylus poses no risk.
Why isn’t my stylus working even with foil and moisture?
The most common issue is lack of grounding. Your finger must touch the conductive part (foil or wire). If you’re wearing rubber gloves or holding only the plastic casing, the circuit breaks. Also, ensure the tip isn’t too dry—re-dampen it slightly and test again.
Can I make a capacitive stylus without using water?
Yes. Materials like conductive foam, graphite pencils (using the lead), or specially treated fabrics can work dry. However, they require larger contact surfaces. A pencil eraser wrapped in foil and attached to a grounded handle may function, though less precisely than dampened tips.
Advanced Tips for Better Performance
While basic designs work, a few enhancements can improve usability:
- Add a wrist strap: Attach a string or band to prevent drops, especially useful for left-handed users.
- Use copper tape instead of foil: It adheres better and provides more consistent conductivity.
- Try conductive gel pads: Cut a small circle from a static-safe mat or ESD pad and attach it to a stick for a reusable dry tip.
- Label your stylus: Mark it clearly so others don’t mistake it for trash or a regular pen.
For artists, consider making multiple tips—fine point for details, broader tip for shading—and store them in a small container.
Conclusion: Empower Your Creativity with Simple Tools
Technology doesn’t have to be complex to be effective. By understanding the principles behind capacitive touchscreens, you unlock the ability to innovate with everyday objects. Making a responsive stylus for your iPhone isn’t just a fun experiment—it’s a practical skill that promotes resourcefulness, reduces reliance on consumer products, and supports creative expression in unexpected moments.
Whether you're sketching ideas, annotating documents, or simply prefer tapping over typing, your homemade stylus can become a trusted companion. Now that you know how easy it is, why not make a few backups? They take minutes to assemble and could make all the difference when you need them most.


 浙公网安备
33010002000092号
浙公网安备
33010002000092号 浙B2-20120091-4
Comments
No comments yet. Why don't you start the discussion?