
Crafting earrings is more than a hobby—it’s a form of wearable art that allows personal expression, innovation, and creativity. Whether you're just starting or have years of experience, there's always room to explore new materials, refine your technique, and design pieces that stand out. From simple stud earrings to intricate dangling masterpieces, this guide walks through practical methods, tools, and insider tips to help crafters at every level elevate their earring game.
Understanding Your Tools and Materials
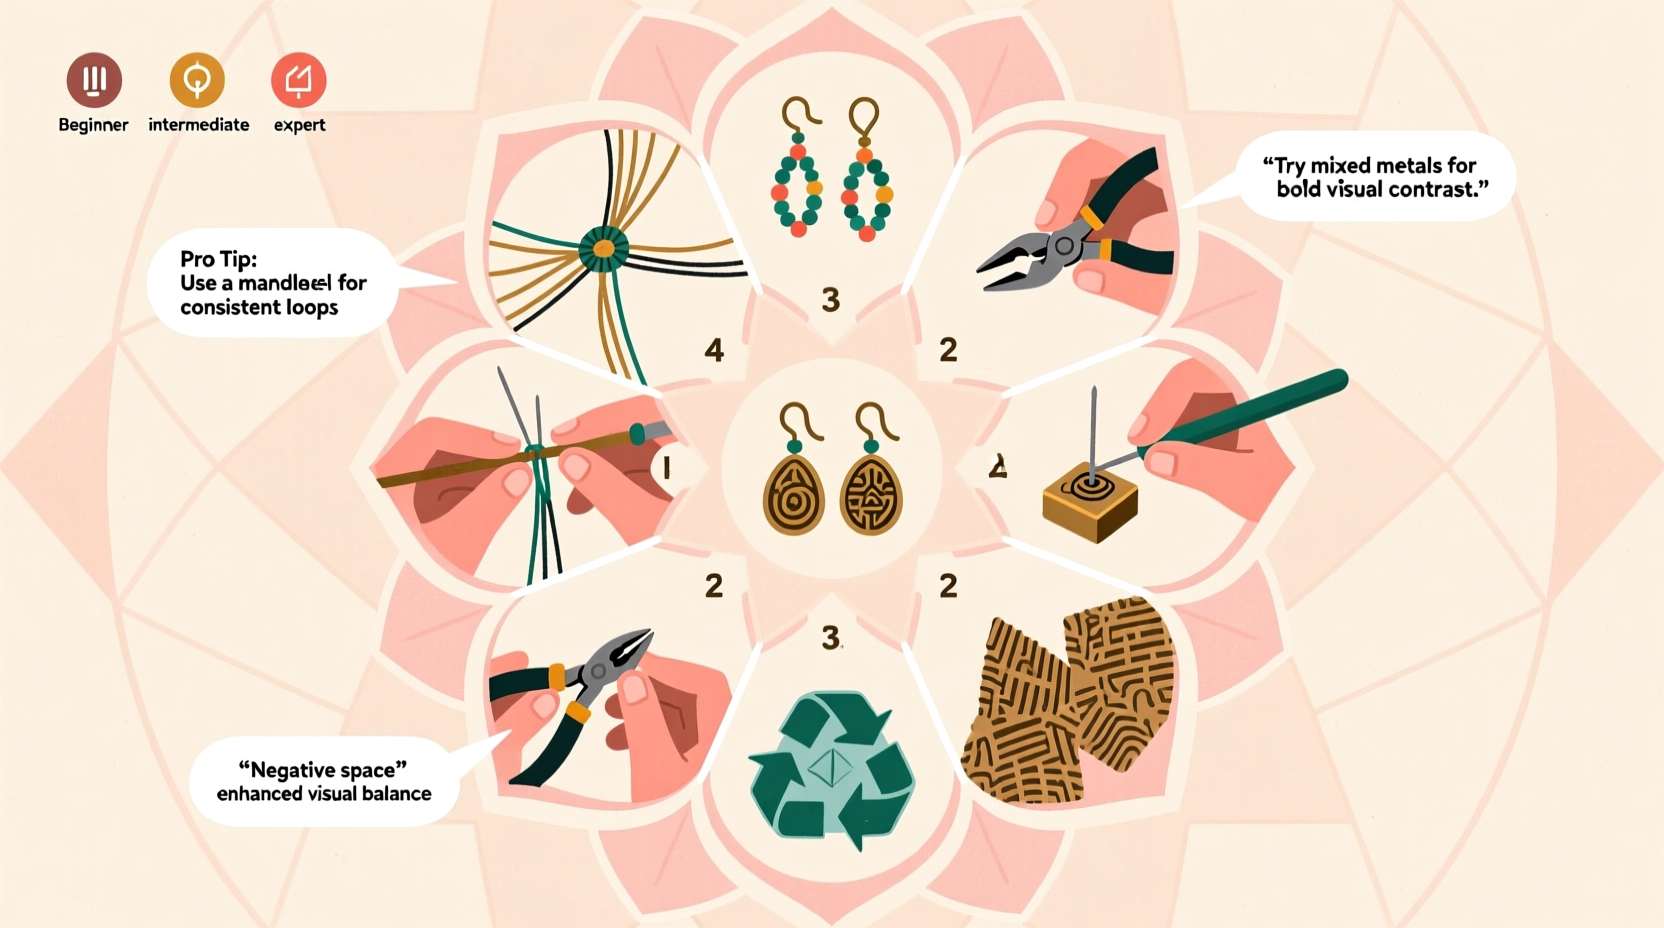
Before diving into design, it’s essential to understand the foundational components of earring making. The right tools not only improve precision but also ensure durability and professional results.
- Pliers: Round-nose, chain-nose, and flat-nose pliers are indispensable for shaping wire, opening jump rings, and securing clasps.
- Wire: Choose between soft (e.g., copper), half-hard, or dead-soft depending on whether you need malleability or structure.
- Earring findings: Posts, hooks, shepherd’s crooks, lever backs, and studs provide secure attachment options.
- Beads and embellishments: Glass, gemstone, wood, acrylic, or recycled materials offer endless aesthetic variety.
- Adhesives: E6000 or UV-resin glue are strong choices for setting stones or attaching non-metal elements.
Beginner-Friendly Techniques: Start Simple, Build Confidence
Newcomers should focus on mastering basic construction before advancing. These accessible techniques lay the groundwork for complex projects later.
- Stud Assembly: Attach flat-back posts to cabochons using epoxy glue. Let cure overnight for maximum strength.
- Simple Hoops: Use pre-made hoop bases and attach beads with headpins and jump rings.
- Ear Wires with Beads: Slide a bead onto a ready-made French hook or create your own with 20-gauge wire using round-nose pliers.
The key at this stage is repetition and consistency. Practice closing jump rings properly—always twist open sideways, never pull apart—to maintain structural integrity.
Mini Case Study: Sarah’s First Pair
Sarah, a college student with no prior jewelry experience, started with polymer clay studs. She shaped small hearts from colored clay, baked them, then glued them to silver post backs. After sealing with a matte varnish, her earrings were both lightweight and durable. Within weeks, she was selling custom pairs at campus markets—proof that simplicity can lead to success.
Intermediate Methods: Add Dimension and Detail
Once comfortable with basics, intermediate crafters can experiment with layered designs and mixed media. This phase emphasizes craftsmanship and personal style.
- Wire Wrapping: Secure stones or beads without glue by wrapping wire around them and forming decorative loops.
- Dangle Earrings: Combine multiple beads on headpins, connect via jump rings, and hang from ear wires for movement and elegance.
- Resin Elements: Cast small resin charms with dried flowers, glitter, or pigments, then embed into bezels or attach as pendants.
| Technique | Skill Level | Time Required | Best For |
|---|---|---|---|
| Basic Stud Assembly | Beginner | 15–30 min | Everyday wear, gifts |
| Wire-Wrapped Pendant | Intermediate | 45–75 min | Statement pieces |
| Resin Drop Earrings | Intermediate | 2–3 hours (incl. curing) | Artistic, colorful designs |
| Laminated Paper Earrings | Beginner/Intermediate | 1 hour | Lightweight, themed accessories |
“Great design isn’t about complexity—it’s about intention. Even a single bead on a curve can speak volumes.” — Lena Torres, Artisan Jewelry Designer
Advanced Innovations: Push Creative Boundaries
For seasoned makers, the goal shifts from function to artistic expression. Advanced techniques often involve combining unconventional materials or mastering precision tools.
- Metal Stamping: Personalize metal blanks with names, symbols, or textures using steel stamps and a hammer.
- Kumihimo Braiding: Create delicate cords from silk or nylon threads, then attach as earring hangers.
- Laser-Cut Components: Design patterns in software and use laser-cut wood, acrylic, or leather for geometric precision.
- Enameling: Fuse powdered glass to metal bases with heat for vibrant, glossy finishes (requires kiln access).
Step-by-Step: Creating Resin Dangle Earrings
- Prepare silicone earring molds and wipe clean with alcohol.
- Mix clear resin according to manufacturer instructions (typically 1:1 ratio).
- Add pigment or mica powder for color; stir slowly to minimize bubbles.
- Pour a thin base layer into each mold cavity. Cure under UV light or let sit 12–24 hours.
- Place small dried flowers or glitter on cured surface.
- Pour second layer to encapsulate elements fully. Cure again.
- Demold carefully and sand edges lightly if needed.
- Attach findings using strong adhesive and allow 24 hours to set.
Avoiding Common Pitfalls: Do’s and Don’ts
Mistakes are part of the learning process, but knowing what to avoid speeds up progress and improves safety.
| Do’s | Don’ts |
|---|---|
| Use gloves when handling resin or chemicals | Work in poorly ventilated spaces |
| Label all materials clearly | Mix unknown adhesives or solvents |
| Test fit components before gluing | Rush curing times—patience ensures durability |
| Keep a dedicated toolkit organized | Use jewelry pliers for non-craft tasks (e.g., opening bottles) |
Frequently Asked Questions
How do I make earrings lighter for sensitive ears?
Opt for hypoallergenic materials like titanium or niobium posts. Use lightweight cores such as foam, laminated paper, or thin polymer clay instead of dense metals or glass. Hollow designs or cut-out patterns also reduce weight significantly.
Can I sell handmade earrings legally?
Yes, provided you follow local regulations. In most regions, home-based craft businesses require registration, proper labeling (e.g., material content), and liability considerations. Check with your municipal or national small business office for specific guidelines.
What’s the best way to photograph handmade earrings?
Use natural lighting near a window, a plain backdrop (white or gray), and include a model shot or earring stand for scale. A macro lens helps capture fine details. Edit minimally to reflect true colors.
Your Next Steps: Craft with Confidence
Every pair of earrings tells a story—of inspiration, trial, and personal vision. No matter your current skill level, the journey of creation is ongoing. Revisit old ideas with new techniques, challenge yourself with unfamiliar materials, and don’t fear imperfection. Some of the most beloved designs emerged from happy accidents.
Start small if needed, but start now. Sketch an idea tonight. Try a new wrap tomorrow. Share your work with someone who appreciates handmade beauty. With each pair you make, you’re not just crafting jewelry—you’re shaping identity, one earring at a time.


 浙公网安备
33010002000092号
浙公网安备
33010002000092号 浙B2-20120091-4
Comments
No comments yet. Why don't you start the discussion?