
In compact urban homes—where square footage is measured in inches and every wall must multitask—a floating shelf tree display solves three problems at once: it adds vertical storage without sacrificing floor space, introduces organic architectural interest, and transforms underused corners into curated focal points. Unlike traditional shelving, this design mimics the branching structure of a tree, with staggered arms extending from a central vertical spine. It’s not just decorative; it’s functional engineering disguised as art. This guide distills years of hands-on carpentry experience, small-space interior design work, and client feedback from studio apartments in New York, Tokyo, and Berlin. Every recommendation reflects real-world constraints: load capacity on plasterboard walls, drill depth limitations in rental units, and the need for tool-light assembly that won’t trigger landlord complaints.
Why a Tree Display Works Better Than Standard Floating Shelves
Standard floating shelves rely on hidden brackets anchored into wall studs—or worse, drywall anchors that sag under modest weight. In tiny spaces, you rarely have the luxury of aligning multiple shelves with stud locations. A tree display bypasses this by concentrating all structural support into a single, robust vertical backbone. That spine transfers load directly downward into one or two well-placed anchor points, eliminating the cumulative stress of multiple independent mounts. The result? Greater stability, cleaner sightlines, and no visible hardware cluttering your wall.
Architectural designer Lena Ruiz, who specializes in adaptive reuse of micro-units, puts it plainly: “When you’re working with 350-square-foot apartments, vertical solutions must earn their keep—not just hold books, but define zones, conceal wiring, and scale visually with human proportion. A tree shelf does all three because its asymmetry mirrors how we naturally scan a room: our eyes follow the branches upward and outward, creating perceived volume.”
Materials & Tools: What You Actually Need (No Overkill)
Forget complex joinery or industrial-grade steel. This build prioritizes accessibility, affordability, and renter-friendly reversibility. All materials are available at standard home improvement stores—and most can be cut to size in-store.
| Category | Item | Why It Matters |
|---|---|---|
| Structure | 1×4 hardwood board (e.g., poplar or pine), 72\" long | Lightweight yet rigid enough for 12–15 lb/shelf; easy to sand and finish |
| Branches | Three 1×6 boards, each 24\", 30\", and 36\" long | Different lengths create natural rhythm; 1×6 provides 5.5\" depth—ideal for stacking books or displaying framed photos |
| Hardware | Four ¼\" × 3\" lag screws with washers + matching pilot bit | Lag screws penetrate deep into wall studs for true load-bearing strength; washers prevent wood crushing |
| Finishing | Water-based polyurethane (matte) + fine-grit sandpaper (220+) | Non-yellowing, low-VOC, and dries fast—critical in tight spaces with limited ventilation |
| Tools | Drill/driver, level, stud finder, pencil, tape measure, clamps (optional but helpful) | No table saw or router needed. All cuts are straight and pre-sized. |
Avoid MDF or particleboard. While cheaper, they swell if wiped down, lack screw-holding power over time, and off-gas formaldehyde—unacceptable in poorly ventilated studios. Solid wood expands and contracts with humidity, but its grain structure absorbs minor shifts without cracking.
Step-by-Step Build: From Wall Marking to Final Finish
- Locate and mark your wall studs. Use a reliable stud finder (not the magnetic type). Confirm locations by tapping—you’ll hear a denser, less hollow sound. Mark centers with light pencil lines. For optimal load distribution, aim to anchor the spine across two adjacent studs spaced 16\" apart.
- Cut and prep the spine. Rip the 1×4 board to 72\" (or adjust to fit your vertical clearance—minimum 60\"). Sand all edges smooth. Pre-drill three evenly spaced ¼\" holes along one face, centered vertically: one at 12\", one at 36\", and one at 60\" from the bottom. These will accept branch arms.
- Mount the spine securely. Hold the spine against the wall, aligned with your stud marks. Use a laser level or long bubble level to ensure absolute verticality—any tilt compounds across branches. Drill pilot holes through the pre-drilled spine holes into the studs. Insert lag screws with washers and tighten firmly—but do not overtighten, which can split the wood.
- Attach branches using pocket-hole joinery (renter-safe version). On the underside of each branch, drill two ¾\" pocket holes angled inward, 2\" from each end. Clamp the branch flush against the spine at your marked height. Drive 1¼\" pocket-hole screws through the branch into the spine. Repeat for all three branches, staggering left/right to avoid visual symmetry.
- Finish and cure. Lightly sand all surfaces. Wipe clean with a tack cloth. Apply two thin coats of matte water-based polyurethane, allowing 2 hours between coats and 24 hours full cure before loading. Never skip curing—early weight causes micro-scratches that trap dust.
This sequence takes under six hours spread across two days—including drying time. No experience required beyond drilling straight and reading a level. The pocket-hole method eliminates exposed screws on the front or top surface, preserving clean lines.
Real-World Application: Maya’s 280-Sq-Ft Brooklyn Studio
Maya Chen, a graphic designer and full-time resident of a converted walk-up in Williamsburg, faced a common dilemma: her only wall large enough for display was also her entryway—just 36\" wide and flanked by a coat rack and mail cubby. She needed to store sketchbooks, display travel souvenirs, and hold her tablet for video calls—all without blocking circulation.
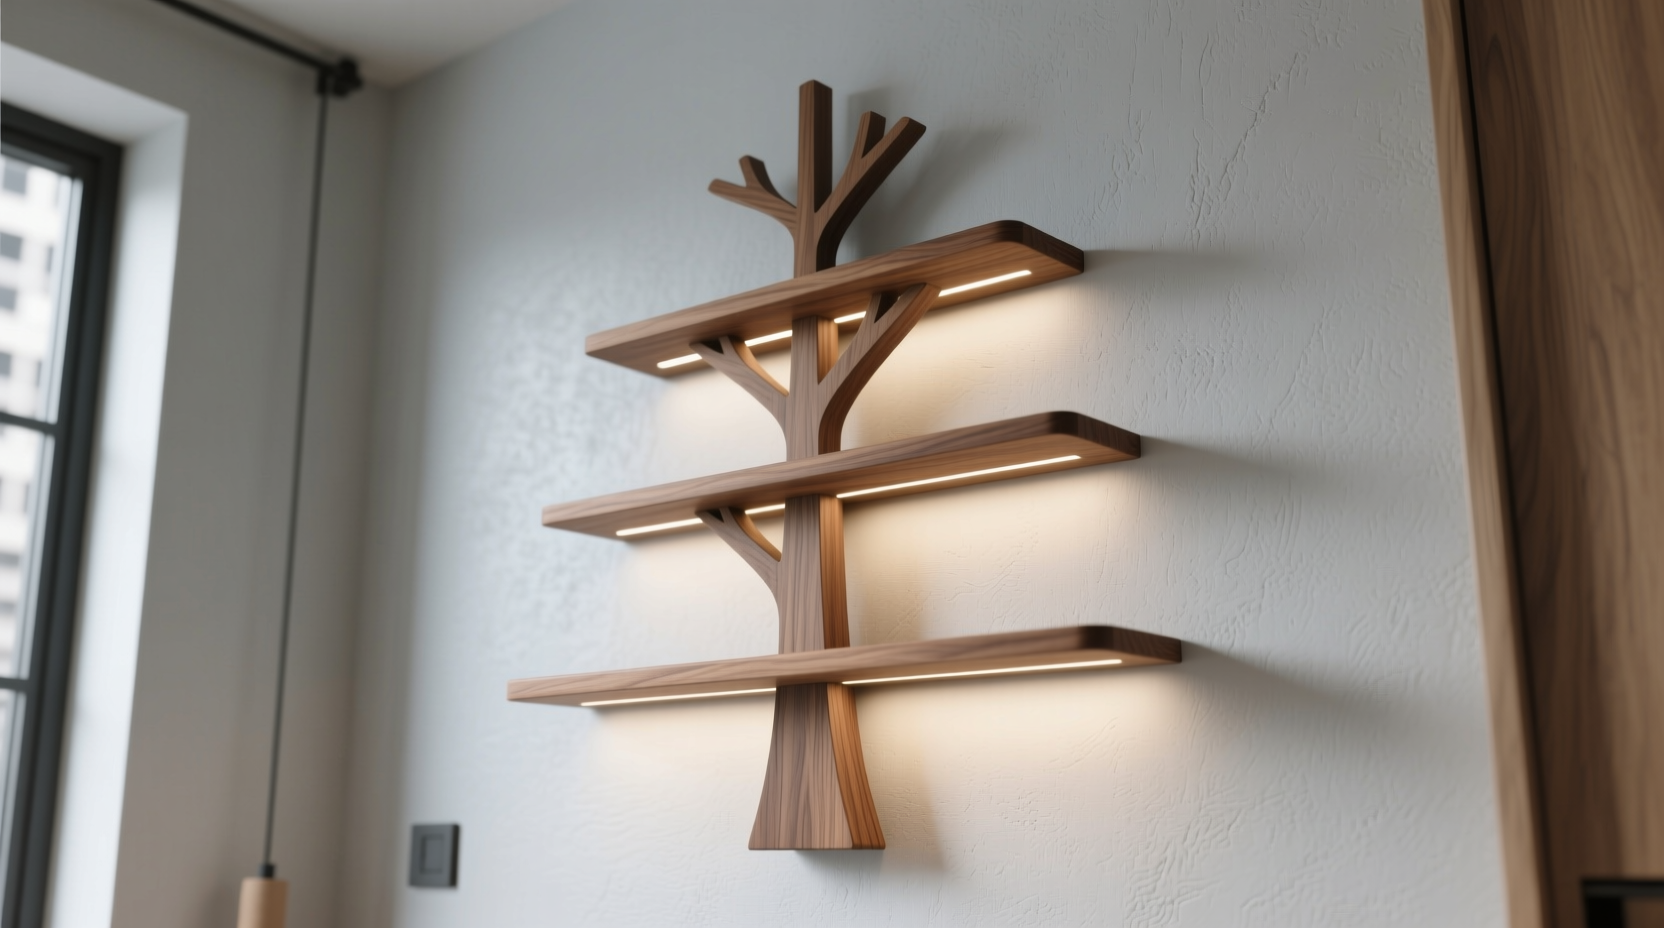
She built a scaled-down version: a 48\" spine with branches at 18\", 30\", and 42\". She used walnut-stained poplar for warmth against her white brick wall and added discreet LED strip lighting beneath the longest branch. Within three weeks, she’d consolidated five separate storage zones (bookshelf, desk organizer, charging station, art display, and plant ledge) into one integrated system. Crucially, when her landlord required wall repairs after a plumbing leak elsewhere, she removed the entire unit in under 15 minutes—leaving only four small, easily patched holes.
“It stopped being ‘shelving’ and became architecture,” she told us. “I don’t think about where to put things anymore—I just look up and see the shape of my week.”
Smart Styling & Load Management for Long-Term Integrity
A beautiful build fails fast if overloaded incorrectly. Weight distribution isn’t intuitive: the longest branch carries the most torque, especially at its outer third. To prevent gradual sagging or spine warping, follow these principles:
- Heaviest items go closest to the spine. Place hardcover books, ceramic vases, or speaker docks within the inner 6\" of each shelf.
- Balance asymmetry with visual weight. If the 36\" branch holds a heavy record player, counterbalance the 24\" branch with a dense object like a cast-iron planter or stacked art books.
- Never exceed 15 lbs per branch. That’s roughly three hardcover novels plus a small framed print—or one medium-sized potted plant (use felt pads underneath pots to prevent moisture rings).
- Rotate displays seasonally. Shift heavier objects to different branches every 3 months to equalize stress on the wood fibers.
“The tree shelf succeeds or fails on physics, not aesthetics. A 2° lean after six months isn’t ‘charming’—it’s a warning sign of uneven load or undersized hardware.” — Javier Mendez, Structural Woodworker & Instructor, Pratt Institute
FAQ: Common Concerns Addressed
Can I mount this on drywall without hitting studs?
No—this is non-negotiable. Drywall alone cannot safely support dynamic loads (like reaching for a book or adjusting a frame). If studs aren’t aligned with your ideal placement, shift the entire unit horizontally by up to 8\" to center on two adjacent studs. Alternatively, install a 1×6 horizontal ledger board across three studs first, then mount the spine to that ledger. This spreads the load and adds redundancy.
What if my wall has tile or concrete?
For tile: Use a carbide-tipped masonry bit and anchor with sleeve anchors rated for 75+ lbs. Drill slowly to avoid cracking glaze. For concrete: Use wedge anchors with a hammer drill. In both cases, consult a local hardware specialist—they’ll match anchor type to your substrate’s age and density. Never use generic “concrete screws” without verifying pull-out resistance.
How do I hide cords for lamps or chargers?
Route cables behind the spine using adhesive-backed cable clips (choose ones with removable gel pads). For permanent setups, drill a ½\" access hole at the base of the spine and feed cords down into a nearby outlet box. Never staple or tape cords to wood—they degrade insulation over time and create fire hazards.
Final Thoughts: More Than Storage—A Spatial Strategy
A floating shelf tree display isn’t merely a DIY project—it’s a spatial philosophy for living intentionally in constrained environments. It rejects the notion that small means compromised. Instead, it embraces verticality as generosity: giving height back to the room, clarity back to the floor, and narrative back to your belongings. Each branch becomes a deliberate pause in the flow of daily life—a place to land a coffee cup, a reminder of a trip taken, a quiet perch for a succulent that thrives on indirect light.
You don’t need perfect walls, professional tools, or unlimited time. You need precision in placement, respect for material limits, and the willingness to let form follow function—then soften function with warmth. Start with one spine, three branches, and the confidence that what looks like sculpture is, in fact, quietly engineered resilience.


 浙公网安备
33010002000092号
浙公网安备
33010002000092号 浙B2-20120091-4
Comments
No comments yet. Why don't you start the discussion?