
Sticky keys on a MacBook can be more than just annoying—they disrupt typing flow, reduce productivity, and may indicate deeper buildup of grime beneath the keyboard. While it's tempting to pry off keys or douse them in liquid, doing so risks damaging the delicate butterfly or scissor-switch mechanisms Apple uses. The good news is that most cases of stickiness can be resolved with gentle, precise cleaning techniques that protect both the hardware and your warranty. This guide walks through safe, effective strategies backed by repair technicians and long-term MacBook users.
Understanding Why Keys Become Sticky
MacBook keyboards, especially models from 2015 to 2019 that used the butterfly mechanism, are particularly vulnerable to debris accumulation. Even newer scissor-switch models aren’t immune. Stickiness usually stems from one or more of the following:
- Crumbs and dust: Tiny food particles and lint accumulate under keys, interfering with movement.
- Liquid spills: Coffee, water, or soda residue can dry into a sticky film around keycaps.
- Skin oils and hand residue: Frequent typing transfers natural oils, which mix with dust over time.
- Wear and tear: Over years of use, rubber domes can degrade or misalign, causing sluggish return.
Before attempting any cleaning, determine whether the issue is surface-level grime or mechanical failure. If a key feels stiff even after thorough cleaning, internal damage might be present—though this is rare with proper care.
Essential Tools for Safe Cleaning
Using the right tools minimizes risk and maximizes effectiveness. Never use sharp objects like paperclips or knives to lift keys—this can snap retaining clips. Instead, gather these items:
| Tool | Purpose | Recommended Option |
|---|---|---|
| Compressed air | Dislodges dust and debris from under keys | Office supply brand with straw nozzle |
| Microfiber cloth | Wipes surfaces without scratching | Lint-free, camera-grade cloth |
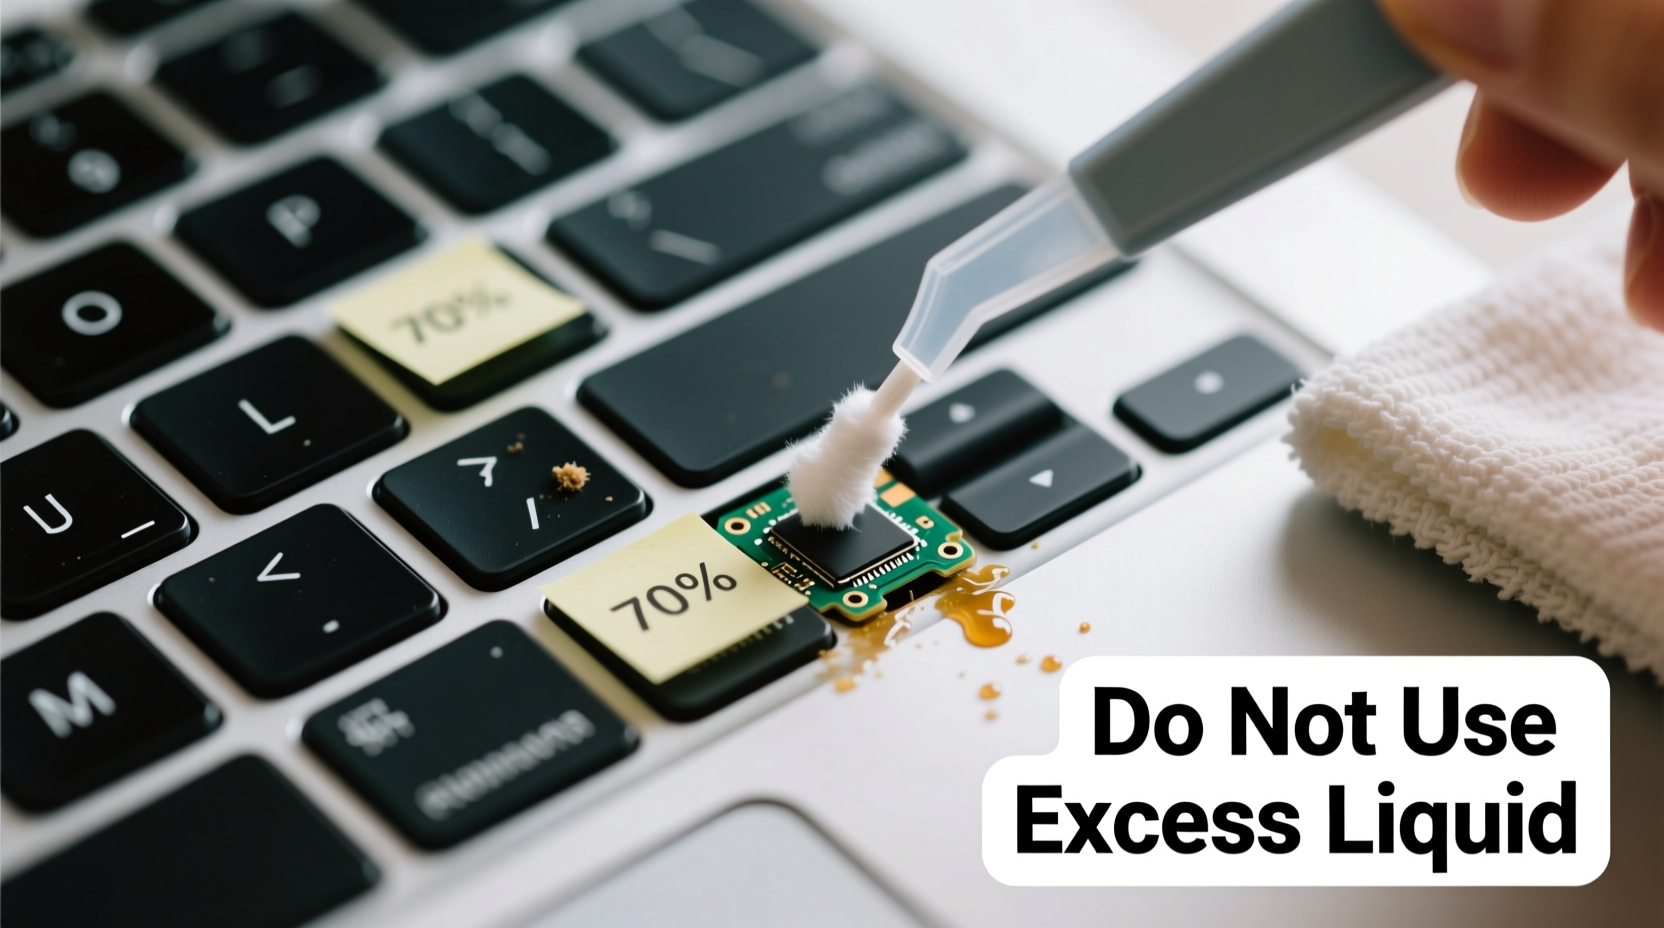
| Isopropyl alcohol (70% or higher) | Dissolves sticky residue safely | Pharmaceutical-grade, no additives |
| Cotton swabs (wooden, not plastic) | Reaches tight spaces gently | Pointed-tip swabs for precision |
| Soft-bristled brush | Loosens particles between keys | Makeup or artist’s brush, clean and dry |
Avoid household cleaners like Windex or bleach wipes. These contain chemicals that can corrode coatings on keycaps and damage internal components if they seep underneath.
Step-by-Step Cleaning Process
Follow this sequence carefully to remove stickiness without disassembling the keyboard. This method works for all MacBook models, including those with Touch Bar and M-series chips.
- Power down and unplug: Shut down your MacBook completely. Disconnect any external power sources or peripherals.
- Tilt and shake gently: Hold the MacBook at a 75-degree angle over a trash can and tap the back lightly. This dislodges loose debris.
- Use compressed air: With the nozzle attached, spray short bursts between and around sticky keys at a 45-degree angle. Move systematically across the keyboard. Repeat twice.
- Brush between keys: Use the soft-bristled brush in small circular motions to loosen compacted dust. Brush from top to bottom to guide debris outward.
- Dampen a cotton swab: Moisten the tip of a swab with isopropyl alcohol—never soak it. Wring it slightly so no drips form.
- Clean around the base: Gently slide the swab around the edge of each sticky keycap, rotating as you go. Do not force it under the key.
- Wipe the keycap surface: Use a microfiber cloth dampened with alcohol to wipe the top and sides of affected keys.
- Let dry completely: Wait at least 15–20 minutes before powering on. Alcohol evaporates quickly, but moisture trapped underneath needs time to dissipate.
- Test the keys: Type slowly to assess responsiveness. Repeat steps if needed.
This process typically resolves mild to moderate stickiness. For persistent issues, consider a second round after 24 hours to allow deeper residue to surface.
“Most keyboard problems we see in service centers stem from improper cleaning attempts. A little patience and the right tools prevent 90% of avoidable damage.” — Daniel Reyes, Senior Technician at MacFix Labs, San Francisco
When Not to Remove Keycaps
Unlike mechanical keyboards, MacBook keys are engineered with fragile retention clips. Removing them improperly can break the hinge mechanism permanently. Apple redesigned its keyboard starting in 2020 to improve durability, but even current models require caution.
Unless you're experienced with electronics repair or have a replacement keycap kit, do not attempt removal. However, if you’re certain a large particle is lodged underneath and airflow hasn’t helped, proceed only as follows:
- Use a thin, flat tool like a guitar pick or plastic spudger.
- Insert it under one corner of the keycap at a shallow angle.
- Lift slowly and evenly—do not twist.
- Remove the key, clean the area with a dry swab, and inspect the scissor mechanism.
- Reattach by aligning the hinges and pressing down gently until it clicks.
Note: On older butterfly-key MacBooks, reattachment is notoriously difficult. Misalignment leads to wobbling or double-actuation. If unsure, skip removal entirely.
Mini Case Study: Resolving Chronic Stickiness in a 2018 MacBook Pro
Sarah, a freelance writer in Portland, noticed her “E” and “R” keys on her 2018 MacBook Pro were sticking after six months of heavy use. She often worked from coffee shops and occasionally sipped tea while typing. Initially, she tried tapping the keys harder, then used a damp tissue to wipe them—both ineffective and risky moves.
After reading about potential damage from moisture, she stopped using liquids and instead followed the compressed air and alcohol-swab method described here. She cleaned the keyboard weekly for three weeks, focusing on the affected area. By the third session, the keys responded smoothly. She now keeps a microfiber cloth in her laptop sleeve and avoids drinks near her device.
Her experience highlights two truths: stickiness develops gradually, and consistent light maintenance beats infrequent deep cleaning.
Preventive Maintenance Checklist
To keep your MacBook keyboard functioning optimally, follow this monthly checklist:
- ✅ Power down and use compressed air on the keyboard
- ✅ Wipe keycaps with a dry microfiber cloth
- ✅ Inspect for visible debris or discoloration
- ✅ Clean hands before extended typing sessions
- ✅ Store in a dust-free environment when not in use
- ✅ Avoid eating or drinking near the laptop
For users in high-dust environments (e.g., workshops or pet-friendly homes), increase cleaning frequency to every two weeks.
Do’s and Don’ts of MacBook Keyboard Care
| Do | Don’t |
|---|---|
| Use isopropyl alcohol with a barely damp swab | Apply liquids directly to the keyboard |
| Clean regularly with compressed air | Use canned air upside down (causes liquid discharge) |
| Wipe the entire keyboard monthly | Use abrasive cloths or paper towels |
| Store your MacBook in a protective case | Place objects on the keyboard when closed |
| Wash hands before prolonged typing | Peel off keys without proper tools or knowledge |
Frequently Asked Questions
Can I use hand sanitizer to clean sticky keys?
No. While hand sanitizer contains alcohol, it also includes fragrances, glycerin, and other additives that leave behind a sticky residue. Stick to pure isopropyl alcohol (70% or higher) for cleaning.
How often should I clean my MacBook keyboard?
For most users, a light clean every 2–4 weeks is sufficient. Heavy typists or those in dusty environments should clean every 10–14 days. Immediate cleaning is recommended after any spill, even if minor.
Will cleaning void my MacBook warranty?
Apple does not void warranties for user cleaning, provided no physical damage occurs. However, liquid damage from improper cleaning (e.g., dripping alcohol into the chassis) is not covered. Always apply liquids sparingly and never while the device is powered on.
Final Thoughts and Action Steps
Sticky keys don’t mean your MacBook is failing—they’re often a sign of neglect, not hardware collapse. With careful attention and the right tools, you can restore smooth typing without risking costly repairs. The key is consistency: regular maintenance prevents the need for aggressive interventions later.
Start today. Power down your MacBook, grab a can of compressed air, and give your keyboard the attention it deserves. You’ll notice the difference in responsiveness and enjoy a cleaner, more reliable machine. Small habits compound over time—protect your investment with simple, smart care.


 浙公网安备
33010002000092号
浙公网安备
33010002000092号 浙B2-20120091-4
Comments
No comments yet. Why don't you start the discussion?