
Creating a custom Minecraft skin allows players to personalize their in-game avatar with unique designs, characters, or even real-life likenesses. While Mojang offers default skins, the real fun begins when you design your own. The best part? You don’t need expensive software or advanced artistic skills. With free online tools and a bit of creativity, anyone can craft a high-quality skin that stands out in multiplayer worlds.
This guide walks through the entire process—from choosing the right canvas to uploading your finished design—using only free, accessible tools. Whether you're designing a superhero, a fantasy creature, or a stylized version of yourself, these steps will help you bring your vision to life without spending a dime.
Understanding Minecraft Skin Basics
A Minecraft skin is a 64x32 or 64x64 pixel texture file that wraps around the player model. It defines the appearance of the head, body, arms, and legs. Understanding the skin’s layout is crucial before diving into design.
The skin template is divided into visible (front) and hidden (back) sections. Each limb has two sides: front and back, plus sleeves and pants overlays if using the \"slim\" or \"Alex\" model. The standard \"Steve\" model uses broader arms, while the Alex model features narrower limbs, often preferred for more agile or feminine designs.
When editing a skin, you’re working on a flat 2D map that folds around the 3D character. This means certain areas—like the inside of the arms or the back of the legs—are not normally visible but must still be filled in to avoid visual glitches.
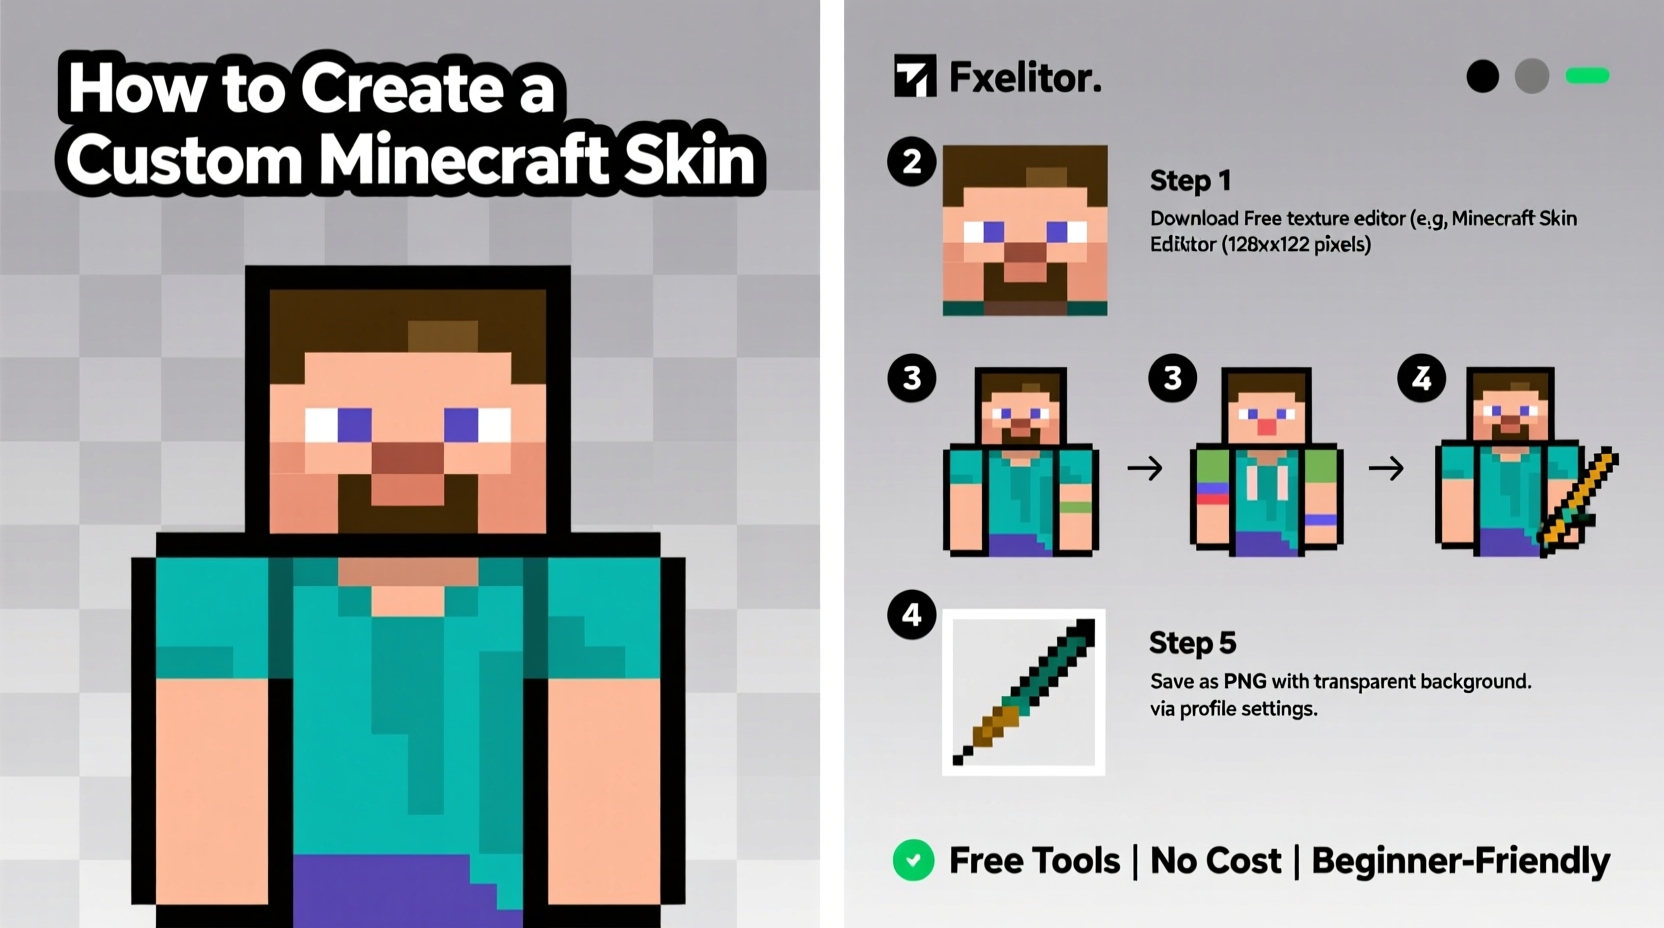
Step-by-Step Guide to Creating Your Skin
- Download a base skin template. Visit the official Minecraft website or trusted community hubs like PlanetMinecraft to download a blank 64x64 PNG template. Choose between Steve (wide arms) or Alex (slim arms) based on your preference.
- Select a free image editor. Use tools like Pixlr E or X, GIMP, or Piskel. These are browser-based or downloadable programs that support layers, zoom, and pixel-level precision.
- Familiarize yourself with the skin layout. Study how each section corresponds to the 3D model—eyes on the head front, arms split into front/back, torso wrapping around.
- Sketch your concept lightly. Use a low-opacity brush to block out major elements: hair, clothing, facial features. Avoid starting with details; focus on placement.
- Add color and detail gradually. Increase contrast and refine outlines once the base structure is set. Use dithering or shading techniques to simulate depth without adding extra pixels.
- Check symmetry and proportions. Flip the image horizontally occasionally to catch imbalances. Misaligned eyes or uneven shoulders are common mistakes.
- Test your skin in-game. Upload it to your Minecraft profile via the official launcher or a compatible server to see how it looks in motion.
Top Free Tools for Skin Creation
Several user-friendly platforms allow you to create, edit, and preview skins without installing software. Here’s a comparison of the most reliable options:
| Tool | Platform | Key Features | Best For |
|---|---|---|---|
| Pixlr X | Web-based | Simple interface, layers, undo history, export as PNG | Beginners learning pixel art basics |
| GIMP | Desktop (Windows, Mac, Linux) | Advanced layer control, custom brushes, transparency support | Experienced users wanting precision |
| Piskel | Web & App | Frame-by-frame editing, onion skinning, animation support | Designers who want to test animations |
| SkinMC | Web-based | Pre-loaded templates, instant preview, direct upload option | Quick edits and immediate testing |
| MineKamp | Web-based | Community gallery, collaborative editing, real-time 3D preview | Creative teams or social designers |
All of these tools support PNG format, which is required for Minecraft skins. Most also allow zooming up to 1600% for precise pixel placement—a critical feature when working at such a small scale.
“Pixel art thrives on limitation. The 64-pixel canvas forces creativity through constraint.” — Lena Torres, Digital Artist & Game Designer
Common Design Mistakes and How to Avoid Them
- Ignoring the skin overlay system: Modern Minecraft versions support layered rendering. If you design clothes or armor, consider how they’ll appear over the base skin. Avoid drawing full sleeves if you expect armor to cover them.
- Overcomplicating details: At 64 pixels wide, fine lines or intricate patterns become muddy. Stick to bold shapes and high-contrast colors for clarity.
- Misaligning facial features: Eyes should sit within the top third of the head section. Misplaced pupils can make a character look cross-eyed or unnatural.
- Forgetting the back view: Many players overlook the back of the head, torso, and legs. A blank or mismatched back breaks immersion during gameplay.
- Using unrealistic proportions: While stylization is encouraged, limbs that are too long or heads too large may distort when animated.
Real Example: Designing a Fantasy Archer Skin
Jamal, a 15-year-old Minecraft enthusiast, wanted to create a woodland elf archer for his survival server. He began by downloading the Alex model template, preferring its sleeker limbs for a graceful look. Using Pixlr X, he sketched pointed ears extending from the side of the head, painted pale green skin, and added braided brown hair flowing down the back.
For clothing, he designed a forest-green tunic with leaf patterns across the chest. Instead of detailing every leaf, he used a repeating 2x2 pixel motif to suggest texture without clutter. He shaded the arms slightly darker on one side to imply lighting direction, enhancing depth.
After completing the front, he mirrored key elements to the back—adding a quiver and bow strap across the shoulders. He uploaded the skin via the Minecraft launcher and tested it in a creative world. Noticing the boots looked blocky, he refined the toe curve and re-uploaded. Within an hour, he had a polished, thematic skin that became popular in his friend group.
His success came from planning, iterative testing, and restraint—proving that effective skins don’t require complexity, just thoughtful execution.
Checklist: Creating Your First Custom Skin
Follow this concise checklist to ensure no step is missed:
- ☐ Download the correct skin template (Steve or Alex)
- ☐ Choose a free editor (Pixlr, GIMP, Piskel, etc.)
- ☐ Open the template and enable grid/zoom features
- ☐ Sketch major design elements (face, outfit, accessories)
- ☐ Color and shade each section with attention to light source
- ☐ Fill in back sections consistently with the theme
- ☐ Save as PNG with no compression artifacts
- ☐ Upload via Minecraft account settings or server skin manager
- ☐ Test in-game and adjust based on visual feedback
- ☐ Share or save a backup copy for future use
FAQ
Can I use copyrighted characters in my skin?
You can create a skin inspired by a copyrighted character for personal use, but distributing or profiting from it may violate intellectual property laws. It's safer to create original designs or use public domain references.
Why does my skin look blurry in-game?
This usually happens when the image is scaled improperly. Ensure your file is exactly 64x64 pixels and saved in PNG format without anti-aliasing or smoothing filters that blur pixel edges.
How do I make my skin compatible with armor?
Design your base skin assuming armor will cover the chest, legs, and parts of the arms. Avoid drawing sleeves or detailed leggings if you want the armor’s texture to show clearly. Use the “overlay” sections wisely to complement, not compete with, armor visuals.
Final Tips for Long-Term Skin Success
Once you’ve created your first skin, consider building a collection. Organize your files with clear names—e.g., “Knight_Armor_Compatible_v2.png”—to track revisions. Back them up to cloud storage or a dedicated folder.
Engage with the Minecraft skin community. Platforms like PlanetMinecraft, Reddit’s r/MinecraftSkins, and Discord groups offer feedback, inspiration, and collaboration opportunities. Some creators even host monthly challenges (e.g., “Cyberpunk Week”) to spark creativity.
If you enjoy the process, explore related skills: animation frames for capes, texture packs for blocks, or modding with Java. The same attention to detail and design thinking applies across digital creation.
Conclusion
Creating a custom Minecraft skin with free tools is more than a cosmetic upgrade—it’s an act of self-expression within a vibrant digital world. By leveraging accessible editors, understanding the technical layout, and applying thoughtful design principles, anyone can go from blank canvas to standout avatar.
The barrier to entry has never been lower, and the tools have never been better. Whether you're crafting a skin for fun, identity, or community recognition, the process rewards patience and imagination. Start simple, learn from each iteration, and don’t hesitate to share your creations.


 浙公网安备
33010002000092号
浙公网安备
33010002000092号 浙B2-20120091-4
Comments
No comments yet. Why don't you start the discussion?