
Sneakers are more than just footwear—they’re a statement. Whether you’ve invested in limited-edition Jordans or sleek minimalist trainers, visible creases can detract from their pristine appearance. While some wear is inevitable, deep or unsightly creases caused by improper storage or fit don’t have to be permanent. With the right approach, you can significantly reduce or even eliminate creasing using simple household tools like an iron and common stuffing materials. This guide breaks down proven, safe techniques to restore your sneakers’ smooth look without damaging the material.
Understanding Sneaker Creases: Why They Form and When to Act
Creases form naturally when flexible materials bend repeatedly during walking. The upper part of the shoe—especially around the toe box and midfoot—bears the brunt of this movement. However, not all creases are created equal. Some develop due to poor fit, over-tight lacing, or storing shoes without support. Others stem from wearing them before they’ve fully broken in.
The key is distinguishing between superficial surface wrinkles and deep structural folds. Surface-level creases in synthetic or leather uppers often respond well to heat and pressure techniques. Deep-set creases in mesh or worn-out foam may require preventive measures rather than reversal.
“Creasing isn’t always damage—it’s often stress on the material. But with early intervention, most modern sneaker uppers can rebound remarkably.” — Marcus Lin, Footwear Restoration Technician, 8 years experience
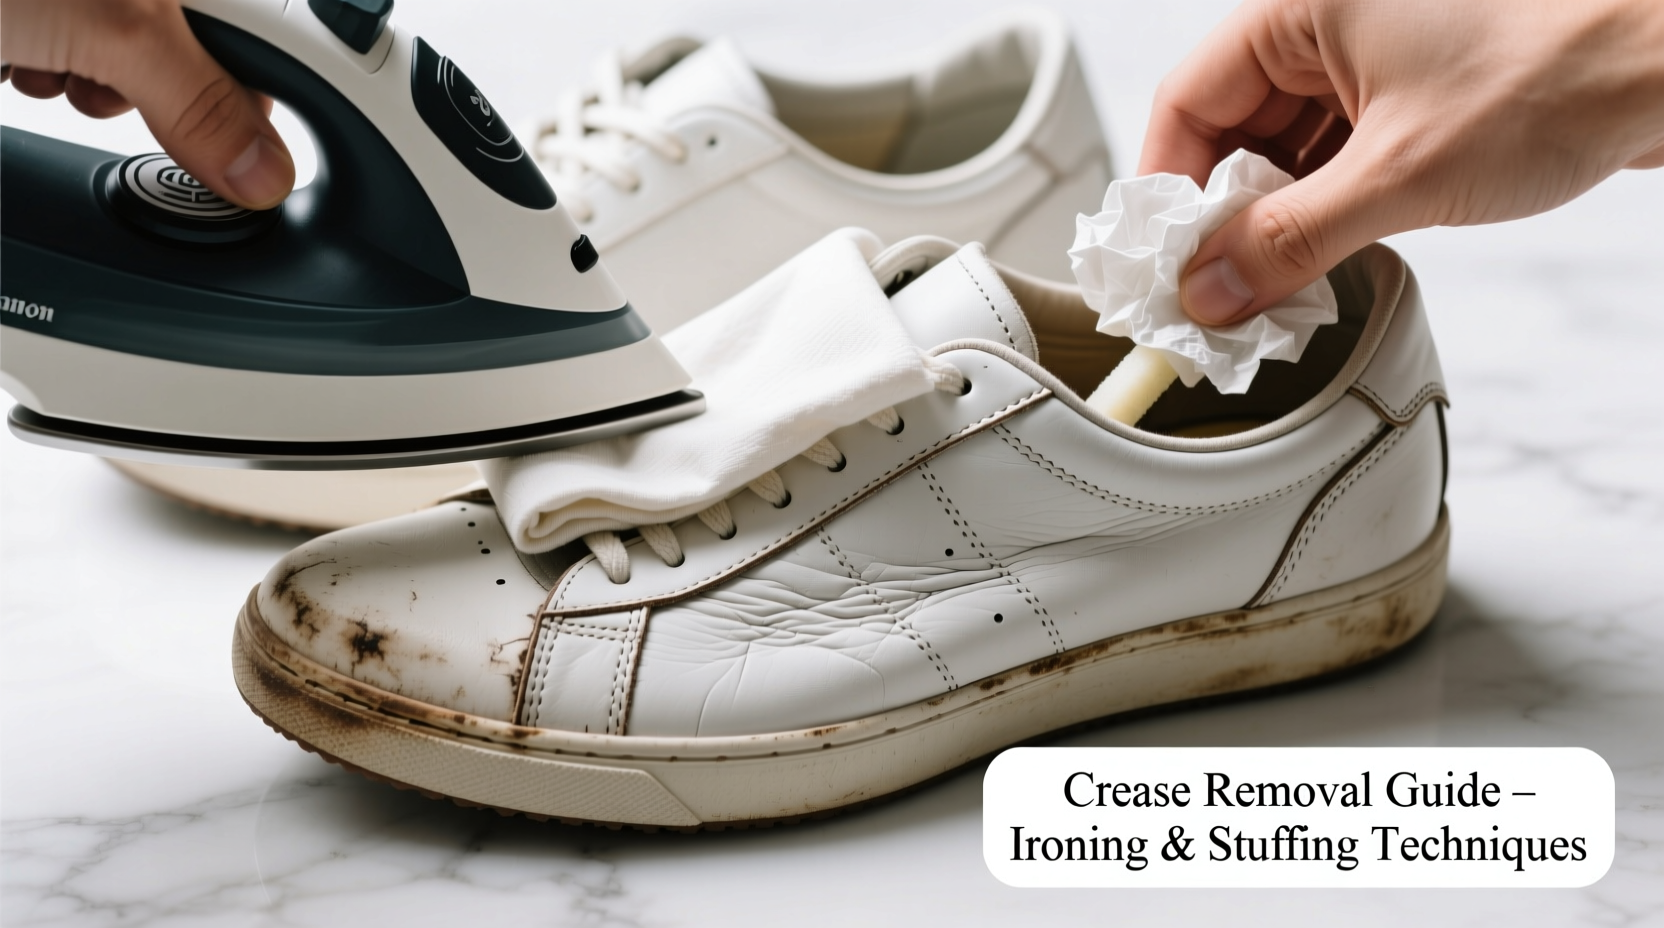
Safe Ironing Techniques for Leather and Synthetic Uppers
Ironing can effectively relax fibers and reshape wrinkled areas, but only if done correctly. Applying direct high heat to sneakers risks melting adhesives, scorching fabric, or warping structure. The goal is gentle, indirect heat combined with moisture and tension.
Step-by-Step Guide: Ironing Out Creases Safely
- Remove laces and insoles: This allows full access to the upper and prevents heat transfer to sensitive components.
- Clean the surface: Wipe down the shoe with a damp cloth to remove dust. Dirt can burn under heat.
- Moisten a thin cotton cloth: Use a hand towel or pillowcase. Dampen it slightly—wring out excess water so it’s not dripping.
- Set iron to low or medium heat: For synthetic leathers (like polyurethane), use no higher than 300°F (150°C). Genuine leather tolerates slightly more, but never exceed medium heat.
- Place the damp cloth over the creased area: Never let the iron touch the shoe directly.
- Gently press and glide: Hold the iron over the cloth-covered crease for 10–15 seconds. Apply light pressure. Repeat 2–3 times, checking progress.
- Reshape while warm: As the material heats, use your fingers or a rounded tool (like a wooden spoon handle) to smooth the area outward from the center of the crease.
- Let cool completely: Allow the shoe to rest in its new shape for at least 30 minutes before handling further.
Stuffing Methods to Prevent and Reduce Creasing Over Time
Prevention is often more effective than correction. Proper stuffing maintains the shoe’s natural contour when not in use, reducing fold lines and supporting structural integrity. Unlike ironing, which addresses existing damage, stuffing is a long-term maintenance strategy.
Best Materials for Sneaker Stuffing
Different stuffing options serve different purposes. Choose based on availability, desired firmness, and protection level.
| Material | Pros | Cons | Best For |
|---|---|---|---|
| Newspaper | Absorbs moisture, customizable volume, cheap | Can leave ink residue, loses shape quickly | Short-term reshaping, odor control |
| Shoe Trees (Cedar) | Premium shape retention, absorbs moisture, reduces odor | Expensive, one-size-fits-most limitations | Luxury or leather sneakers |
| Towel or Sock Rolls | Soft, reusable, readily available | Less rigid support, may compress over time | Daily rotation shoes, travel |
| Plastic Bottles (Cut to Fit) | Firm support, free, retains shape | Non-breathable, risk of scratching interior | Deep crease recovery phase |
| Custom Foam Inserts | Precise fit, durable, professional-grade | Hard to source, costly | Collectors or display models |
How to Apply Stuffing for Maximum Effect
Effective stuffing isn’t just about filling space—it’s about shaping. Follow these steps for best results:
- After wearing, immediately insert stuffing while the shoe still holds warmth and flexibility.
- Mold the stuffing to push gently against the inner toe box and sides where creases typically form.
- For stubborn horizontal toe creases, roll a small towel tightly and place it vertically across the bend line.
- Leave stuffed overnight—or longer for deep recovery.
- Avoid overstuffing, which can stretch seams or distort the collar.
Combining Ironing and Stuffing: A Real-World Example
Consider the case of James, a sneaker enthusiast who purchased a pair of white-on-white Air Jordan 1s. Within two weeks of casual wear, deep diagonal creases formed across the toe box. He avoided wearing them, fearing further degradation. Instead of discarding them, he applied a combined technique:
First, he cleaned the uppers with a microfiber cloth and diluted sneaker cleaner. Then, using a damp cotton rag and iron set to “synthetic” mode, he applied heat over the worst crease for 12 seconds. As the material warmed, he used a rounded wooden spoon to gently flatten the fold outward. Immediately after, he rolled two socks tightly and placed them deep into each shoe, focusing extra bulk in the toe area. He left them stuffed for 48 hours.
The result? A 70% reduction in visible creasing. While fine lines remained—inevitable with regular wear—the harsh, deep folds were gone. By continuing to use cedar shoe trees during storage, James prevented recurrence.
Do’s and Don’ts: Avoiding Common Mistakes
Many sneaker owners worsen creasing through well-intentioned but misguided actions. Below is a clear breakdown of what to embrace and what to avoid.
| Do’s | Don’ts |
|---|---|
| Use a barrier cloth between iron and shoe | Apply direct heat to synthetic uppers |
| Stuff shoes immediately after wear | Store sneakers flat or crumpled in a box |
| Rotate between multiple pairs weekly | Wear tight-fitting sneakers that bunch at the toes |
| Use shoe trees or soft rolls for daily storage | Overstuff with hard objects that strain stitching |
| Address creases early before fibers set | Expect 100% removal on heavily worn or mesh-based models |
Frequently Asked Questions
Can I use a hairdryer instead of an iron?
Yes, but with caution. A hairdryer provides dry heat, which is less effective than steam-assisted methods. Hold it 6–8 inches away and move continuously to avoid hot spots. Pair it with manual smoothing using your fingers or a soft tool. It’s safer than an iron for delicate fabrics but slower and less precise.
Will creases come back after treatment?
Likely, yes—especially if the root cause isn’t addressed. Walking creates natural flex, so some creasing is unavoidable. However, treated creases return more slowly if you maintain proper storage, wear properly fitted shoes, and rotate usage. Think of treatment as resetting the clock, not eliminating the process.
Are certain sneaker materials more prone to creasing?
Absolutely. Smooth leather and synthetic overlays crease visibly but often respond well to heat and stuffing. Mesh and knit uppers (like Nike Flyknit or Adidas Primeknit) resist sharp folds but can develop permanent fiber distortion if overstretched. Canvas tends to hold creases less dramatically but absorbs odors and stains more easily.
Expert Tips for Long-Term Crease Management
Beyond one-time fixes, long-term care makes the biggest difference. Seasoned collectors and resellers rely on consistent habits to keep inventory showroom-ready.
- Break in gradually: Wear new sneakers for short periods initially to allow the upper to adapt without sudden stress.
- Lace loosely over the toe box: Tight lacing pulls material taut and encourages premature folding.
- Invest in quality shoe trees: Cedar versions regulate humidity and help maintain arch and toe shape passively.
- Store horizontally with support: Avoid stacking boxes or placing weight on stored shoes.
- Condition leather regularly: Use pH-balanced leather conditioner every 4–6 weeks to maintain suppleness and reduce cracking.
“The best-looking sneakers aren’t the ones never worn—they’re the ones cared for religiously after every wear.” — Diana Cho, Sneaker Curator at Urban Sole Archive
Final Checklist: Your Crease Recovery Action Plan
Follow this concise checklist to systematically address and prevent sneaker creasing:
- Assess the severity and location of creases.
- Clean the upper surface gently with appropriate products.
- Test ironing method on a small hidden area.
- Apply indirect heat with a damp cloth and low iron setting.
- Smooth the warmed area manually using a rounded tool.
- Immediately stuff the shoe with supportive material.
- Leave stuffed for at least 24 hours.
- Repeat if necessary, allowing 48 hours between sessions.
- Adopt preventive habits: shoe trees, rotation, proper fit.
- Monitor progress monthly and reapply as needed.
Conclusion: Restore, Maintain, and Wear with Confidence
Creases don’t have to mean the end of a sneaker’s visual appeal. With careful ironing and smart stuffing, you can reclaim the clean lines that made you fall in love with your kicks in the first place. These techniques are accessible, affordable, and highly effective when applied with patience and precision. More importantly, integrating preventive care into your routine ensures that every pair stays fresher for longer.


 浙公网安备
33010002000092号
浙公网安备
33010002000092号 浙B2-20120091-4
Comments
No comments yet. Why don't you start the discussion?