
Leather boots are an investment in both style and durability. Over time, even the most well-cared-for pair can develop surface scratches from everyday wear. While professional restoration is an option, you don’t always need a specialist or expensive products to bring your boots back to life. With a few common household items and the right technique, you can significantly reduce or eliminate minor to moderate scratches at home.
The key lies in understanding the type of scratch and matching it with a suitable remedy. Not all marks are created equal—some affect only the surface finish, while others penetrate deeper into the leather grain. This guide walks you through proven, accessible methods that use ingredients already in your kitchen or bathroom, ensuring your boots look polished without costing a fortune.
Understanding Leather Scratches
Before attempting any repair, it's essential to assess the nature of the scratch. Misdiagnosing the damage can lead to ineffective treatment or further harm to the leather.
- Surface Scratches: These appear as light streaks on the finish and don’t catch your fingernail. They often result from dust, light abrasion, or shallow contact with rough surfaces.
- Deeper Scratches: These create visible grooves in the leather. You can usually feel them when running a finger across the surface. They may expose lighter layers beneath the dye.
- Scuffs: Unlike true scratches, scuffs involve smearing or dulling of the finish due to friction. They’re often darker than the surrounding area and respond well to buffing.
Most household remedies work best on surface-level damage. Deep gouges may require professional attention, but even they can be improved with careful conditioning and color blending techniques.
“Many people panic at the first sign of a scratch, but natural leather is resilient. With proper care, minor imperfections often fade or blend in over time.” — Daniel Reeves, Master Cobbler with 30+ years of experience
Step-by-Step Guide: Removing Scratches with Household Items
Below is a detailed sequence of safe, tested methods using common household supplies. Follow these steps in order, starting with the gentlest approach and progressing only if needed.
Step 1: Clean the Surface
Dirt and oils can interfere with treatment. Use a soft, slightly damp cloth to wipe down the scratched area. For stubborn grime, mix a drop of mild dish soap with water and gently dab the spot. Avoid soaking the leather. Wipe dry immediately with a clean towel and let the boots air-dry completely away from direct heat.
Step 2: Try the Warm Water Method (for Surface Scratches)
Moisture can help lift compressed fibers in light scratches. Dampen a clean cotton cloth with warm (not hot) water and hold it against the scratch for 30–60 seconds. The goal is to gently swell the leather fibers. Afterward, let the area dry naturally. Once dry, lightly buff with a soft cloth. Many fine scratches disappear as the leather re-expands.
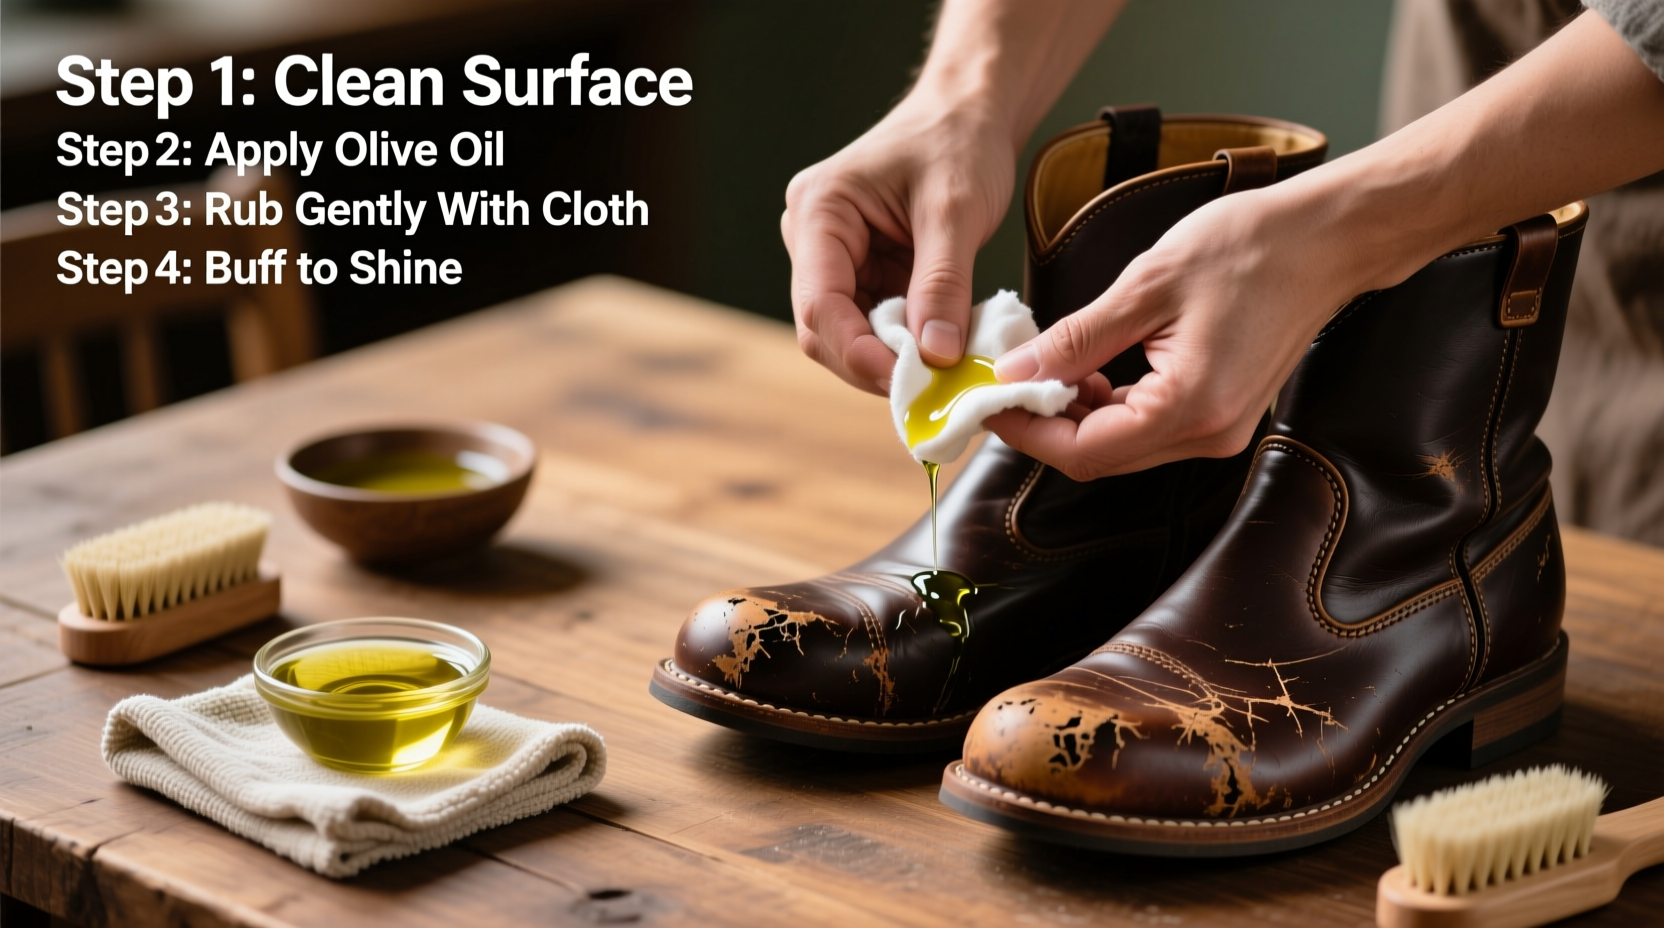
Step 3: Apply Natural Oils (Conditioning & Blending)
Natural oils like olive oil, coconut oil, or almond oil can condition dry leather and help mask fine scratches by restoring suppleness and shine.
- Apply a small amount of oil to a lint-free cloth (never directly onto the boot).
- Gently rub in circular motions over the scratched area.
- Allow the oil to absorb for 10–15 minutes.
- Buff off excess with a dry cloth.
Caution: Use oils sparingly. Over-application can weaken leather fibers over time and attract dirt. This method works best on aniline or semi-aniline leathers; avoid on suede or nubuck.
Step 4: Use a Pencil Eraser for Scuffs
A simple pencil eraser (preferably white, non-abrasive) can lift surface scuffs caused by friction. Gently rub the eraser over the affected area using short strokes. The rubber grabs tiny particles and lifts the mark without damaging the finish. Wipe clean afterward with a dry cloth.
Step 5: Try White Vinegar and Linseed Oil (For Deeper Marks)
This combination is favored by many shoemakers for restoring luster and evening out discoloration.
| Ingredient | Purpose | Application Ratio |
|---|---|---|
| White vinegar | Cleans and slightly opens leather pores | 1 part |
| Linseed oil (raw, not boiled) | Conditions and darkens leather slightly | 2 parts |
Mix the solution in a small container. Dip a cotton swab or soft cloth into the mixture and apply sparingly to the scratch. Let it sit for 5–10 minutes, then buff thoroughly. Repeat once if needed. This method helps blend in scratches by subtly enriching the color and texture.
Step 6: Buff with Heat (Final Polish)
After treatment, restore shine by buffing. Use a soft cotton or microfiber cloth and rub the area vigorously in circular motions. Alternatively, hold a hairdryer on low heat 6–8 inches from the surface for 10–15 seconds to warm the leather slightly before buffing. The warmth opens the pores and enhances the polish effect.
Do’s and Don’ts When Treating Leather at Home
To protect your boots and maximize results, follow this checklist of best practices.
| Do’s | Don’ts |
|---|---|
| Test treatments on inconspicuous areas first | Use harsh chemicals like bleach or acetone |
| Work in a well-ventilated space | Soak leather with liquids |
| Use minimal amounts of oil | Apply direct heat (e.g., irons or blow dryers on high) |
| Buff gently after treatment | Ignore manufacturer care labels |
| Let boots dry naturally after cleaning | Rush the process—leather needs time to absorb and settle |
Real Example: Reviving Work Boots After a Hiking Trip
Mark, a landscape architect, returned from a weekend hike with deep scuff marks on the toe caps of his brown leather work boots. He initially thought they were ruined. Instead of buying new ones, he tried the vinegar and linseed oil method described above. After cleaning the boots and applying the mixture twice over two days, followed by thorough buffing, the scratches faded significantly. The boots didn’t look brand-new, but the damage was no longer noticeable at a glance. Six months later, with regular conditioning, the boots remain in daily rotation—proof that minor interventions can extend usable life dramatically.
Checklist: How to Remove Scratches from Leather Boots at Home
Follow this concise action plan for best results:
- ✅ Identify the type of scratch (surface, deep, or scuff)
- ✅ Clean the area with a damp cloth and mild soap if needed
- ✅ Dry boots completely before treatment
- ✅ Start with the least invasive method (warm cloth or eraser)
- ✅ Apply natural oils or vinegar-oil mix sparingly
- ✅ Buff thoroughly after each application
- ✅ Repeat only if necessary, allowing time between treatments
- ✅ Finish with a conditioning routine every few weeks to prevent future damage
Frequently Asked Questions
Can I use toothpaste to remove scratches from leather boots?
No. Despite popular myths, toothpaste is abrasive and often contains bleaching agents that can strip color and damage the leather finish. It may temporarily mask a scuff but risks long-term harm.
Will coconut oil darken my leather boots?
Possibly. Coconut oil can slightly darken lighter leathers, especially with repeated use. Always test in a hidden area first. If color change is a concern, opt for a dedicated leather conditioner instead.
How often should I condition my leather boots to prevent scratches?
Condition every 4–6 weeks under normal use. In dry or cold climates, or with frequent outdoor wear, consider conditioning every 2–3 weeks. Regular hydration keeps leather flexible and more resistant to surface damage.
Prevention Tips for Long-Term Boot Care
While fixing scratches is useful, preventing them is even better. Incorporate these habits into your routine:
- Rotate your boots: Wearing the same pair daily increases wear and reduces recovery time between uses.
- Use shoe trees: Cedar shoe trees absorb moisture, maintain shape, and reduce creasing that can lead to cracks.
- Apply a leather protector spray: A silicone-free waterproofing spray adds a barrier against abrasion and stains.
- Store properly: Keep boots in a cool, dry place away from sunlight, which fades and dries leather.
Conclusion: Restore Confidence in Your Footwear
Scratches on leather boots don’t mean the end of their life—they’re often just signs of a well-lived journey. With patience and the right household tools, most minor damage can be minimized or erased entirely. The methods outlined here—from warm cloths to natural oil blends—are accessible, affordable, and effective when applied correctly.
By understanding your leather type, diagnosing the scratch accurately, and following a thoughtful restoration process, you preserve both the appearance and longevity of your footwear. More than saving money, this care reflects respect for quality craftsmanship and sustainable living.


 浙公网安备
33010002000092号
浙公网安备
33010002000092号 浙B2-20120091-4
Comments
No comments yet. Why don't you start the discussion?