
A cluttered pantry doesn’t just make meal prep frustrating—it can lead to wasted food, overspending, and daily stress. The good news? You don’t need a renovation or expensive organizing systems to fix it. With smart, budget-friendly solutions from your local dollar store, you can transform a chaotic pantry into a streamlined, functional space in a single afternoon. These aren’t gimmicks; they’re tested strategies that interior organizers and frugal homemakers use to maintain order on a tight budget.
The key isn’t buying more containers—it’s choosing the right ones, using vertical space wisely, and creating a system that sticks. Dollar stores offer surprisingly durable bins, baskets, shelf risers, and labels that perform just as well as high-end alternatives. When paired with intentional organization principles, these tools can deliver lasting results without draining your wallet.
Step-by-Step: Clearing and Assessing Your Pantry
Before you buy a single item, take time to empty and evaluate your pantry. This step is often skipped, but it’s essential for long-term success. Without assessing what you own and how you use your space, even the best containers won’t solve underlying disorganization.
- Remove everything. Take all items off shelves and place them on a nearby counter or table. This gives you a clean slate and helps identify expired products.
- Check expiration dates. Toss anything past its prime. Studies show the average household throws away $1,500 worth of food annually—much of it due to poor visibility and forgotten items.
- Categorize your items. Group like with like: baking supplies, snacks, canned goods, pasta, breakfast items, etc. This reveals usage patterns and storage needs.
- Measure your shelves. Note the height, depth, and width. This ensures any containers you buy will fit properly.
- Wipe down shelves. Clean surfaces prevent pests and make the space feel fresh before reorganizing.
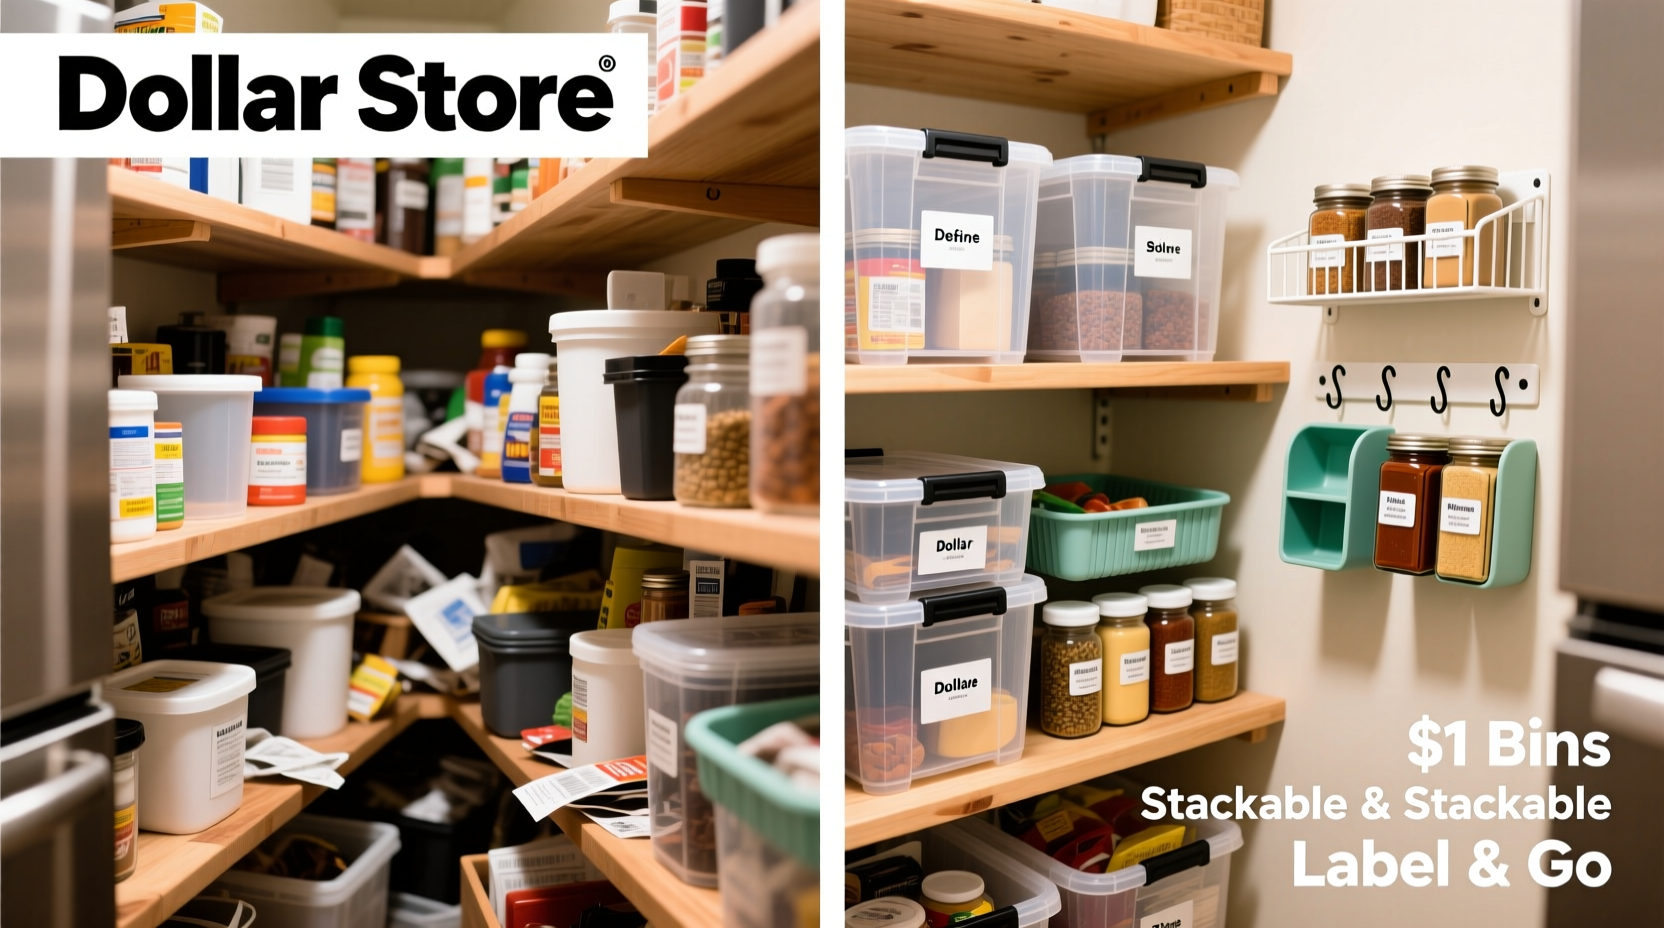
Dollar Store Hacks That Deliver Real Results
Many people assume dollar store products are flimsy or ineffective. While not every item is worth buying, several consistently perform well for pantry organization. The trick is knowing which ones to choose and how to use them strategically.
1. Repurpose Plastic Bins as Drawer-Style Organizers
Dollar stores sell clear plastic bins in various sizes—perfect for grouping small items like spice packets, tea bags, or instant oatmeal cups. Place one bin per category so everything stays together and visible.
- Use shallow bins for front-row access on deep shelves.
- Label each bin with a removable label maker or masking tape and marker.
- Nest smaller bins inside larger ones for tiered organization.
2. Turn Cake Pans into Can Organizers
Metal cake pans or rectangular baking trays (often found for $1) make excellent upright can holders. Instead of stacking cans precariously, stand them on end inside the pan. This allows you to see labels instantly and practice first-in, first-out rotation.
3. Use Tension Rods for Lid Control
If your pantry includes reusable food storage containers, loose lids are likely a pain point. Install inexpensive tension rods vertically between shelves to slide lids behind. No drilling required, and it keeps matching sets together.
4. Transform Magazine Holders into Dry Goods Dispensers
Plastic or fabric magazine files can hold cereal boxes, crackers, or paper bags upright. They also work well for holding cutting boards or baking sheets if your pantry doubles as a utility closet.
5. Clip-On Hooks for Hanging Small Tools
Attach adhesive hooks to the inside of pantry doors to hang measuring cups, oven mitts, or reusable shopping bags. It frees up shelf space and keeps frequently used items within reach.
Smart Storage Table: What Works (and What Doesn’t)
| Item | Best For | Avoid Using For |
|---|---|---|
| Plastic shoe organizers | Snacks, spice jars, drink mixes | Heavy canned goods |
| Stackable food storage containers | Flour, sugar, pasta | Items you rarely use |
| Adhesive shelf liners | Preventing sliding, adding grip | Greasy environments (can trap residue) |
| Mini whiteboard with marker | Shopping list, inventory tracking | Humid areas (ink may smear) |
| Fabric bins with handles | Kid-accessible snacks, produce | Long-term liquid storage |
Real Example: How One Family Transformed Their Pantry in 90 Minutes
The Thompson family of four struggled with a walk-in pantry that had become a dumping ground. Breakfast items were buried behind holiday decorations, kids couldn’t find their snacks, and dinner prep often involved digging through stacks of boxes.
They spent $18 at a local dollar store, purchasing:
- Three stackable plastic bins ($3)
- Two wire shelf risers ($4)
- A pack of adhesive hooks ($1)
- A roll of masking tape and marker for labeling ($1)
- A magnetic mini whiteboard ($5)
- Two fabric baskets ($4)
In under two hours, they cleared expired items, grouped foods by category, placed shelf risers to create layered visibility, stored snacks in labeled bins at kid-height, and mounted the whiteboard for the weekly menu and grocery list. A year later, they report spending less on duplicate groceries and preparing meals 20% faster.
“Organization isn’t about perfection—it’s about making your space work for you. The dollar store gave us the tools to build a system we actually stick to.” — Sarah Thompson, Home Organizer & Parenting Blogger
Essential Checklist: Pantry Organization in 7 Steps
Pantry Reboot Checklist:
- Empty the entire pantry and discard expired items.
- Wipe down shelves and inspect for pests or moisture.
- Sort items into logical categories (e.g., baking, snacks, canned).
- Measure shelf dimensions to guide container purchases.
- Buy only what you need: bins, risers, labels, hooks.
- Group like items together and place frequently used things at eye level.
- Add labels and a whiteboard for inventory management.
Maximizing Vertical and Door Space
Most pantries waste valuable real estate on flat shelves. By going vertical, you double usable space without changing the footprint.
Shelf risers—commonly sold for $1–$2—are game-changers. Place one toward the front of a shelf to create two levels: shorter items in front, taller ones behind. This works especially well for spices, oils, and condiments.
Over-the-door organizers, typically marketed for shoes, can be repurposed for small pantry essentials. Hang one on the back of the pantry door and use pockets for:
- Drink packets (hot chocolate, coffee)
- Single-serving snacks
- Baking sprinkles or food coloring
- Recipe cards or meal planning sheets
For deeper pantries, consider placing a tension rod horizontally near the top to hang lightweight baskets with S-hooks. These can store onions, garlic, or even reusable produce bags.
Labeling Strategies That Last
Labels are the glue that holds an organized pantry together. Without them, systems break down quickly—especially in households with multiple users.
Dollar store options include:
- Masking tape + marker: Cheap and removable. Ideal for temporary groupings or rotating seasonal items.
- Chalkboard labels: Stick-on tags that let you change contents without reprinting.
- Mini label makers: Battery-powered devices (under $10) that print durable, professional-looking labels.
When labeling, use clear, consistent language. Instead of “Grains,” try “Pasta & Rice.” Instead of “Spices,” label “Baking Spices” and “Cooking Spices” separately if stored apart.
FAQ: Common Pantry Organization Questions
Can I really organize a pantry well with only dollar store items?
Absolutely. While high-end organizers look appealing, function matters more than brand. Dollar store containers made of thick polypropylene or sturdy wire perform well when used correctly. Focus on durability, fit, and consistency rather than price.
How do I keep my system from falling apart after a few weeks?
Maintenance starts with design. If your system requires too much effort to maintain, it won’t last. Assign homes for every item, involve all household members in upkeep, and schedule a 10-minute weekly reset. Also, avoid over-containerizing—only group items that belong together.
What should I do with oddly shaped items that don’t fit in bins?
Store bulky or irregular items on lower shelves or in corners where stability matters most. Use fabric bins to corral multiple odd shapes (like wraps, large seasoning jars, or bulk tubs). Prioritize accessibility over aesthetics—function comes first.
Final Tips for Long-Term Success
Organization isn’t a one-time project—it’s a habit. The most effective pantries evolve with your lifestyle. Reassess every three months: Are certain categories growing? Are some containers unused? Adjust as needed.
Rotate stock using the FIFO method (First In, First Out). Place newer purchases behind older ones to prevent items from being forgotten at the back of the shelf.
Involve your household. Teach children where snacks live. Show your partner where cooking oils are stored. When everyone understands the system, compliance increases naturally.
“The best pantry system is the one you’ll actually use every day.” — Maria Gonzales, Professional Home Organizer
Take Action Today
You don’t need permission, perfect containers, or a weekend free to start. Grab a trash bag, empty one shelf, and sort what’s there. Add a single bin from the dollar store to group similar items. Small actions compound into lasting change.
Think about how much time you’ve lost searching for soy sauce or realizing you bought sugar twice. Now imagine opening your pantry and seeing exactly what you need, where you expect it. That clarity is possible—and affordable.


 浙公网安备
33010002000092号
浙公网安备
33010002000092号 浙B2-20120091-4
Comments
No comments yet. Why don't you start the discussion?