
Green screen technology has transformed video production, making it possible to place subjects in any environment—from bustling cityscapes to outer space—without leaving the studio. When executed well, chroma keying is invisible. But poor technique leads to jagged edges, color spill, and unrealistic composites that break immersion. Adobe Premiere Pro offers powerful tools to achieve clean keying, but knowing how to use them effectively separates amateur results from professional-grade visuals. This guide walks through every phase of the process: preparation, shooting, keying, refining, and final compositing.
1. Preparing for a Successful Green Screen Shoot
The foundation of a flawless green screen effect isn’t built in post-production—it begins on set. Lighting, fabric choice, and subject positioning all influence how easily you can remove the background later. A poorly lit green screen introduces shadows and gradients that confuse the keying algorithm, leading to inconsistent transparency.
Use a smooth, wrinkle-free backdrop made of non-reflective material. Muslin cloth or matte vinyl works better than shiny polyester, which reflects light unevenly. Position your subject at least six feet away from the screen to minimize green spill—the reflection of green light onto skin and clothing. Use three-point lighting on the subject and separate lights for the background to maintain even illumination across the entire screen.
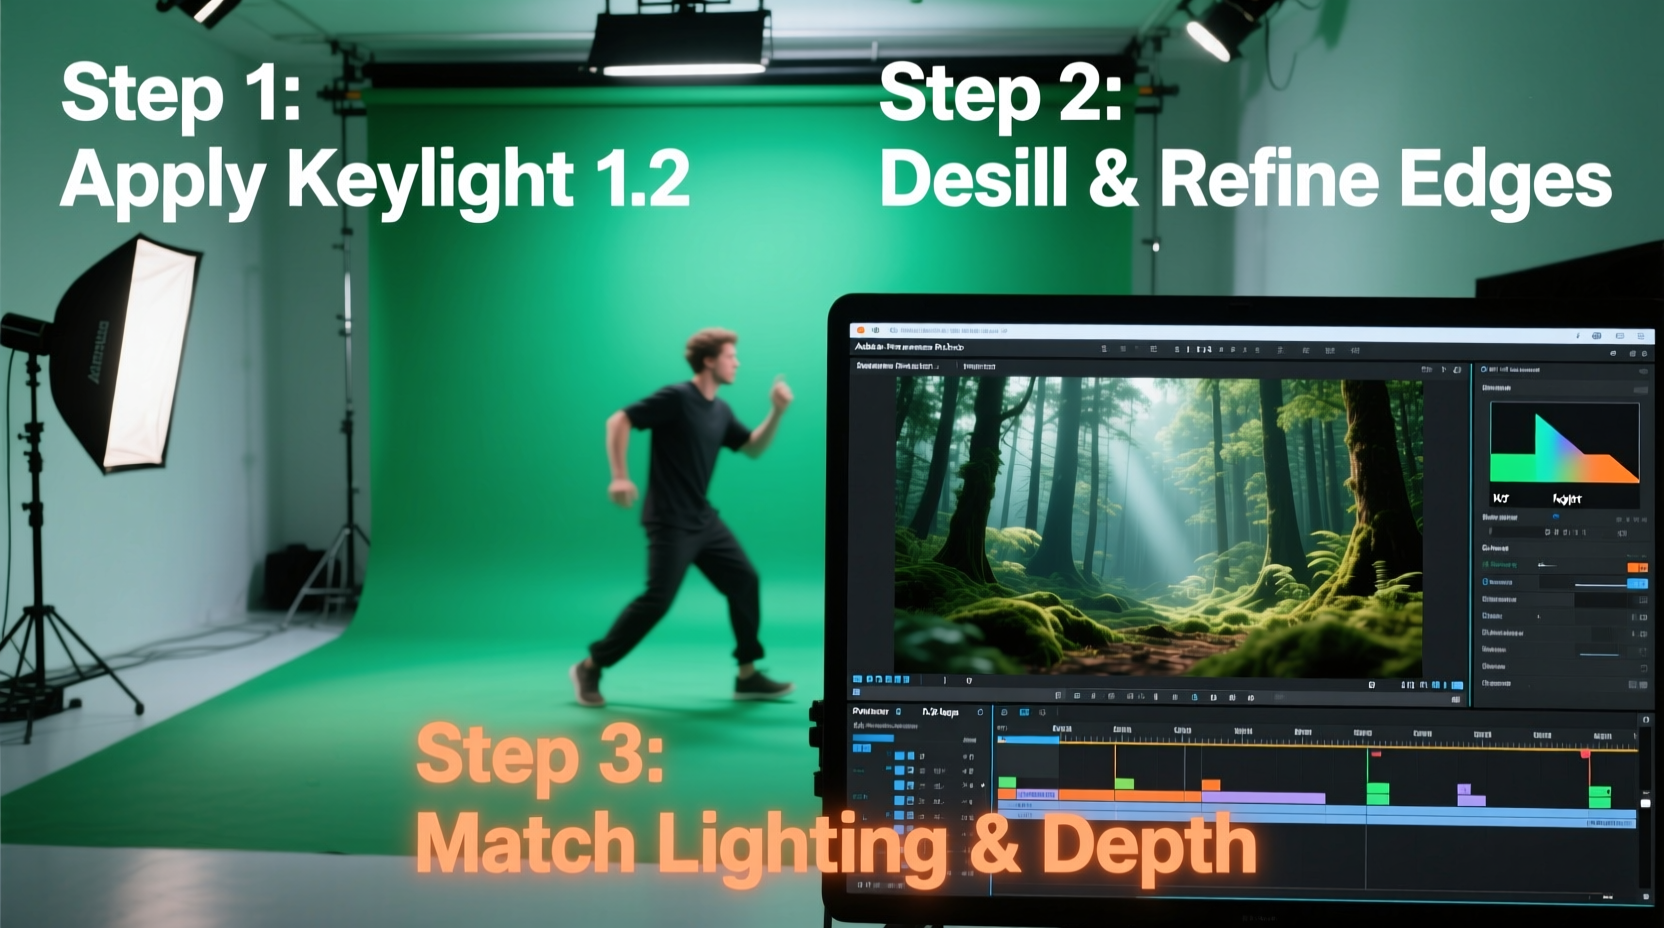
2. Step-by-Step Keying Process in Adobe Premiere Pro
Once you’ve captured clean footage, import it into Adobe Premiere Pro and begin the keying process using the Ultra Key effect. Follow these steps to extract your subject cleanly:
- Import and sequence your clip: Drag your green screen footage into a new sequence.
- Apply Ultra Key: Go to the Effects panel, search for “Ultra Key,” and apply it to your clip.
- Select the key color: Use the eyedropper tool to click on the greenest part of the background. Premiere will automatically remove pixels matching that hue.
- Refine the matte: Adjust settings like Pedestal (controls edge softness), Reduce Matte (removes fringes), and Spill Suppression (eliminates green tint on edges).
- Clean up edges: Zoom in and fine-tune Matte Generation and Matte Cleanup sliders to eliminate halos and preserve detail in hair or motion blur.
For complex shots—such as fine hair strands or transparent elements—consider nesting your sequence and applying additional effects like Garbage Matte or Masking to isolate problem areas before keying.
3. Optimizing Key Quality with Advanced Settings
Default keying settings rarely produce perfect results. Real-world footage contains variations in lighting, movement, and texture that demand careful tweaking. Understanding what each Ultra Key parameter does allows precise control over the final composite.
| Setting | Function | Recommended Adjustment |
|---|---|---|
| Matte Generation | Determines how aggressively pixels are removed based on color similarity | Increase slightly if background remnants remain; reduce if subject edges fade |
| Matte Cleanup | Sharpens the alpha channel, tightening edges and removing noise | Set between 10–20% for most scenes; higher values risk cutting into fine details |
| Spill Suppression | Removes green reflections cast onto the subject by the screen | Enable and adjust until skin tones look natural under different lighting |
| Pedestal | Controls the darkness of the keyed-out area and edge blending | Adjust subtly to avoid black halos around the subject |
“Great keying isn’t about removing green—it’s about preserving realism. The best composites feel effortless because the viewer never notices the effect.” — Daniel Reyes, Senior VFX Editor at Lumina Studios
4. Real-World Example: Creating a Travel Vlog Composite
A travel content creator films themselves against a portable green screen in their apartment. Their goal is to appear standing in front of iconic landmarks like the Eiffel Tower and Machu Picchu. After importing both the green screen footage and stock background videos into Premiere, they apply Ultra Key and notice green fringing around their hair.
To fix this, they first increase the Spill Suppression to 75%, eliminating the unnatural green glow. Then, they open the Secondary Matte Controls and enable Advanced Spill Suppression, choosing “Desaturate” mode to neutralize residual color without darkening the image. Next, they animate a garbage mask to exclude a reflective watch face that was causing artifacts. Finally, they adjust the background brightness and add a slight shadow beneath the subject using an adjustment layer with a soft black gradient, enhancing depth and realism.
The result is a seamless integration where the host appears naturally placed within each destination, despite never having left home.
5. Common Mistakes and Best Practices Checklist
Even experienced editors make errors that compromise green screen quality. Recognizing these pitfalls early improves efficiency and output quality.
- Using uneven lighting on the green screen
- Allowing wardrobe colors to blend with the background
- Over-processing the key, resulting in lost detail or jagged edges
- Ignoring scale and perspective when compositing with new backgrounds
- Skipping color grading after keying, leaving mismatched tones
- ✅ Ensure even, shadow-free lighting on the green screen
- ✅ Keep subject separated from the backdrop to prevent spill
- ✅ Use Ultra Key with precise eyedropper sampling
- ✅ Fine-tune matte settings to preserve fine details
- ✅ Apply spill suppression to neutralize green reflections
- ✅ Match lighting direction and color temperature between subject and background
- ✅ Add subtle shadows or ambient occlusion for realism
- ✅ Export test renders frequently to check for artifacts
Frequently Asked Questions
Can I achieve good results with a smartphone green screen setup?
Yes, provided you maintain consistent lighting and use a high-quality, evenly colored backdrop. Modern smartphones capture sufficient resolution and dynamic range for effective keying, especially when combined with proper editing techniques in Premiere Pro.
Why does my subject look pasted in after keying?
This usually stems from mismatched lighting angles, color temperatures, or scale discrepancies between subject and background. Adjust white balance, add directional shadows, and ensure perspective aligns—for example, a wide-angle background should not feature a subject shot with a telephoto lens.
Is Ultra Key better than other keying plugins?
Ultra Key is optimized for speed and integration within Premiere Pro, making it ideal for quick-turnaround projects. For more complex productions, third-party tools like Red Giant’s Keying Suite or After Effects’ Keylight offer greater precision, but require steeper learning curves and longer render times.
Final Thoughts
Mastering green screen effects in Adobe Premiere Pro combines technical knowledge with artistic judgment. It’s not enough to simply remove the background—true success lies in crafting a believable scene where the viewer accepts the impossible as real. By preparing carefully during filming, leveraging Ultra Key’s full capabilities, and refining composites with attention to light, color, and detail, you can produce professional-quality videos that captivate audiences.


 浙公网安备
33010002000092号
浙公网安备
33010002000092号 浙B2-20120091-4
Comments
No comments yet. Why don't you start the discussion?