
Crafting knot bracelets is more than just a pastime—it’s a meditative practice that blends creativity, precision, and personal expression. Whether you're looking to make a meaningful gift or create stylish accessories for yourself, mastering the basics of knotting opens the door to endless design possibilities. This guide breaks down everything a beginner needs to know, from selecting materials to completing your first bracelet with confidence.
Gathering Your Materials and Tools
The foundation of any successful knot bracelet lies in using the right supplies. Unlike complex jewelry-making methods, knotting requires minimal tools, making it accessible and affordable. The most common materials include cord, thread, clasps, and optional embellishments like beads or charms.
- Cord: Nylon, waxed cotton, or silk threads are ideal due to their strength and smooth texture. For beginners, 1mm waxed cotton cord offers excellent grip and durability.
- Scissors: Sharp, small scissors allow for clean cuts without fraying.
- Adhesive (optional): A tiny drop of clear-drying glue can secure knots and prevent unraveling.
- Clasp or closure: Lobster clasps, magnetic closures, or sliding knots offer different styles and ease of use.
- Tape or clipboard: To anchor your work while tying, use tape to secure the base cord to a surface or clip it to a board.
Understanding the Square Knot: The Core Technique
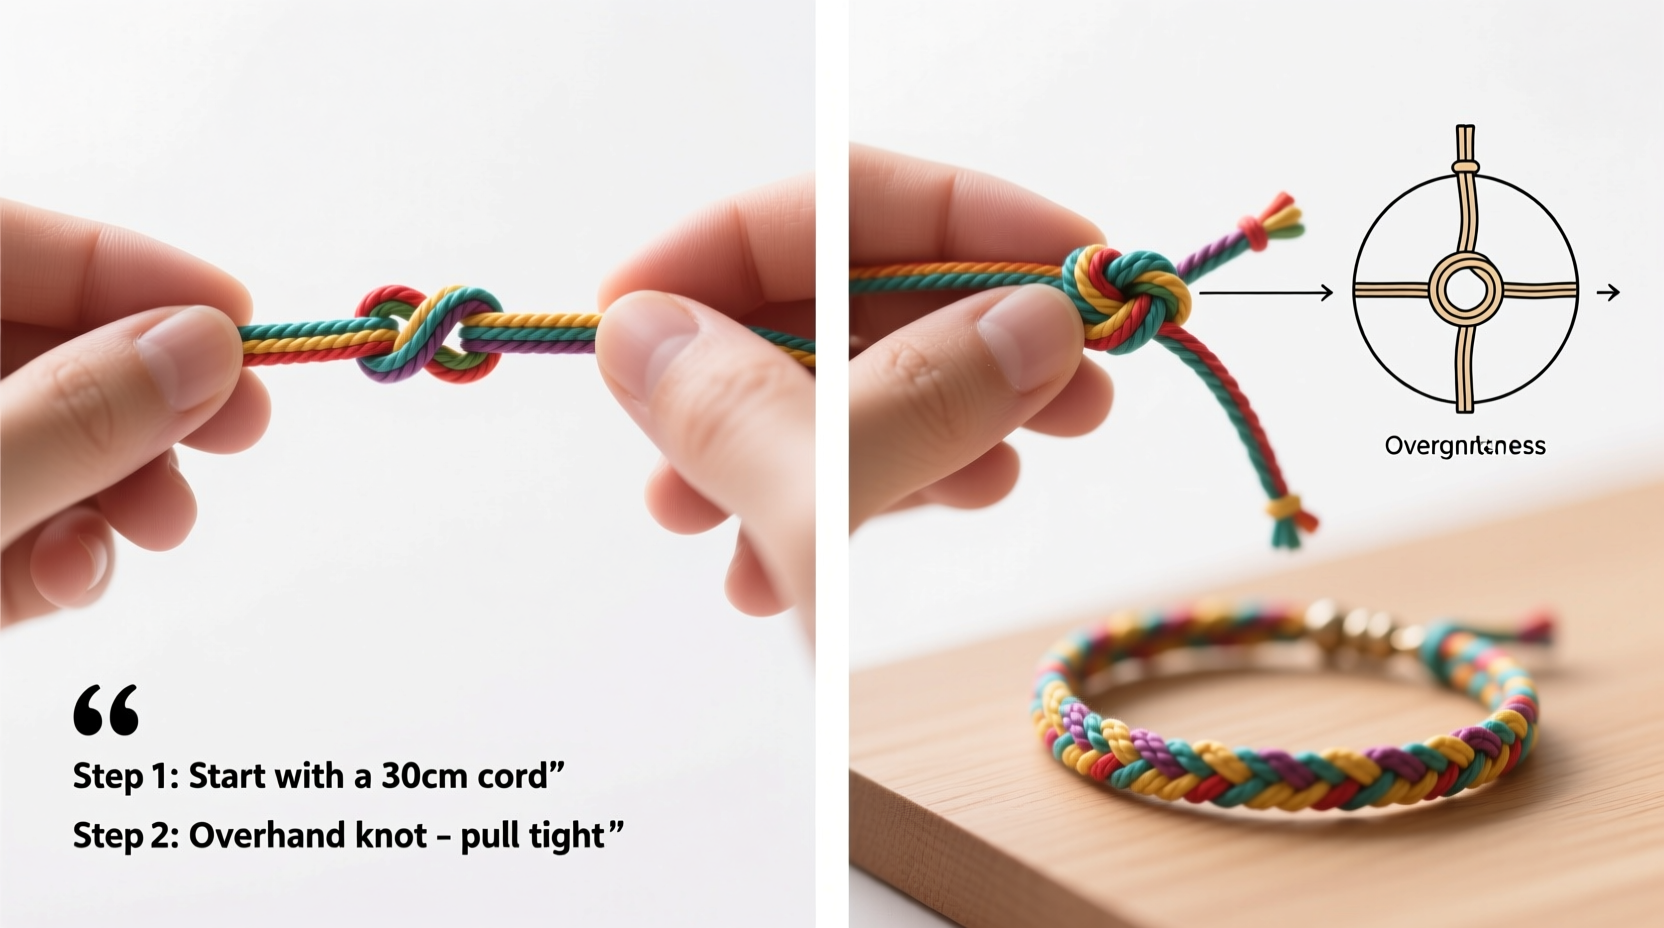
The square knot—also known as the reef knot—is the cornerstone of most knot bracelets. It creates a flat, symmetrical pattern and is strong enough to hold up over time. Once mastered, this knot allows you to progress into intricate braided and macramé designs.
To tie a square knot:
- Anchor two cords: one long base cord (filler) and one shorter working cord (knotting strand).
- Place the left working cord over the filler and under the right working cord.
- Bring the right working cord under the filler and through the loop created on the left.
- Pull both ends to tighten—this completes the first half of the knot.
- Repeat in reverse: start with the right cord over the filler and under the left, then pass the left under and up through.
- When tied correctly, the knot lies flat and resembles a “+” sign at its center.
Continue repeating these steps down the length of the bracelet. Consistency in tension ensures an even appearance.
| Aspect | Do | Don’t |
|---|---|---|
| Tension | Maintain consistent, firm pressure on each knot | Pull too tightly and distort the alignment |
| Alignment | Keep filler cords straight and centered | Let them twist or cross unintentionally |
| Knot Direction | Alternate starting side with each row | Always start from the same side (creates a spiral) |
| Finishing | Secure ends with a dab of glue or hidden knot | Leave loose ends exposed where they can fray |
Step-by-Step: Creating Your First Bracelet
Follow this straightforward process to complete a classic four-strand square knot bracelet.
- Measure and cut: Cut four strands of waxed cotton cord, each 90 cm (35 inches) long.
- Prepare the base: Fold all four cords in half and tie a simple overhand knot at the top to form a loop. Tape this loop securely to your workspace.
- Divide the strands: You now have eight hanging strands. Group them into two sets of four, one on the left and one on the right.
- Begin knotting: Take the leftmost strand from the left group and use it as the working cord. Tie a square knot around the two middle cords (the fillers), incorporating the second strand from the left as the partner working cord.
- Repeat across: Use the outermost strand from the right group to tie a square knot over the same two center cords, moving outward.
- Alternate layers: Continue alternating left and right square knots, always using the outermost strand as the working cord. Each new knot should sit directly below the previous one.
- Check length: Periodically wrap the piece around your wrist. Most adult bracelets range between 17–20 cm (6.5–8 inches) in knotted length.
- Finish securely: Once the desired length is reached, gather all eight strands, trim excess to about 2 cm, and tie a final overhand knot. Add a drop of clear glue for reinforcement if needed.
- Add closure (optional): Attach a clasp to the starting loop and the final knot, or braid the ends together for a seamless look.
Real Example: Maya’s First Friendship Bracelet
Maya, a high school student with no prior crafting experience, decided to make bracelets for her friends before summer break. She started with basic two-color square knot patterns using blue and white cords. Her first attempt was uneven—some knots were too loose, others too tight. But after reviewing her technique and focusing on consistent tension, her second bracelet showed noticeable improvement. By the fourth piece, she added small glass beads between knot sections for texture. Her friends loved the personalized gifts, and Maya discovered a calming rhythm in the repetitive motion. What began as a simple project evolved into a creative outlet she continues to enjoy.
“Knotting teaches patience and focus. The repetition isn’t monotonous—it’s therapeutic.” — Lena Torres, Art Therapist and Jewelry Instructor
Expanding Your Skills: Creative Variations
Once comfortable with the square knot, experiment with variations to elevate your designs:
- Spiral knot: Use the same knot repeatedly from one side only, creating a twisted, helix-like effect.
- Alternating knot patterns: Combine square knots with half-hitches or diagonal clove hitches for textured bands.
- Incorporate beads: Slide a bead onto the filler cords before knotting around it to lock it in place.
- Color blocking: Use contrasting colors to form geometric patterns or initials using spaced-out knots.
For those interested in gifting, personalize bracelets with birthstone-colored threads or engrave tiny metal tags to attach at the clasp.
Frequently Asked Questions
How do I prevent my cords from fraying?
Waxed cotton cords naturally resist fraying. If using untreated thread, lightly run the end through a flame (quickly) to seal it, or apply a small amount of clear nail polish to the tip before threading.
Can I wash a knot bracelet?
It’s best to avoid submerging knot bracelets in water, especially those made with natural fibers. Moisture weakens the fibers over time and may cause discoloration. Instead, spot-clean with a dry or slightly damp cloth.
What’s the average time to make one bracelet?
A simple four-strand bracelet takes 20–40 minutes for a beginner. With practice, completion time drops to 10–15 minutes. Intricate designs with beads or color changes may take an hour or more.
Essential Checklist for Beginners
- ☐ Choose soft, durable cord (waxed cotton recommended)
- ☐ Cut cords 3x the intended bracelet length
- ☐ Anchor your work to a stable surface
- ☐ Practice square knots until consistent
- ☐ Maintain even tension throughout
- ☐ Finish with a secure knot and optional glue
- ☐ Trim ends neatly or incorporate into closure
Final Thoughts
Creating knot bracelets is a rewarding craft that combines simplicity with artistic potential. With just a few basic materials and one fundamental knot, you can produce elegant, wearable pieces that reflect your personality or convey thoughtfulness when gifted. The process fosters mindfulness, improves dexterity, and encourages creative problem-solving. Every knot tied is a small act of intention—a blend of focus and care woven into something tangible.


 浙公网安备
33010002000092号
浙公网安备
33010002000092号 浙B2-20120091-4
Comments
No comments yet. Why don't you start the discussion?