
Drawing shoes may seem intimidating at first, but with the right approach, anyone can learn to sketch them confidently. Whether you're a fashion student, an aspiring designer, or just someone who enjoys creative sketching, mastering basic shoe drawings builds foundational skills in form, proportion, and line control. This guide breaks down the process into manageable steps, offering practical techniques and expert-backed insights to help you progress from blank page to polished sketch.
Understanding Shoe Anatomy: The Foundation of Sketching
Before picking up a pencil, it's essential to understand the core components of a shoe. Familiarity with these elements allows you to draw with intention rather than guessing shapes. Most footwear—whether sneakers, boots, or loafers—shares common structural parts:
- Toe box: The front section that covers the toes.
- Vamp: The upper part covering the instep.
- Laces or closure system: Functional and design element across many styles.
- Heel counter: The stiff back portion supporting the heel.
- Sole: Includes outsole (bottom) and midsole (cushion layer).
- Collar and tongue: Provide comfort and adjust fit.
Recognizing how these parts connect and interact gives your sketches realism and balance. Study real shoes from multiple angles—side, top, and three-quarter views—to train your eye for spatial relationships.
Essential Tools and Materials for Beginners
You don’t need expensive equipment to start. A few basic tools are enough to produce clean, effective sketches:
| Tool | Purpose | Beginner Recommendation |
|---|---|---|
| Pencil (HB, 2B) | Light sketching and darkening lines | Start with HB for light guidelines |
| Eraser (kneaded + vinyl) | Adjusting lines without damaging paper | Kneaded eraser lifts graphite gently |
| Sketchbook (A4 or smaller) | Practice surface with good tooth | Medium-weight paper (90–120 gsm) |
| Ruler or straight edge | Aiding symmetry and sole alignment | Optional for freehand practice |
| Fine liner (0.3mm) | Defining final lines | Use after mastering pencil work |
Keep your workspace well-lit and organized. Natural daylight helps you see values and contrasts more accurately, which is crucial when defining shadows and depth.
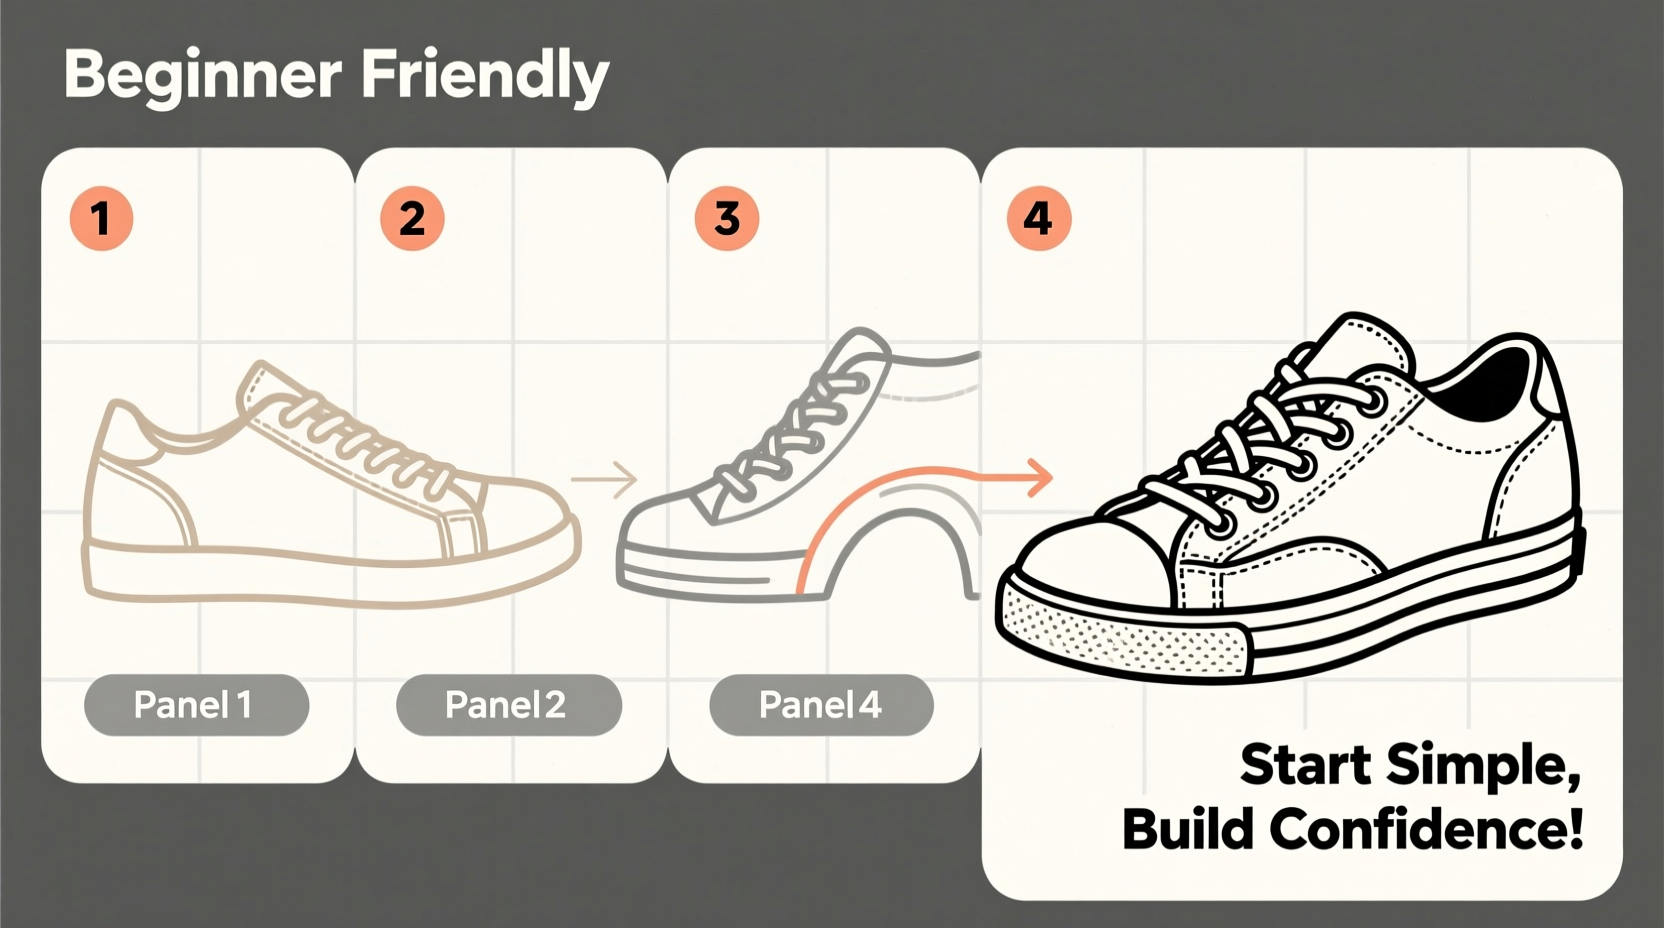
Step-by-Step Guide to Drawing a Basic Sneaker
Follow this structured timeline to draw a classic low-top sneaker—a versatile style ideal for learning foundational techniques.
- Draw the sole base: Lightly sketch a slightly curved rectangle. This represents the outsole’s bottom edge. Keep lines soft; this is just a guide.
- Add the midsole thickness: Draw a parallel line above the sole to indicate height. Connect both ends vertically to form a 3D base.
- Outline the upper shape: From the midsole, begin curving upward to form the toe box. Imagine a teardrop shape extending from front to back.
- Define the heel cup: Curve the back upward higher than the front, creating a supportive enclosure. Maintain smooth transitions between sections.
- Add the tongue and laces: Sketch a symmetrical oval for the tongue. Add six to eight vertical lace holes on each side, evenly spaced.
- Refine the collar: Extend the ankle opening with a U-shaped curve connecting both sides of the heel.
- Detail key elements: Add stitching lines along seams, subtle curves for material panels, and texture hints like perforations.
- Darken final lines: Once satisfied, go over main contours with a firmer pencil or pen. Erase all construction lines.
Repeat this process daily for one week. Focus on consistency, not perfection. Each repetition trains muscle memory and improves accuracy.
“Confidence in drawing comes not from talent, but from repetition. Ten deliberate sketches teach more than a hundred rushed ones.” — Diego Marquez, Fashion Illustration Instructor at Central Saint Martins
Common Challenges and How to Overcome Them
Even with clear instructions, beginners often encounter specific hurdles. Awareness of these issues—and their solutions—can accelerate improvement.
Problem: Shoes look flat or misshapen.
This usually stems from incorrect proportions. The front third of the shoe should be longer than the back two-thirds combined. Use light horizontal dividers to map space before adding curves.
Problem: Asymmetry in laces or panels.
Work one side at a time, mirroring each feature. After drawing a lace hole on the left, immediately place the corresponding one on the right.
Problem: Lines appear shaky or hesitant.
Practice gesture drawing: set a timer for 2 minutes and sketch quick shoe silhouettes without lifting the pencil. Speed builds fluidity.
Mini Case Study: From First Attempt to Confident Sketches
Jamila, a 22-year-old design student with no prior drawing experience, began practicing shoe sketches using this method. Her first attempt was uneven—the sole tilted, the toe pointed too sharply, and the laces were off-center. Instead of scrapping it, she analyzed her errors and repeated the exercise daily. By day five, her lines were smoother and more balanced. On day ten, she completed a clean side-view sneaker with accurate volume and panel details. Within three weeks, she filled half a sketchbook and started designing her own variations. Her breakthrough came not from sudden inspiration, but from consistent, mindful repetition.
Developing Your Own Style: Beyond the Basics
Once you’ve mastered a standard silhouette, experiment with modifications. Try altering the toe shape (round, pointed, squared), increasing heel height, or adding overlays and zippers. These changes build creativity while reinforcing structural understanding.
To push further, challenge yourself with different perspectives:
- Three-quarter view: Shows both side and front, revealing depth.
- Top-down view: Emphasizes lacing pattern and footbed layout.
- Low-angle view: Dramatizes sole thickness and tread design.
Each angle demands slight adjustments in foreshortening and curvature. Begin with light construction lines to map vanishing points and perspective flow before detailing.
Checklist: Building Strong Sketching Habits
- ✅ Spend 15 minutes daily on shoe drawing practice
- ✅ Start each session with light construction lines
- ✅ Focus on one shoe type per week (e.g., sneakers, boots, sandals)
- ✅ Compare sketches weekly to track progress
- ✅ Study real shoes or technical flats (2D design templates) for reference
- ✅ Label parts of your sketches to reinforce terminology
- ✅ Finish each drawing with clean, defined outlines
Frequently Asked Questions
How long does it take to learn to draw shoes well?
With consistent daily practice, most beginners see noticeable improvement within two to three weeks. Mastery takes months, but confidence in basic forms develops quickly. Focus on small wins—each clean sole or symmetrical lace is progress.
Do I need to know how to draw people to sketch shoes?
No. While understanding foot proportions helps, standalone shoe sketches rely more on object-based observation. You’re drawing a product, not anatomy. However, placing shoes on simplified feet later can enhance realism.
Can I use digital tools instead of paper?
Absolutely. Apps like Procreate or Adobe Fresco offer layers and undo functions that support learning. But starting on paper builds tactile sensitivity and reduces dependency on digital corrections.
Final Thoughts: Start Simple, Stay Consistent
Mastering simple shoe sketches isn’t about innate talent—it’s about disciplined practice and patient observation. Every expert designer once struggled with wobbly lines and uneven soles. What sets them apart is persistence. By breaking down complex forms into basic shapes and following a repeatable process, you gain control and clarity. Don’t wait for inspiration. Pick up your pencil today, draw one shoe, and then another tomorrow. Over time, your hand will move with greater precision, your eye will catch subtle curves, and your confidence will grow with every page.


 浙公网安备
33010002000092号
浙公网安备
33010002000092号 浙B2-20120091-4
Comments
No comments yet. Why don't you start the discussion?