
Handmade paper is more than just a craft—it’s a return to tradition, sustainability, and mindful creation. In an age dominated by mass production, crafting your own paper offers a tactile connection to material and process. Whether you're drawn to its environmental benefits, artistic potential, or meditative rhythm, learning how to make handmade paper is both rewarding and accessible. This guide walks you through every stage, from gathering scraps to pressing finished sheets, ensuring even complete beginners can create high-quality, textured paper perfect for stationery, art, or gift wrapping.
Gathering Materials and Setting Up Your Workspace
The foundation of successful handmade paper lies in preparation. Unlike industrial processes that rely on virgin wood pulp, handmade paper thrives on recycled fiber, giving new life to old documents, packaging, or fabric remnants. Start by collecting clean paper waste—avoid glossy magazines or wax-coated cardboard, as these contain additives that hinder fiber bonding.
Your basic toolkit includes a blender (dedicated to craft use), a flat mold and deckle (a frame with a screen), a sponge, towels or felt sheets, and a press board or heavy books for drying. A plastic tub large enough to submerge the mold is also essential. Choose a workspace near a water source, preferably outdoors or in a garage, as papermaking can be messy. Cover surfaces with plastic sheeting and keep spare cloths nearby for spills.
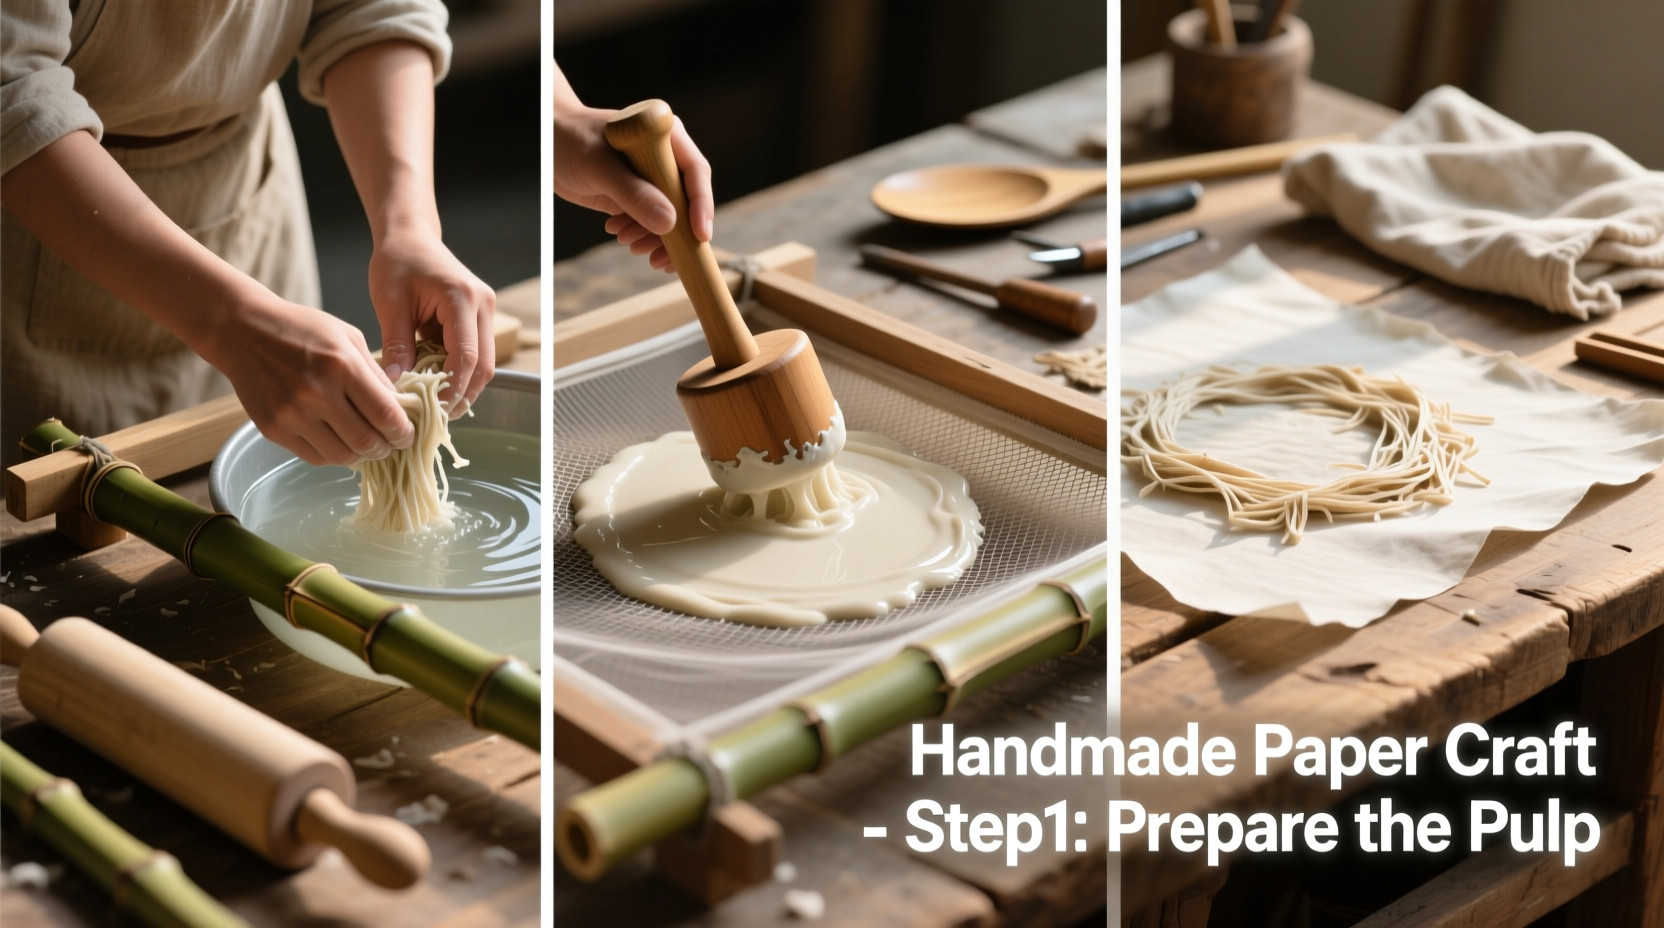
The Pulping Process: Turning Waste into Fiber Slurry
Pulping breaks down cellulose fibers into a workable slurry. Tear collected paper into small strips, about 1 inch wide, and soak them in warm water for at least two hours—or overnight for tougher materials. Once softened, transfer a handful of soaked paper to a blender with fresh water. Blend in short bursts until the mixture resembles thin oatmeal. The consistency should be smooth but not watery; aim for one part pulp to five parts water.
For added texture or color, mix in flower petals, tea leaves, or finely shredded colored paper. Avoid overloading the blend—too many inclusions weaken the sheet. If using natural additives, ensure they are dry and pesticide-free. Some artisans add methylcellulose (a non-toxic thickener) at this stage to improve suspension and reduce pilling during formation.
“Hand papermaking is alchemy—you transform the discarded into something precious through patience and attention.” — Lila Chen, Paper Artist and Educator
Forming the Sheet: The Core Technique
This is where craftsmanship comes alive. Pour the pulp into a large tub filled with water, stirring gently to distribute fibers evenly. Submerge the mold and deckle (screen side up) at a slight angle, then lift horizontally through the slurry. Shake gently side to side—not up and down—to entangle fibers and create a uniform mat. This motion, known as “couching,” ensures strength and even thickness.
Lift the mold smoothly from the water. Excess liquid drains through the screen, leaving a wet sheet clinging to the surface. For thicker paper, repeat the process with a second dip, layering pulp directly onto the first sheet while still wet.
| Desired Paper Type | Fiber Source | Blending Time | Water Ratio (Pulp:Water) |
|---|---|---|---|
| Thin & Translucent | Printer paper, tissue | 30–45 seconds | 1:8 |
| Standard Writing Weight | Copy paper, notebook pages | 1–2 minutes | 1:6 |
| Heavy Art Stock | Cotton linters, denim | 2–3 minutes | 1:4 |
Drying and Finishing: From Wet Mat to Usable Sheet
Once formed, the sheet must be transferred from the mold to a porous surface for drying. Place a damp felt or blotter sheet on a flat surface, then flip the mold face-down onto it. Gently peel back the screen, allowing the wet paper to release. Repeat layering with alternating felt and paper if making multiple sheets.
Press the stack under a wooden board weighted with heavy books or a mechanical press for 12–24 hours. This removes excess moisture and improves density. After pressing, carefully peel off each sheet and hang it on a clothesline with clips or lay it flat on a drying rack. Full drying takes 24–48 hours depending on humidity. Avoid direct sunlight, which can cause warping or fading.
For a smoother finish, iron the dry paper on low heat with a pressing cloth. This also enhances translucency and makes it ideal for calligraphy or printmaking.
A Beginner’s Journey: Realizing Potential Through Practice
Sophie, a graphic designer from Portland, started making paper after receiving a handmade journal as a gift. Inspired, she tried her first batch using shredded printer paper and dried rose petals. Her initial attempts were uneven and prone to tearing, but she kept notes on pulp ratios and drying times. By her fifth batch, she produced consistent, elegant sheets she used for client thank-you cards. Within months, she launched a small Etsy shop selling custom wedding invitations on handmade paper embedded with wildflower seeds. Her story reflects a common truth: mastery grows not from perfection, but from iterative learning.
Essential Checklist for First-Time Papermakers
- Collect 2–3 cups of clean, recyclable paper (non-glossy)
- Soak paper in warm water for 2+ hours
- Blend soaked paper into smooth pulp
- Mix pulp with fresh water in a vat (adjust ratio for desired thickness)
- Dip mold and deckle, shake to form even sheet
- Couch (transfer) sheet onto felt or towel
- Stack and press sheets for 12–24 hours
- Peel and air-dry completely before use
- Optional: Iron for smooth finish
Common Questions About Handmade Paper
Can I write or print on handmade paper?
Yes, but consider the texture. Rougher sheets work well with fountain pens or pencils, but may jam laser printers. For inkjet printing, let the paper dry thoroughly and feed sheets one at a time. Pre-sizing with a light gelatin solution can reduce absorbency and prevent bleeding.
How long does handmade paper last?
When made from acid-free materials and stored properly, handmade paper can last decades or longer. Cotton-based papers are archival and often used in fine art and bookbinding. Avoid storing in humid areas or direct sunlight to preserve integrity.
Is handmade paper eco-friendly?
Generally, yes. It repurposes waste, uses minimal energy compared to industrial production, and avoids harmful bleaching agents when done naturally. However, water usage should be managed responsibly—reuse soaking water for gardening when possible, and avoid chemical additives.
Begin Your Craft Today
Creating handmade paper is an act of slow creativity in a fast world. Each sheet carries the imprint of your hands—the subtle ridges, the speckles of color, the whisper of recycled history. What begins as a simple experiment can evolve into a sustainable practice, a creative outlet, or even a small business. There’s no single “right” way to make paper; experimentation is part of the joy. Try different fibers, embed local plants, or experiment with dyes made from onion skins and turmeric.


 浙公网安备
33010002000092号
浙公网安备
33010002000092号 浙B2-20120091-4
Comments
No comments yet. Why don't you start the discussion?