
A large capacity pencil case offers the potential for convenience, but without proper organization, it can quickly become a chaotic jumble of pens, pencils, erasers, and tools. The key to unlocking its full utility lies not in how much you can fit inside, but in how efficiently and intuitively everything is arranged. Whether you're a student, artist, designer, or office professional, mastering the art of organizing your supplies leads to faster access, reduced frustration, and longer-lasting tools. Below are proven, practical strategies to transform your oversized pencil case from a storage pit into a streamlined command center.
Assess Your Contents and Usage Patterns
Before rearranging anything, take inventory. Empty your pencil case completely and lay out every item. Categorize them by function: writing instruments, coloring tools, measuring devices, correction supplies, specialty items (like mini staplers or tape), and accessories (rubber bands, paper clips). Then ask yourself:
- Which items do I use daily?
- Which ones are rarely touched?
- Are there duplicates I can consolidate?
- Do any tools belong elsewhere—like in a desk drawer or backpack compartment?
This audit prevents overfilling and ensures only essential, frequently used items occupy prime real estate. As Marie Kondo’s principles suggest, keep only what “sparks joy” or serves a purpose. A cluttered case defeats the purpose of portability.
Implement a Zoning System
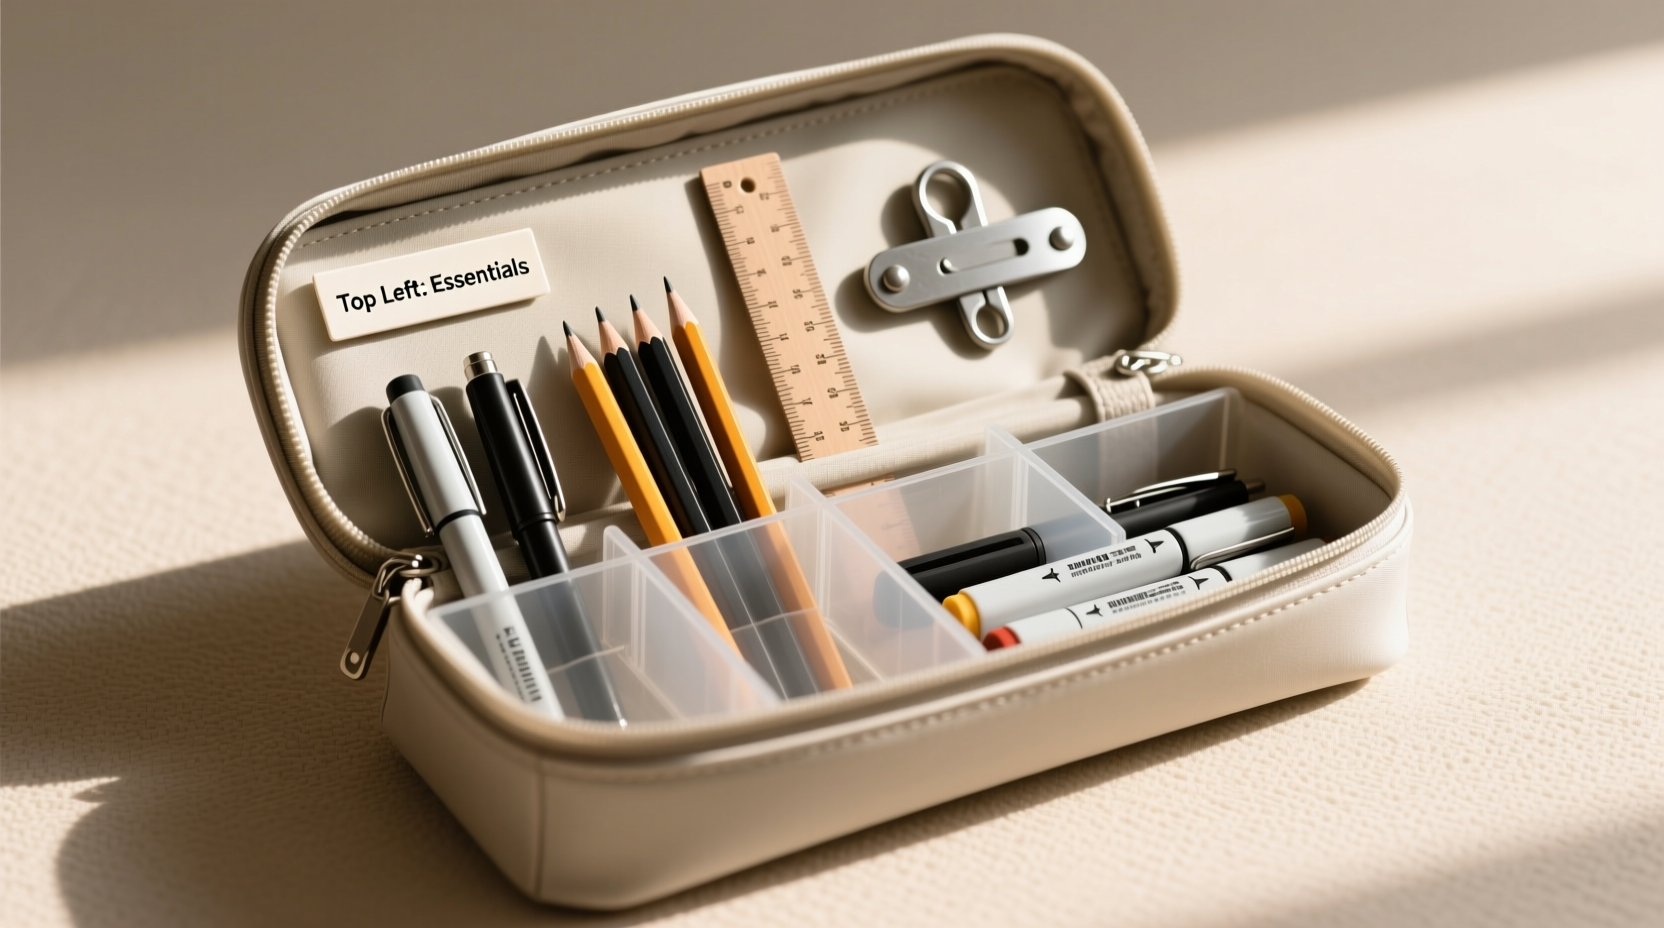
Think of your pencil case like a small apartment: every inch should serve a designated function. Divide the interior into zones based on frequency of use and category. A well-zoned layout might include:
- Front Zone (High-Access): Daily-use pens, mechanical pencils, highlighters.
- Middle Zone (Moderate-Use): Specialty markers, rulers, erasers.
- Rear or Side Pockets (Low-Use): Spare leads, sticky notes, backup batteries for light-up pens.
If your case has internal dividers, customize their positions. For cases without built-in sections, use slim organizers like foldable pen sleeves, silicone bands, or even repurposed mint tins for tiny items. Vertical stacking with flat pouches maximizes depth, especially in wide cases.
Recommended Zoning Layout for Large Cases
| Zone | Contents | Container Type |
|---|---|---|
| Front Left | Ballpoint pens, gel pens | Mesh pocket or upright sleeve |
| Front Right | Mechanical pencils, lead refills | Pen tube or elastic loop |
| Middle Compartment | Markers, colored pencils | Zippered inner pouch |
| Rear Pocket | Eraser, sharpener, sticky notes | Flat fabric sleeve |
| Side Slot | Ruler, USB drive, nail file | Stiff insert or cardholder |
Use Space-Saving Tools and Hacks
Maximizing volume isn’t about stuffing more in—it’s about using smarter configurations. Consider these physical hacks that reclaim wasted space:
- Pen Clips or Bands: Attach rubberized bands around grouped pens to prevent rolling and save space.
- Refill Cartridges Separately: Store ink refills in a tiny plastic bag instead of carrying multiple full pens.
- Stackable Mini Containers: Use magnetic or nesting trays for small parts like eraser crumbs or spare pencil tips.
- Foldable Rulers: Replace rigid rulers with compact, accordion-style versions.
- Label Everything: Small labels on compartments reduce search time and accidental misplacement.
For artists, consider transferring paint pens or markers into labeled slots by color family—red, blue, green—rather than leaving them loose. This reduces visual clutter and speeds up selection.
“Efficiency in small spaces comes from intentionality, not capacity. A well-organized 20-item case outperforms a stuffed 50-item one.” — Lena Torres, Productivity Consultant and Workspace Designer
Step-by-Step Guide to Reorganizing Your Pencil Case
Follow this six-step process monthly—or whenever your case feels unwieldy:
- Empty Completely: Remove all contents and wipe down the interior with a dry microfiber cloth.
- Categorize: Group items into types: pens, pencils, tools, etc.
- Prioritize: Rank each group by usage frequency. Keep top-tier items easily accessible.
- Choose Zones: Assign areas in the case based on priority and size.
- Insert Organizers: Add dividers, bands, or pouches as needed to maintain separation.
- Test & Adjust: Close the case, then open it and retrieve three common items. If retrieval takes more than five seconds, revise the layout.
This routine takes less than 15 minutes but pays dividends in daily efficiency. Set a recurring calendar reminder to refresh your system every four weeks.
Real-Life Example: From Chaos to Clarity
Sophia, a graphic design student, struggled with her oversized zipper pouch. It held over 40 items, including dual-tip markers, fineliners, sketch pencils, and digital stylus tips. Every time she needed a specific color, she dumped the entire case onto her desk. After applying zoning and decluttering techniques, she restructured her case:
- Removed 12 dried-out markers and duplicate pencils.
- Added a removable fabric divider to separate black ink from color tools.
- Used a labeled silicone band to hold her three most-used fineliners at the front.
- Stored lead refills in a coin-sized zip bag tucked into a side mesh pocket.
The result? She now accesses tools 70% faster during critiques and reports fewer lost items. Her case still holds 30+ items—but they’re predictable, accessible, and logically arranged.
Common Mistakes to Avoid
Even with good intentions, poor habits undermine organization. Watch out for these pitfalls:
- Overpacking: Just because the case can hold 50 items doesn’t mean it should. Overstuffing warps zippers and damages tools.
- Mixing Dry and Wet Media: Water-based markers near pencils can transfer color or moisture, ruining other tools.
- Ignoring Weight Distribution: Heavy items at the top can cause the case to tip when opened vertically.
- Skipping Maintenance: Dust, graphite buildup, and dried ink accumulate silently. Clean every 2–3 weeks.
FAQ
How often should I clean my pencil case?
Wipe down the interior with a dry cloth weekly. Perform a deep clean—removing all items, vacuuming debris, and spot-cleaning stains—every 3–4 weeks. For fabric cases, hand-wash gently with mild soap once per semester.
Can I use household items as organizers?
Absolutely. Repurpose mint tins for metal tools, cut-up credit cards as stiff dividers, or binder clips (attached to the side) to hold notepads. Egg cartons work well for temporary sorting during reorganization.
What if my case has no internal pockets?
Add functionality with DIY inserts: sew a small fabric pocket, glue felt strips to create pen loops, or use adhesive-backed hook-and-loop tape to secure modular pouches. Alternatively, invest in a universal-fit organizer sleeve that fits inside various cases.
Final Checklist: Optimize Your Pencil Case in One Session
Print or bookmark this checklist for your next reorganization:
- ✅ Empty and clean the entire case
- ✅ Sort items into categories
- ✅ Discard dried, broken, or redundant tools
- ✅ Define high-, medium-, and low-access zones
- ✅ Install dividers, bands, or inner pouches
- ✅ Label compartments if helpful
- ✅ Test accessibility of top 5 used items
- ✅ Schedule next review in 30 days
Take Control of Your Tools
A large capacity pencil case is only as effective as its organization. When thoughtfully structured, it becomes an extension of your workflow—not a barrier. By applying strategic zoning, routine maintenance, and smart spatial hacks, you turn chaos into clarity. The goal isn’t minimalism for its own sake, but precision: having the right tool available at the right moment, without digging or distraction.


 浙公网安备
33010002000092号
浙公网安备
33010002000092号 浙B2-20120091-4
Comments
No comments yet. Why don't you start the discussion?