
Crafting custom shoes is more than a hobby—it's an art form that blends design, precision, and craftsmanship. Whether you're creating a one-of-a-kind pair for personal wear or building a portfolio as a shoemaker, the process demands attention to detail, patience, and a deep understanding of materials and construction. From selecting the right leather to mastering lasting techniques, this guide walks through every phase of shoemaking with actionable insights and proven methods.
Understanding Shoe Anatomy and Design Principles
Before cutting any material, it’s essential to understand the core components of a shoe: the upper, lining, insole, midsole, outsole, heel, and welt (if applicable). Each part plays a functional and aesthetic role. The upper wraps the foot, the sole provides traction and cushioning, and the insole supports comfort. A well-designed shoe balances form and function—style should never compromise fit or durability.
Begin by sketching your design on paper or using digital tools like Adobe Illustrator or specialized shoemaking software. Focus on proportions, seam placement, and material transitions. Consider how the shoe will flex at the ball of the foot and how heel height affects posture. For beginners, start with simple lace-up oxfords or low-top sneakers before advancing to boots or heels.
Selecting Materials: Leather, Soles, and Beyond
The quality of your materials directly impacts the final product. Top-grain leather is ideal for uppers due to its durability and natural grain texture. Suede offers a soft, textured finish but requires protective sprays. For soles, vegetable-tanned leather provides classic elegance and molds to the foot over time, while rubber offers superior grip and weather resistance.
Lining materials matter too. Pigskin or calf lining improves breathability and comfort. Avoid synthetic linings—they trap moisture and degrade faster. Thread should be waxed polyester or nylon for strength, especially in high-stress areas like the vamp and heel counter.
| Material | Best Use | Pros | Cons |
|---|---|---|---|
| Top-Grain Leather | Uppers | Durable, ages beautifully | Expensive, requires conditioning |
| Suede | Uppers, casual styles | Soft feel, stylish | Stains easily, less durable |
| Vegetable-Tanned Sole | Outsoles | Molds to foot, biodegradable | Slippery when wet, needs resoling |
| Vibram Rubber | Outsoles | Excellent traction, long-lasting | Heavier, less traditional look |
| Pigskin Lining | Interior lining | Breathable, soft | Can stretch if poorly attached |
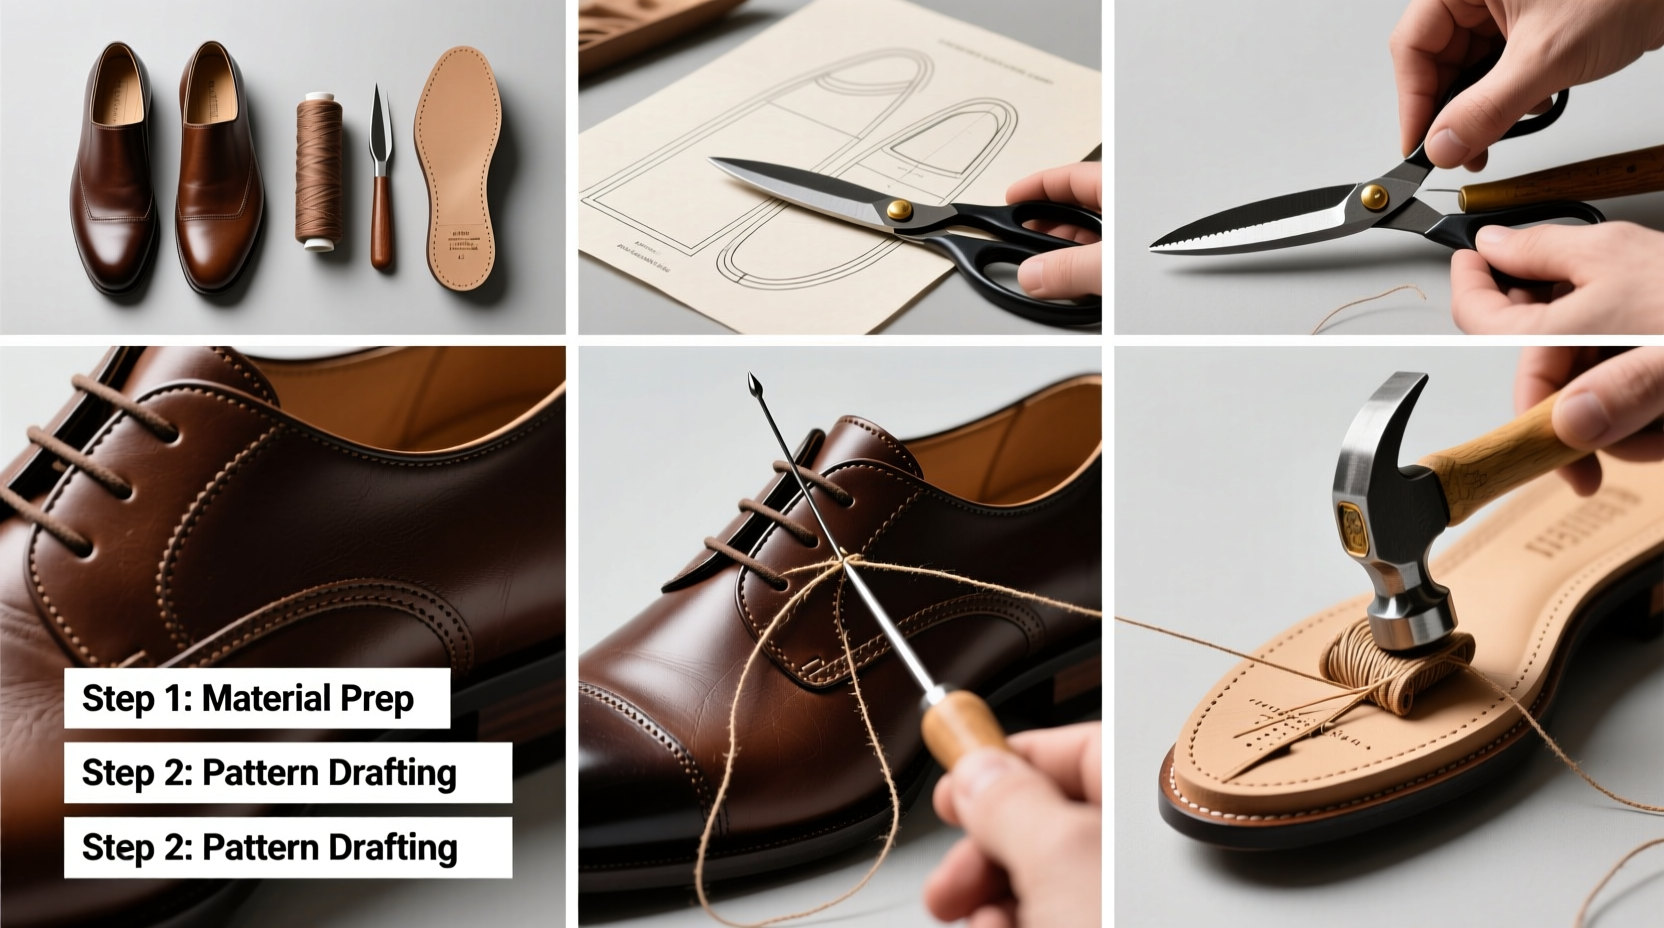
Step-by-Step Shoemaking Process
Creating a shoe from scratch involves multiple stages, each requiring specific tools and techniques. Follow this timeline to move from concept to wearable masterpiece.
- Design & Pattern Making: Draft a last-based pattern using cardboard or heavy paper. Transfer measurements from a physical last (the mold shaped like a foot) to create accurate templates for each shoe component.
- Clicking (Cutting): Use a rotary cutter or click knife to cut leather pieces based on your patterns. Mark stitching lines and orientation arrows to ensure consistent assembly.
- Skiving: Thin edges of leather where layers overlap, especially around seams and quarters. This reduces bulk and ensures smooth joins.
- Stitching the Upper: Sew pieces together using a saddle stitch or machine (e.g., post-bed sewing machine). Reinforce stress points like eyelet areas with bartacks.
- Lasting: Stretch the upper over the last using toe and heel pincers. Secure it temporarily with tacks or adhesive tape.
- Attaching the Insole: Cement or stitch the insole to the lasting margin. For Goodyear-welted shoes, this creates a foundation for the welt.
- Welt Attachment: Stitch a strip of leather (the welt) around the perimeter, connecting upper, insole, and eventually the sole.
- Sole Fitting & Cementing: Trim the outsole to match the welt, then roughen both surfaces. Apply contact cement and press together.
- Edge Trimming & Finishing: Use a knife or edge trimmer to shape the sole edge. Bevel and sand for smoothness, then apply edge paint.
- Polishing & Final Inspection: Condition the leather, buff with a horsehair brush, and check for loose threads or uneven seams.
“Shoemaking isn’t about speed—it’s about reverence for the craft. Every stitch tells a story of intention.” — Rafael Mendez, Master Cordwainer, Madrid School of Footwear
Essential Tools and Workshop Setup
You don’t need a full factory, but certain tools are non-negotiable. Start with a basic toolkit:
- Shoe last (wood or plastic, matching your target size)
- Clicking knife or rotary cutter
- Hammer, nails, and tacks
- Stitching awl and harness needles
- Waxy thread (size 3-5)
- Skiving knife or rotary skiver
- Lasting pliers (toe and heel)
- Shoe turner (for slip lasts or moccasins)
- Rasp and half-round file (for shaping soles)
- Contact cement and glue spreader
Set up your workspace with a sturdy table, good lighting, and ventilation—especially when using adhesives. Store sharp tools safely and keep leather rolls flat and dry. As you advance, consider investing in a post-bed sewing machine or a sole press for professional results.
Mini Case Study: From Sketch to Street – Elena’s First Custom Oxfords
Elena, a graphic designer from Portland, wanted to make her first pair of handmade oxfords. She started with a size 7¾ last borrowed from a local cobbler. Using kraft paper, she drafted a cap-toe pattern, adjusting the throat height for comfort. She sourced chestnut top-grain leather from a tannery in Milwaukee and pigskin lining from an online supplier.
Her first attempt failed at lasting—the upper tore near the heel due to insufficient skiving. After studying technique videos and practicing on scrap leather, she rebuilt the upper with reinforced stitching and proper edge thinning. On the second try, the lasting succeeded. She hand-stitched a Dainite-style rubber sole using pre-punched holes for alignment. The final result? A pair of rich, burnished oxfords that drew compliments at her office—and sparked a new passion.
Checklist: Your First Pair of Custom Shoes
- ☑ Obtain a shoe last in your desired size
- ☑ Design and test paper patterns
- ☑ Source high-quality upper, lining, and sole materials
- ☑ Cut and skive all leather components
- ☑ Stitch upper sections accurately
- ☑ Last the upper securely
- ☑ Attach insole and prepare for welting
- ☑ Stitch or cement the outsole
- ☑ Finish edges and polish the leather
- ☑ Remove from last and inspect for flaws
Frequently Asked Questions
How long does it take to make a pair of custom shoes?
For beginners, expect 20–40 hours spread over several weeks. Complex styles like brogues or boots may take longer. With practice, skilled makers can complete a pair in under 15 hours.
Can I make shoes without a sewing machine?
Yes. Hand-stitching with a saddle stitch is traditional and strong. It’s slower but allows greater control and is ideal for small batches or bespoke work. Many artisans prefer hand-welting for its durability and aesthetic.
What’s the most common mistake beginners make?
Underestimating the importance of precise pattern-making. Even a 2mm error can cause fit issues or wrinkling when lasted. Always double-check measurements and do a trial fit with inexpensive fabric before cutting leather.
Mastery Through Practice and Patience
Like any craft, shoemaking improves with repetition. Your first pair may have flaws—uneven stitching, slight misalignment, or stiffness—but each project teaches something new. Join online communities like r/fosscils on Reddit or the British Online School of Footwear forums to share progress and get feedback.
As you gain confidence, experiment with exotic leathers, creative lasts, or unique sole combinations. Some artisans incorporate recycled materials or laser-cut designs for modern flair. The key is to stay curious, respect the process, and let each pair reflect your evolving skill.


 浙公网安备
33010002000092号
浙公网安备
33010002000092号 浙B2-20120091-4
Comments
No comments yet. Why don't you start the discussion?