
Building an app used to require months of development, technical expertise, and a large budget. Today, anyone with a good idea can create a fully functional app—without writing a single line of code. No-code platforms have democratized software development, enabling entrepreneurs, small business owners, and creatives to bring their digital ideas to life quickly and affordably. This guide walks you through the entire process, from concept to launch, with practical steps that require zero programming knowledge.
1. Define Your App’s Purpose and Target Audience
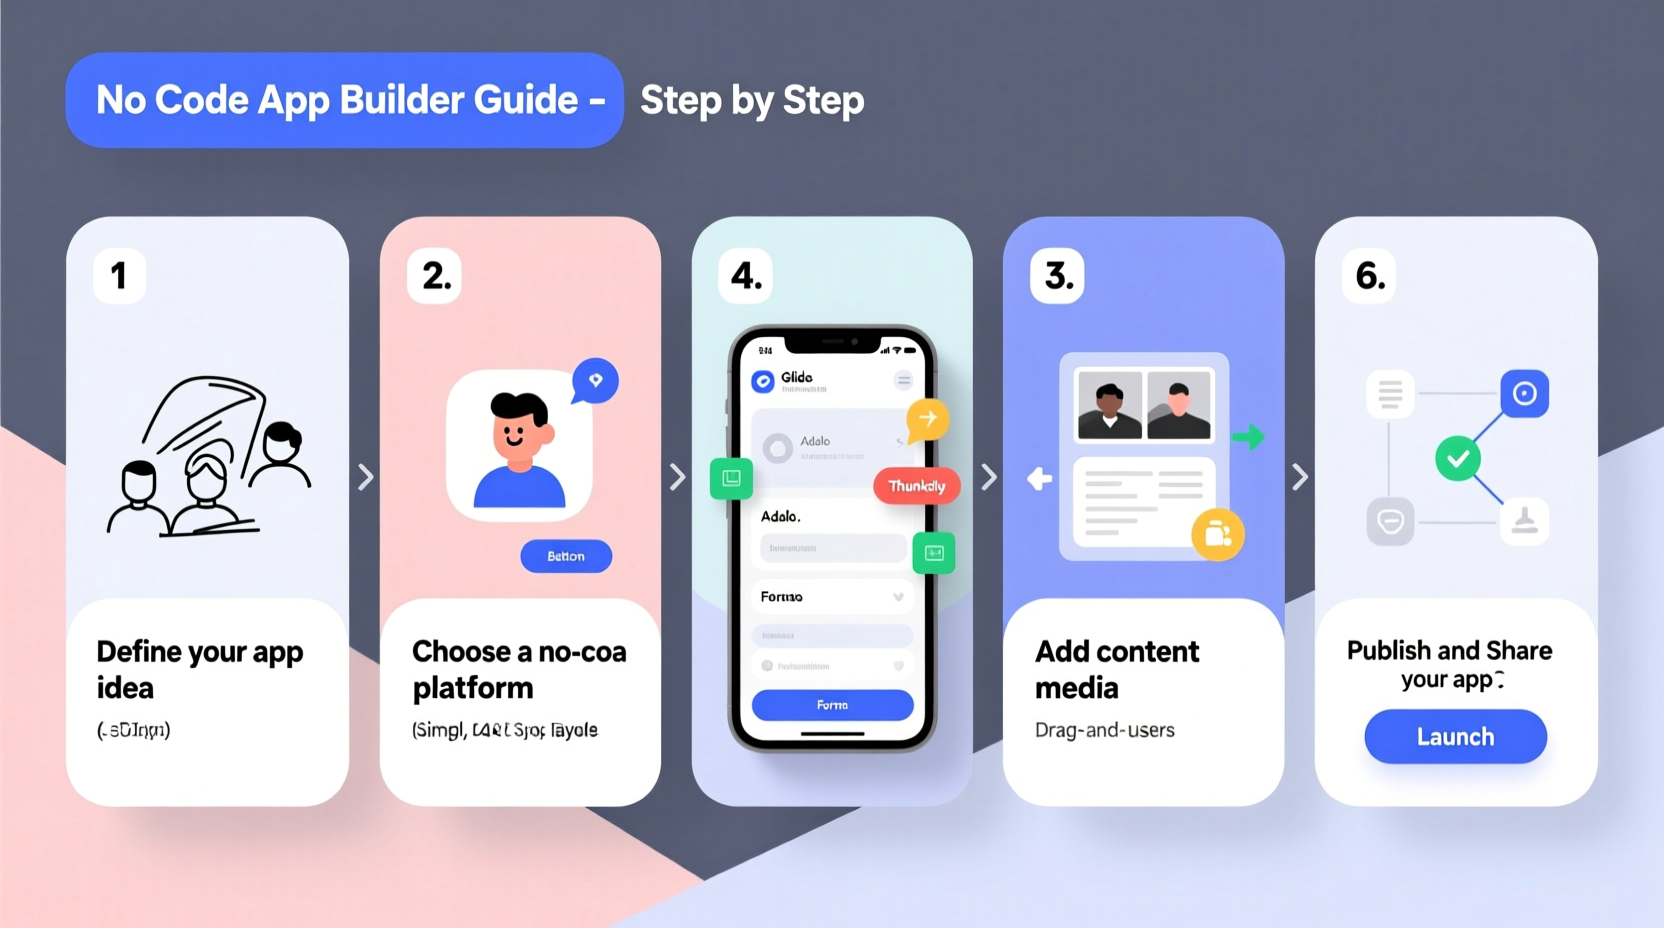
Before touching any tool, clarity is essential. Ask yourself: What problem does my app solve? Who will use it? A well-defined purpose prevents scope creep and keeps development focused. Start by writing a one-sentence mission for your app. For example: “An app that helps freelance designers track project deadlines and client payments.”
Next, identify your target users. Are they students, remote workers, fitness enthusiasts, or local service providers? Understanding your audience informs every design and functionality decision. Create a simple user persona:
- Name: Sarah, 32
- Occupation: Freelance graphic designer
- Pain Points: Missed deadlines, inconsistent invoicing, disorganized client communication
- Goals: Stay on schedule, get paid faster, reduce admin time
2. Choose the Right No-Code Platform
No-code doesn’t mean low capability. Modern platforms offer drag-and-drop interfaces, database integration, user authentication, and even AI features. The key is selecting one that matches your app’s complexity and goals.
| Platform | Best For | Learning Curve | Pricing (Starting) |
|---|---|---|---|
| Adalo / Adalo+ | Simple mobile apps with basic databases | Low | $50/month |
| Glide | Apps powered by Google Sheets data | Very Low | Free tier available |
| Thunkable | Feature-rich mobile apps (iOS & Android) | Moderate | $20/month |
| Webflow + Memberstack | Web-based apps with member logins | Moderate to High | $15/month + add-ons |
| Bubble | Complex web apps with workflows and logic | High | $29/month |
If you're new, start with Glide or Adalo. They allow rapid prototyping using spreadsheet data. As your needs grow, transition to Bubble or Thunkable for advanced features like push notifications, user accounts, and payment processing.
“Non-technical founders who ship fast using no-code tools outpace traditional startups in early validation.” — Sophia Li, Founder of NoCode Founders Collective
3. Map Out Your App’s Structure and Features
Sketch a basic flow of how users will interact with your app. This is called a user journey map. For a task-tracking app, it might look like:
- User opens app
- Logs in or signs up
- Views dashboard with active tasks
- Adds a new task with deadline and priority
- Receives a reminder notification
- Completes task and marks it done
List only essential features for your first version—this is your Minimum Viable Product (MVP). Avoid adding “nice-to-have” functions like social sharing or analytics at this stage. Focus on core functionality that delivers value.
4. Build and Test Your App Step by Step
With your structure ready, begin building in your chosen platform. Here’s a realistic timeline for a beginner:
Week 1: Set Up and Data Modeling
Create your data structure—what information will your app store? For a to-do app, you’ll need tables for Tasks, Users, and Projects. In Glide, this means connecting a Google Sheet with columns like Task Name, Due Date, Status, and Assigned To.
Week 2: Design the Interface
Use the platform’s drag-and-drop editor to design screens. Add buttons, lists, input fields, and navigation menus. Match colors and fonts to your brand. Most tools let you preview the app on a mobile device in real time via companion apps.
Week 3: Add Functionality and Logic
Define actions: What happens when a user taps “Complete Task”? Set rules like “Update status to ‘Done’” and “Send confirmation message.” In Bubble, you’d use visual workflow editors to chain these steps without code.
Week 4: Internal Testing
Invite three to five trusted testers—friends, colleagues, or members of your target audience. Give them specific tasks: “Add a new task due tomorrow,” “Mark two items as complete.” Collect feedback on usability, bugs, and confusion points.
“Your first version will be imperfect. That’s okay. Launching a working prototype teaches you more than six months of planning.” — Marcus Reed, No-Code Educator and Podcaster
5. Launch and Grow Your App
Once tested and refined, it’s time to go live. Publishing varies by platform:
- Glide: Share a link or publish to the web. For app stores, use Glide’s paid export feature or third-party wrappers like Trusted Web Activity.
- Thunkable: Export directly to Google Play and Apple App Store (requires developer accounts).
- Bubble: Host on Bubble’s servers and share via web link; mobile access through PWA (Progressive Web App).
After launch, focus on growth:
- Collect user feedback through in-app forms or surveys.
- Monitor usage patterns—where do users drop off?
- Add one new feature per month based on demand.
- Share updates on social media or newsletters.
Mini Case Study: From Idea to 1,000 Users in 8 Weeks
Lena Kim, a yoga instructor in Portland, wanted her students to access daily practice routines and track their progress. With no tech background, she used Glide to turn a Google Sheet of poses and sequences into a mobile app. She added images, video links, and a checklist system. After testing with 20 students, she launched publicly via Instagram and email. Within eight weeks, over 1,000 users downloaded the app. Lena now offers a premium version with personalized plans using Stripe integration through Glide’s add-ons.
Her success came not from technical skill, but from solving a real problem for a specific group—and iterating quickly based on feedback.
Essential Checklist: Building Your No-Code App
Follow this step-by-step checklist to stay on track:
- ☑ Define your app’s core purpose in one sentence
- ☑ Identify and research your target audience
- ☑ Choose a no-code platform suited to your needs
- ☑ Sketch user flows and screen layouts
- ☑ Build your data structure (tables, fields, relationships)
- ☑ Design the user interface using templates or custom styles
- ☑ Add interactive features (buttons, forms, notifications)
- ☑ Test with real users and collect feedback
- ☑ Fix bugs and refine the experience
- ☑ Publish and promote your app through relevant channels
Frequently Asked Questions
Can I really make money from a no-code app?
Yes. Many no-code apps generate revenue through subscriptions, one-time purchases, ads, or premium features. Platforms like Bubble and Glide support integrations with Stripe and PayPal for seamless payments.
How much does it cost to build a no-code app?
Costs vary. Free tiers allow basic prototypes. Full-featured apps typically range from $20–$100/month depending on the platform and add-ons. Publishing to app stores may require a one-time $25 fee (Google) or $99/year (Apple).
What if I want to add custom features later?
No-code tools support plugins and API connections. You can integrate with Zapier, Airtable, or custom backend services. If scaling demands it, some founders hire developers to migrate the app to custom code later—using the no-code version as a proven prototype.
Conclusion
Creating an app without coding experience is not just possible—it’s becoming the standard path for innovators who want to move fast and validate ideas cheaply. The tools are accessible, the learning curve is manageable, and the potential impact is real. Whether you’re solving a personal frustration or serving a community, your idea deserves to exist in the world. Start small, build consistently, and let real user feedback guide your next steps. The next great app might not come from Silicon Valley—it might come from you.


 浙公网安备
33010002000092号
浙公网安备
33010002000092号 浙B2-20120091-4
Comments
No comments yet. Why don't you start the discussion?