
Unboxing a new iPhone is exciting. But the setup process can feel overwhelming—especially if you're juggling app transfers, iCloud backups, privacy settings, and Apple ID configurations. Done right, the initial setup lays the foundation for a seamless, personalized experience. Done poorly, it leads to data loss, duplicated apps, or missed security opportunities. This guide walks you through each phase with precision, ensuring your iPhone works exactly how you want from the moment you power it on.
1. Prepare Before You Begin
Before turning on your new device, preparation is key. A few minutes of planning now saves hours of troubleshooting later. Start by ensuring your current iPhone (if upgrading) is fully charged and connected to Wi-Fi. Back up your data using iCloud or a computer via Finder (macOS) or iTunes (Windows). An iCloud backup ensures wireless transfer, while a local backup preserves more data types, including health records and message history.
If you're switching from an Android device, use Apple’s Move to iOS app before starting. It securely transfers contacts, messages, photos, calendars, and more during setup.
Essential Pre-Setup Checklist
- Charge both devices (old and new)
- Connect to stable Wi-Fi
- Update your old phone to the latest iOS version
- Back up to iCloud or computer
- Sign out of sensitive accounts (optional but recommended for trade-ins)
- Remove SIM card (if required by carrier)
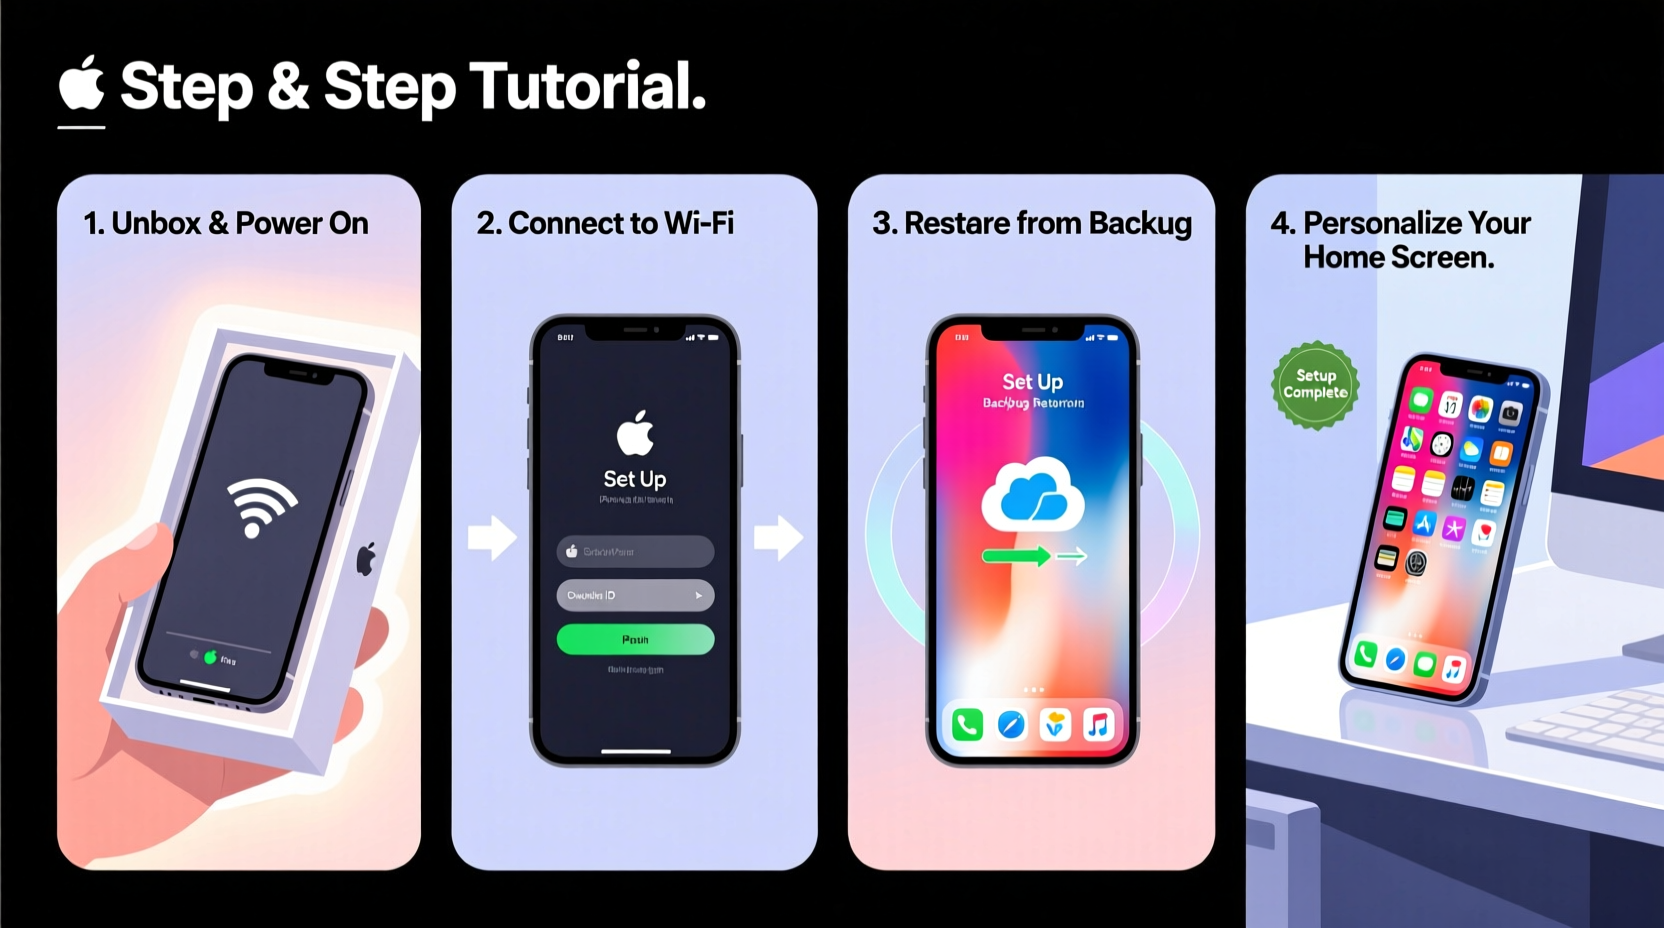
2. Initial Setup: From Power-On to Home Screen
Power on your new iPhone by pressing and holding the side button until the Apple logo appears. The setup assistant launches automatically. Follow these steps in order:
- Choose Language & Region: Select your preferred language and country. This affects keyboard layout, date format, and app defaults.
- Connect to Wi-Fi: Pick your network and enter the password. A strong connection is essential for restoring from iCloud or transferring data wirelessly.
- Enable Location Services: Choose “Customize” to review which system services access location data. Consider disabling non-essential tracking like Analytics or Emergency SOS.
- Restore from Backup: When prompted, choose “Restore from iCloud Backup” or “Restore from Mac or PC.” If you backed up locally, connect via cable later.
- Sign In with Apple ID: Enter your credentials. Two-factor authentication will verify your identity.
- Set Up Face ID or Touch ID: Position your face slowly within the frame or place your finger on the sensor multiple times for optimal recognition.
- Create a Passcode: Use a custom alphanumeric code for maximum security, not just 4 digits.
During restoration, your apps, messages, photos, and settings begin downloading. This may take minutes or hours depending on backup size and internet speed.
3. Optimize Privacy and Security Settings
iOS offers powerful privacy tools, but they’re not always enabled by default. After setup, dive into Settings to lock down your digital footprint.
| Setting | Action | Why It Matters |
|---|---|---|
| App Tracking Transparency | Enable globally | Prevents apps from tracking your activity across other companies’ apps |
| Location Services | Set to “While Using” or “Never” for non-critical apps | Reduces background data collection |
| Lockdown Mode | Consider enabling if at high risk of targeted attacks | Disables certain features to block sophisticated exploits |
| Passwords App | Turn on iCloud Keychain | Safely syncs passwords across devices |
| Find My iPhone | Ensure it's active | Enables remote lock, erase, and locate features if lost |
“Most users overlook privacy settings during setup, leaving themselves exposed to unnecessary data harvesting. Taking 10 extra minutes to configure permissions pays off in long-term security.” — David Lin, Mobile Security Analyst at SecureiOS Labs
4. Personalize Your Experience
Your iPhone should reflect your habits and preferences. Customize these areas to enhance usability:
- Home Screen Layout: Edit the home screen by long-pressing an app, tapping “Edit Home Screen,” and rearranging or removing icons. Use folders to group similar apps.
- Wallpaper & Dark Mode: Go to Settings > Wallpaper to apply a personal image. Enable Dark Mode in Settings > Display & Brightness for reduced eye strain.
- Siri & Accessibility: Train Siri to recognize your voice under Settings > Siri & Search. Adjust text size, bold text, or enable VoiceOver under Accessibility if needed.
- Notification Management: Visit Settings > Notifications. Prioritize alerts from key apps and mute others to avoid distractions.
Real Example: Sarah’s Seamless Upgrade
Sarah upgraded from an iPhone XR to an iPhone 15 Pro. She followed the pre-setup checklist, created an iCloud backup the night before, and ensured her Wi-Fi was stable. During setup, she chose “Restore from iCloud Backup” and went to bed. By morning, her phone was ready—apps installed, messages synced, even her Safari tabs reopened. She spent 20 minutes fine-tuning privacy settings and organizing her home screen. No data was lost, no apps re-downloaded manually. Her transition felt effortless because preparation eliminated friction.
5. Post-Setup Maintenance and Optimization
The work doesn’t end once your apps are restored. Perform these tasks within the first 48 hours to ensure peak performance:
- Update Apps: Open the App Store and tap your profile icon. Update all apps to their latest versions for bug fixes and compatibility.
- Verify iCloud Sync: Check Settings > [Your Name] > iCloud. Confirm that Photos, Notes, Contacts, and Health are toggled on.
- Set Up iCloud+ Features: If subscribed, enable Private Relay, Hide My Email, and Advanced Data Protection for enhanced privacy.
- Optimize Battery Charging: Enable in Settings > Battery > Battery Health to reduce wear over time.
- Erase Old Device: Once confirmed your new iPhone works perfectly, erase your old one via Settings > General > Transfer or Reset iPhone > Erase All Content and Settings.
Frequently Asked Questions
How long does it take to set up a new iPhone?
Initial setup takes 10–15 minutes for basic configuration. Restoring from a large iCloud backup may take several hours, especially on slower connections. A local restore via computer is typically faster.
Can I switch from Android after starting iPhone setup?
No. The Move to iOS option only appears during initial setup. If you skipped it, you’ll need to erase the iPhone and restart the process to transfer Android data wirelessly.
What should I do if my backup fails to restore?
First, confirm you’re signed in with the same Apple ID used for the backup. Ensure sufficient iCloud storage. If issues persist, try restoring from a computer using Finder or iTunes, which often resolves corrupted backup errors.
Final Steps: Own Your Device Like a Pro
Setting up a new iPhone isn’t just about transferring data—it’s about building a secure, efficient, and personalized environment tailored to your lifestyle. By following this structured approach, you avoid common pitfalls, protect your privacy, and unlock the full potential of your device from day one. Whether you’re a longtime Apple user or new to the ecosystem, mastering the setup process gives you confidence and control.


 浙公网安备
33010002000092号
浙公网安备
33010002000092号 浙B2-20120091-4
Comments
No comments yet. Why don't you start the discussion?