
For cats that enjoy time outdoors—whether they're feral, stray, or supervised household pets—exposure to cold weather can pose serious health risks. Hypothermia, frostbite, and respiratory issues are real concerns when temperatures drop. A well-built, insulated outdoor cat house provides a dry, warm refuge that helps cats maintain body heat and stay safe through winter and extreme weather. This guide walks you through every critical element of constructing a durable, energy-efficient shelter designed for year-round use.
Why Insulation Matters in Outdoor Cat Shelters
Cats have a higher body temperature than humans—around 100–102°F—but their small size and limited fat reserves make them vulnerable to rapid heat loss in cold environments. An uninsulated shelter may block wind and rain but won’t retain enough warmth to protect a cat overnight when temperatures fall below freezing.
Proper insulation slows heat transfer, trapping the cat’s natural body heat inside the shelter. Combined with a compact interior design, elevated flooring, and weatherproof materials, insulation transforms a basic box into a functional microclimate. The goal isn’t to heat the space actively but to minimize heat loss so the cat’s own warmth sustains a survivable internal temperature.
“Even a modestly insulated shelter can maintain an internal temperature 20–30 degrees warmer than the outside air, which is often the difference between life and death.” — Dr. Linda Harper, Feline Wildlife Veterinarian
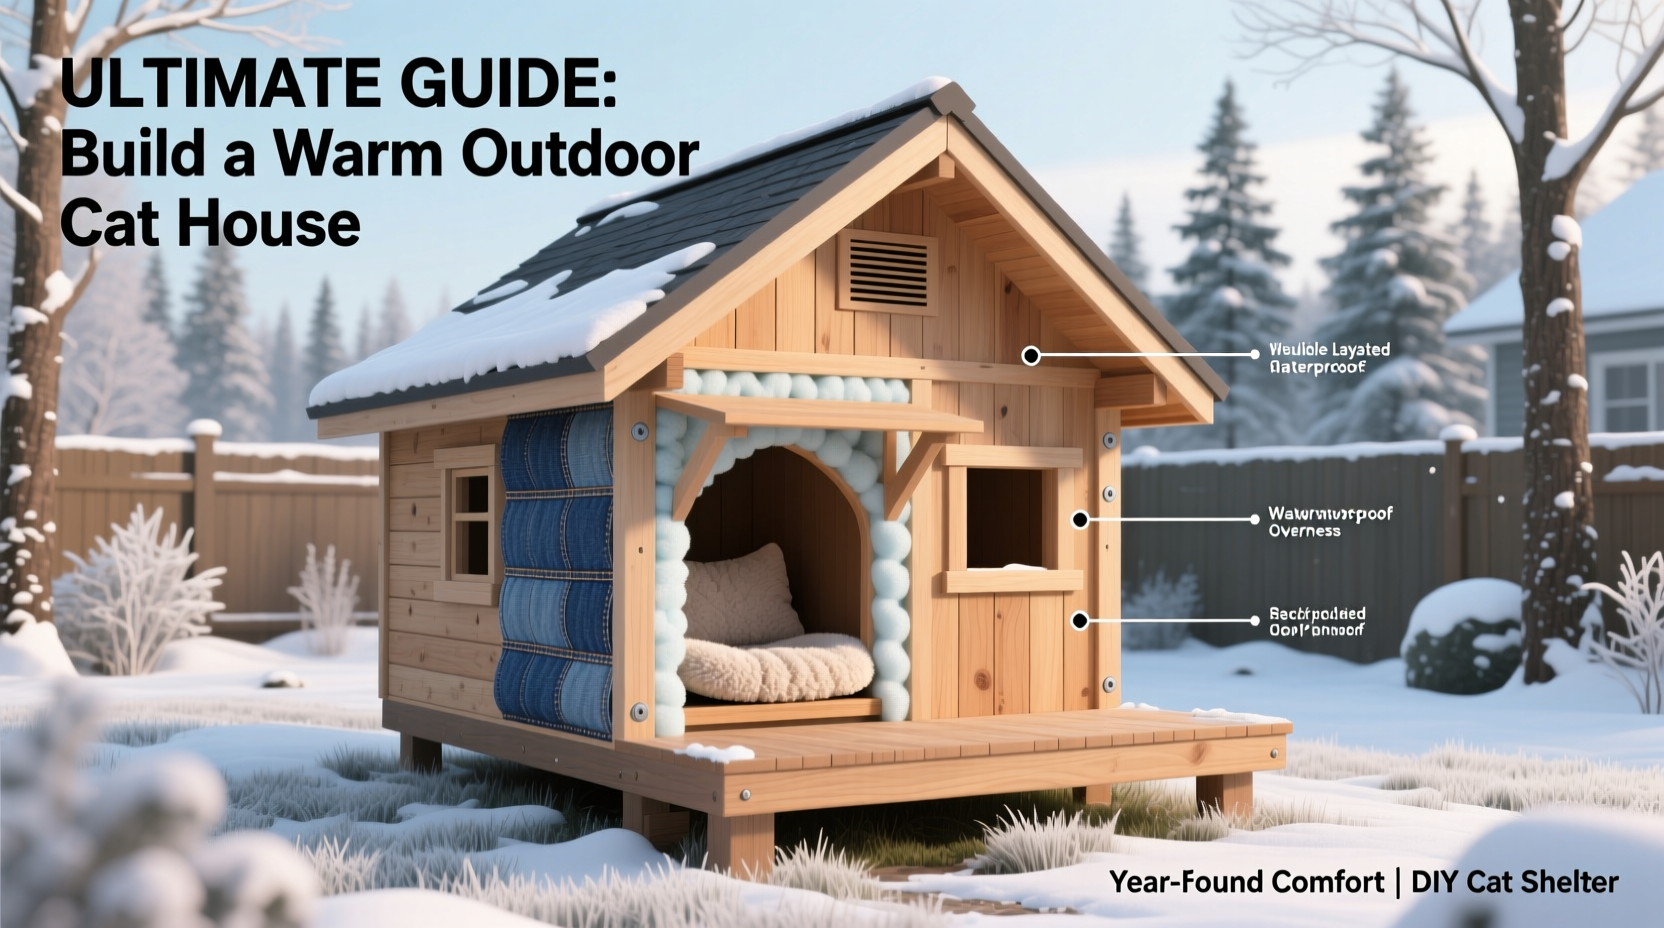
Materials and Design: Building for Warmth and Durability
The success of an outdoor cat house hinges on smart material choices and thoughtful design. Below are key considerations for each component:
Exterior Shell
Use waterproof, rot-resistant materials such as:
- Plywood (exterior-grade, at least ½ inch thick)
- Composite decking boards
- Recycled plastic lumber
Seal all exterior seams with silicone caulk and finish with exterior-grade paint or sealant to prevent moisture absorption.
Insulation Types Compared
| Material | R-Value per Inch | Safety for Cats | Maintainability |
|---|---|---|---|
| Polystyrene Foam (XPS) | 5.0 | Safe if enclosed; non-toxic | Easy to clean, moisture-resistant |
| Fiberglass | 3.2 | Dangerous if exposed; causes irritation | Hard to maintain; degrades when wet |
| Recycled Denim Insulation | 3.7 | Non-toxic, pet-safe | Good, but less moisture-resistant |
| Reflective Bubble Insulation | 2.0 | Very safe | Lightweight, but best used as secondary layer |
For safety and performance, rigid polystyrene foam is the top choice. It resists moisture, doesn’t off-gas, and maintains its R-value over time.
Step-by-Step Construction Guide
Follow this sequence to build a fully insulated, weatherproof cat house suitable for sub-zero conditions.
- Design the Shelter: Keep interior dimensions small—about 18” x 18” x 18”. Smaller spaces heat more efficiently with body warmth. Include a single entrance, ideally 6” in diameter, positioned away from prevailing winds.
- Build the Base: Construct a raised floor using 2x4 runners underneath. Elevate the house at least 2 inches off the ground to avoid moisture wicking and improve airflow beneath.
- Frame the Walls and Roof: Use exterior plywood. Cut four side panels and a roof panel slightly larger than the base to create an overhang (at least 2 inches) for rain protection.
- Add Insulation: Line all interior walls, floor, and ceiling with 1-inch rigid polystyrene foam. Secure with construction adhesive. Overlap seams and seal edges with foil tape to eliminate thermal bridging.
- Reinforce the Interior: Cover insulation with a thin plywood or hardboard liner to prevent chewing and protect the foam. Avoid carpet—it retains moisture and molds easily.
- Assemble and Seal: Screw panels together. Caulk all exterior joints. Install a sloped roof with shingles or metal flashing for water runoff.
- Install the Entry Tunnel: Attach a short PVC pipe or wooden tunnel (6” diameter, 8–10” long) to the entrance. This creates a windbreak and reduces cold air infiltration.
- Add Bedding: Use orthopedic foam or straw (not hay) for bedding. Straw sheds moisture and traps air, providing additional insulation.
Weatherproofing and Placement Tips
Even the best-insulated shelter fails if poorly placed or exposed to the elements. Consider these strategies:
- Position the shelter in a sheltered location—against a garage wall, under a deck, or beside thick shrubbery—to block wind.
- Face the entry away from north and west winds, typically the coldest and strongest.
- Lift one edge slightly to allow condensation to escape while preventing rain ingress.
- Place the house on a pallet or concrete slab to prevent ground moisture absorption.
Real-World Example: The Community TNR Initiative
In Ithaca, New York, a volunteer-led Trap-Neuter-Return (TNR) group built 12 insulated cat houses for a managed feral colony. Using recycled polystyrene and reclaimed wood, each shelter maintained internal temperatures above 40°F even during a week-long cold snap of -10°F. Volunteers monitored the structures weekly, replacing damp straw and checking for pests. Over two winters, no cats in the colony suffered cold-related injuries—a marked improvement from previous years when makeshift boxes offered little protection.
This case highlights how proper insulation, routine maintenance, and strategic placement significantly increase survival rates for outdoor cats.
Essential Checklist for a Successful Build
- ☐ Choose a compact interior (18” cube ideal)
- Maximizes heat retention from the cat’s body.
- ☐ Use rigid foam insulation (XPS preferred)
- Ensure full coverage on all six sides.
- ☐ Elevate the base at least 2 inches
- Prevents moisture damage and improves insulation.
- ☐ Install a wind-blocking entry tunnel
- Reduces drafts and snow intrusion.
- ☐ Seal all exterior joints with waterproof caulk
- Eliminates air leaks and water seepage.
- ☐ Use straw—not blankets or towels—for bedding
- Straw insulates even when damp; fabric holds moisture.
- ☐ Place in a sheltered, dry location
- Avoid low spots where water collects.
Frequently Asked Questions
Can I use a heating pad in the cat house?
Electric heating pads are not recommended due to fire risk and potential malfunction in damp conditions. If supplemental warmth is essential, use a thermostatically controlled, chew-proof pet-safe heating disc designed for outdoor shelters. Even then, insulation and proper design should reduce the need for active heating.
How often should I clean the shelter?
Inspect monthly. Replace bedding every 2–4 weeks depending on weather. Clean interior surfaces with a mild vinegar-water solution twice per season to prevent mold and parasites. Avoid strong chemicals that could linger and irritate the cat’s respiratory system.
Will the cat actually use the house?
Cats are cautious by nature. Introduce the shelter gradually. Place familiar-smelling bedding or treats inside to encourage exploration. Position it near existing resting spots. Most cats adopt insulated shelters within a few days once they recognize them as safe, dry, and warm.
Final Thoughts: Building Compassion Into Design
An insulated outdoor cat house isn’t just a DIY project—it’s an act of care. By combining smart insulation, weather-resistant construction, and attentive placement, you create a lifeline that protects cats from harsh elements. Whether you’re helping a neighborhood stray or providing a retreat for your adventurous indoor-outdoor cat, this shelter will serve as a reliable haven through every season.


 浙公网安备
33010002000092号
浙公网安备
33010002000092号 浙B2-20120091-4
Comments
No comments yet. Why don't you start the discussion?