
It’s the week before Christmas. You pull out last year’s favorite string of warm-white mini lights—only to discover that the first 25 bulbs glow brightly, while the remaining 50 sit stubbornly dark. No flickering, no buzzing, just a clean, abrupt cutoff halfway down the strand. You swap bulbs, check the plug, even try a different outlet—nothing changes. This isn’t random failure. It’s physics in action: your lights are wired in series, and one small break has severed the entire current path downstream. Understanding why this happens—and how to isolate and repair it—isn’t just handy holiday maintenance. It’s basic electrical literacy that saves time, money, and seasonal frustration.
How Series-Wired Christmas Lights Actually Work (and Why They Fail So Dramatically)
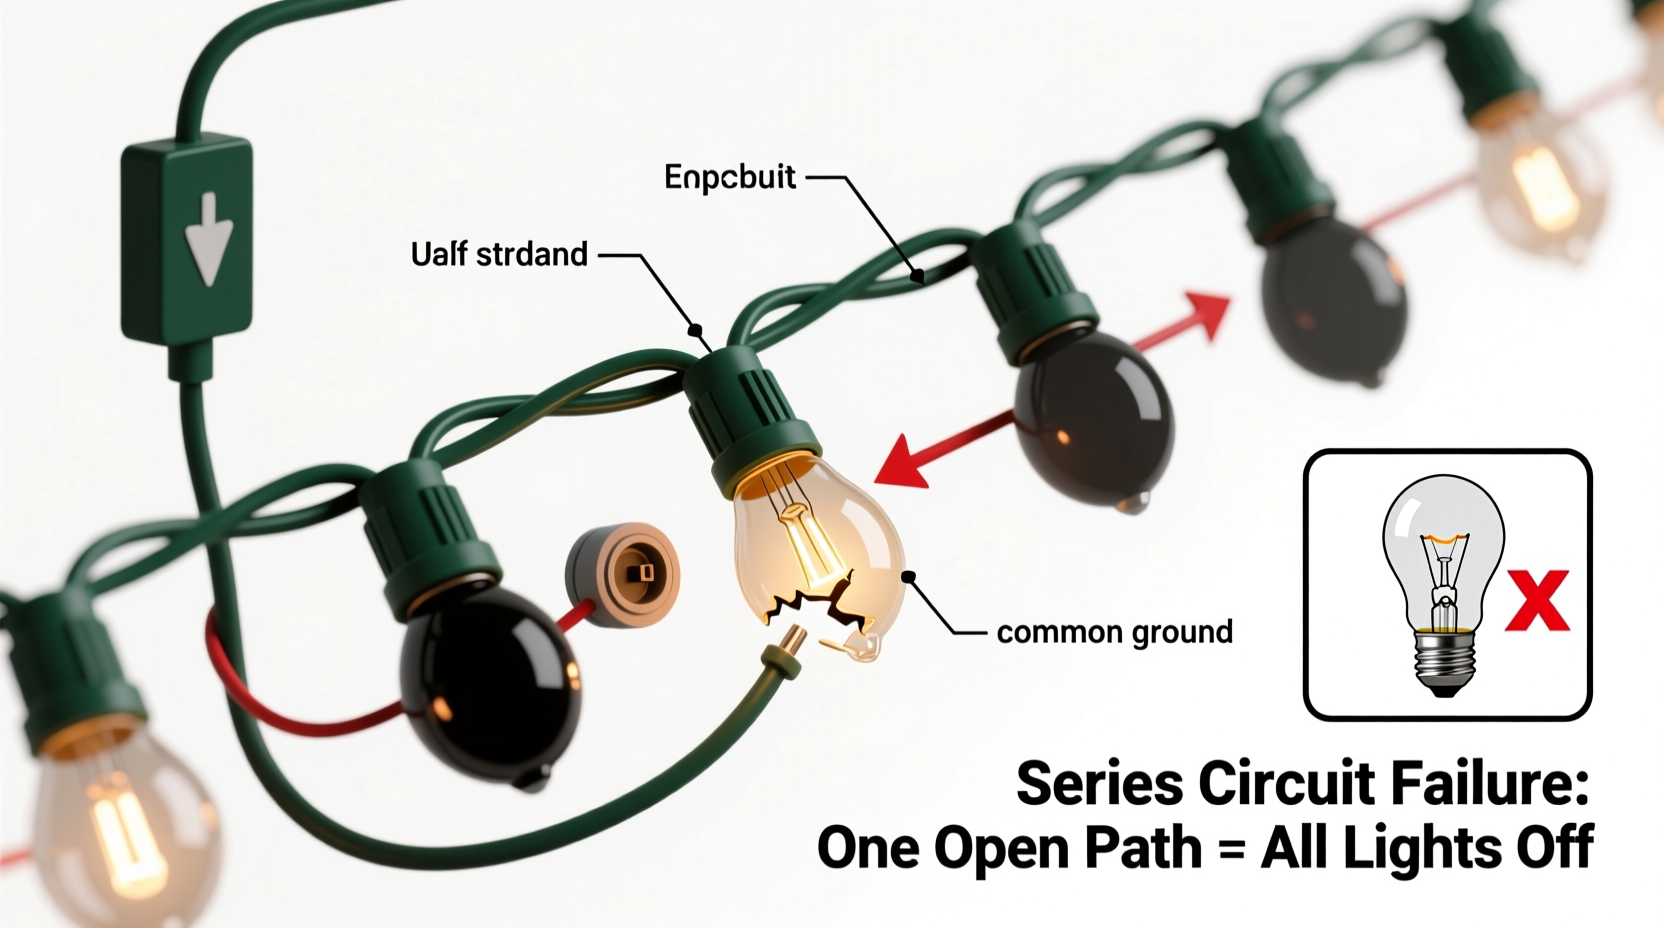
Most traditional incandescent mini light strings—especially those manufactured before 2015—are wired in a single continuous series circuit. That means electricity flows from the plug, through bulb #1, then bulb #2, then #3, and so on, all the way to the last bulb, before returning to the outlet via the neutral wire. There are no parallel branches or independent pathways. Every bulb is a necessary link in the chain.
This design has two major consequences. First, it’s energy-efficient: low-voltage bulbs (typically 2.5V each) can be powered safely off a standard 120V household outlet when strung in groups of ~48 (48 × 2.5V = 120V). Second, it’s inherently fragile: if *any single point* in that loop fails—a broken filament, a loose socket, a corroded shunt, or even a cut wire—the entire circuit opens. Current stops flowing. All bulbs downstream of the break go dark. The upstream section remains lit because current still reaches them—hence the “half-lit” symptom.
Modern LED strings often use hybrid wiring—segments wired in series, with those segments connected in parallel—but many budget and vintage-style LED sets retain full-series architecture to keep costs low and maintain compatibility with older controllers and dimmers. So unless your packaging explicitly states “parallel-wired” or “individually fused,” assume it’s series.
The Four Most Common Causes—And How to Spot Each One
When half a strand goes dark, the break is almost always located at or just before the first dark bulb—or at the last lit bulb’s socket. Here’s how to systematically identify which of these four culprits you’re dealing with:
- Filament Break (Most Common): The tungsten filament inside a bulb snaps. In older bulbs, this simply opens the circuit. In newer “shunted” bulbs, a tiny conductive bridge (the shunt) is designed to activate and bypass the broken filament—keeping the rest of the strand lit. But shunts fail too, especially after repeated thermal stress or corrosion.
- Loose or Corroded Bulb Socket: Oxidation builds up on the metal contacts inside the socket, increasing resistance until current can no longer pass reliably. This often manifests as intermittent lighting or flickering just before total failure.
- Broken Wire Inside the Cord (Near a Bulb Base): Repeated bending, tugging, or freezing temperatures can fracture the fine copper wire inside the insulated cord—especially where it enters the plastic socket housing. This break may not be visible externally.
- Failed Shunt (In “Shunted” Bulbs): Not all bulbs have shunts—and not all shunts work. If a bulb has a shunt but it’s oxidized, misaligned, or never activated (due to insufficient voltage surge at burnout), the circuit stays open. Shunt failure is why replacing *only* the dark bulb sometimes doesn’t restore full function.
“Series-string reliability hinges on two things: consistent bulb quality and robust shunt engineering. We’ve seen failure rates jump 40% in economy lines where shunts are stamped rather than laser-welded.” — Dr. Lena Torres, Electrical Engineer, Holiday Lighting Standards Institute
A Step-by-Step Diagnostic & Repair Protocol
Don’t start swapping bulbs randomly. Follow this proven sequence—it takes under 10 minutes and avoids unnecessary part replacement:
- Unplug the strand completely. Safety first. Never test live circuits with bare hands or metal tools.
- Identify the “boundary bulb”: Find the last bulb that lights up. Gently wiggle its base while observing adjacent bulbs. If wiggling causes flickering or momentary illumination downstream, the socket is likely loose or corroded.
- Remove the boundary bulb and inspect its base. Look for blackening (sign of arcing), bent contacts, or white powdery corrosion (copper oxide). Use a dry cotton swab to gently wipe contacts—if residue comes off easily, cleaning may resolve it.
- Test the next bulb downstream (first dark one) with a bulb tester or multimeter. Set your multimeter to continuity mode (Ω) and touch probes to the two metal tabs at the bulb’s base. A working bulb reads near-zero ohms; an open filament reads “OL” (overload). If it’s open, replace it—but don’t stop there.
- Insert a known-good bulb into the boundary socket. If the downstream section now lights, the original boundary bulb was faulty *and* its shunt failed. If it remains dark, the problem is in the socket or wiring—not the bulb.
- Check socket continuity: With the bulb removed, set your multimeter to continuity. Touch one probe to the brass contact at the bottom of the socket (center tab), and the other to the silver screw shell (threaded side). You should hear a beep. No beep? The socket’s internal contact is broken or disconnected.
- Inspect the cord entry point. Look closely where the wire disappears into the plastic socket housing. Gently bend the cord back and forth while monitoring continuity. If the beep cuts in and out, the wire is fractured internally.
Do’s and Don’ts of Series Light Maintenance
| Action | Do | Don’t |
|---|---|---|
| Bulb Replacement | Use exact-voltage replacements (e.g., 2.5V for mini incandescents); match base type (E10, T1¾) | Substitute 12V automotive bulbs or mismatched LED bulbs—they’ll overload or starve the circuit |
| Cleaning Contacts | Use 91% isopropyl alcohol on a cotton swab; let dry fully before reassembly | Use vinegar, lemon juice, or abrasive cleaners—they accelerate corrosion |
| Storage | Wind loosely around a cardboard tube; store in climate-controlled space (avoid garages/attics) | Wrap tightly on plastic spools or hang by one end—this stresses sockets and wires |
| Troubleshooting Tools | Use a non-contact voltage tester to verify power reaches the plug, then a bulb tester for rapid diagnosis | Rely solely on visual inspection—over 70% of failures show no external damage |
| Repairing Wires | Solder breaks with rosin-core solder and heat-shrink tubing; avoid tape-only fixes | Twist-and-tape splices—these oxidize, overheat, and create fire hazards |
Real-World Case Study: The Porch Light Cascade Failure
In December 2023, Sarah K., a homeowner in Portland, OR, installed three identical 100-bulb incandescent strands along her front porch railing. Two weeks in, the middle strand went half-dark. She replaced every dark bulb—still dark. She checked fuses in the plug—fine. Then she noticed condensation inside the third socket from the end of the lit section. Using a magnifier, she saw microscopic white crystals coating the contacts: copper hydroxide, formed from moisture infiltration during nightly fog. She cleaned the socket with alcohol, dried it with compressed air, and reinstalled the bulb. The full strand lit instantly. But two days later, the same socket failed again. This time, she cut the cord just before that socket, stripped the wires, and soldered in a new, weather-rated socket with silicone sealant. The strand worked flawlessly through January. Her takeaway? Environmental exposure compounds series-circuit fragility—and surface cleaning alone isn’t enough when moisture breaches the housing.
FAQ: Your Top Series-Light Questions Answered
Can I convert a series string to parallel wiring?
No—without complete rewiring and voltage regulation, it’s unsafe and impractical. Series strings rely on precise voltage division across dozens of bulbs. Rewiring in parallel would subject each 2.5V bulb to 120V, causing instant catastrophic failure and fire risk. Instead, upgrade to a certified parallel-wired LED set designed for your display scale.
Why do some “new” LED strings still fail in halves?
Many budget LED strings use “series-segment” architecture: 20–30 LEDs wired in series form one segment, and multiple segments connect in parallel. If one segment fails open (due to driver IC failure, cracked PCB trace, or blown capacitor), only that segment goes dark—so you see “chunks” of darkness, not clean halves. True half-failures in LED strings usually indicate a broken inter-segment wire or failed main controller board.
Is it safe to leave a partially working strand plugged in?
Yes—if the lit section is stable and shows no signs of overheating, buzzing, or flickering. However, the open circuit downstream creates higher resistance at the break point, which can cause localized heating over time. For safety and longevity, unplug and repair within 48 hours. Never cover a partially lit strand with insulation or flammable material.
Prevention Is Simpler Than Repair—Here’s Your Annual Maintenance Checklist
- ✅ Before Storage: Wipe all sockets with isopropyl alcohol; inspect for cracks or discoloration.
- ✅ At Unboxing: Plug in *before* hanging—test full operation on a grounded outlet with a GFCI breaker.
- ✅ Mid-Season Check: Every 72 hours, run hands lightly along the cord, pausing at each socket to feel for warmth (a sign of resistance buildup).
- ✅ After Outdoor Use: Let strands acclimate indoors for 2 hours before storing—prevents condensation inside sockets.
- ✅ Every 2 Years: Replace all bulbs in high-use strands—even if they appear functional. Filaments weaken with thermal cycling.
Conclusion: Master the Circuit, Not Just the Fix
That half-dark strand isn’t a nuisance—it’s a lesson in applied electricity. Every time you locate a corroded socket or confirm a shunt failure, you’re reinforcing fundamental concepts: current flow, resistance, continuity, and circuit topology. These aren’t abstract ideas reserved for electricians. They’re tangible, observable phenomena happening in your living room, your tree, your porch. Once you understand why series wiring behaves this way—why one weak link collapses the chain—you stop reacting to symptoms and start anticipating failure. You choose better products. You store smarter. You troubleshoot faster. And you gain quiet confidence that no holiday lighting emergency is beyond your control.
This season, don’t just fix the lights—understand them. Test one strand using the diagnostic protocol above. Document what you find. Share your insight with a neighbor struggling with the same issue. Because real reliability isn’t about perfect gear. It’s about knowing how the system works—and having the clarity to restore it, yourself.


 浙公网安备
33010002000092号
浙公网安备
33010002000092号 浙B2-20120091-4
Comments
No comments yet. Why don't you start the discussion?