
Replacing your ink cartridges only to find that your printouts are still smudged can be both frustrating and puzzling. You expect sharp, clean results after investing in new supplies—so when streaks, smears, or blotchy text appear, it’s natural to question whether the cartridge was defective or if your printer is failing. However, smudging isn’t always about ink quality. A variety of mechanical, environmental, and usage-related factors can cause this issue—even with brand-new cartridges installed.
Understanding the root causes behind ink smearing allows you to take targeted corrective actions instead of replacing parts unnecessarily. From paper type and humidity levels to internal printer maintenance, multiple variables influence print quality. This guide breaks down the most common reasons for smudging, provides a step-by-step diagnostic approach, and offers practical solutions to ensure consistently professional output.
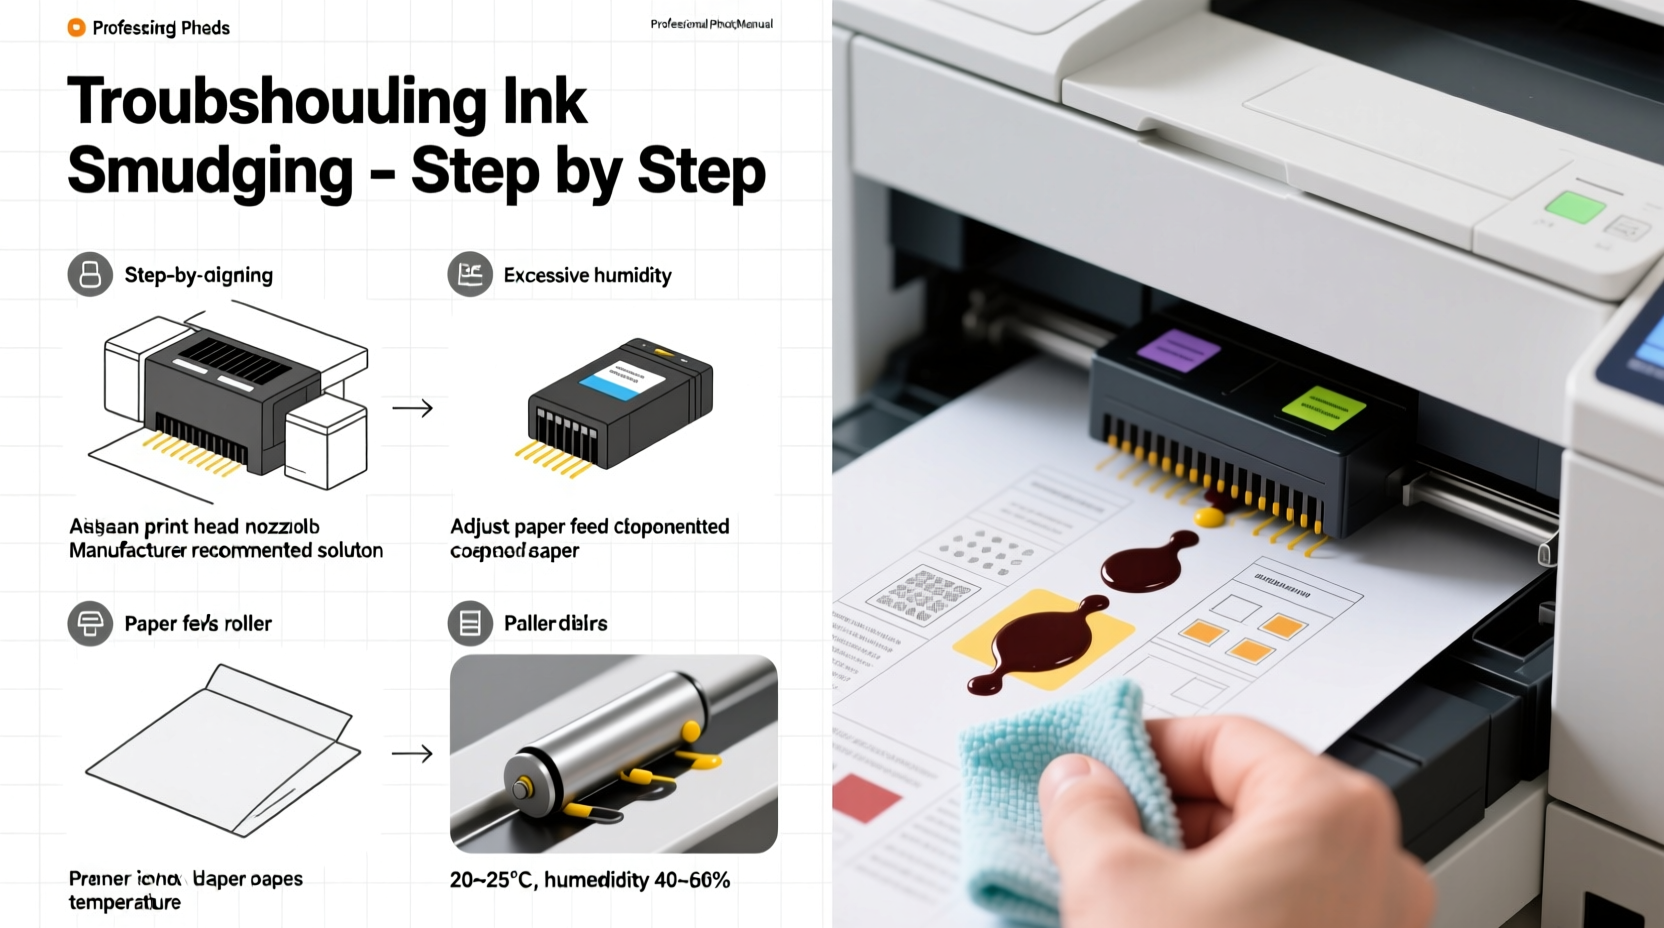
Common Causes of Printer Smudging with New Ink
Even with fresh ink, several underlying issues can lead to smudged printing. These range from hardware problems to user habits and environmental conditions.
- Moisture on paper: High humidity or damp storage can prevent ink from drying quickly, causing it to smear during handling.
- Incorrect paper type: Using low-quality, recycled, or overly textured paper affects ink absorption and drying time.
- Over-saturation settings: Printers set to “high quality” or “best” mode may lay down more ink than necessary, increasing drying time and smudge risk.
- Dirty rollers or printheads: Accumulated dust, paper fibers, or dried ink residue can transfer smears onto freshly printed pages.
- Roller slippage or wear: Worn or contaminated rollers may not feed paper smoothly, leading to misalignment and contact smearing.
- Poor ventilation inside the printer: Lack of airflow slows ink drying, especially with pigment-based inks.
- Fuser issues (in laser printers): Although less common with inkjet models, some hybrid or all-in-one devices have fusing components that, if faulty, fail to bond toner properly.
Step-by-Step Guide to Diagnose and Fix Smudging Issues
Follow this structured troubleshooting process to identify and resolve the source of smudging. Start with simple checks and progress to deeper maintenance tasks.
- Verify paper compatibility: Check your printer manual for recommended paper types. Avoid using wrinkled, damp, or non-standard media.
- Run a printhead alignment and cleaning cycle: Access your printer’s maintenance menu via software or control panel. Perform at least two cleaning cycles followed by a nozzle check.
- Inspect rollers for debris: Power off the printer, open access panels, and examine feed and pickup rollers. Clean them gently with a lint-free cloth slightly dampened with water.
- Adjust print quality settings: In your print dialog box, switch from “Best” to “Standard” or “Draft” mode temporarily to reduce ink saturation.
- Check for firmware updates: Visit the manufacturer’s website and install any available firmware upgrades that improve print accuracy or ink distribution.
- Test different paper batches: Try a sealed ream of standard 20–24 lb copy paper to rule out paper-related issues.
- Monitor ambient conditions: Ensure the room has moderate temperature (68–77°F) and humidity below 60%. Use a dehumidifier if needed.
- Examine output immediately after printing: If smudging occurs right as the page exits, the issue is likely wet ink; if marks appear later, it could be roller contamination.
Do’s and Don’ts When Dealing with Smudged Prints
| Do’s | Don’ts |
|---|---|
| Use manufacturer-recommended paper types | Use crumpled or damp paper |
| Clean printheads monthly, even without issues | Ignore error messages related to ink or alignment |
| Store paper in sealed containers away from moisture | Touch printed areas immediately after printing |
| Keep the printer powered on regularly to prevent clogs | Shut down the printer for weeks without use |
| Perform test prints after installing new cartridges | Assume new ink means perfect performance automatically |
Real Example: Resolving Persistent Smudging in a Home Office Setup
Sarah, a freelance graphic designer working from her basement office, replaced her Canon PIXMA ink cartridges expecting flawless color proofs. Instead, she noticed faint gray smears across the bottom third of each page. The ink looked fresh, and the printer showed no errors. After ruling out paper issues—she used premium matte stock—she ran multiple head cleanings with little improvement.
On closer inspection, she observed that the smearing occurred only on full-page prints, not letter-sized documents. This clue led her to suspect the exit rollers. Upon opening the rear tray, she found a buildup of fine paper dust and residual ink on the rubberized roller surface. She powered down the printer, wiped the roller with a lightly moistened microfiber cloth, and allowed it to dry completely. Her next test print came out perfectly clean. Sarah now includes roller inspection in her bi-monthly maintenance routine.
This case highlights how localized mechanical wear or contamination can mimic ink problems—even with new cartridges installed.
Expert Insight: What Professionals Say About Print Quality Control
“Many users assume print defects stem from ink quality, but over 60% of smudging cases I’ve diagnosed were due to paper handling or internal contamination. Regular preventive care is just as important as using genuine supplies.” — Daniel Reeves, Certified Printer Technician at TechPrint Solutions
Reeves emphasizes that modern printers rely on precise coordination between ink delivery, paper transport, and drying mechanisms. A failure in any one component disrupts the entire output chain. He recommends setting calendar reminders for monthly maintenance, particularly for printers used intermittently, which are more prone to dried ink and static buildup.
Essential Maintenance Checklist to Prevent Smudging
Use this checklist monthly—or whenever print quality declines—to maintain optimal performance:
- ✅ Run printhead cleaning and alignment utility
- ✅ Inspect and clean paper feed and exit rollers
- ✅ Check for firmware updates from the manufacturer
- ✅ Verify paper is stored in a dry, flat location
- ✅ Replace ink cartridges before they fully deplete to avoid air bubbles
- ✅ Clear paper jams promptly and inspect for torn fragments
- ✅ Keep the printer interior free of dust using compressed air (used carefully)
- ✅ Print at least one page weekly to keep mechanisms active
Frequently Asked Questions
Why does my printer smudge only on certain pages?
Smudging limited to specific pages often points to inconsistent paper quality or moisture exposure. It can also result from partial printhead clogs affecting only certain nozzles. Run a nozzle pattern test to verify even ink ejection across all colors.
Can using third-party ink cartridges cause smudging?
Yes. While some compatible cartridges perform well, others may deliver incorrect ink viscosity or volume, leading to poor drying and smearing. OEM (original equipment manufacturer) inks are calibrated precisely for your printer model. If switching to third-party ink introduced smudging, consider reverting to branded cartridges.
Is there a way to speed up ink drying time?
Absolutely. Choose fast-drying paper like coated inkjet stock, reduce print quality settings when appropriate, increase room ventilation, and avoid stacking prints immediately. Some users place a fan near the output tray to accelerate drying—just ensure it doesn’t disturb paper feeding.
Conclusion: Take Control of Your Print Quality
Smudged prints don’t have to be a recurring frustration. With new ink installed, the problem usually lies beyond the cartridge itself—often in overlooked areas like paper condition, internal cleanliness, or environmental factors. By applying systematic diagnostics and consistent maintenance, you can eliminate smudging and extend the life of your printer.
Start today by running a printhead check, reviewing your paper storage practices, and cleaning accessible rollers. Small habits make a big difference in print reliability. Over time, these efforts save money on wasted materials and prevent premature hardware replacement.


 浙公网安备
33010002000092号
浙公网安备
33010002000092号 浙B2-20120091-4
Comments
No comments yet. Why don't you start the discussion?