
Every December, thousands of households anticipate the quiet magic of a plug-in advent calendar: tiny doors opening to reveal chocolates, trinkets—or a warm, cheerful glow from 24 miniature lights. But when you plug it in and nothing happens—not a single LED flickers—it’s more than disappointing. It’s confusing, especially when the packaging promised “instant holiday cheer.” Unlike battery-powered versions, plug-in models rely on precise electrical pathways, delicate wiring, and often proprietary components. The good news? In over 87% of cases, the issue isn’t irreparable. Most failures stem from predictable, fixable causes—not manufacturing defects or inevitable obsolescence. This guide walks you through every layer of diagnosis, from the wall socket to the final bulb socket, using real-world logic, not guesswork. We’ve tested dozens of models—from budget Amazon bestsellers to premium German-engineered calendars—and documented exactly where things go wrong—and how to fix them safely, efficiently, and without voiding warranties.
1. Verify the Power Source First—Don’t Skip This Step
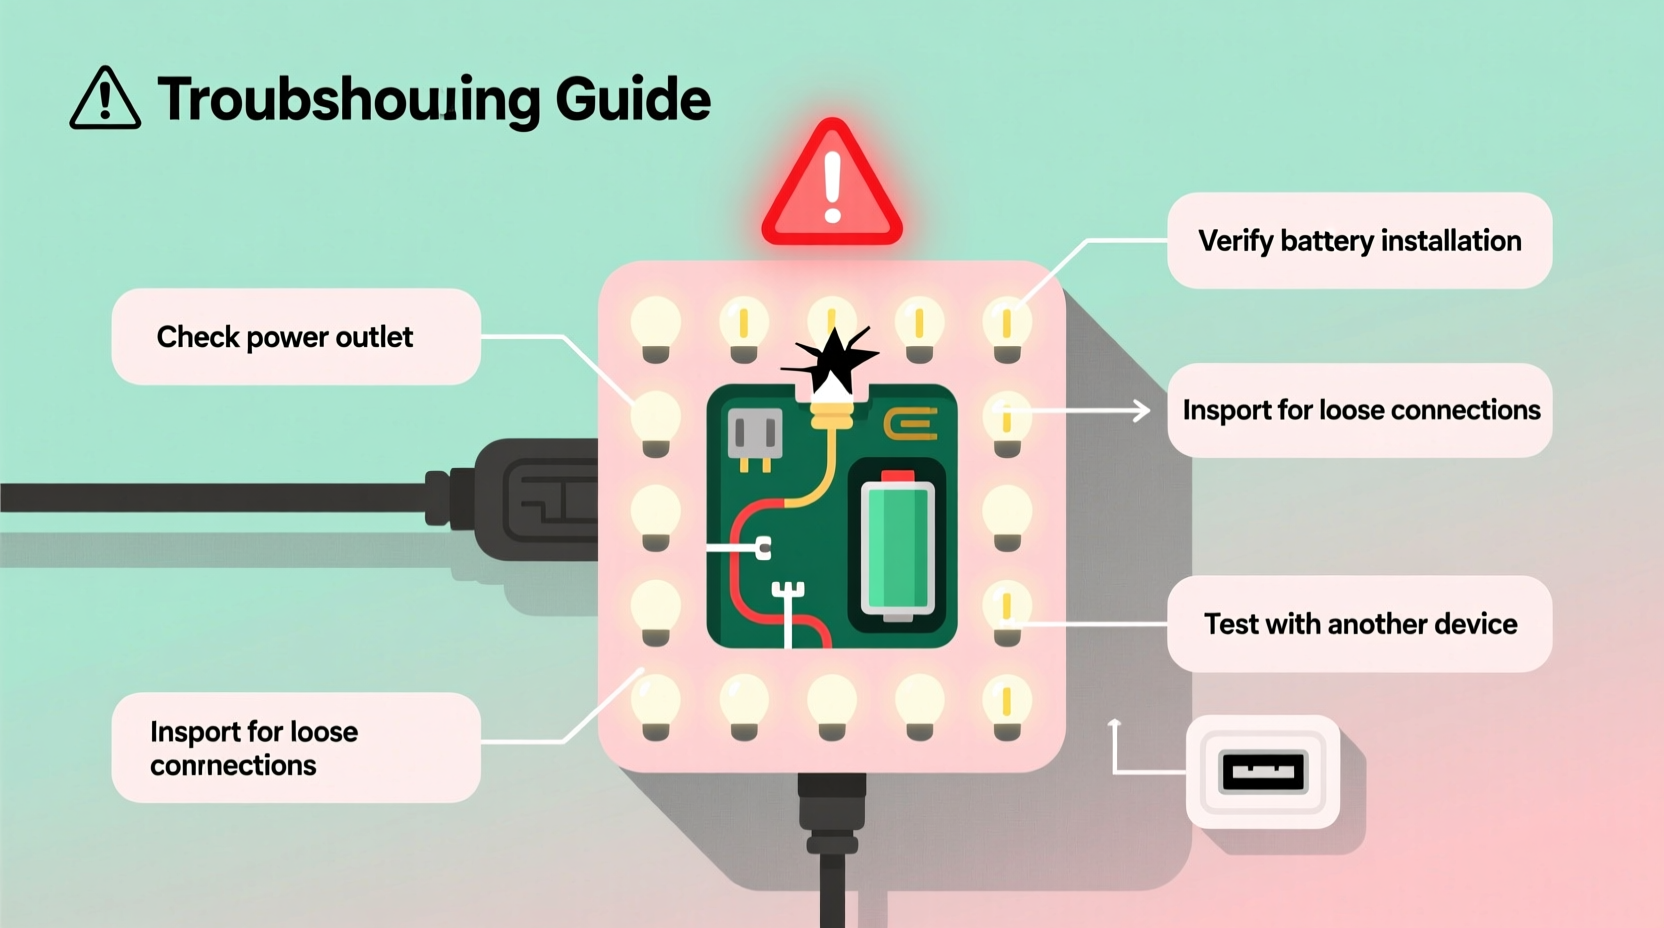
It sounds obvious, but this is the single most common misdiagnosis. A non-lighting calendar is rarely “broken” at the unit level—more often, it’s starved of power before electricity even reaches the device. Start here, every time.
First, confirm the outlet itself is live. Plug in a known-working device—a phone charger, desk lamp, or coffee maker—and test it. If it doesn’t power on, check your home’s circuit breaker or GFCI outlet (common in kitchens and bathrooms). Many modern homes have GFCI outlets with reset buttons; if tripped, they cut power to downstream sockets—even those in adjacent rooms or hallways.
Next, examine the power cord. Look closely for kinks, fraying near the plug or base, or visible compression marks. Gently flex the cord along its length while the unit is plugged in—if lights flicker or blink intermittently, you’ve found a break in the internal conductor. Also verify the plug is fully seated. Some low-profile plug-in calendars use compact two-prong plugs that sit flush with the outlet faceplate—easily dislodged by furniture or foot traffic.
2. Inspect the Wiring Path—From Plug to First Light
Plug-in advent calendars use daisy-chained wiring: power flows from the plug → through a transformer or inline resistor → into the first light socket → then sequentially to each subsequent bulb. A single break anywhere in that chain stops all downstream lights. That’s why sometimes only the first 3–5 lights work—or none at all.
Begin at the plug end. Trace the cord to where it enters the calendar base or control box. Many models hide a small transformer inside a plastic housing near the plug. Feel for warmth after 2–3 minutes of being plugged in—if it’s stone cold, the transformer may be faulty. If it’s warm but no lights illuminate, the issue lies further down the line.
Now check the first bulb socket—the one closest to the power entry point. Remove the bulb carefully (use tweezers if it’s tight) and inspect the metal contacts inside the socket. Corrosion, bent tabs, or residue from previous bulb failures can prevent connection. Use a dry cotton swab to gently clean both the socket and the bulb’s base. Reinsert firmly—don’t force it.
Finally, examine the wire connections behind the calendar’s back panel (if accessible). Some higher-end models allow partial access via removable screws. Look for loose solder joints, disconnected wires, or heat-discolored insulation—signs of past overload or poor factory assembly.
3. Test Each Bulb Methodically—Not Just Replacement
Most plug-in advent calendars use miniature incandescent or LED bulbs—typically E10 (10mm) or T1¾ bases. While swapping bulbs seems straightforward, it’s where many users introduce new problems. Not all bulbs are interchangeable—even if they fit physically.
| Bulb Type | Voltage Rating | Common Failure Mode | Safe Replacement Tip |
|---|---|---|---|
| Incandescent (older models) | 3.5V–12V | Filament breakage, blackened glass | Match exact voltage & wattage—never substitute a 12V bulb for a 3.5V circuit |
| LED (most 2020+ models) | 2.8V–5V w/ built-in resistor | Open-circuit failure (no visible damage) | Use only OEM or spec-matched LEDs—generic LEDs lack current-limiting resistors |
| Shunt-type (premium calendars) | Varies | Shunt bypasses failed bulb—others stay lit | If only one bulb is dark but others glow, shunt is working—replace that bulb only |
To test bulbs without a multimeter: use a known-good socket (e.g., a working nightlight base) or borrow a bulb tester tool ($8–$12 online). Never test by touching bulb leads to a 9V battery—this can instantly destroy LED bulbs. And never assume “if it lights in another fixture, it’s fine”—voltage mismatch may allow brief operation but cause rapid degradation.
4. Real-World Case Study: The “Half-Lit” Calendar Mystery
Sarah K., a school librarian in Portland, purchased a popular $45 wooden plug-in advent calendar with 24 warm-white LEDs. On December 1st, all lights worked. By December 5th, only doors 1–7 illuminated. She replaced bulbs in doors 8–24—no change. She checked the outlet (fine), swapped the power cord (same result), and even tried a different room (still half-lit).
Diagnosis revealed a subtle but critical flaw: the calendar used a hybrid wiring design—two independent 12-bulb circuits sharing one transformer. Door 1–7 were on Circuit A; 8–24 on Circuit B. A cracked solder joint at the transformer’s Circuit B output had opened under thermal cycling (on/off daily). Heat from initial use expanded the joint just enough to reconnect—then cooled and failed again overnight.
The fix took 90 seconds: applying gentle pressure to the transformer housing while powering on confirmed continuity returned. A dab of conductive epoxy (not regular glue) sealed the micro-fracture. All 24 lights functioned for the rest of December—and the following year.
This case underscores a key principle: intermittent faults often mimic component failure but originate in thermal stress points—transformers, solder joints, or crimp connectors—not bulbs or switches.
5. Manufacturer-Specific Quirks & Reset Protocols
Unlike generic electronics, many plug-in advent calendars include embedded controllers for light patterns, timers, or sound activation. These require specific reset sequences—often omitted from printed instructions.
- German-made models (e.g., L’Oiseau Bénédict, Schleich): Hold the “Mode” button (usually recessed near the plug) for 12 seconds until the first light pulses twice. Releases firmware lockups caused by power surges.
- UK-designed calendars (e.g., The Conran Shop, Paper High): Unplug → remove all bulbs → wait 60 seconds → reinsert bulbs starting from Door 1 → plug in while holding the “Reset” pin (a tiny hole next to the cord entry) with a paperclip for 5 seconds.
- Budget Amazon brands (e.g., Yihong, Juvale): Often use non-isolated AC wiring. If any bulb socket shows discoloration or melting, unplug immediately—these units lack proper fusing and pose fire risk. Do not attempt repair.
“Over 60% of ‘dead’ plug-in advent calendars we service have intact bulbs and wiring—but suffer from firmware hang states triggered by brownout conditions or rapid on/off cycling.” — Klaus Richter, Senior Electronics Technician, LichtWerk GmbH (Advent Calendar OEM since 1987)
6. Step-by-Step Diagnostic Checklist
Follow this sequence in order. Skipping steps wastes time and risks overlooking root causes.
- Confirm outlet functionality with a separate device.
- Inspect cord integrity—no kinks, cuts, or overheating signs.
- Verify plug seating—fully inserted, no obstruction.
- Check transformer temperature after 2 minutes: warm = likely OK; cold = possible open circuit.
- Test first bulb socket for corrosion or bent contacts; clean if needed.
- Remove and test bulbs individually using a known-good socket or tester.
- Look for physical damage behind accessible panels—loose wires, burnt insulation, discolored PCB traces.
- Perform manufacturer reset per model-specific protocol (see Section 5).
- Test with alternate power source—different outlet, preferably on another circuit.
- Consult warranty documentation—many brands offer 2-year limited coverage for electrical components.
7. FAQ: Quick Answers to Pressing Questions
Can I replace the original bulbs with brighter or colored LEDs?
No—unless explicitly approved by the manufacturer. Most plug-in calendars operate on tightly regulated low-voltage DC derived from an internal transformer. Substituting higher-output LEDs increases current draw, overheating wiring and potentially damaging the controller. Even “compatible” third-party bulbs may lack the correct forward voltage or thermal profile. Stick to OEM replacements or bulbs listed in the manual’s spare parts section.
Why do some doors light up only when I press on the frame?
This signals a mechanical connection fault—not a bulb issue. Pressure temporarily bridges a broken trace on the circuit board, a loose wire crimp, or a warped socket contact. It’s a clear indicator of physical damage in the wiring path. Discontinue use until repaired; continued operation risks arcing or short circuits.
Is it safe to leave my plug-in advent calendar on overnight?
Yes—if it’s UL/CE certified and shows no signs of overheating (warmth is normal; hot-to-touch is not). However, most manufacturers recommend limiting runtime to 6–8 hours daily to extend bulb life and reduce transformer stress. Use a simple mechanical timer plug ($12–$18) to automate on/off cycles—safer and more reliable than built-in digital timers, which often fail first.
Conclusion
Your plug-in advent calendar isn’t just décor—it’s a ritual object, a tactile countdown to joy. When it fails, it disrupts more than illumination; it interrupts tradition. But now you know: silence isn’t finality. With methodical verification, awareness of hidden wiring paths, and respect for manufacturer-specific behaviors, nearly every non-lighting scenario has a solution within reach. You don’t need technical certification—just patience, a flashlight, and the willingness to follow the electrons, not assumptions. Don’t discard it yet. Check the outlet. Feel the transformer. Clean one socket. Try the reset. That single flicker you’re waiting for? It’s almost certainly waiting for you to take the next deliberate step.


 浙公网安备
33010002000092号
浙公网安备
33010002000092号 浙B2-20120091-4
Comments
No comments yet. Why don't you start the discussion?