
Building a DIY pallet cat house is an affordable, sustainable, and rewarding way to give your cat a safe, comfortable outdoor or indoor retreat. With minimal tools and materials, you can transform a discarded wooden pallet into a weather-resistant shelter that provides warmth, privacy, and protection. This guide walks you through every phase—from sourcing materials to finishing touches—so you can craft a functional and attractive home your cat will love.
Why Build a Pallet Cat House?
Repurposing wooden pallets not only reduces waste but also offers a sturdy base for pet shelters. Cats naturally seek enclosed spaces where they feel secure, and a well-built pallet house mimics the den-like environment they instinctively prefer. Whether used as an outdoor sanctuary during mild seasons or a stylish indoor hideaway, this structure supports feline well-being while reflecting your commitment to eco-conscious craftsmanship.
“Cats thrive in environments where they can observe their surroundings from a secure vantage point. A thoughtfully built shelter meets both their physical and psychological needs.” — Dr. Lena Torres, Feline Behavior Specialist
Materials and Tools Checklist
Before beginning construction, gather all necessary supplies. Using untreated wood is essential to avoid exposing your cat to harmful chemicals. Most standard pallets are made from pine or hardwood and are ideal for this project if structurally sound.
What You’ll Need:
- One standard wooden pallet (approximately 48\" x 40\")
- Measuring tape and pencil
- Circular saw or handsaw
- Drill with screwdriver bit
- Exterior-grade wood screws (2-inch)
- Sandpaper (medium and fine grit)
- Untreated cedar or pine boards (for walls and roof, optional)
- Waterproof roofing material (e.g., asphalt shingle, rubber membrane)
- Non-toxic wood sealant or pet-safe exterior paint
- Insulation material (if building for cold climates – e.g., recycled denim or foam board)
- Soft bedding (washable cushion or fleece blanket)
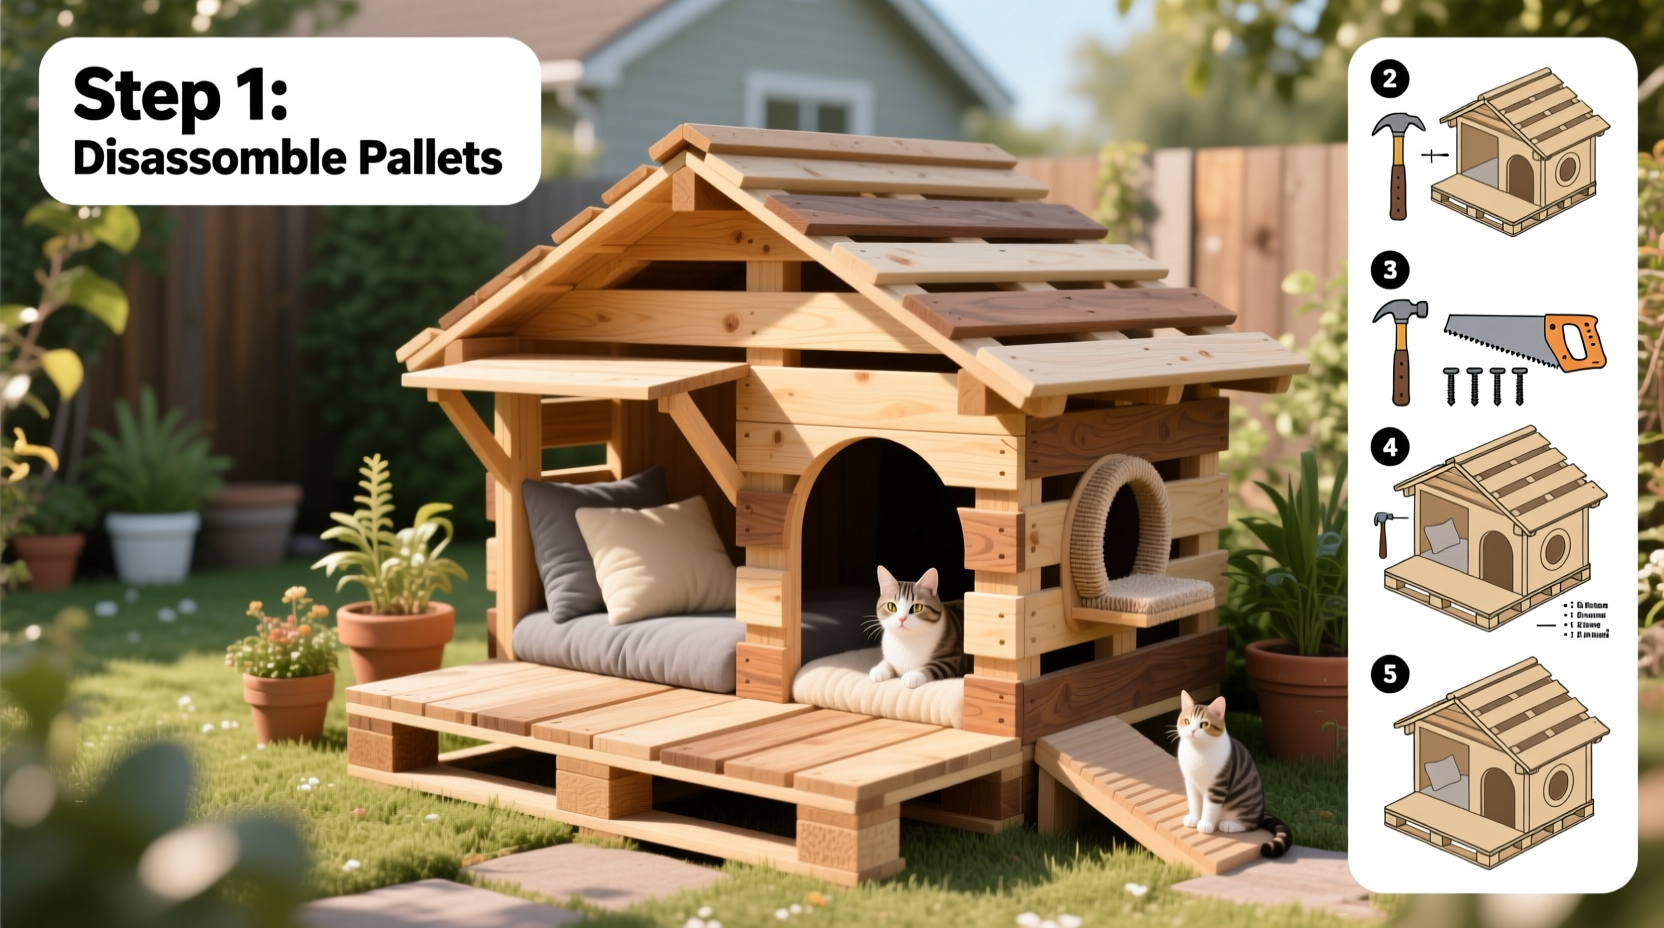
Step-by-Step Construction Guide
Follow this clear sequence to assemble a durable, safe, and inviting cat house from a single pallet.
- Prepare the Pallet: Inspect the pallet for nails, splinters, or rot. Remove any protruding hardware and sand rough edges thoroughly. Wipe down with a damp cloth and let dry completely.
- Create the Base Frame: The pallet itself serves as the floor. If needed, reinforce weak slats with additional wood strips underneath using screws.
- Build the Walls: Cut four vertical support posts from scrap wood (about 18 inches tall). Attach one post to each corner of the pallet using two screws per post. These will anchor the side walls.
- Add Side Panels: Measure and cut two side panels (18” high x 40” wide) and two end panels (18” high x 24” wide, accounting for wall thickness). Secure them to the support posts with screws. Leave one end panel removable or hinged for easy cleaning.
- Construct the Roof Frame: Extend two longer pieces of wood across the top of the side walls to form front and back roof supports. Add angled rafters or a flat frame depending on desired roof style.
- Install the Roof: Cut a plywood or repurposed pallet top to fit the roof dimensions. Attach it securely and cover with waterproof material. Overhang the roof slightly (2–3 inches) on all sides to deflect rain.
- Seal and Protect: Sand all surfaces smooth. Apply two coats of non-toxic, pet-safe wood sealant or water-based exterior paint. Allow full curing time before introducing the cat.
- Insulate (Optional): For outdoor use in cooler zones, line interior walls with rigid foam insulation or attach a layer of reflective bubble wrap before adding final cladding.
- Furnish the Interior: Place a soft, washable mat or cushion inside. Elevate it slightly off the floor with a small platform to prevent moisture absorption.
- Position Safely: Place the house on a level surface, ideally elevated 2–3 inches on bricks or feet to improve airflow and prevent ground dampness.
Design Considerations and Customization Options
A basic pallet cat house can be enhanced with thoughtful modifications based on your cat’s habits and local climate.
| Feature | Option | Benefit |
|---|---|---|
| Entry Size | 6” x 7” doorway | Large enough for most cats, deters larger animals |
| Ventilation | Small drilled holes near roof | Prevents condensation without drafts |
| Roof Type | Sloped with overhang | Better rain runoff than flat roof |
| Color | Light-colored exterior | Reflects heat in sunny climates |
| Multiple Entries | Two opposing doors | Increases escape routes and airflow |
Real-Life Example: Mia’s Backyard Retreat
Sarah from Portland, Oregon, built a pallet cat house for her shy rescue cat, Mia, who was hesitant to go outside. Concerned about Pacific Northwest rains, Sarah added a sloped roof with asphalt shingles and lined the interior with breathable insulation. She painted the exterior in a soft gray with a green trim to blend into her garden. After placing it under a covered porch, Mia began using it daily within a week. “She naps in it every afternoon,” Sarah said. “It gave her confidence to explore safely.”
Safety and Maintenance Best Practices
A well-maintained cat house remains hygienic and structurally sound over time. Regular inspection prevents hazards like mold, pests, or loose components.
- Clean the interior weekly with mild vinegar-water solution; never use chemical cleaners.
- Check for insect nests or rodent activity monthly.
- Inspect screws and joints every three months; tighten or replace as needed.
- Reapply sealant annually, especially in humid or rainy regions.
- Bring indoors during extreme weather if possible.
“Outdoor cat shelters should be cleaned at least once a week and positioned away from predator access points like open fences or low bushes.” — James Reed, Urban Wildlife Biologist
Frequently Asked Questions
Can I use a pallet from a shipping warehouse?
Only if it’s heat-treated (marked with \"HT\") and free of stains or odors. Avoid chemically treated or oil-soaked pallets, which pose health risks.
Will my cat actually use the house?
Most cats adapt quickly if the house is placed in a quiet, familiar location. Encourage use by placing treats, toys, or catnip inside initially.
Is this suitable for kittens or elderly cats?
Yes, provided steps or ramps are added for mobility. Ensure the interior is draft-free and extra bedding is available for temperature regulation.
Final Thoughts and Call to Action
Creating a DIY pallet cat house blends practicality, sustainability, and compassion. With careful planning and attention to detail, you can build a shelter that enhances your cat’s quality of life while reducing environmental impact. This project costs little, fosters creativity, and deepens your bond with your pet. Whether you're a seasoned builder or a first-time crafter, the satisfaction of seeing your cat curl up in a home you made is unmatched.


 浙公网安备
33010002000092号
浙公网安备
33010002000092号 浙B2-20120091-4
Comments
No comments yet. Why don't you start the discussion?