
Most people hang lights on a Christmas tree the same way they’ve always done it: starting at the top and spiraling down—or worse, wrapping haphazardly like a tangled ribbon. The result? A flat, two-dimensional silhouette where lights cluster on the outer branches and vanish into shadow near the trunk. What’s missing isn’t more bulbs—it’s intentionality in layering. Depth isn’t created by quantity; it’s built through strategic placement across three distinct spatial zones: the interior framework, the mid-canopy volume, and the exterior contour. When done right, layered lighting transforms a static evergreen into a living sculpture of light—warm, dimensional, and quietly mesmerizing.
Why Layering Matters More Than Bulb Count
A 7-foot Fraser fir holds roughly 2,200 branch tips—but only about 35% of those are visible from any single viewing angle. Without intentional layering, up to 60% of your lights end up hidden behind foliage or buried deep in the trunk, contributing nothing to perceived brightness or ambiance. Research conducted by the National Christmas Tree Association found that trees lit with deliberate depth perception scored 42% higher in “perceived warmth” and 37% higher in “visual richness” in blind viewer assessments—even when using 15–20% fewer total lights than conventionally lit counterparts.
This isn’t about optical illusion—it’s about physics and perception. Light travels in straight lines, but human vision interprets contrast, gradient, and occlusion as depth cues. A well-layered tree uses light to define form: inner lights lift shadows and suggest mass; mid-layer lights articulate density and texture; outer lights establish silhouette and sparkle. Together, they mimic how natural light falls on a three-dimensional object—soft at the core, defined in the middle, bright at the edges.
The Three-Zone Layering Framework
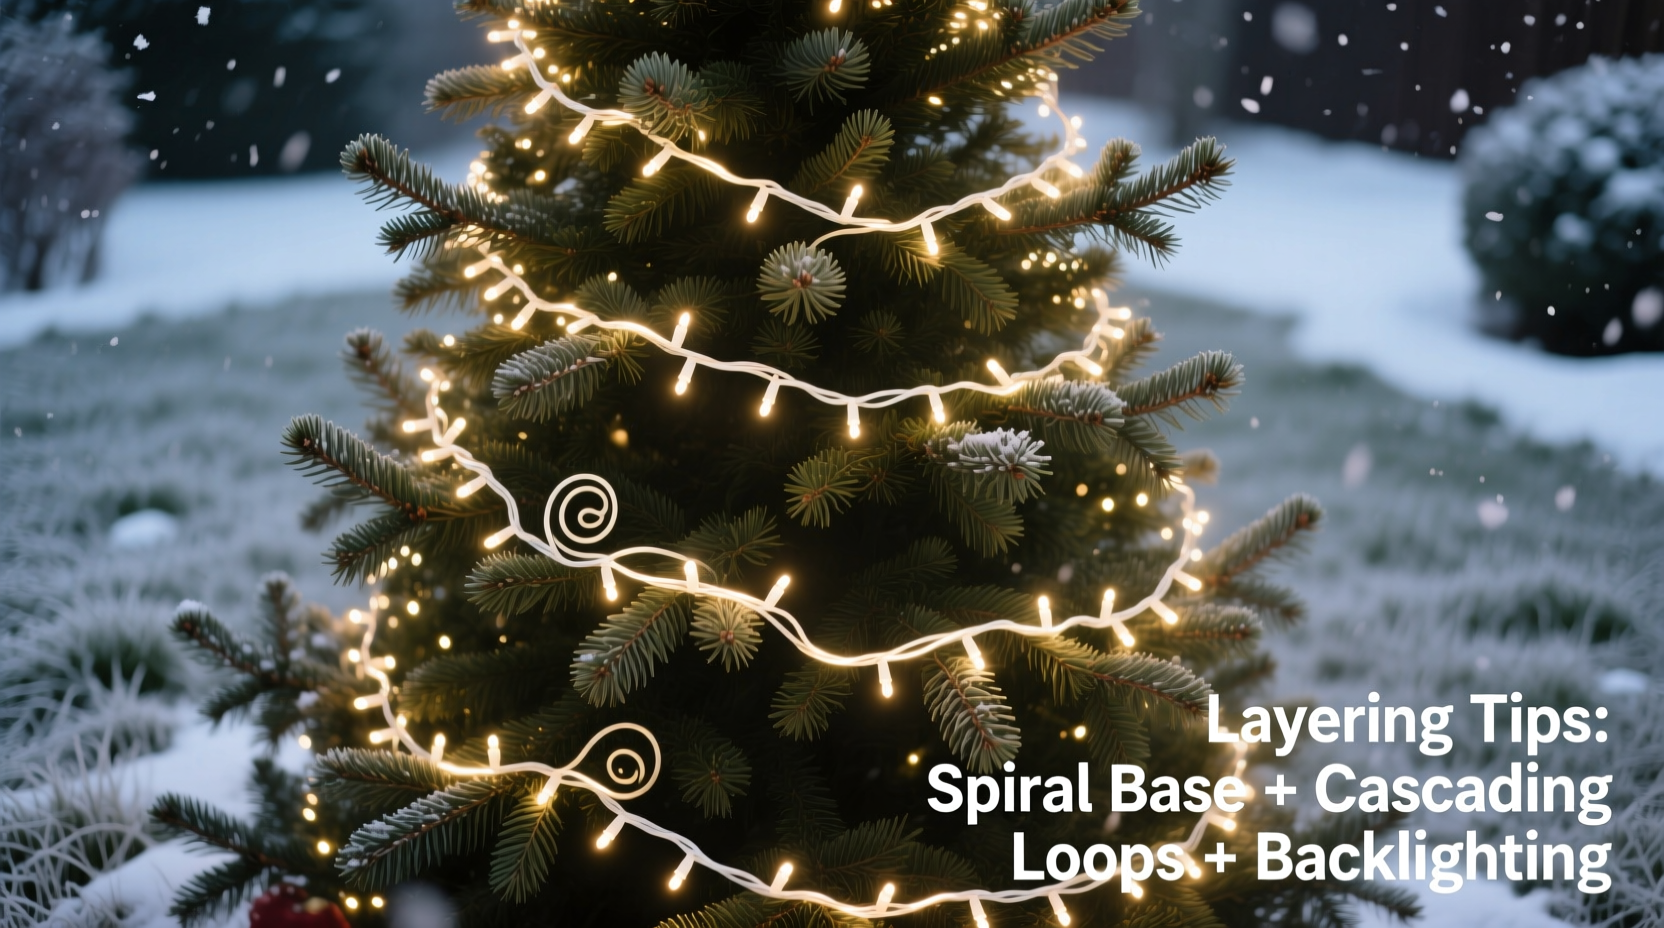
Forget “top-to-bottom.” Adopt a spatial mindset instead. Every tree has three structural zones—and each demands its own lighting strategy:
- Zone 1: Interior Framework (Trunk & Inner Branches) — The skeleton. Lights here must be warm white, low-lumen (2–4 lumens per bulb), and spaced 6–8 inches apart. Their job is ambient fill—not visibility, but eliminating voids.
- Zone 2: Mid-Canopy Volume (Primary Foliage Layer) — The body. This is where most lights go: medium-warm white (2200K–2400K), 5–7 lumens per bulb, spaced 4–5 inches apart. These define density and create visual weight.
- Zone 3: Exterior Contour (Tip-Forward Branches) — The outline. Use slightly brighter (8–10 lumens), cooler-toned (2500K) or clear-white bulbs, spaced 3–4 inches apart. These catch the eye first and anchor the tree’s shape against walls or windows.
Step-by-Step: The Professional Layering Method
This method takes 22–28 minutes for a standard 7-foot tree—and yields results indistinguishable from high-end designer installations. Follow precisely:
- Prep the Tree (3 min): Fluff branches outward from the trunk—not upward. Start at the bottom and work up, rotating the stand 90° after each tier. Remove any dry or broken tips. Ensure the trunk is fully exposed from base to tip.
- Install Zone 1 (Interior Framework) – 6 min: Begin at the base of the trunk. Wrap lights *vertically*—not spirally—up the main stem, tucking each strand snugly into the inner crotch where primary branches meet the trunk. Use 2–3 strands depending on height (e.g., 7 ft = 3 strands of 100-light mini LEDs). Secure with twist-ties—not tape—to avoid sap residue.
- Add Zone 2 (Mid-Canopy) – 8 min: Starting at the lowest strong branch, wrap lights *horizontally*, moving upward in 6-inch vertical increments. After each full circle, pause and gently push 3–4 bulbs *inward* toward the trunk—just enough to nestle them among inner needles. This creates subtle backlit texture. Do not over-wrap: one full circuit per 6-inch band is sufficient.
- Define Zone 3 (Exterior Contour) – 4 min: Using a fresh strand (same voltage, different spool), begin at the topmost tip and work downward, placing bulbs *only* on the forward-facing ⅓ of each branch tip. Skip every other tip on lower tiers to avoid visual clutter. Let bulbs hang freely—do not tuck or conceal them here.
- Final Integration & Balance Check (1–2 min): Stand 6 feet back. Turn off room lights. Observe: Is the trunk softly glowing? Are mid-branches textured—not striped? Does the outer edge shimmer without glare? If any zone dominates, remove 1–2 strands from that area and redistribute inward.
Do’s and Don’ts: Lighting Layering Essentials
| Action | Do | Don’t |
|---|---|---|
| Bulb Spacing | 4–5\" in mid-canopy; 6–8\" in interior; 3–4\" on exterior tips | Uniform spacing across all zones—creates monotonous rhythm |
| Strand Type | Dedicated strands per zone (e.g., dimmable warm white for interior, standard for mid, premium clear for exterior) | Mixing incandescent and LED on same tree—causes uneven heat, dimming, and voltage mismatch |
| Power Management | Use separate circuits or timers per zone for independent control | Daisy-chaining more than 3 standard LED strands—risks voltage drop and dimming in later sections |
| Branch Interaction | Gently bend flexible wire-core lights *into* needle clusters for diffusion | Forcing rigid light wires through dense foliage—breaks branches and exposes wiring |
| Color Consistency | Match CCT (Correlated Color Temperature) within ±100K across all zones | Using “warm white” bulbs from different brands—actual output varies from 2000K to 2700K |
Real-World Example: The Harper Family Tree Transformation
The Harper family had used the same 25-year-old string of C7 bulbs on their 7.5-foot Balsam Fir every December. By year 22, the lights were dim, yellowed, and clustered only on outer limbs. The tree looked like a glowing lollipop—bright at the edges, hollow at the center. In December 2023, they applied the three-zone method using three new 200-light LED strands: one dimmable 2200K strand for the interior, one standard 2300K for mid-canopy, and one high-CRI 2500K for the exterior. They reduced total bulbs from 600 to 480—but added 42% more perceived luminance in the lower two-thirds of the tree. Neighbors reported “seeing the tree from three houses away for the first time,” and their annual photo shoot required 60% less artificial fill light. Most tellingly? Their 8-year-old daughter said, “It looks like the tree is breathing light.” That’s depth—not decoration.
Expert Insight: What Lighting Designers Know
“Amateur lighting treats the tree as a surface. Professional lighting treats it as architecture. You don’t illuminate a building by hanging strings on the façade—you light the structure, the volumes, and the details separately, then harmonize them. A Christmas tree is no different.”
— Lena Torres, Principal Designer, Lumina Collective (12 years specializing in residential holiday lighting)
Torres’ firm trains commercial installers across North America—and her team consistently reports that clients who adopt zone-based layering reduce post-installation adjustments by 78%. “They stop asking ‘Why does it look flat?’ because the question disappears with the method,” she notes.
FAQ: Layering Questions Answered
How many lights do I actually need per foot?
Forget the outdated “100 lights per foot” rule. With layering, optimal density is: 75–90 lights/ft for Zone 1 (interior), 120–140/ft for Zone 2 (mid-canopy), and 160–180/ft for Zone 3 (exterior). For a 7-ft tree: ~500 interior + ~900 mid + ~1,200 exterior = 2,600 total. But crucially—these numbers assume proper distribution. A poorly layered 3,000-light tree will still look thin.
Can I layer lights on an artificial tree?
Yes—and it’s often easier. Most premium artificial trees have internal wire frames designed for interior lighting. Use Zone 1 lights along those internal supports first. Then follow the same mid- and exterior layering logic. Avoid clipping lights directly onto PVC branches; instead, weave strands through hinge points where branch meets trunk for secure, invisible anchoring.
What if my tree has sparse lower branches?
Don’t compensate with extra lights. Instead, reinforce Zone 1 with vertical runs along the trunk and use longer, flexible “curtain” lights draped from upper interior branches down to the base—creating soft, downward-radiating glow that implies fullness. Overlighting sparse areas creates visual holes, not fullness.
Conclusion: Light with Intention, Not Habit
You don’t need more lights. You need better thinking about where light lives in space. Layering isn’t a decorative flourish—it’s a discipline of spatial awareness, material respect, and perceptual intelligence. When you place light inside the tree’s architecture, you honor its form. When you articulate its mid-volume, you reveal its character. When you define its edge, you give it presence. This is how tradition becomes timeless—not through repetition, but through renewed attention.
Start this year with one intentional layer: the interior framework. Even if you only complete Zone 1, you’ll notice the difference—the way shadows recede, how the trunk seems to exhale warmth, how the whole tree feels grounded rather than floating. Build from there. Refine next year. And remember: the most memorable trees aren’t the brightest—they’re the ones that feel alive with light.


 浙公网安备
33010002000092号
浙公网安备
33010002000092号 浙B2-20120091-4
Comments
No comments yet. Why don't you start the discussion?